47 Driveway ideas

Our favourite driveway ideas for the most durable and stylish driveways

47 Driveway ideas

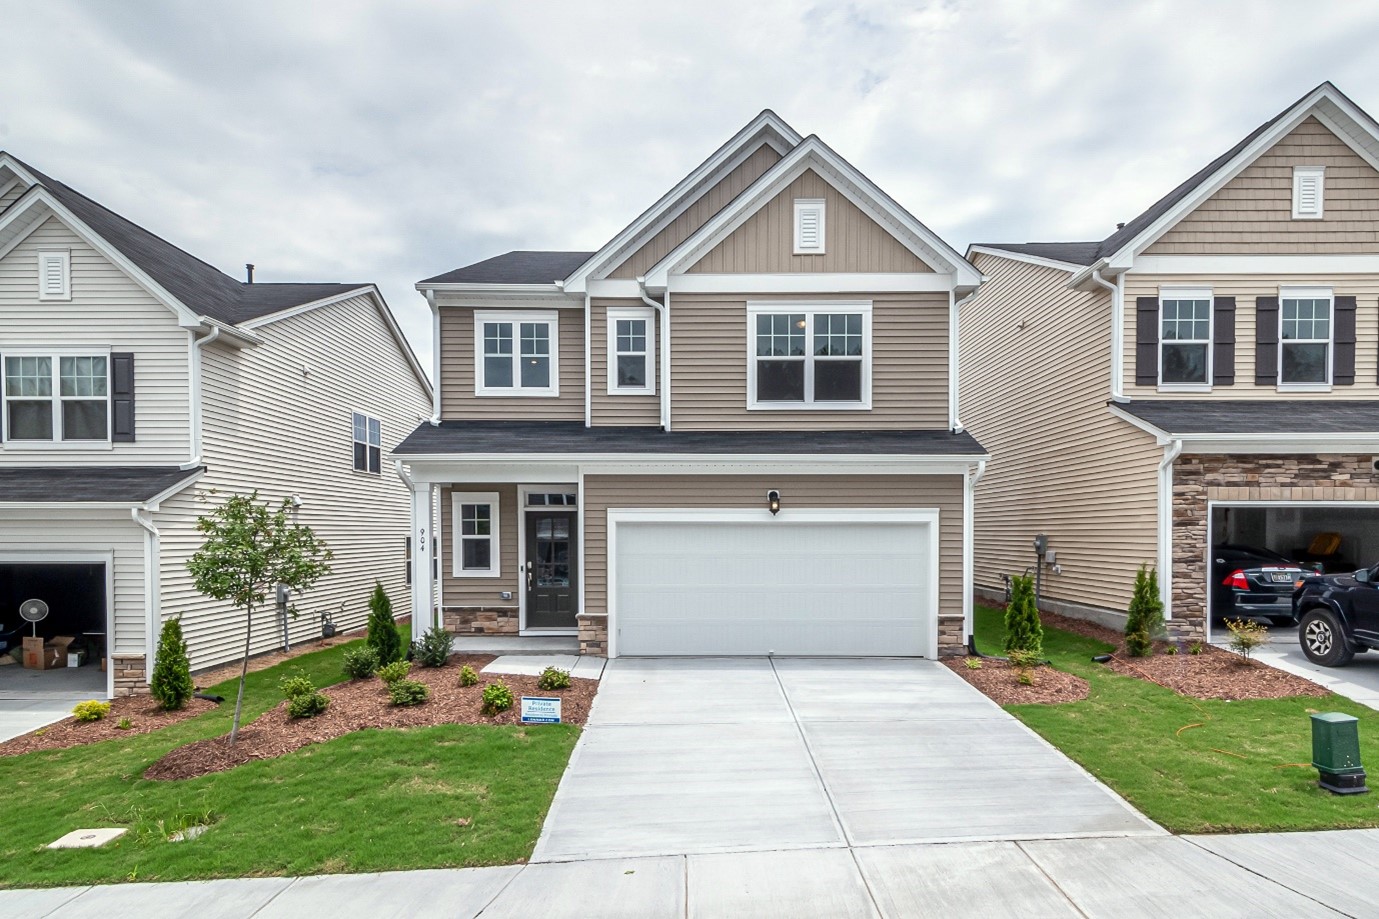
Driveways are such a noticeable hardscaping feature of your home. They are the first thing people encounter, so curb appeal is always going to be a big factor. Aesthetically, your driveway needs to fit your home’s architectural style. It also needs to create a sense of unity between your home and the landscape surrounding it. There’s such a wide variety of different materials to choose from including gravel, concrete, pavers, brick and grass. It can be hard to know which materials to choose to achieve a certain look and that’s why we’ve put together this blog about driveway ideas.

Beyond the look, what else needs to get factored into your choice of driveway material? You’ll be considering durability, depending on how much traffic your driveway will handle. The material needs to be strong, give traction, be non-slip when wet, and be kind to stains and marks caused by everyday use.

Each material has its own maintenance needs and costs. Some need more frequent and complicated maintenance than others. When calculating the cost of your materials, factor in the labour needed to install it. But also remember to add in ongoing maintenance costs over the driveway’s anticipated lifetime. Don’t forget, a gorgeous driveway usually increases your home’s resale value, as well as allowing you to enjoy it in the meantime.

driveway-ideas-paving
Source: Photo by Julia Kuzenkov from Pexels

Now, let’s take a look at what’s been trending in driveway ideas and designs.

Pavers, bricks and stone driveway ideas

Pavers are a common driveway material. They come in a range of styles including concrete blocks, clay bricks, cobblestones or permeable pavers. Here are a few styles you might consider. For those keen on DIY, make sure you check out our guide to laying pavers. When you’re ready to hire a professional, find one here.

1. Chevron and herringbone

Block pavers laid in a chevron or herringbone pattern have a classic charm about them. That’s the great thing about paving your driveway, you have so many options in terms of colours, patterns and designs. However, note that having patterns laid will add to your costs of installation. Other than that, block paving is both durable and easy to maintain.

2. Plain pavers

Traditional clay brick pavers have been around for centuries. Brick pavers are set in a sand or mortar base and can come in a variety of colours and shapes. Pavers can be an eco-friendly choice, when they enable good drainage. They’re also low maintenance and can be easily repaired. And visually, a simple paved driveway displays rich texture and pattern.

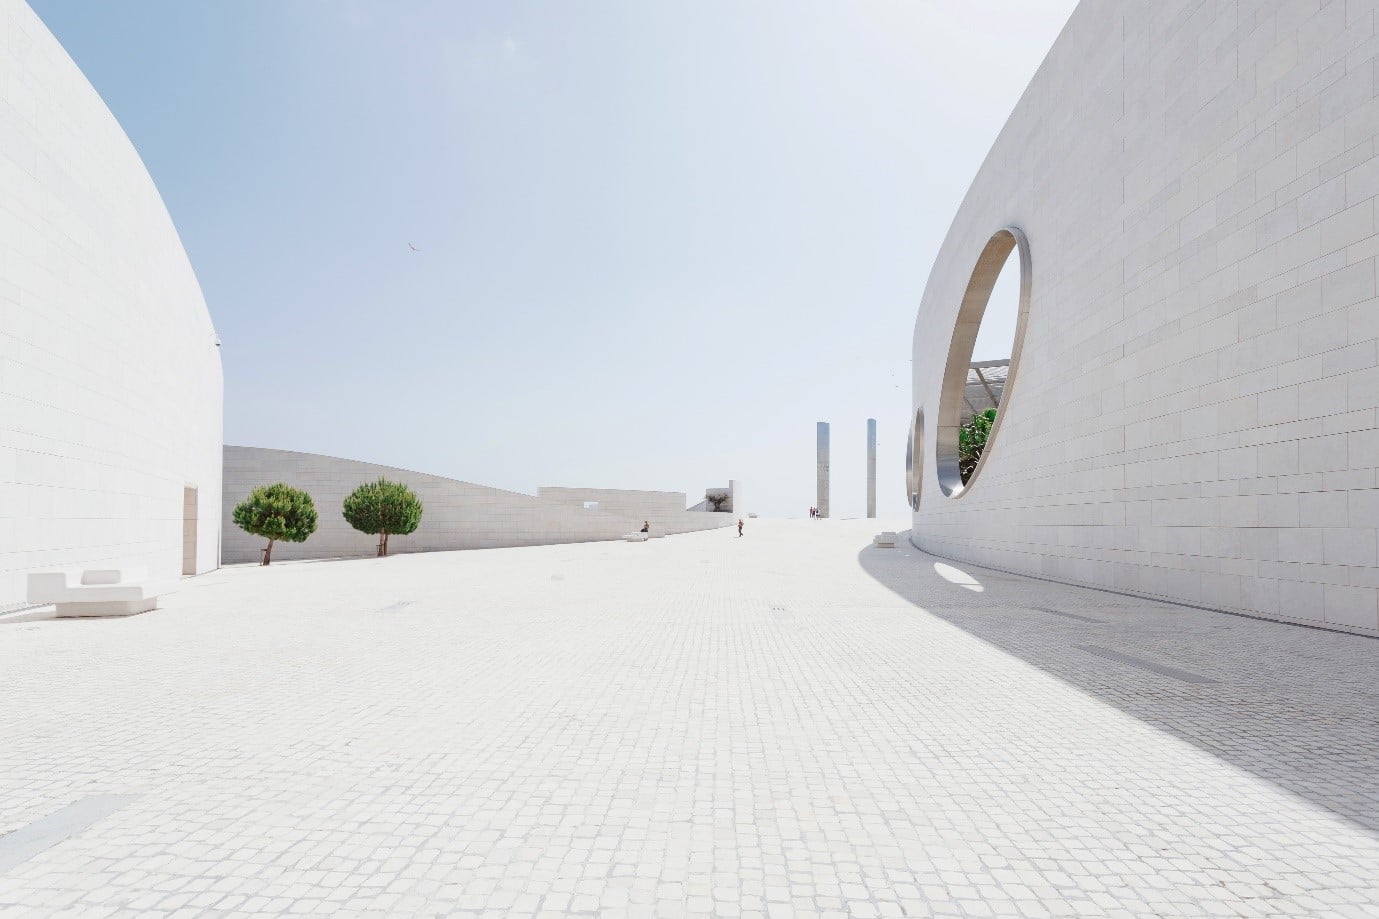
3. Light coloured pavers

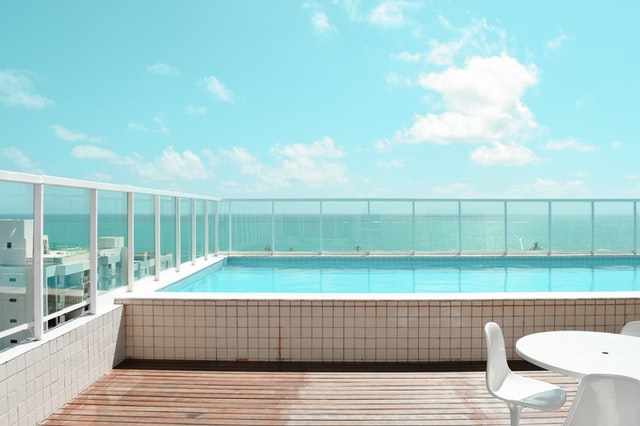
When you’re going for clean, pared down and light filled, it makes sense to choose a light-coloured paving stone.

driveway-ideas-large-paversdriveway-ideas-large-pavers
Source: Photo by Thiago Calamita from Pexels

4. Warm coloured pavers

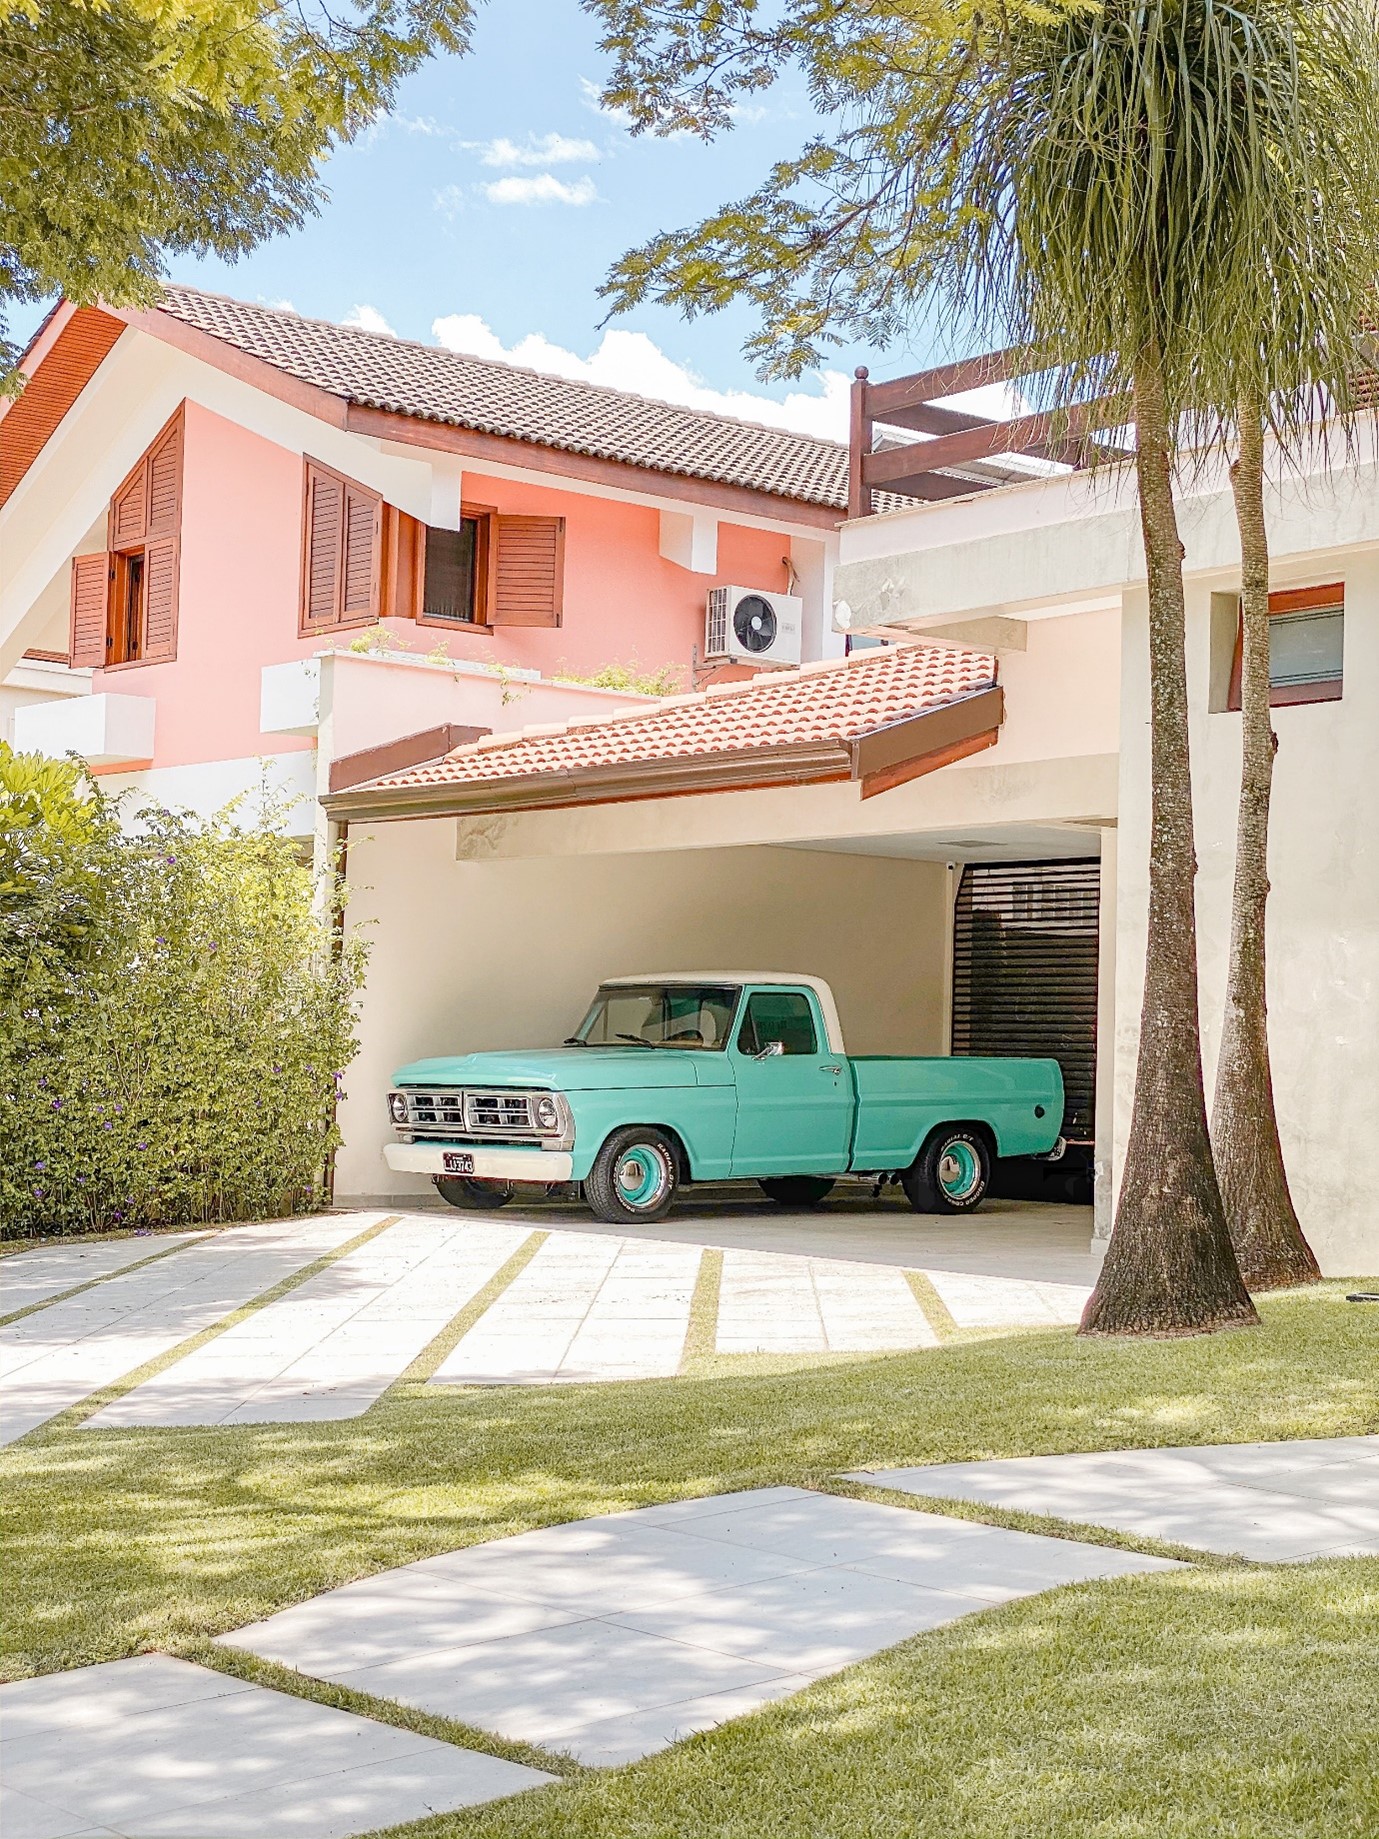
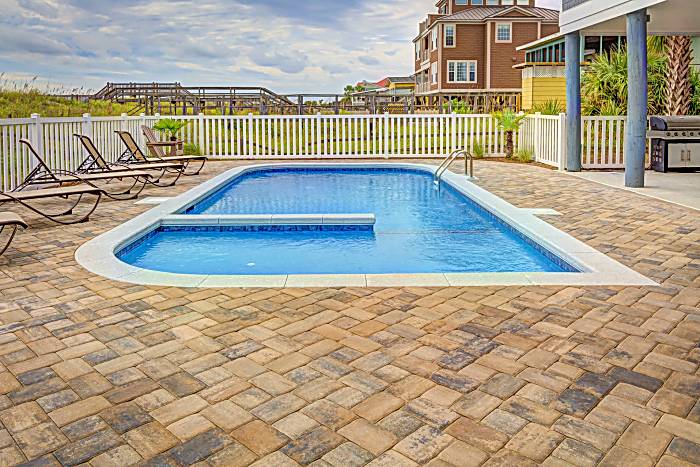
A warm, pale-coloured paving stone is a lovely soft look against the façade of a modern home. Choosing a paving stone in a sandy tone gives a nice beachy flavour, perfect for a coastal aesthetic.

5. Grey pavers

When the focus is on the home’s façade, the driveway can take a bit of a back seat. A contemporary home clad in weathered timber has the perfect complement in tonally varied grey driveway pavers.

6. Brick herringbone

For a more traditional style home, classic brick pavers are a good option. Brick pavers are made of fired clay, which weathers over time and creates a patina like in the driveway below. Brick paved driveways will need to be regularly sealed and you can also pressure clean them yourself to vastly improve the look.
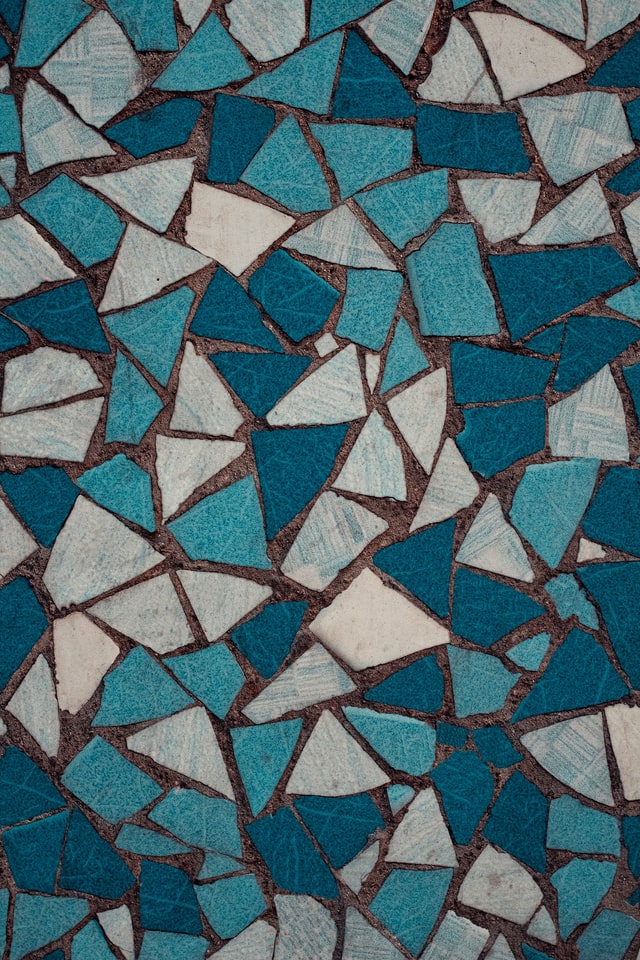
7. Crazy pavers

Crazy pavers or flagstones are increasingly popular. They offer the benefits of traditional hard driveway materials. Yet they are eco-friendly and provide a unique, visually dynamic aesthetic.

‘Raw yet alive’ is an apt description of the effect you get with flagstones, aka crazy paving. Organic shapes, earthy tones, colour and texture, all contribute to this natural-looking aesthetic.

8. Rustic pavers

Natural stone crazy pavers for the driveway are perfect to enhance the connection to the great outdoors. Stone pavers are ideal for blending seamlessly with the landscape. The result is a naturalistic, grounded effect. And the freeform shapes can provide a lively contrast to linear-heavy modern house designs.

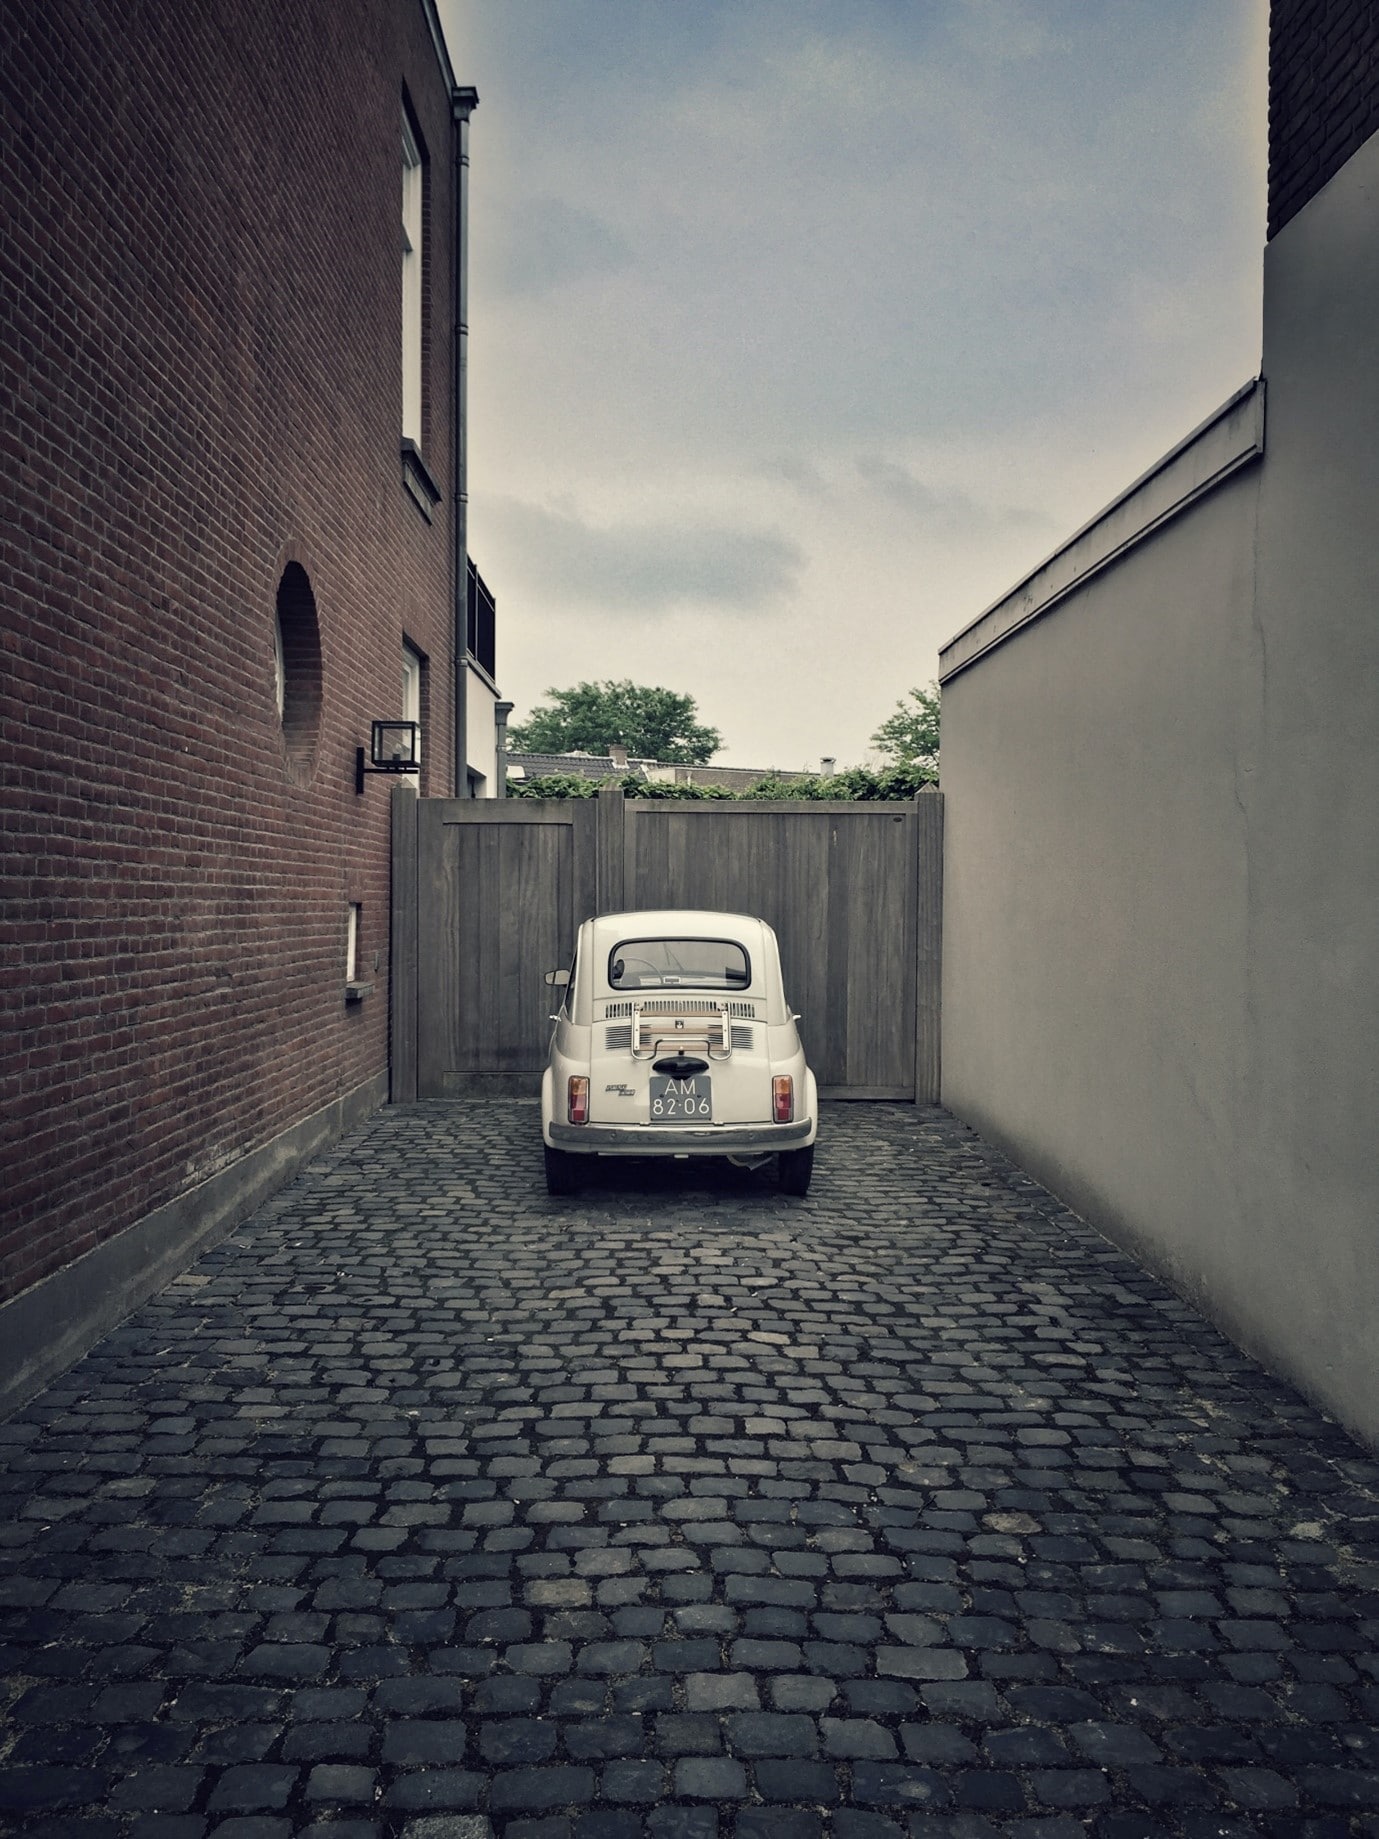
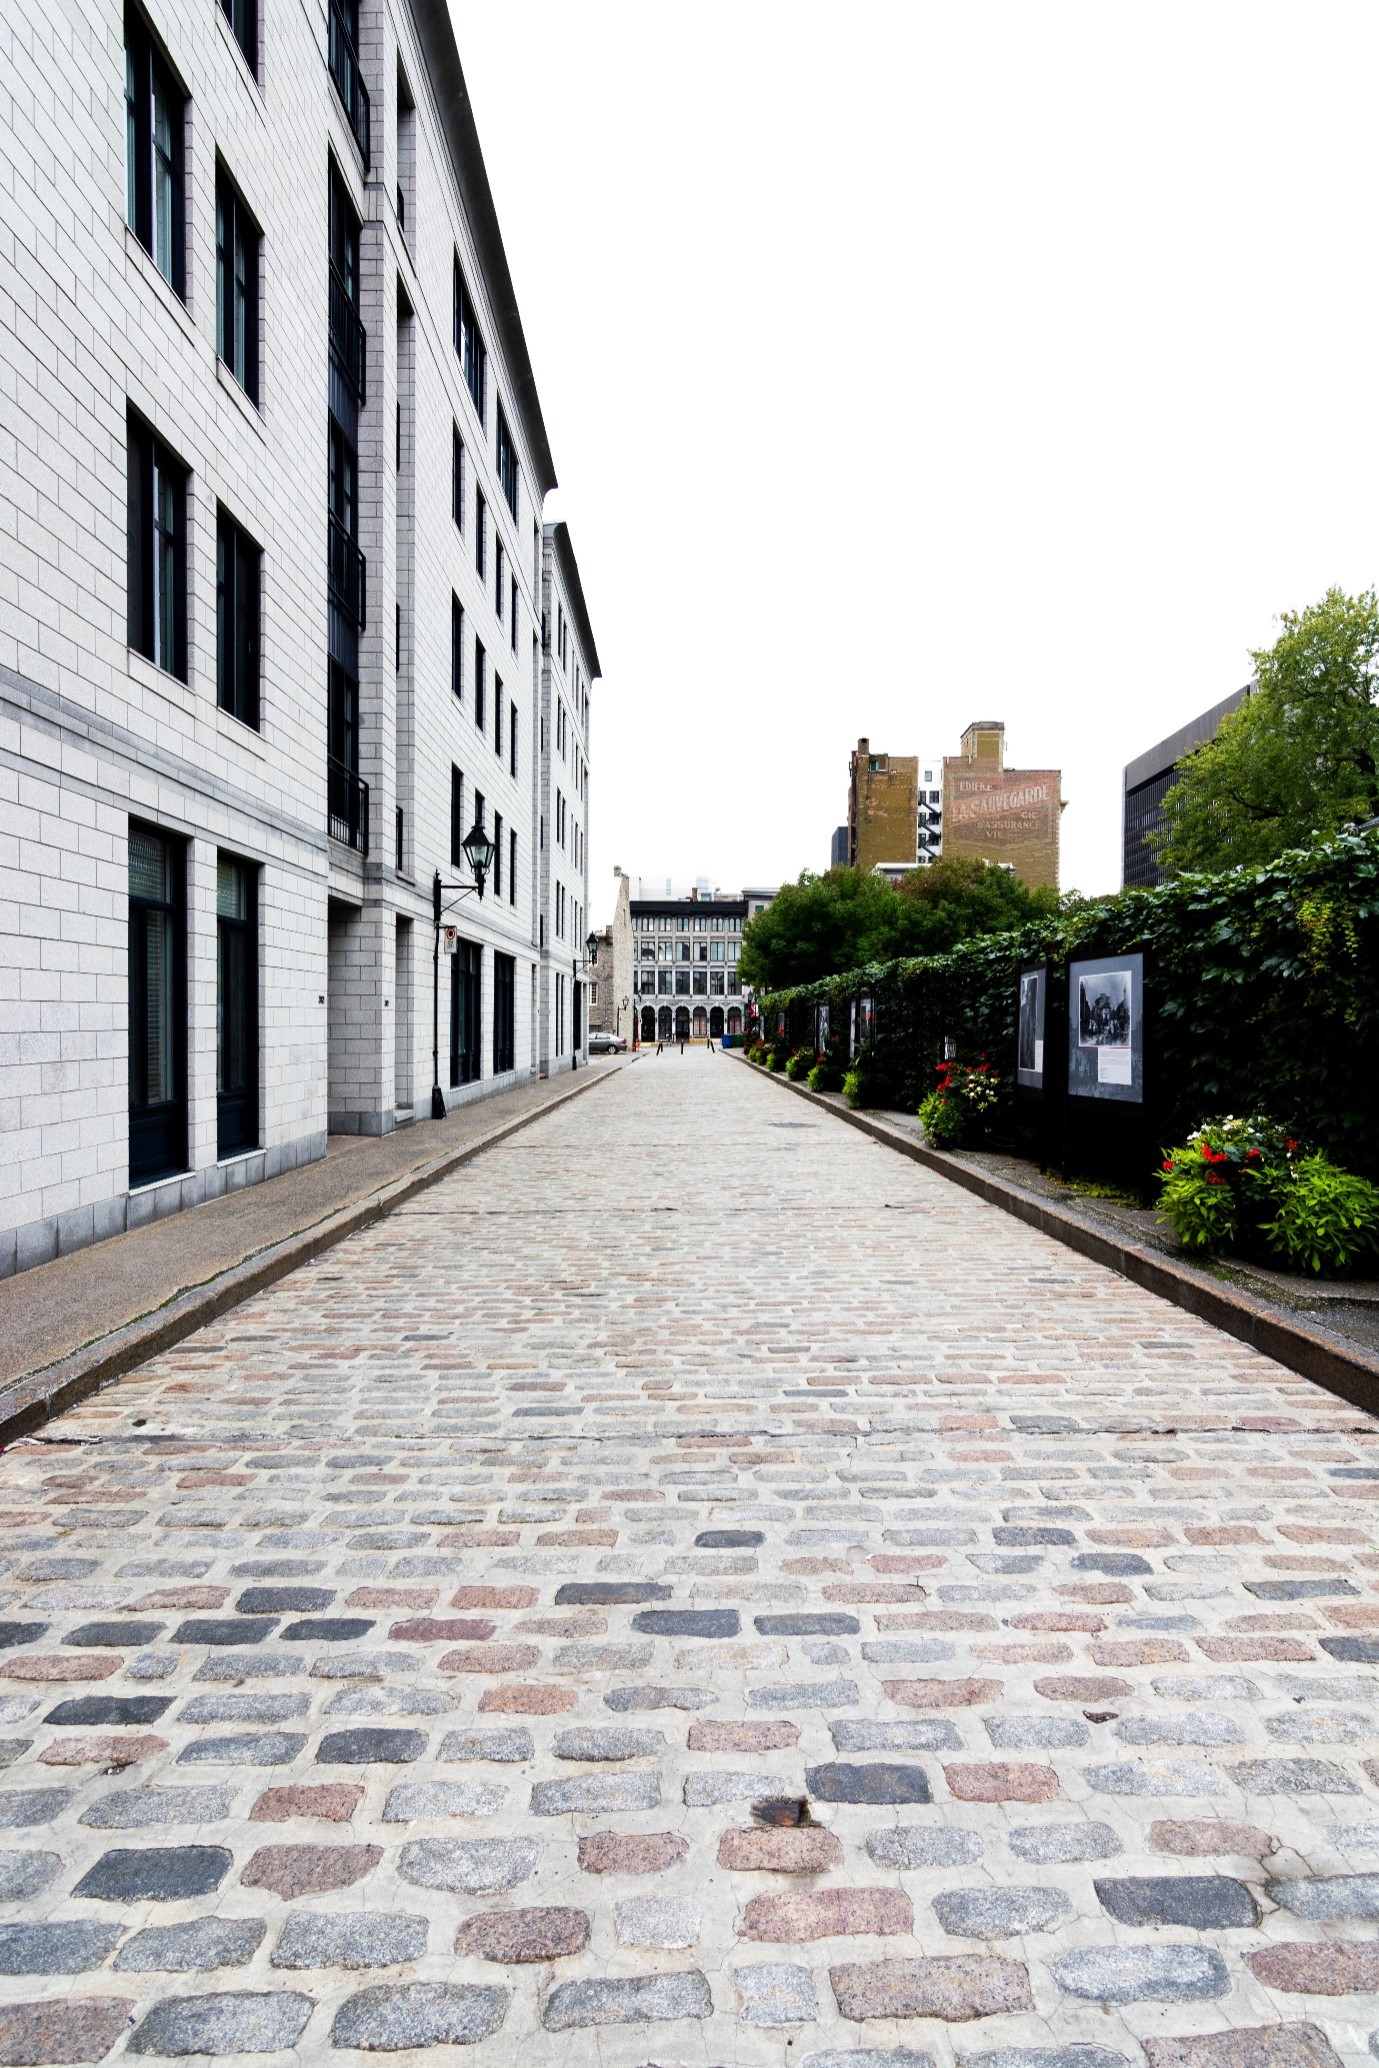
9. Antique reclaimed cobblestone pavers

For a traditional drive with oodles of charm, you really can’t beat historic stone pavers. Reclaimed antique pavers from European and American cities can be used to enhance the look of your driveway, though the cost can be quite high. They’re highly durable (basically indestructible), low maintenance pavers. And they have a gorgeous visual effect, so they’re something to consider.

10. Contemporary cobblestone

Even though cobblestone usually has an olde-worlde flavour to it, it also works really well with contemporary homes. It’s a lovely way to add pattern and texture, and looks great contrasted with a plain façade.

driveway-ideas-dark-stones
Source: Photo by Frans Strous on Unsplash

11. Quarried granite blocks

Who doesn’t love the textures and tones of stone? As a paving material, it blends into the surrounding landscape and looks timeless.

Green driveway ideas

Love the look of natural grass but don’t love the idea of driving into a muddy mucky mess? Then permeable grass pavers might be the solution. These are eco-friendly surface materials that allow water to drain well while enabling grass to also grow in between. Permeable pavers can be laid in any number of patterns. The ability to make personalised patterns is something that appeals to many when it comes to paver tiles. If you don’t want an overly linear look, consider circular pavers for a bit of whimsy.
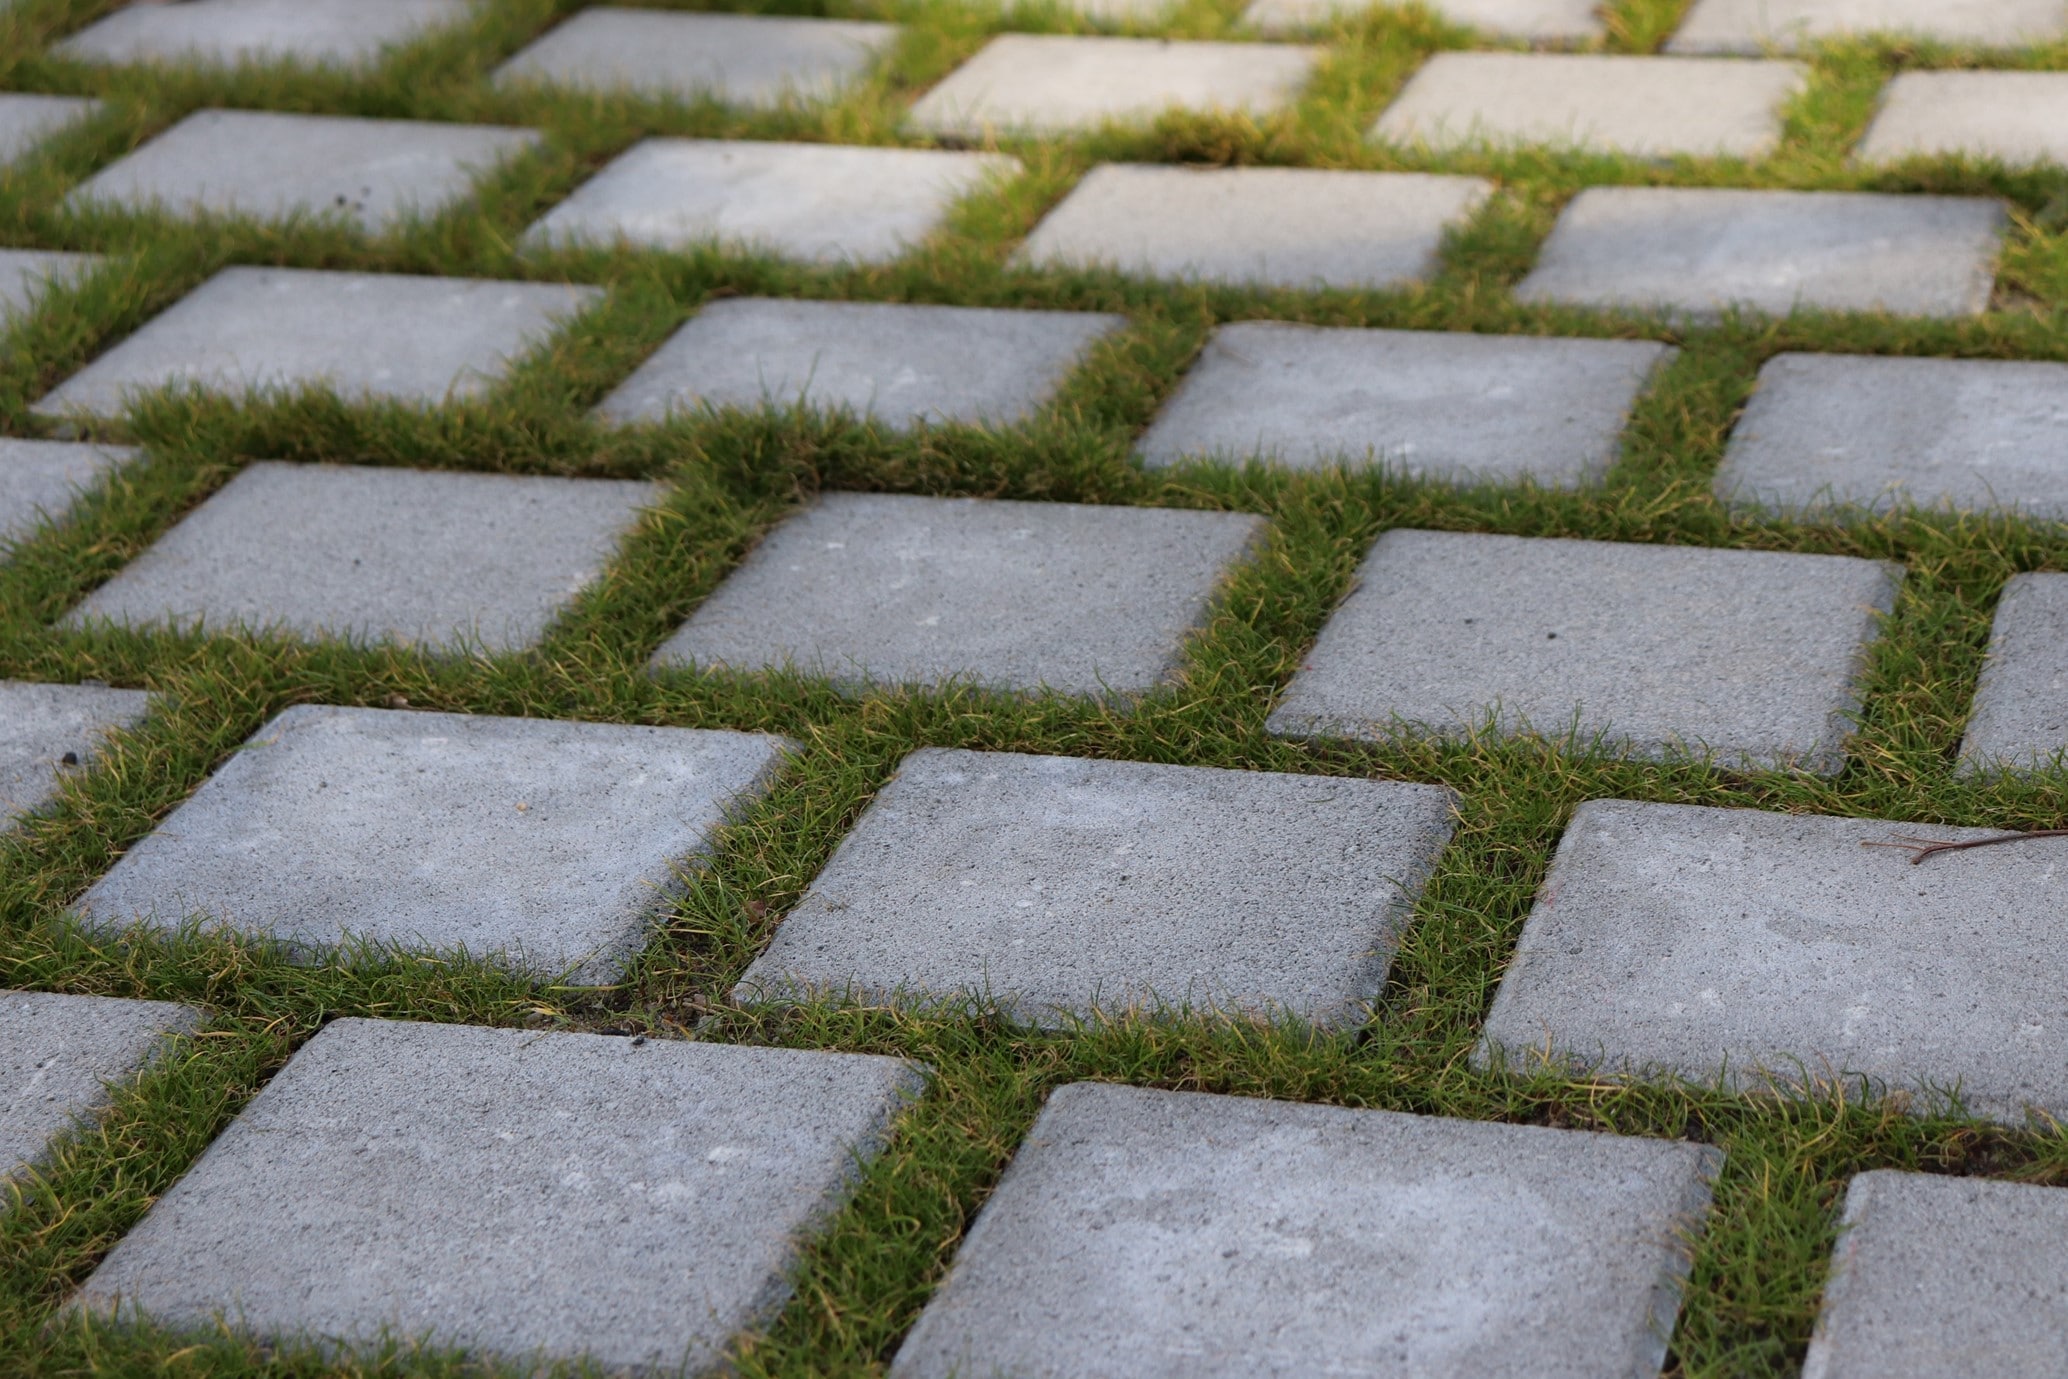
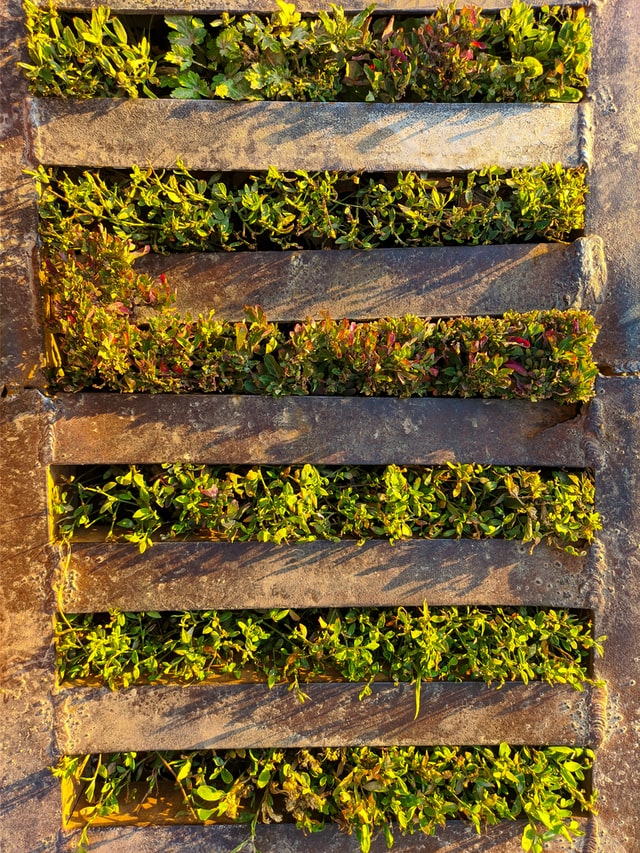
driveway-ideas-permeable-pavers
Source: Photo by toinane on Unsplash

12. Grass grid

Like the look of grass growing on your driveway? An alternative option to permeable pavers is to simply allow grass to grow up in a grid between paver tiles. Gridded grass driveways are a popular contemporary look.

13. Median strips

Ribbon driveways are a classic look. But more importantly if you want to reduce storm water runoff then having a median nature strip will greatly improve drainage. A mix of hardscaping and green grass is ideal for the eco-friendly home owner.

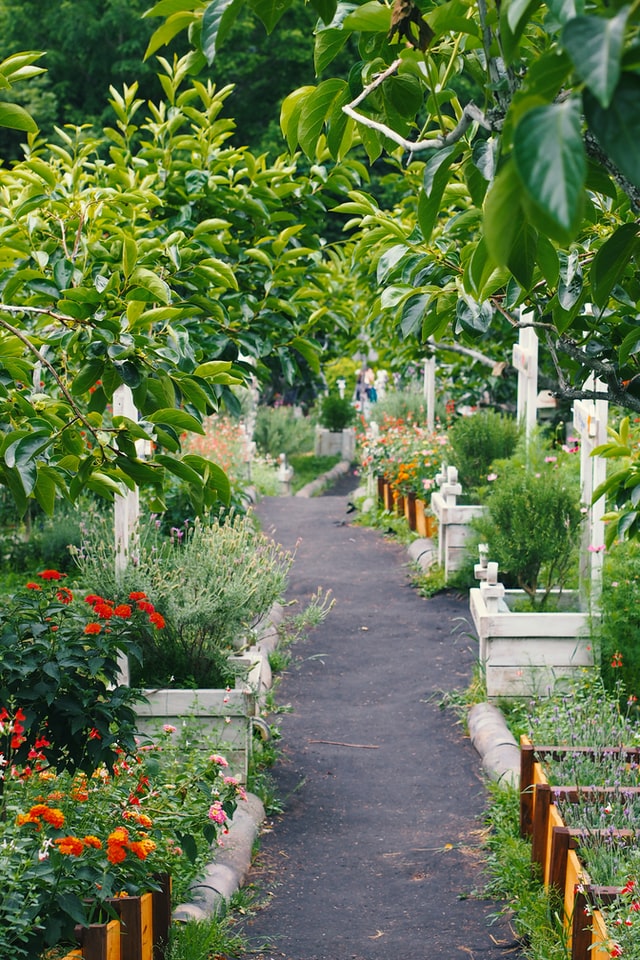
14. Integrated garden beds

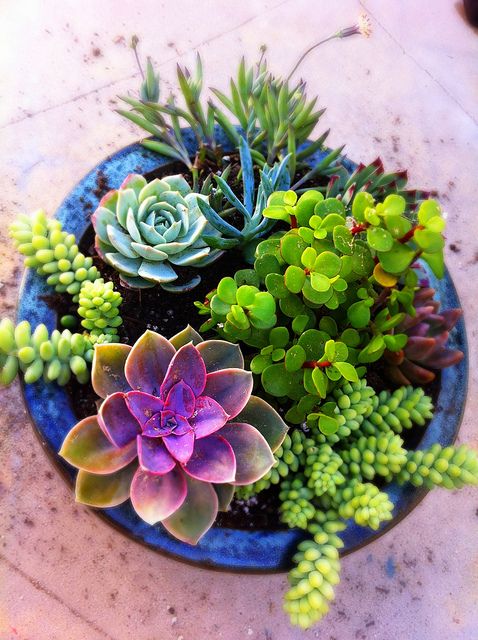
Integrated garden beds are another way to add zest to a driveway. The median strip of your ribbon driveway is ideal for planting a long, narrow garden bed of low-growing plants. Succulents are a fantastic choice as they are low maintenance and won’t require watering.

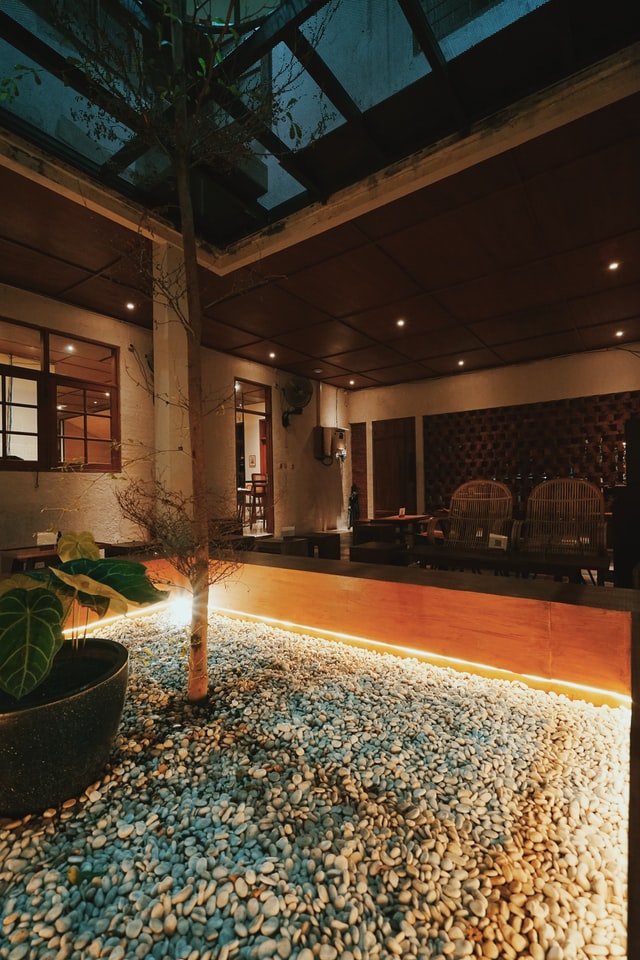
15. Bush timber driveway

Less common is the choice of timber as an eco-friendly option. But some people just love the aesthetic, the texture and colour. They are also cost-effective, strong, offer good drainage and have zero maintenance needs. Simply embed new or recycled sleepers in soil, mulch or concrete, adding some gravel for a casual look.

Concrete driveway ideas

This is another versatile, low cost, durable and low maintenance driveway material. It costs less than stone pavers so is often an attractive option. Poured concrete driveways can look highly contemporary. And the material is suitable for sloping sites, which some materials aren’t. You can also get decorative effects through staining and stamping, or by forming custom pavers. (Find an expert in driveway concreting here.)

driveway-ideas-white-paved
Source: Photo by Hugo Sousa on Unsplash

16. Concrete and timber

Timber and concrete are a match made in heaven, so if you have a timber-heavy home then the sleekness of concrete may appeal. A soft-looking timber façade can use concrete as a cool base to offset the wood’s warmth.

17. Smooth concrete

The smoothness of concrete is a major drawcard, especially if you also have children. A simple, broad expanse of poured concrete is always practical for playing sport or riding bikes.

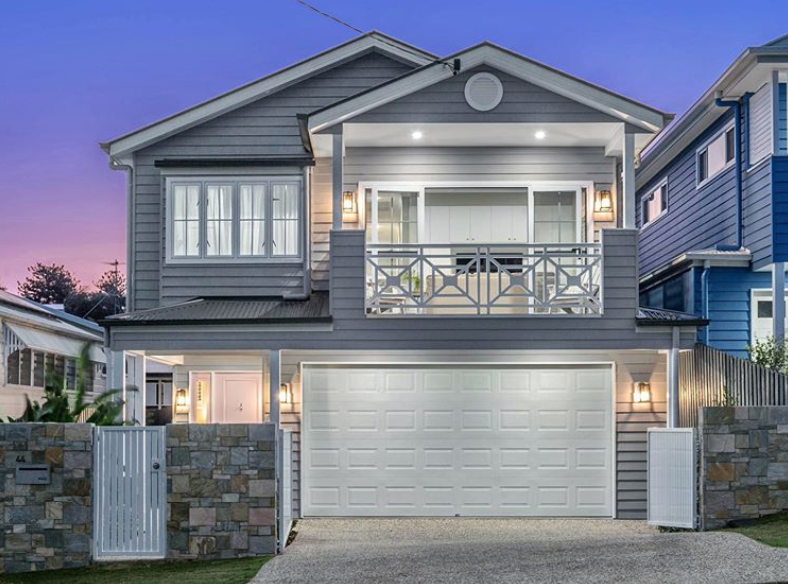
18. Perfect for farmhouse

Concrete is so versatile and goes with so many different architectural styles. A simple, pared back concrete driveway doesn’t compete with the busyness of a farmhouse façade. Think shiplap, carriage doors and industrial pendant lights. (If you love the look of these farmhouse garage doors, make sure you also check out our blog on garage door ideas.)

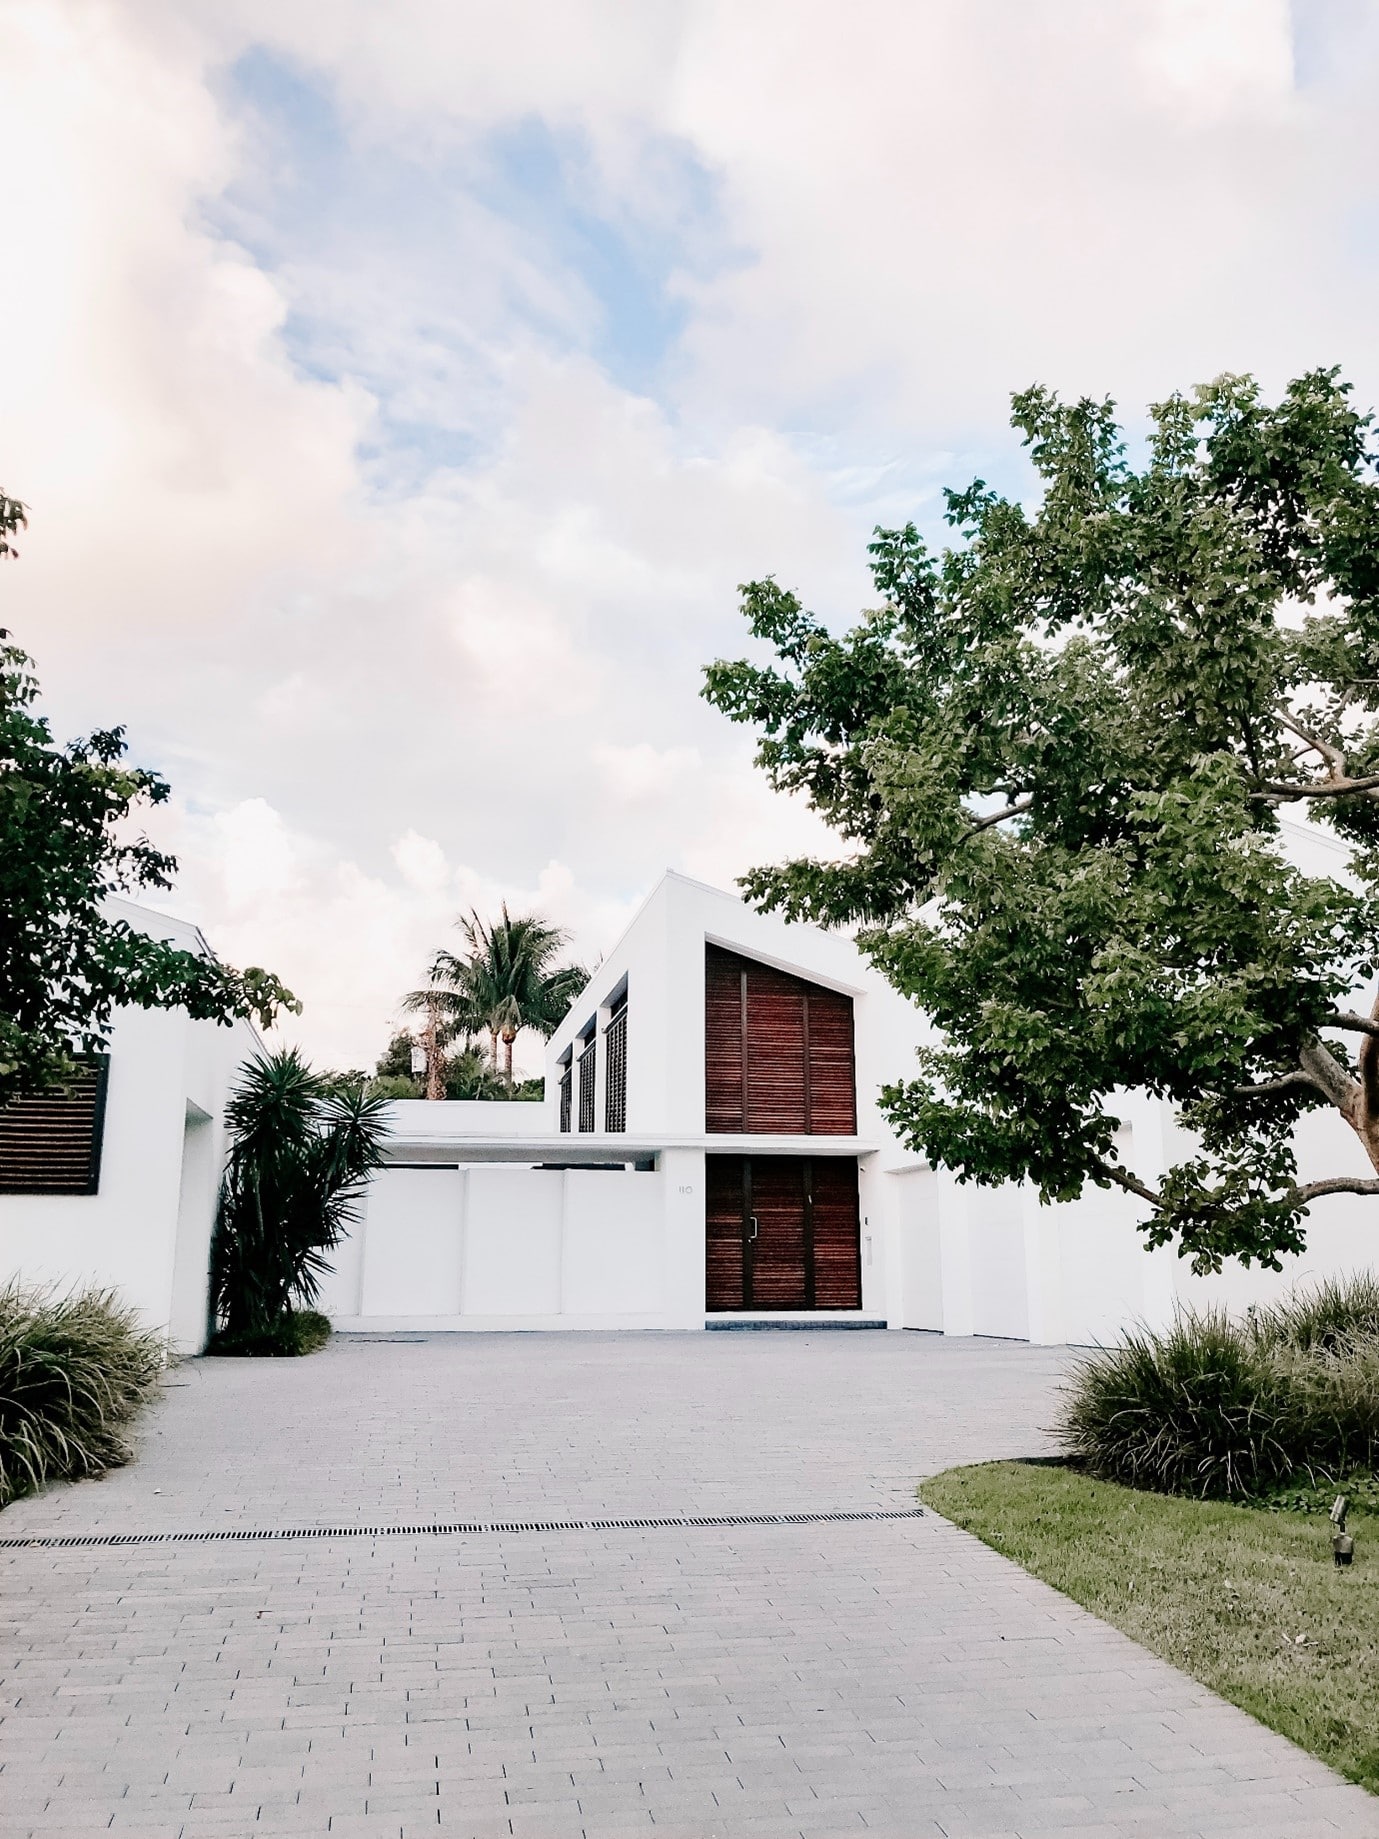
19. Large format concrete paving

A poured concrete tile effect looks stunning for a contemporary home. Particularly with a little crushed gravel trim between the pavers. Garden beds either side of the driveway are always appealing and a chance to up your curb appeal even more.

driveway-ideas-light-contemporary-pavers
Source: Photo by Curtis Adams from Pexels

20. Concrete and tints

Concrete can be tinted with chemical stains and concrete dyes so you have plenty of options for finding a colour to complement your home’s exterior and aesthetic. To create a dark grey concrete effect, for example, you can add black oxide to the concrete mix. Concrete aggregate (see below) in darker tones really suits a monochromatic home exterior.

21. Painted faux slate

A clever DIY is to paint a concrete driveway to look like slate. The trick is to use outdoor concrete paints. I’m not sure how long the effect would last though. But it’s worth speaking to a concreter who can tell you what kind of effects are possible.

22. Stamped concrete

A quick way to ‘pave’ your driveway is to go with stamped concrete instead of pavers. This is a cost-effective and easy way to get the appearance of pavers if you like a traditional, textured driveway look.

23. Asphalt driveway

Asphalt is kind of the poor cousin of concrete, because it’s cheaper and less durable. This means it’s considered less of a premium material. But it’s still a great choice for contemporary driveways and offers the ability to DIY repair worn areas. And it looks neat and orderly.

Concrete aggregate

If you love the rugged stone look but don’t like the idea of loose gravel, consider a concrete aggregate. Aggregate gets its finish by having the top layer of concrete removed. This slightly reveals the stones or other conglomerate materials. Exposed concrete aggregate driveways are increasingly popular. They offer a lot of design flexibility due to the varying range of colours and textures than can be obtained to suit your property.

driveway-ideas-monochrome-gravel
Source: Photo by Kyle Mackie on Unsplash

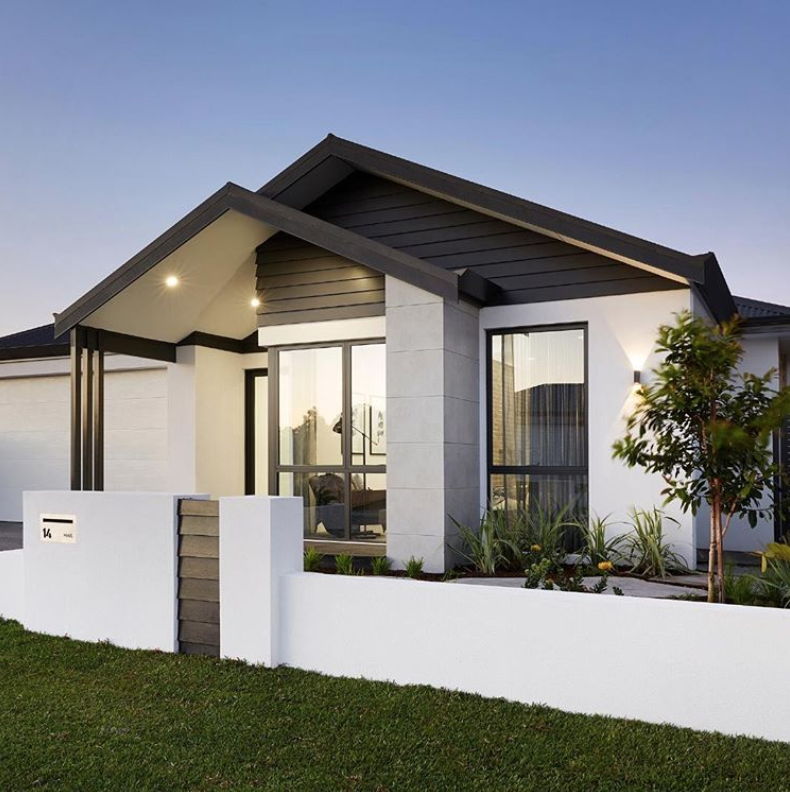
24. Exposed aggregate concrete

Exposed aggregate goes with so many different styles of home. It particularly suits contemporary homes though. It provides that added bit of texture to generate visual interest while looking sleek and streamlined.

25. Family-friendly

Exposed aggregate is a great choice for a family home. It’s skid resistant as well as being a durable finish for heavy traffic areas so it’s perfect for driveways that double as outdoor living areas.

26. Mixed materials

When you can’t decide on a single driveway material…why not use a variety? Consider incorporating several materials. For example, a mix of grass, squares of poured concrete, strips of basalt stone, and geometric permeable pavers. The result is a dynamic space that’s a breeze to drive in and out of.

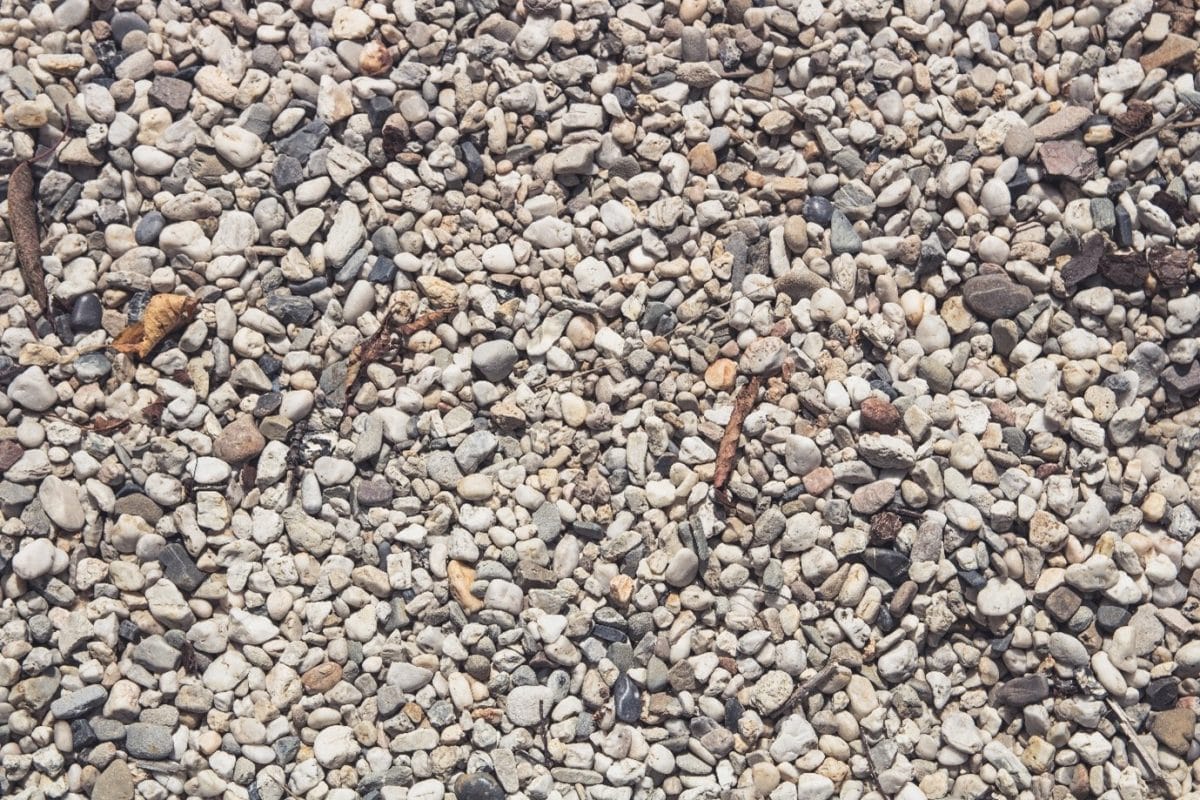
Gravel driveway ideas

It’s loved for its low price, its eco-friendliness due to its permeability, and its appeal to all the senses. Gravel is an ever popular choice of driveway hardscaping material. Often it is combined with a cellular grid to keep the stones in place. And adding driveway edging is always a good idea to contain a gravel driveway. Little maintenance is required, but the gravel needs to be topped up from time to time.
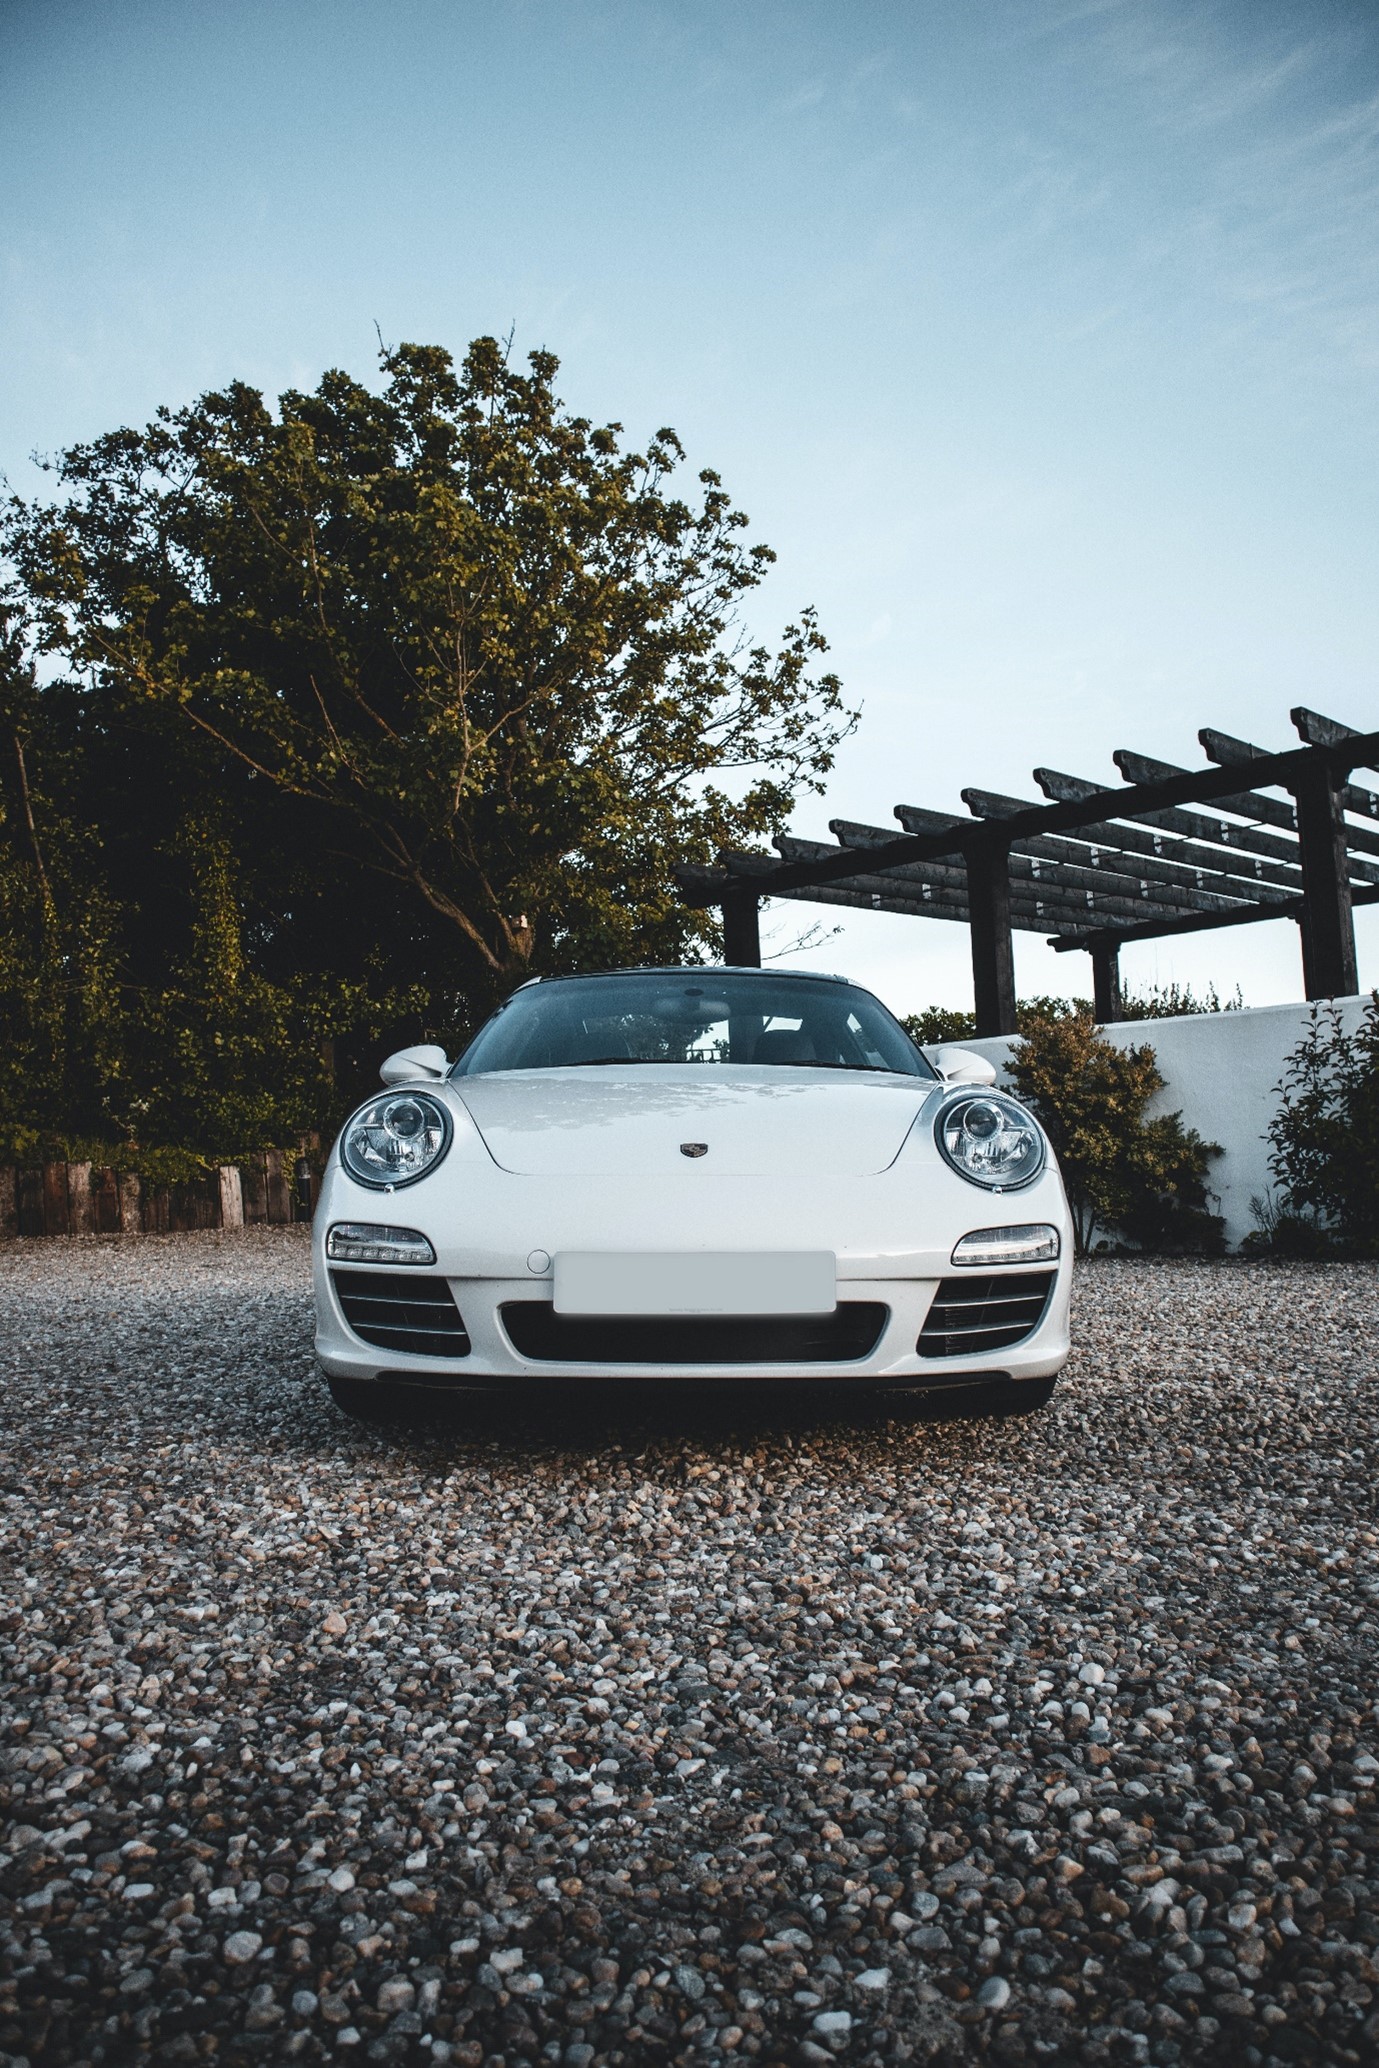
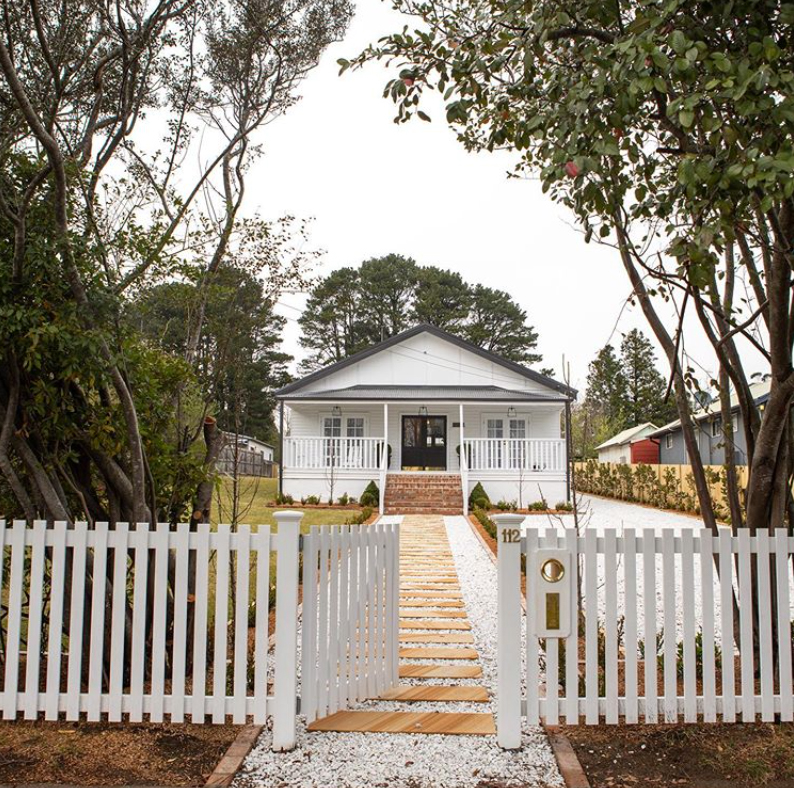
27. White gravel

White gravel makes for a classic gravel driveway look. It’s a low cost material that creates a luxe, vintage-style look.

28. Colours and textures

One of the things people love about gravel is that you can choose from a range of colours and grades of the stones. Finding one which complements your home is easy! Choosing a warmer-toned gravel with plenty of red in it will give lots of summery, Mediterranean feels.

29. Stabilised gravel

While you may love the look of loose gravel, it can undoubtedly become a pain when it spreads and scatters. An alternative is to go for crushed granite that has had a stabiliser added so it’s more solid. The surface remains charmingly rustic, though.

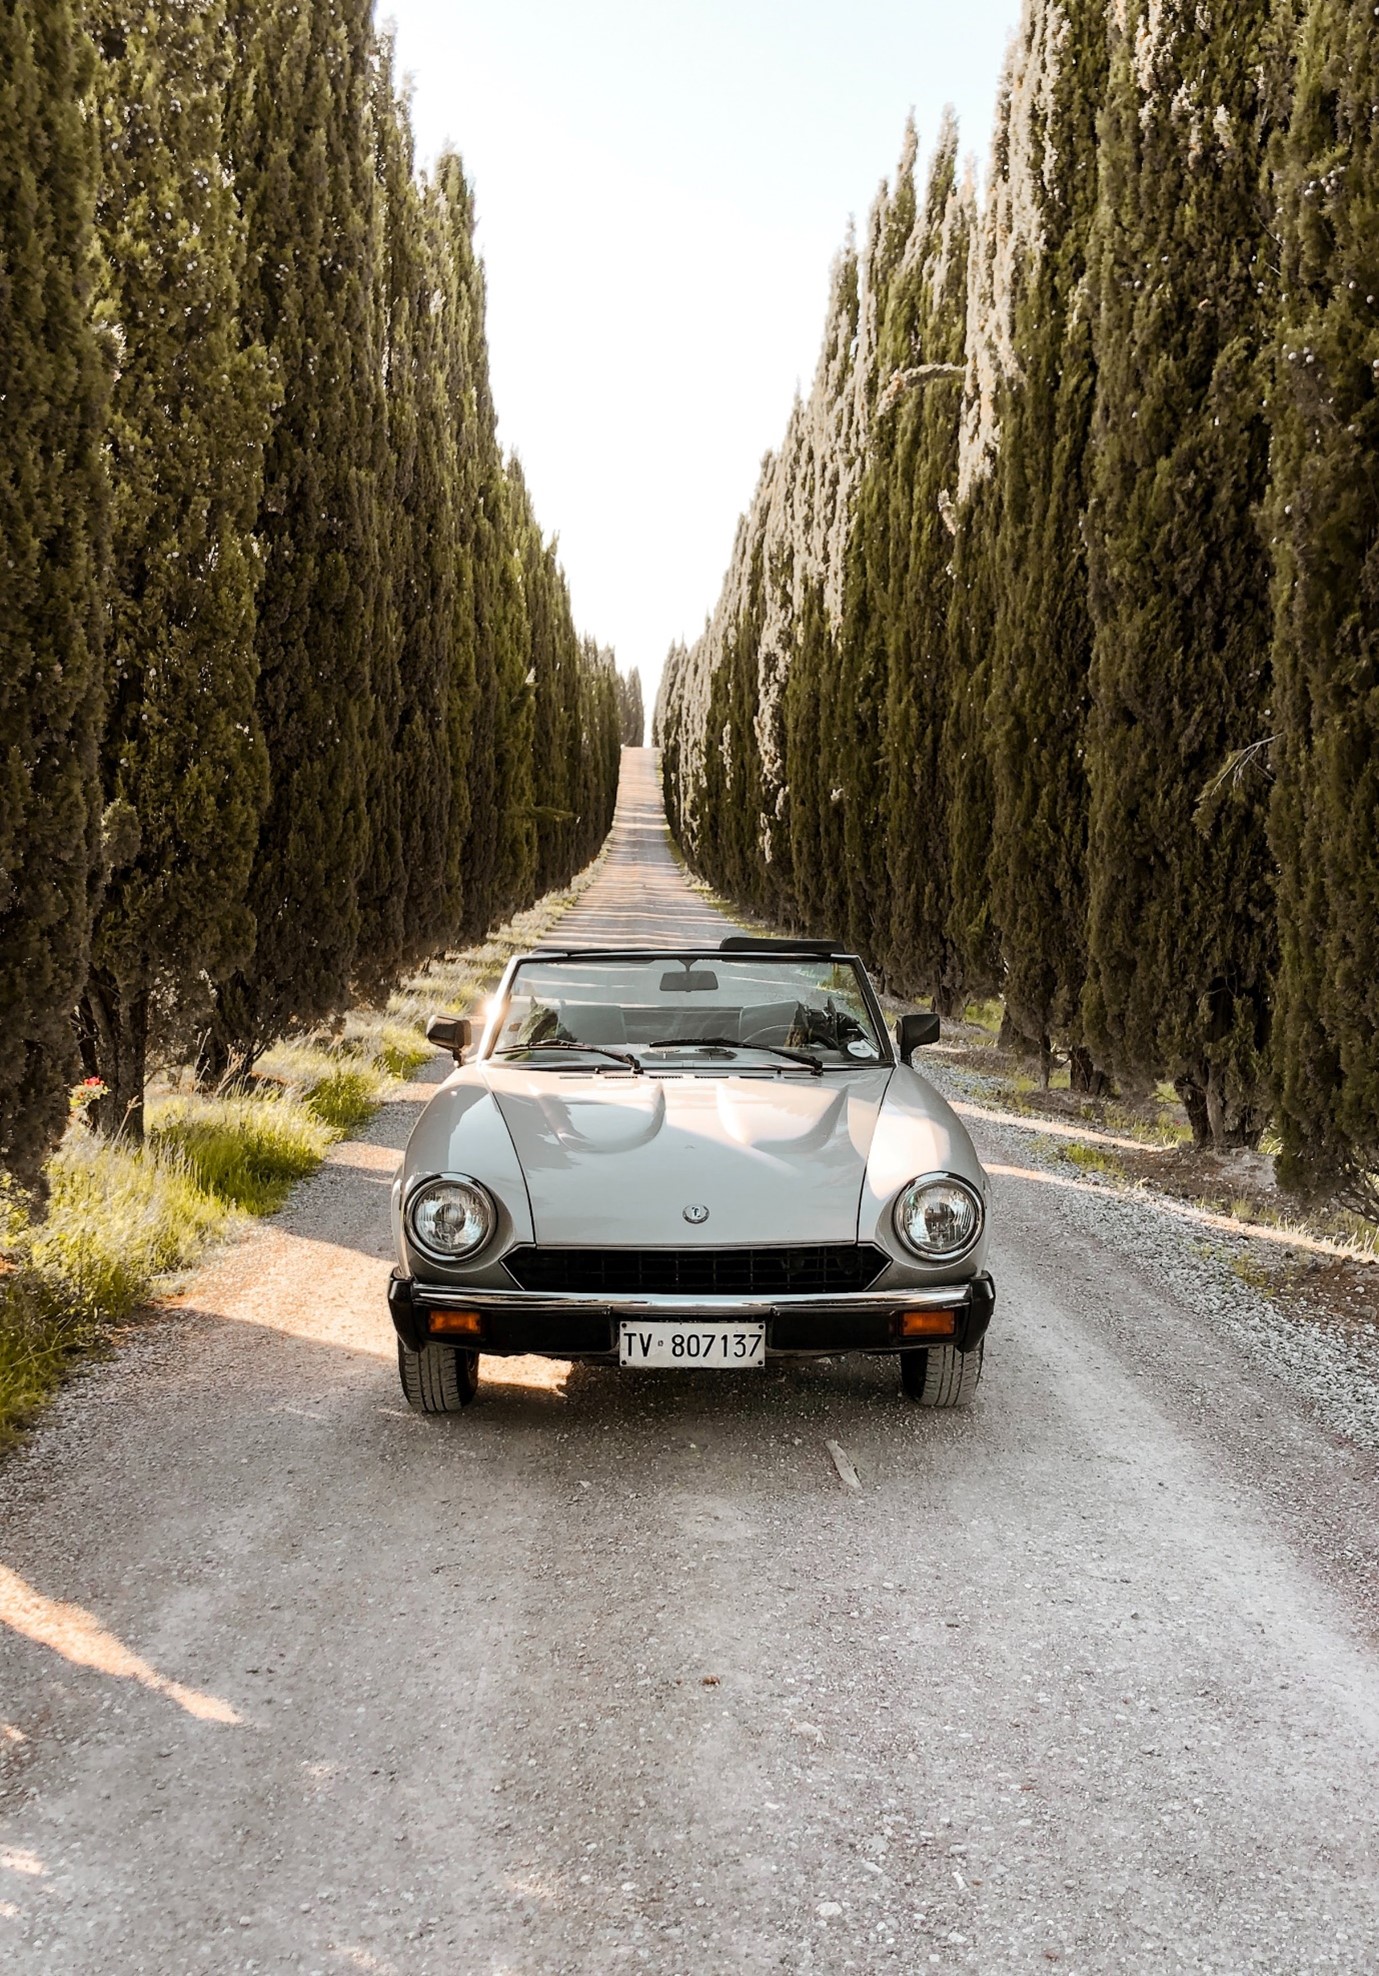
30. Traditional ribbon gravel drive

It’s when you have a loooong driveway to surface that gravel makes a lot of sense due to its low cost. It can therefore be more popular in rural areas ,like a lengthy gravelled ribbon driveway.

driveway-ideas-long-gravel-drive
Source: Photo by karl muscat on Unsplash

31. Tar and chip

Multicoloured gravel chips laid in tar, the so called “tar and chip” method, is another durable and relatively low cost option. It’s maintenance free, compared to gravel driveways, and has great traction. Plus, it can look truly stunning.

32. Resin bound gravel

A popular alternative to loose gravel is resin-bound gravel. This mimics the appearance of gravel but the stones are bound to a film of resin, leaving a rough dry aggregate surface. Different colours and textures are available and it can be permeable to assist drainage.

33. Gravel with asphalt

If you have a resin-bound gravel driveway, you might add a section of asphalt to define your parking area. An alternative to resin-bound gravel is self-binding gravel. This doesn’t have the same cohesive properties as resin. But it’s an affordable low maintenance option for residential driveways too.

34. Coastal crushed shell

A material that mimics gravel well is crushed shell. Shell driveways can be eco-friendly if obtained from a sustainable harvesting company. They give great drainage and act as mulch when they decompose. They—obviously–particularly suit a coastal vibe. (Love gravel as a landscape material? Make sure to check out our gravel garden ideas.)

Driveway edging ideas

Having a well-thought out border is a great way to give your driveway definition and character, softening the driveway’s hard edges. Not only does it make your driveway stand out but things like curbs, setts and stones along the edge will provide drainage opportunities too. (Find loads more garden edging ideas here.)

35. Gravel edged with pavers

Blocks and pavers are a traditional edging material. They give neatness and structure to driveways, especially those with loose stones or chips.

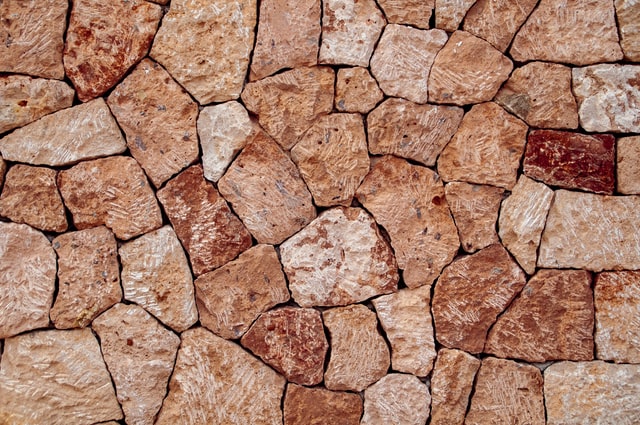
36. Stacked stone edging

Another option is stacked stone edging. This particularly suits a rustic or native garden. Stacked stone is great if your drive is on a slope as it will act as a little retaining wall.

37. Corten steel edging

For a subtle metal edge, try Corten steel edging. The popular industrial-look garden hardscaping material keeps your borders exceptionally tidy.

38. Rock borders

For an edging material that looks completely naturalistic, rocks make great borders. They fit perfectly into their landscape setting and look lovely.
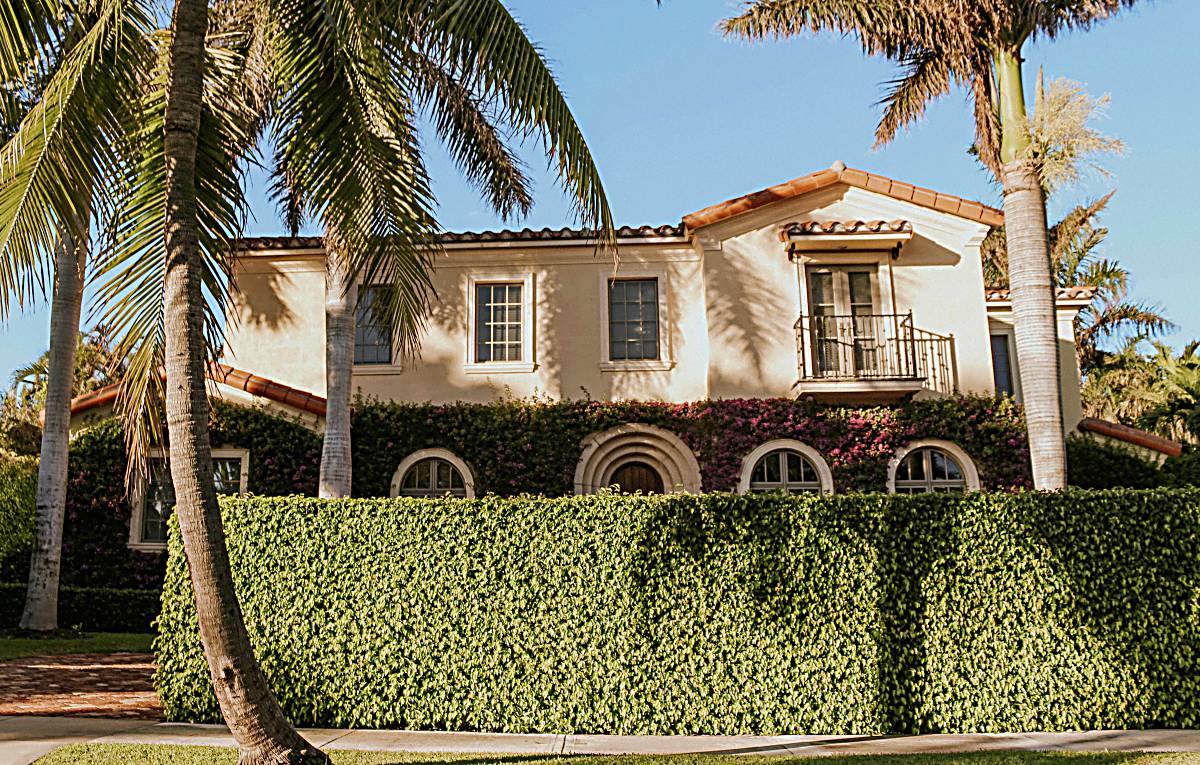
Driveway gate ideas

When it comes to driveway gate ideas, there’s a massive amount of choice on the market in terms of colours, styles and materials. While they have the job of providing additional security and privacy to your home, they also offer you the chance to set the tone for your home’s style. Your choice of gate can add a really finishing touch to your overall aesthetic and add loads of curb appeal. Here are just a couple of examples for inspo. It might also be helpful to view our blog on front fence ideas.

39. Consider functionality

What kind of driveway gate function do you need? A mechanical or motorised gate? If opting for automatic gates, make sure you consider solar power to save running costs. Would you prefer a swing gate or a sliding one? Swing gates need a wider than usual driveway gate, made of materials that won’t sag.

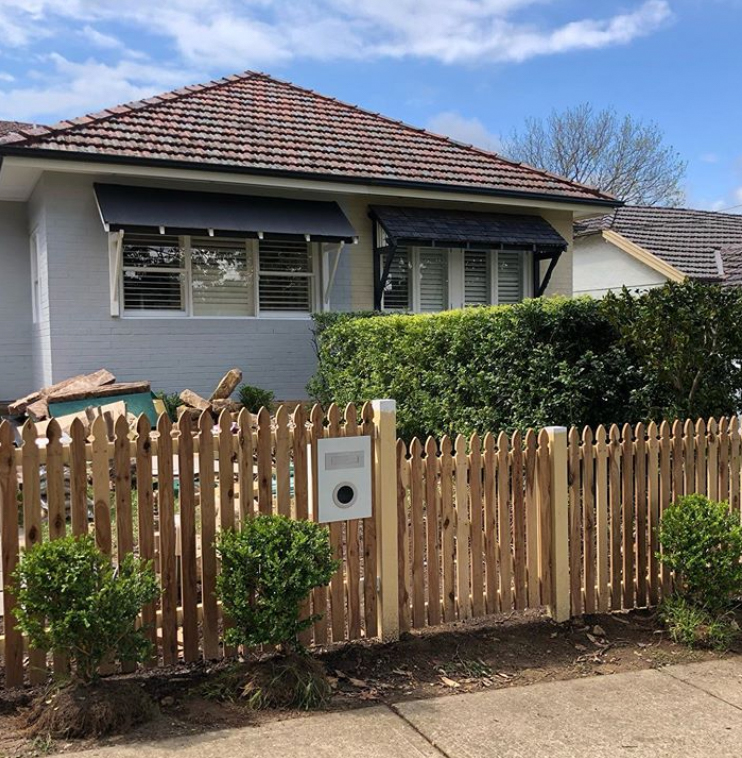
40. Contemporary timber gates

Timber is so versatile—you can create a traditional look or something highly modern. Always go for a quality exterior-grade timber that is appropriately treated. (Need a hand with timber gate installation?)
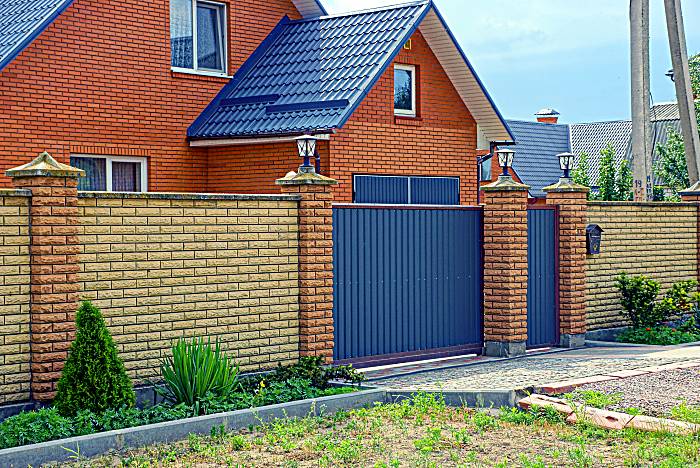
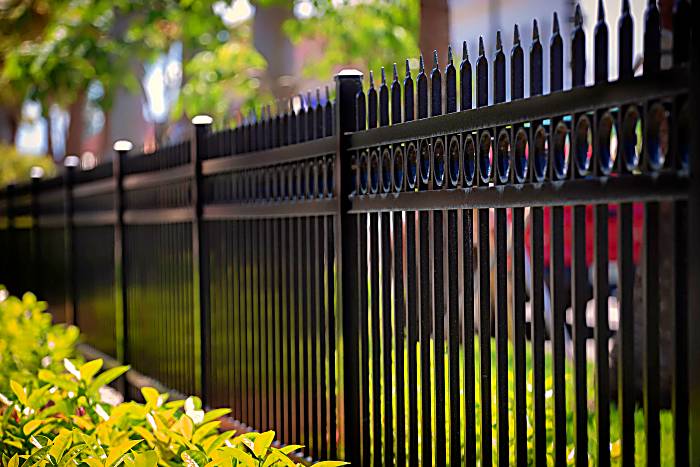
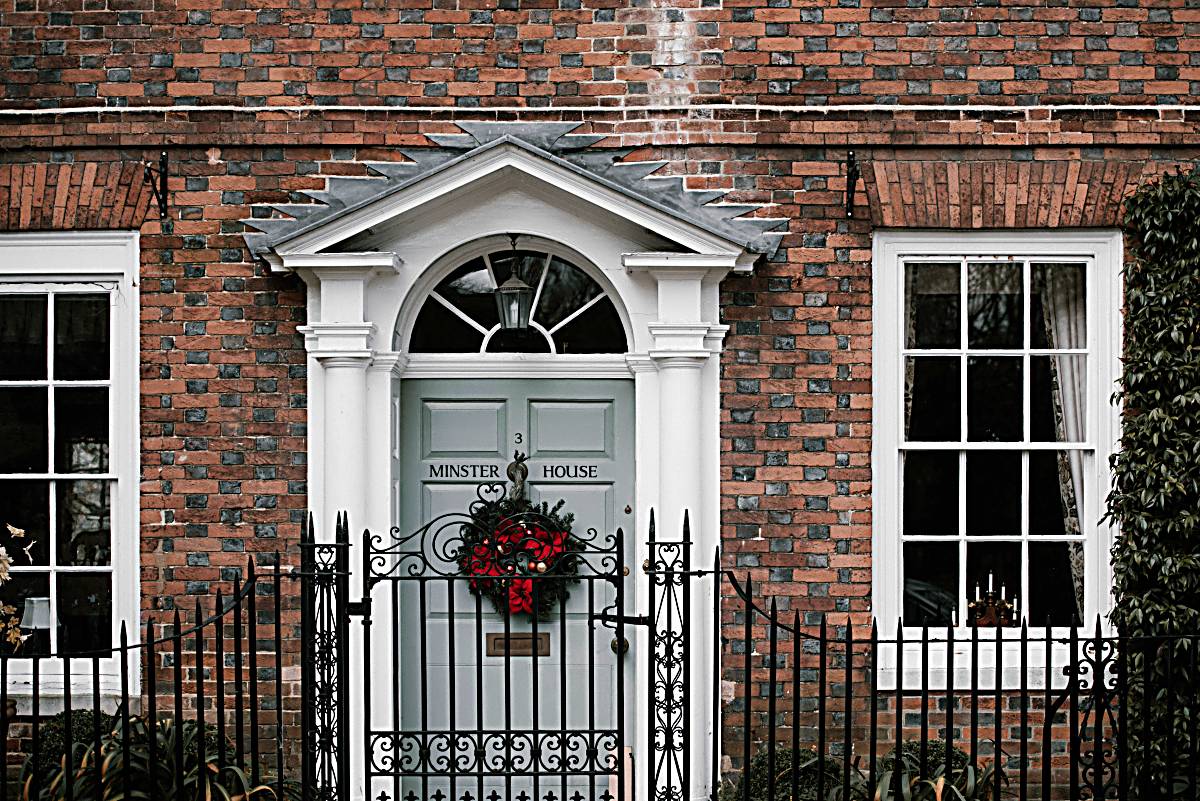
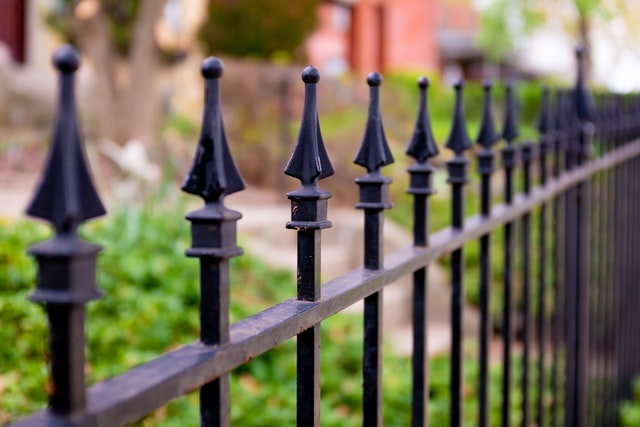
41. Metal gates

Choosing a gate made from metal usually means a choice between durable aluminium, classic wrought iron or strong, contemporary steel. An older home might well suit wrought iron while aluminium and steel tend to look more modern. Powder coating means you can also choose from a huge range of colours to suit your home’s look.

Driveway lighting ideas

Think about your lighting choices early on, when selecting your other materials. Do you prefer subtle uplighters, or modern drive-over lights? Either way, lights with motion sensors that spring to life when you drive past are typically more energy-efficient. Here are just a couple of ideas. For more, see also our blog on landscape lighting.

42. Stripe lights

Simple, solid edging uplighters provide stripes of light along a driveway. The tiny little bollards act like an edging material to define the driveway as well as light the way.

43. Small round lights

If you love a minimal look, then tiny, unobtrusive edging lights are the way to go. They provide just enough light to lead the way, but remain subtle and understated. These kinds of lights are a popular contemporary choice. Especially if you prefer not to have bollard style lighting sticking out into the visual plane.

44. Double-ended lights

Adding the safety of lighting to your driveway also greatly enhances its curb appeal. There are so many different types of driveway lights out there and it really boils down to a matter of personal taste. Double-ended lights set into the middle of the driveway provide plenty of illumination for the entire width of your drive.

45. Embedded edging lights

Embedded edging lights are another option for guiding the way. These are aluminium LED lights featuring anti-glare and waterproof design, operated by light sensors to come on when the sun sets.

46. Illuminated pavers

You can also get illuminated pavers that are completely embedded into the driveway. Powered by LEDs and solar chargeable, they are a low cost method of lighting your driveway. And because they’re flush to the driveway surface, they don’t intrude visually when not in use.

47. Heated driveway ideas

Finally, if winters where you live mean shovelling snow from the drive, then a heated driveway would be the ultimate in convenience. Driveway heating systems comprise either heated driveway mats or cables embedded into hardscaping—concrete, asphalt or the mortar under pavers. Prices can be surprisingly affordable.

And that’s a wrap of my pick of driveway ideas to consider whether you’re upgrading your driveway or building new. Which ideas appeal to you the most? Let me know in the comments! Want more outdoor inspo? Make sure you also check out our blog on backyard ideas.

driveway-ideas-multicoloured
Source: Photo by Ferran Fusalba Roselló on Unsplash

Get some help with your driveway ideas

Driveway building and maintenance are jobs best left to the professionals and you can find them all right here. You can find experts to build your new driveway, including any necessary levelling, land clearing or soil/sand delivery. Perhaps you need help sealing or resealing your driveway, or other specialised driveway repairs. Or maybe you just want your old driveway to look sparkling new again?


How to actually build a sturdy shed foundation for your beautiful garden

Every good shed starts with an even better foundation.

How to actually build a sturdy shed foundation for your beautiful garden

Everyone (with a garden) needs a good garden shed. This very useful space is great for extra storage or a place to craft other various projects, but every good shed starts with a solid foundation. You want to ensure that your garden shed offers stability and safety, and learning how to build a shed foundation is the path to achieving that.

It should also be noted that whether you are building your shed from scratch, or buying a pre-fabricated option, both methods require you to form the foundation. This makes learning how to build a shed foundation an unavoidable step for anyone who wants a new shed.

Read on for all of the essential steps to ensure the correct surface, along with the steps for how to build a shed foundation.

Start by levelling the surface

You have a few options for your foundation, be it concrete, a raised wooden deck or concrete slabs, but all will require that you start with a level surface. Your shed will probably warp over time, and the adverse effects of this will be lessened if you level the ground first. Remove the debris and place a weed-proof membrane down to prevent things from growing through the floor.

Grass and weeds growing under your shed can be a problem as the floor will not dry out properly after the rain. This can cause premature rot, mould and mildew.

Laying the base

There are many base options for your shed, but the most popular are cast concrete or concrete paving slabs. Both options provide a longer-lasting garden shed foundation, and will require these steps:

  1. Use mason’s string and batter boards as a border around the area
  2. Dig about 15 cm deep 
  3. Place a wooden framework for the concrete 
  4. Place a level layer of 7 cm deep gravel, then pour the mixture of cement and concrete
  5. Spread out with a hand screed
  6. Let it dry completely starting the shed

Make sure you have all the tools and materials before you start to make for a more efficient process. While this is a task that is made easier with two people, it most certainly can be done with just one.

Common mistakes to avoid

The first thing to avoid is laying paving slabs on irregularly spread gravel as this will create an unstable base that will warp and crack over the years. Your base will likely sink once the underlying material disintegrates.

If opting for a raised wooden deck, ensure you clear the ground first and use a weed-proof membrane. While ideally, you’ll find a spot that is already level, you can still learn how to build a shed foundation on uneven ground. This will require grading the soil and making sure you are not in a spot that will collect water.

If you want to ensure that your base area stays dry, remove all grass from the site and use a dirt tamper with 5-6 cm of gravel to help drain the water underneath. Knowing how to build a gravel foundation for a shed will help secure the longevity of your base when it is up against the elements.

building a shed foundation
Source: Shutterstock

How to build a shed foundation with deck blocks

Deck blocks are another option for your shed foundation. These pre-formed masses of concrete feature formations in the top to hold vertical posts or beams. Many people prefer this feature as a form of extra structure security.

While they are generally a more temporary foundation for freestanding or floating structures, many people use them as they have a more straightforward installation process. You should not consider the option, however, if you are in a high wind area. Your local building code office will usually have the final say on whether or not you can use them.

Deck blocks are quicker and cheaper to install and require minimal surface prep or digging. The number of blocks you need will depend on the weight, layout, and size of your shed. The bigger the shed, the bigger your blocks. You will likely need help moving larger ones into place as they can be weighty.

The steps for building a shed foundation with deck blocks

First, you’ll want to level your blocks and ensure you have the following tools on-hand:

  • Tape Measure
  • Mason Line
  • Level
  • Safety Glasses
  • Knee Pads
  • Laser Level

1: Calculate where your blocks will be located and prepare the area with level string lines

2: Place your blocks in position and continually check to ensure your structure is level 

3: Measure diagonals to make sure all blocks are in the correct position. 

While deck blocks can be a very stable base, they can be challenging to level if the ground settles once the shed is built. Try to avoid disturbing the environment too much while levelling the deck blocks.

What happens if I have no or inadequate foundation?

Apart from being unsafe, a shed that is not level won’t look very good or feel great to be inside of. Doors and windows may not close properly as your shed will settle over time, causing things to come out of alignment. Avoid this right from the start with a solid foundation.

You may also find that the centre of the floor may not be well supported, primarily if you use concrete blocks on an uneven base. If the centre of the floor is inadequately supported, it will result in a bouncy floor that sags over time. This is especially the case in a larger shed or garage that will be storing heavy vehicles or equipment.

open garden shed with gardening tools
Source: Shutterstock

Frequently asked questions

What is the best foundation for a shed?

You have a few options for your foundation, most commonly concrete, a raised wooden deck or concrete slabs. The most popular options can be cast concrete or concrete paving slabs. They will provide a longer-lasting garden shed foundation. Wooden decking is a popular option as it looks neater and easier to level. If you do opt for this, however, ensure that you lay a weed membrane beneath it to prevent various growth through your deck.

Ultimately, the decision will be based on whichever aesthetics you prefer, or the foundation that is within your budget.

Do you need a foundation for a shed?

Absolutely! Whether you are building your shed from scratch or buying a pre-fabricated option, both methods require you to form a foundation. This makes learning how to build a shed foundation an unavoidable step for anyone who wants to build a new shed. The foundation will help ensure your shed’s longevity as it battles the outdoor elements.

The quality of your foundation will also help you avoid other issues. Besides poor aesthetics, shed doors may not close properly on an unstable base. You may also have drainage issues, or problems with wet areas underneath your shed if the flooring has not been treated properly.

How do you prepare a foundation for a shed?

Once you have decided what your shed foundation will be (most commonly concrete, a raised wooden deck or concrete slabs), you’ll need to level a surface. This is a crucial step to ensuring the longevity of your base, so remove the debris and place a weed-proof membrane down. This will prevent things from growing through the floor.

If you have opted for a cast concrete or concrete paving slab base, use mason’s string and batter boards to form a border around the area. Dig about 15 cm down placing a wooden framework on the edge for the concrete to then be poured into. Add a level layer of 7 cm deep gravel, then pour the mixture of cement and concrete in, spreading it out with a hand screed. Allow it to dry completely before you start work on building the shed on top.

Enjoy the peace of mind in knowing your shed will stay up!

Now that you’ve learned how to build a shed foundation, you can push on with the rest of the shed knowing that it won’t collapse! We’re sure you’ll undoubtedly appreciate that peace of mind when standing inside of it. Safety first, always!

If you’ve mastered the foundation but are having a little trouble with the shed installation, there are plenty of Taskers on hand to help! You’ll find people who are specific experts in Bunnings shed installation, or the building of various other garden shed designs to ensure you have a quality space that will perform its function for many years to come. If you already have a shed, but it is in some drastic need of repair, we have the people to help with that as well.

If, on the other hand, the successful laying of your shed foundation was understandably satisfying, have a read of our backyard ideas blog and proceed with building the shed yourself. These blogs will give you some other great DIY projects! It will not only increase the value of your home, but also the function and enjoyment of your outdoor areas. Grab the tools and get to work and make your backyard something you are proud of today!

30 Pool fencing ideas for your backyard

Fancy up your pool area with a slick new fence!

30 Pool fencing ideas for your backyard

While pool fencing is an essential to ensure the safety of your family, this doesn’t mean it has to be an eyesore. In fact, fencing off your pool area can be a great feature, adding to the overall aesthetic of your backyard.

There are so many different finishes and materials that work well for pool fencing – so let’s take a look.

pool-fencing-tinted
Source: Photo by Toomas Tartes on Unsplash

Aluminium

Aluminium is sturdy, no fuss and an easy option. It is classic and timeless in look and will be very low maintenance. Just install, then you probably won’t have to worry about it again.

Glass

One of my favourite pool fence finishes is glass. I love that you can see straight through to the pool to watch the kids and all the fun happening in the pool. And when you are in the pool yourself, you don’t feel disconnected from the rest of the house.

Timber

Timber is a natural material and can give so much character to any area with the natural veining of the wood running through it. Timber will bring warmth and comfort into your pool area without much effort at all!

There are many different pool fences on the market today, it’s just a matter of doing some research, having a look at this blog and deciding on what’s going to suit your family best. So what are you waiting for? Check out these 30 pool fencing ideas!

1. Retaining wall

A retaining wall as a pool fence is perfect for a pool in a corner rather than a perimeter fence. This way you can still get plenty of green landscaping to give you a feeling of being on permanent holidays.

pool-fencing-white-and-flowers
Source: Photo by Soff Garavano Puw on Unsplash

2. Fence variations

There are no rules that say you must commit to just one look, so why not incorporate a few different fence variations around your pool? For example, one side of the fence might be clear glass with grey aluminium, while the back fence might be grey concrete slabs, and the right side black aluminium.

3. Clear view

One of my favourite types of pool fencing is a clear fence! This is the best way to go if you want your fence to seem the least obtrusive as possible. Although one downside to a clear glass fence is that it arguably the most high maintenance fencing you can choose as you will have to regularly clean it to ensure that the glass can be seen through.

pool-fencing-glass
Source: Photo by R ARCHITECTURE on Unsplash

4. Mixed materials

There are so many ways you can mix materials for a pool fence. Here’s another idea: keep one side simple black aluminium fencing and the other fancied up with clear glass. This would work really well if you were on a property that had a view. You could utilise the practicality of a black aluminium fence on one side and leave the glass side for where you want to be able to see the view through.

5. Simple aluminium

Aluminium is simple and no fuss. It gives such a classic look and will stay in fashion forever. Aluminium is also very sturdy and built to last. So if you need something that will be low maintenance and will stand the test of time and weather, aluminium is the way to go.

swimming pool fence black aluminium
Source: Shutterstock

6. White vinyl fence

How sweet is this white vinyl fence! It really reminds me of a white picket fence which seems to be the quintessential fencing that everyone dreams of. A white fence really gives a cottage look and looks great on this big property.

white fence for pools
Source: Pixabay from Pexels

7. Child-proof fence

If you have young kids, then it is really so important that your fence is childproof so that no one goes wandering in unnoticed. This fence has screens so that it is still easy to watch the kids if they are in the pool.

pool-fencing-classic
Source: Photo by Matheus Natan from Pexels

8. Flat top aluminium

Keep an aluminium pool fence nice and neat with flat tops. Instead of having turrets atop each foundational instalment, flattening off the tops will give a minimal and trendy look to your fence. This means you won’t have to worry about the look of the turrets and rest easy knowing that your pool fence will look great in years to come.

9. Timber posts and glass

If you’re wanting to be able to see the pool from the house but also want privacy, then try installing glass screens to face the property so that you can see straight into the pool from the house. Then, add a timber post fence  to sit around the sides and back of the pool to give the area some privacy. Genius!

pool-fencing-with-gazebo
Source: Photo by Jonathan Borba on Unsplash

10. Subtle but safe

When your property itself makes a statement, you won’t want to have a pool fence that distracts from that. A long glass pool fence will ensure safety for the kids as well as not ruining the overall look of your property.

11. Gazebo addition

Adding a gazebo structure to your fencing makes it fun for the whole family! Parents can relax under the vines growing upon the gazebo while they watch the kids having a splash in the pool. The pool fence itself can be installed with a gazebo in mind which works really well.

12. Deck fence

Fencing has been utilised here in the deck area and through the wrap-around fencing of the property boundaries. Painting your metal railings a gorgeous colour is something worth considering too.

pool-fencing-colourful-railings
Source: Photo by Wim van ‘t Einde on Unsplash

Need your fence fixed? Make sure your pool is always safe by getting on top of any pool gate repairs that are needed.

13. Arched tops

If you’re after something a little more creative and unique, then this is for you! You don’t often see arched tops, but if they are accompanied with the right outdoor elements, they look really great! If you have a very angular pool, arched tops will also help to round off the area to stop it from looking so sharp.

14. On-trend timber

As timber is a natural element, it will always stay in fashion. This timber fence utilises beams so that it is slightly lifted off the ground and you can still see the white decking easily.

pool-fencing-weathered-timber
Source: Photo by Thom Milkovic on Unsplash

15. Hedge pool fencing

Bring the finesse of a countryside estate pool to a smaller inner-city terrace with stunning evergreen hedge pool fencing. Pick the right varietal and ensure you’ve planted them with the correct spacing. You can also find an expert to help with hedge planting and hedge trimming maintenance.

16. Timeless aluminium

Aluminium will always be timeless and classic. It’s perfect for a sturdy and long-lasting fence which is important for an area that is used a lot. Modern black matches really well with many contemporary properties and is typically a great contrast for other materials.

17. Modern pool fencing

Stone or concrete are awesome modern pool fencing materials and will ensure your pool area has that chic, upmarket feel to it.

pool-fencing-gabion
Source: Photo by Carlos Colon on Unsplash

18. Brushwood or bamboo

On the cheaper side, it’s not all that common but anther pool fence option for the boundary side is to have a bamboo or brushwood fence.

pool-fencing-bamboo
Source: Photo by Chris A. Tweten on Unsplash

19. Blending in

If your property packs a punch, then you really don’t want anything taking away from that so a glass fence will work really well. Ideally, it will be almost as if the fence isn’t even there. And being able to see through really ensures that the connection between the house and pool area are preserved.

20. Black framing

This pool fence is made up of black-framed panels. This is great as you can clearly see there is a fence there, however you can still see through to the pool. Great for watching the kids as well as peering out onto a magnificent view if you have one!

pool-fencing-black
Source: Photo by Marvin Meyer on Unsplash

21. Wraparound fencing

I love that this fence really fades into the background with the use of trees, shrubs and bushes between the pool and the fence. Putting plants inside your pool fence boundaries will really help to camouflage the fence and make it look as if it is part of the natural surroundings.

pool-fencing-mixed
Source: Photo by Raygar He on Unsplash

22. Hedged fence

This is for you if you have to get a fence but don’t want it to spoil your natural surroundings. The fence could be a complete hedge or you could even install a fence and have the hedge grow around it. It’s really up to you! A hedged fence looks so European – straight outta somewhere in France or Italy!

23. Pointed hardwood posts

Hardwood is another material that will match with almost any property. Add clear screens in-between hardwood posts so that you can easily see straight through to the pool. Pointed posts really give character to a simple fencing, too.

24. Modular walls

If you live in suburbia where there isn’t much privacy and your neighbours live right next to your property, then you’ll want to incorporate fencing that is ultra-private. Modular walls are definitely the way to go to ensure more privacy for your property and you could even match the finish of the walls to your rendered house!

pool-fencing-stone
Source: Pixabay on Pexels

25. Wire panels

Wire panels are a great idea if you live in a place that has lots of wildlife. Wire like this will ensure that no unwanted critters or animals can come into your pool area. A wire panel fence is sturdy, yet you can still see through it which works so well.

26. Half and half

Keen to add interest by mixing materials? How about having one side to look through and the other for practicality? Doing a half and half fence will make cleaning easy as you will only have to tend to the glass side and not have to worry too much about the maintenance of the aluminium side. How convenient!

27. White picket pool fence

If you love the white picket fence look, add it to your property in pool fence form! Your property will look straight out of a movie based somewhere like the glamorous Beverly Hills!

28. Artificial garden panels

Now this is a great pool fence idea! If you don’t have the patience or time to wait for a hedge to grow, why not source some artificial garden panels which will give the same effect?! Plus, if you’re not really a gardener you won’t have to worry about trimming or watering this low maintenance instalment.

29. Frameless glass

Frameless glass really works so well, especially for properties that have a view. Being able to look through to the pool gives the illusion that the pool connects to its surrounding landscape!

30. Timber texture

And last but not least we have this textured timber fence that has so much character! As timber is a natural material, preserving the imperfections and uniqueness of the wood will create so much texture and turn any boring wood fence into something of beauty!

pool-fencing-feature-wall
Source: Photo by Jonathan Borba on Unsplash

So, there we have it! 30 pool fencing ideas to help you get started with your fencing installation! I love the clear glass pool fences that allow for an unobstructed view of the surroundings as well as the standalone panels that look so trendy and like a work of art. What were your favourites? Let me know in the comments below.

And let’s not forget to keep it swimmable all year round and get an extra helping hand with pool cleaning! Also, if you’d like to know how much a swimming pool fence costs, check out our updated swimming pool fencing cost guide.

How to build a pergola – step by step

Boost the value of your home and the quality of your entertaining with a DIY pergola.

How to build a pergola – step by step

Learning how to build a pergola really isn’t as hard as you may think. It’s actually a bit of fun and can add value to your home while boosting curb appeal and making it easier to entertain without having to worry about the weather.

Pergolas are a cost-effective option that will improve your backyard and can be constructed out of a range of materials, incorporating various style to suit your home. You can build and decorate to suit your tastes and home, and have a little fun with adding seats, cushions or carpet to create another relaxing space that is also great for entertaining!

What is a pergola?

In most cases, a pergola is composed of four beams to provide shade or a roof for an outdoor area. Your pergola can be open or closed depending on the layout, but usually, they have two to four open sides.

Constructed from a variety of different materials, a steel or timber pergola is the most common option as an extension of your home. You can get creative, choosing to decorate with vines or a curved arch. You also have the option of a freestanding or attached model.

Just don’t confuse a pergola with a gazebo despite the fact they are closely related. Gazebos are always round in shape and provide more shade and protection than a pergola as they include both flooring and a roof.

Pergola design options

Pergolas are relatively cheap and easy to design for a good fit for your backyard. The design options include:

  • Attached to the house: An attached pergola is an extension of the home with at least one of the sides sharing wall, flooring, or beam with the home. A great option for privacy while still allowing sunlight and a breeze to come through.
  • Freestanding Pergola: This version is not connected to any other structure and is perfect for the front, side, or back of your home. Treat it like a garden nook to relax in, and you can even lay a path to it from your home for an added effect.
  • Pergola with built-in deck: If you want to level up (literally) you can build your pergola on a floating deck to make it more of a statement piece. Add a few chairs and a dining table, and you have yourself a fresh new outdoor dining area. Actually, if you’re thinking of adding a floor, make sure you take a look at these decking ideas or just jump in and find someone nearby to help with decking.
A pergola with flowers
My Foto Canva

What are the steps for how to build a pergola?

Building a pergola is more straightforward than you may think. You can adapt these instructions to customise your build for something bigger or taller and vary the materials for your look, but these steps will give you the core basics for how to build a freestanding pergola.

Construction materials needed to build a pergola

  • Four long beams, usually 4×4 (standard) or 6×6 
  • 2 x 4 beams, 2 x 6 beams, 2 x 10 beams
  • Hammer
  • Ladder
  • Shovel
  • Circular saw
  • Drill
  • Galvanised deck screws
  • Screwdriver
  • Spade

Step by step guide

  1. Consult with your local council to ensure any regulations concerning backyard renovations are et, so you are not made to rip down your new pergola down the track.
  2. Identify and mark out the area that the pergola will occupy.
  3. Stain or paint any materials you are planning on using before you begin construction.
  4. Dig four holes, one in each of the corner of your designated area roughly two feet deep and nine inches wide.
  5. Put some gravel in the hole to absorb moisture.
  6. Sit one of the beams in the hole, straight and upright.
  7. Pour pre-mixed quick-dry concrete in the hole and allow it to dry, repeat this action for all four beams.
  8. Cut the 2×10 beams and fasten them to the posts to create a roofing base .
  9. Cut the smallest beams into rafters and attach them to the top beams.

These steps are the simple core requirements, from here, you can alter and decorate; however, you want. Using a shade cloth on the roof is an easy and cost-efficient way to create a little cover. Choose a dark-coloured fabric and add some fairy lights for effect.

You can also research some potential design ideas to determine what kind of material and look you will go with. If you really want to make this an easy process, you can buy a DIY pergola home building kit which will give you everything you need and save you the effort of planning.

Alternative options

If you want something a little more robust, add a flat roof to your pergola for more significant shade and protection from the elements. This way, you can decorate beneath the pergola with carpet or outdoor furniture and pillows, creating a comfortable entertaining area for family and friends. 

If you have a deck or patio that extends out from your home, the pergola can be used as a transition piece, or you can build one to cover your pool or jacuzzi. This is a great way to add privacy and shade to your pool while also keeping it cleaner from falling leaves. 

Pergolas as transitions

In some cases, pergolas are used more as a decorative statement than a functional addition to your home or yard. You can use a pergola to accent a home by putting textural materials on the exterior, and throughout the pergola. Many people use it as a structure purely to hang lighting to create a welcoming and softening transition between a home and its deck areas.

You can even use it to hang plants and pots to increase the greenery of your yard. Pergolas a great for vines, you can train your foliage to wrap its way around the wood, creating a visually stunning planter.

Pergola with a view of the beach
Bryan Agua

Frequently asked questions

What is the best wood to use for a pergola?

Wood is the most popular material used for pergola construction. It is cost-efficient, easy to work with and durable when it comes to outdoor conditions. Considering which type of wood is essential. You can use any wood you’d like, but there are some options that will offer a more professional-quality structure.

The best wood choices for your pergola are:

  • Pressure Treated Wood – low cost
  • Red Cedar and Redwood – more expensive but offers the benefit of being naturally protected 
  • Tropical Hardwood – costly but offering a stunning look
  • Modified Wood – the best choice when it comes to price, aesthetic and reliability

How tall should a pergola be?

Your pergola can be as large or small as you would like, but your existing architecture will often determine the best size. You don’t want a structure that towers over your home, or more importantly, neighbours fence. An ideal pergola will be in scale with your home’s design to help it feel integrated, particularly if it’s against your house.

In this case, the placement of your windows and roofline will let you know how high your pergola should sit. The way you plan to use the space also plays a role in determining the size. You’ll want to ensure you have enough floor space for things like chairs and a table, big enough to accommodate your family or friends if you plan to entertain. 

The minimum height of a pergola is often no lower than 7’6.” This will allow ample headroom. A standard pergola sits around the range of 8-10’. A lower ceiling makes for more intimate gatherings, while a more extensive roof is better suited to match a larger house. If you plan to include lighting inside, you’ll want to have a little more height.

How long will a wood pergola last?

As pergolas spend their time outside and are exposed to all of the elements, their lifespan will vary based on the material used. The quality of construction is also a factor that will play a part.

A metal pergola will often last around five years as they are susceptible to rust, which is why they are not a popular choice. Pressure-treated wood, on the other hand, can last up to 12 years; however, it is crucial to note that wood is vulnerable to both rot and mould. You can get the most out of your wood by re-staining it every year.

A vinyl pergola is the best option in terms of longevity as it is entirely impervious to the elements. It also won’t require any yearly maintenance and can be cleaned with a simple hosing down. 

Ready to build that new pergola?

Hopefully, you’ve found the information in this article helpful in how best to construct your new pergola. DIY work can be a fun and rewarding experience with plenty of benefits. If you want a little help, find someone to help build your pergola.

If you are feeling like a little DIY work, you may be interested in our tips to build a deck to go with your new pergola and some alfresco dining ideas for your home. We also have plenty of deckingpatio and backyard ideas to increase your enjoyment of your space and the value of your home. Happy building!

Side of house ideas for your home

It’s time to transform this limited and underused outdoor area. Check out our side of house ideas for ways to perk up your property’s most forgotten space.

Side of house ideas for your home

Are you making the most of your side yard? It’s typically small, narrow and often a challenge to turn into a usable space. But there’s no reason you can’t turn it into something attractive and generate more usable (and valuable) outdoor space for your property with some clever side of house ideas.

Whether you just improve the overall look of it so that you’ll be proud for guests to use it as a walkway, or you turn it into a private, mini sanctuary that you’ll want to actually spend time in. There’s absolutely no need to waste this space.

There are lots of easy ways you can beautify your side of house area – so let’s take a look at 33 side of house ideas that will inspire you to give it a total makeover.

1. Show the way

One of the most obvious things to do is create a well-landscaped path that really emphasises the main function of the side yard space, which is to enable travel between the front and back parts of your garden without needing to go through the house. Define your path with pavers, rocks or steppers that will visually lead the way, but feel free to make it an asymmetrical, meandering pathway for more visual interest. For example, adding a mixed planting around flagstone pavers.

2. Make it orderly but interesting

Maybe you prefer a neat, ordered pathway? Even so, the space doesn’t have to be a plain, boring rectangle. Make a straight path more interesting by adding asymmetry. A row of beautiful hedges on one side and a bare house wall on the other, for example.

For help with the right kind of hedge for your side yard, why not speak to an expert in hedge planting!

3. Blur the boundaries

When you’re deciding what to plant in your side yard area, use some of the same plants you’ve used in your front and back yard for continuity of style and to link it all up nicely. This is especially important if you can see the backyard from your side of house area. Have a coastal home? Use indigenous and native plants, leaving garden borders undefined and obscured by the planting. This gives the illusion of having a much larger backyard.

4. Create a destination

Rather than have your side of house area be just a means of getting from point A to B, why not use the space to create a relaxing destination in itself? Just the addition of some comfy outdoor furniture or a few beanbags can totally transform the area so that it becomes a little nook for you to escape to.

Of course, it depends on how much space you have to play with. But it doesn’t have to be the biggest space in the world—just try to keep other decorative elements minimal so it doesn’t feel too cluttered.

side-of-house-ideas-extend-verandah
Source: Photo by Sonnie Hiles on Unsplash

5. Add dramatic pavers

The type of pavers you choose are an opportunity to create visual interest and drama, just as much as your choice of plants will. A popular choice is “crazy pavers”, aka flagstone pavers, which typically come in bluestone, sandstone or quartz. These wildly-shaped stones really liven up an area and especially complement a contemporary home with lots of linear structure.

If you’re thinking that paving is the way to go, see here for some more paving ideas for your garden.

side-of-house-ideas-tropical
Source: Photo by Jonas Ferlin from Pexels

6. Be creative with your side of house ideas

I know what I said above about continuity through your various garden spaces. But you don’t actually have to be all matchy-matchy with the style of your side yard and your front or back garden—it’s fine to break that rule! Please yourself with a themed side of house garden of your choice. Love tropical gardens? Why not style up your side of house area with tropical plants and timber decking, even if your backyard isn’t resort-style? If you do this though, it’s a good idea to create a visual barrier between the two garden areas, with a fence or shrubs, for example.

7. Palm Springs perfection

If you love the Palm Springs desert-style aesthetic, a neat and low maintenance planting of the barrel and columnar cacti set amongst white rocks will look the goods. Place along the side of a whitewashed wall to deliver iconic minimalist, laidback elegance. It’s a simple look to recreate at home.

8. Draw from Japanese style

Let Marie Kondo at your yard and spark some side return joy. Borrow from the distinct hallmarks of Japanese decorating style. Such as, a focus on airiness and lightness, a sense of visual balance, a love of sophisticated simplicity and the keen use of white and illumination.

Want to use narrow trees along the side of your house but don’t want a “runway” effect?  Planting skinny, columnar varieties of the tree draw the eye upwards, adding height to the elongated space and making it seem much larger.

9. Embrace natives

It’s a great idea to use native plants as they are typically far lower maintenance than other kinds of flora. They also easily deliver a laid-back coastal aesthetic, with a gorgeous colour palette of silvery greys, blues, greens and browns. A pathway of crushed decomposed granite can amplify the coastal flavour.

10. Grow a privacy screen

A popular material that works well as a privacy screen along the side of your house is a non-invasive clumping bamboo, which is tall, fast-growing and easy to maintain. As well as creating privacy along your boundary line it will also act as a sound barrier and a windbreak. For your side of the house area, choose a narrow, upright bamboo, like Goldstripe. It works really well as a solid contrast to a home’s walls. Combined with a faded timber walkway and leafy plants in concrete containers, it will give off serious tropical vibes.

Add even more privacy for your backyard with these privacy fence ideas.

11. Dreamy glass bricks

Something a little different that could work as an alternative to conventional screening materials is chic modern ‘frosted lozenge’ glass bricks. A wall of these opaque glass blocks creates both privacy and delightfully ethereal filtered light as well as beautiful shadow patterns that will change as the sun moves across the sky. I’m in love with the look of this material.

12. Play with texture and light

Another example of an experimental side of house design is playfully using timber screens to manipulate the light. A walkway can feel claustrophobically tunnel-like so add visual excitement and airiness caused by the dappled light and shadow through the perforated wood.

If you decide to forego vegetation in your side of house, you can keep things really intriguing by using different surfaces, materials, colours and textures like this.

13. Layer it up

Enliven plain walls with a dynamic planting of flowers, shrubs and trees. The variety of textures, forms and colours are so pleasing to the eye. Try the Lagerstroemia indica, a tree of the Nachez variety, which landscape designers say will grow to a maximum of 6×4 feet in its lifetime and is easily pruned.

14. Cascade plants down a fence

A beautifully textured side of house design might feature crazy pavers in a meandering pathway, and a range of plants chosen specifically to change colour throughout the seasons. White plaster walls look amazing adorned with delicate climbing vines while lush foliage also spills over the top of the walls, creating privacy from neighbouring homes. Cascading plants will create a green waterfall down the side of a fence, but your side garden will probably need a little garden maintenance.

side-of-house-ideas-crazy-pave-path
Source: Photo by Sigmund on Unsplash

15. Add timber for warmth

Create a timber side of house walkway which seamlessly connects to the flooring used throughout your house. Or, complement oak window frames with oak sliding door frames.

16. Go vertical

If your space is so narrow that you don’t even have room for a row of narrow shrubs let alone trees, plant climbing vines that will creep up your walls to provide much-needed greenery against plain house walls. A popular choice is star jasmine but there are many other choices—why not hire an expert in garden planting to design the perfect planting palette for your home.

17. Soak up the ambience

Turn your side of house area into a relaxing and private haven where you can escape the world by setting up a little table and chairs and adding a touch of magic with a string of lights. It’s the perfect place to read the weekend papers, do some journaling or enjoy a cup of coffee.

18. Decorate with planters

If you only have a narrow strip along the side of your house, garden with plants in containers or raised garden beds rather than ground level beds as they will take up less room as well as be much easier to maintain and keep neat. Side yards are also perfect for space-saving vertical gardening structures, including trellises and arches.

To have someone help you with your side path garden design, why not speak to a local who specialises in planter boxes or if you’re not quite ready, check out this guide to planter boxes.

19. Grow a side yard veggie garden

You can have fun growing edibles along the side of your house where they will be out of the way but still handy to reach for maintenance and harvesting. Just make sure your space gets at least eight hours of sunshine a day and you’ll be able to grow your choice of herbs, fruits and veggies with no trouble. Mini-greenhouses look neat and are functional. Or, growing vines like cucumbers, passionfruit or beans up your fence or on a trellis is another solution for the narrow side of house space.

Make sure you check out this handy guide on winter vegetable gardens, and also look at these vegetable garden, raised garden beds, and herb garden ideas for your home

20. Create a canopy

It’s a landscaping trick, apparently: walking through a compressed space into more open space is known to create drama and mystery. So growing tall, leafy plants that will droop over a walkway and create a tunnel effect is a great way to generate that sense of interest. Not only that, but canopies create shade, which is great if the side of your house receives a lot of sunshine. Gently canopy a side path, building in a water feature, for the ultimate tranquillity.

21. Use contrast

This monochromatic look is high contrast, which is visually very appealing, as are the many parallel lines. The solid white and black walls also provide an excellent backdrop to the plants which edge the neat pathway. The fencing is shou sugi ban (Japanese charred wood), a technique which is becoming quite popular here, thanks to its many benefits and distinctive look.

It’s environmentally friendly, low maintenance, durable, flame-retardant, naturally insect-resistant, and resistant to moisture damage. And of course, it is a unique, bold visual style.

Love shou sugi ban cladding? Bear in mind darker coloured walls and fences will absorb sunlight and increase the radiant heat of the space—so may be best suited if you live in a cooler region.

22. Add drama up above

Overhead architecture, like arbours and pergolas connected to the side of a house, helps draw the eye upward and make a small and narrow space appear larger. They also help create that sense of moving through a compressed space that I spoke about earlier, which creates drama. And of course, you can plant up an arbour or a pergola with vines and other climbing plants to envelop you in greenery and create mesmerising light play and dynamic movement in the breeze.

Speaking of adding some cover, here are our favourite pergola designs.

side-of-house-ideas-make-sunroom

Source: Photo by Tandya Rachmat on Unsplash

23. Create a dry stream bed

Landscaping with river rocks is a popular way to achieve a naturalistic side of house design and one of the benefits of creating a path out of rocks or pebbles is that it can force rainwater out from along the side of your house and prevent pooling. Stones in a dry stream bed can give you a lovely monochrome aesthetic, broken up by little shrubs serving as pops of colour.

You could even turn part of a dry stream bed into a Zen rock garden with the addition of sand and enjoy some meditative raking, creating attractive ripples or overlapping circles and feeling blissfully at one with your Buddha-nature.

24. Add atmosphere with uplights

There are so many options for gorgeous landscaping lighting and one is to install uplights at ground level to illuminate certain features of your side of house garden. Uplights can be placed into a side path as well as at the bottom of trees to highlight their beauty as well as guide people along the path at night. Solar or low-voltage lights are best but speak with a landscape lighting expert to get the ideal lighting solution for your side of house design.

25. Make it pet-friendly

If you have pets, you’ll want to create a side of house area that is safe for them as well as able to withstand heavy paw traffic without ending up with ugly, patchy worn grass and trampled flowers. There are various tips and tricks you can look into, for example:

  • Use hardscaping to make winding paths that dogs enjoy following, with layers and dimension that will stimulate your furbaby;
  • Add brick pavers or gravel in high traffic areas
  • Plant hardy, pet-friendly plants that are non-toxic and can withstand urination (there are plenty of flowering woody shrubs which do this well);
  • Use soft mulch that won’t hurt paws.

26. Pet-proof it

Unless you decide to make your side of house area pet-friendly and able to withstand their activities, you probably don’t want it being overtaken by your pets, dug up and generally turned into a muddy mess. In that case, simply corral the animals behind a gorgeous gate, like a gappy timber one that allows a filtered view of the backyard.

27. Open up a side servery

Indoor/outdoor living spaces are a popular way to create a transition between the interior and exterior of your home and opening up a side servery increases your alfresco dining options. Changing a standard side window into one that fully opens up can totally transform your side of house into an additional entertaining space, provided there is enough space for seating and it gets enough sunlight to be inviting. Add some bar stools and you have a perfect spot to enjoy on a balmy summer night.

28. Turn it into a play area

A fab idea if you have enough room at the side of your house and if you’d like to avoid your front and back gardens from being visually assaulted by kids’ playground clutter! Add a cubby and grips from a local hardware store to a concrete boundary wall to create a nifty little playground that’s safely enclosed and tucked out of sight from the streetscape.

29. Make a spot for garden storage

If you don’t have a shed, the narrow side of house area is the perfect place to unobtrusively stash a slim little gardener’s storage cupboard. Add a long, narrow bench for potting up and you’ll have a nicely private nursery area that doesn’t detract from your backyard garden design.

30. Add unique seating

If the side of your house is a little boring but gets a pleasant amount of sun then simply add a variety of quirky stools and chairs to create a place for some calm contemplation, away from the hustle and bustle of the street or the busyness of backyard occupants.

31. Choose bench and planter combos

When you only have a long narrow side of house area to work with, kill two birds with one stone and install combined planter/bench designs. They keep everything neatly flush to the wall or fence and provide pleasing symmetry while being eminently functional both for humans and plants!

32. Add a lap pool – or a moat

Maybe you can swim, or maybe you can just to dangle your legs in refreshing water. Either way, adding a water feature to the side of your house is a gorgeous way to amp up the tranquillity and summer vibes, and it’s much less costly than putting in a backyard pool.

If you have the space though, go ahead and add a lap pool to increase the functionality of the space (and the value of your home). Add boulders and a low maintenance planting along a side—succulents like agaves and aloes give it, even more desert-oasis feels.

For inspo you can’t beat architect Olle Lundberg’s Californian redwood cabin and outside plunge pool. The entire house is made of salvaged and reclaimed materials, including the pool that’s actually a former livestock watering tank made of 80-year-old virgin-growth redwood.

33. Add an outdoor shower

The side of your house is also ideal for installing an outdoor shower as they take up very little room and yet provide a practical way to wash off after swimming or getting dirty playing sports or enable you to just enjoy a shower out in nature. They’re an easy DIY and can be very aesthetically pleasing, especially if you source gorgeous vintage-style fixtures. A vintage silver rainfall outdoor shower looks gorgeous against a black fence, crushed granite and organic décor elements.

And that’s a wrap on my selection of side of house ideas which show you how you can make the most of this under-utilised, and often neglected space. In the comments, why not let me know which of these side yard ideas is up your alley, or if you’ve done something interesting with your side of house area – I’d love to hear your input!

When you’re ready to get started on your side of house ideas, it’s a good idea to start with a general tidy-up of the area, and then if possible, enlist the expertise of an expert to ensure you get the garden design right before you go ahead and DIY.

50 Fabulous front fence ideas

Create a lovely warm welcome to your home with a timber, aluminum or steel fence.

50 Fabulous front fence ideas

You can tell a lot by first impressions and when it comes to your property the front yard, and more so, the front fence is that very first look at a home. So it’s really important that your front fence looks great, is neat and well designed. But what look do you go for? Well, that’s why I’ve put together 50 of my favourite front fence ideas for all different types of homes.

Also, let’s not forget that front fences provide security for your home, give you a little privacy and mark the boundaries of your property. So, on one hand, you have design and the other hand you have functionality and there are many different finishes that can be used when choosing materials for your front fence.

Timber

Timber is a great finish as it is a great natural finish that will stay in fashion for years to come. Due to the natural finish of timber, you will find that it will most likely match all the other finishes on your property nicely.

Aluminium/Steel

Aluminium or steel is a great finish for a front fence as it is sturdy and requires little to no maintenance once it’s installed.

Stone

Stone is one of my favourite finishes for a front fence as it really has so much character especially when you use different shapes and colours of stone.

…and more! Check out these 50 front fence ideas to consider for your next build.

1. Modern front fence

First up we have this very modern and on-trend front fence! If I was looking at building a front fence, this is definitely a design that would be on the top of my wish list. I love the simplicity of the white render which is complemented with the wooden vertical slats. The letterbox is also very minimalist and streamlined which sits flush with the wall.

2. Horizontal and vertical

Here is another clever use of wooden fencing. The vertical slats show the area that is the ‘fence’ and the horizontal arrangement shows where the gate is so there is no confusion when you are driving up to this house. Timber will always be in fashion and will go with all your other design choices.

3. Fencing variations

This classic fencing style is a great design for when you want the security of a fence but also want to be able to see out of your yard! The grey concrete pillars match perfectly with the exterior of the house and the black steel fencing brings in a little creativity with the design, however, still keeps the fence nice and simple with its approach.

4. Welcoming white

Try white timber fence mixed with the decorative concrete blocks. This suite is a coastal home to a tee!

The white wood is simple and classic whilst the design of the blocks create interest and add something a little different. The gate can be finished off in the same white wood design as the fence which creates a very seamless design.

5. Privacy aluminium

This privacy fence is such a good idea if you’re still wanting to have glimpses of the outside through your fence! The aluminium has been placed in a diagonal angle, all going the same way which looks nice and modern as well as not only allowing for privacy but also a cheeky glimpse of people passing by.

If you’re looking for similar fencing, find a professional who can help guide you in the right direction when it comes to aluminium fencing.

6. Quaint country

This front fence is giving me all the quaint country vibes. The white picket fence looks oh so sweet paired with the grey accents as well as the cute red fence toppers. I especially love that beautiful flower tree which provides shade and a warm welcome to all your guests.

7. Minimal modern

The front fence can be an extension of the bold boxed shapes of the house. Experiment by having the side block look as if it wraps around the edge due to an innovative black mailbox design. The colour black can be carried across to the aluminium slatted part of the fence which brings the whole design together cohesively.

8. Classic white picket fence

This is the quintessential white picket fence to match this turn-of-the-century American cottage. The monochrome external paint carrying through to the fence has resulted in a very well put together home that has instant curb appeal.

If you want to revamp your curb appeal, you should definitely take a look at these front garden ideas as well.

9. Fancy street appeal

This fence provides a fantastic street appeal to everyone walking by. This fence design is very clever as you can look through it at some angles, whereas from other angles it looks as if it’s blocked out. Perfect for privacy!

10. Custom sandstone front fence

When you live on a hill, custom features are a must as items, like this sandstone, will need to be custom cut to suit the exact measurements of your property.

11. Subtle design

Try a side fence kept very simple to allow for a breeze to flow through. Have a subtle design of the gate with a step-like design running across it. The house number is bold against the white background.

12. Stone wall front fence

Due to the natural qualities of the finish, this wall would really age well as time goes on. I love the idea of a white wooden gate that is the perfect contrast against the rough stone. And the letterbox and house number area go very well with the gate.

13. Hardwood country style

Here is a typical hardwood country front fence which is another purposeful design that sets the boundaries of the property. I can just imagine this fence would be perfect for a house on acreage where you would like your property seen from the road, but also with the added security.

14. Vintage vibes

This sort of design would’ve been popular in the ’60s but creative fences are surely making a comeback! Try a vintage style letterbox that is so sweet and feminine. The front area is complemented by large bold greenery that goes well against the white.

15. Garden beds

Another way to spruce up your front fence is to add raised garden beds. The garden beds on this property consist of ground cover plants that work well with the statement trees. Well maintained greenery will always give any place a welcoming feel. The grey concrete along with the black steel slats are a match made in heaven with the garden beds!

Spring green garden in a wooden box under the sun's rays
Source: Shutterstock

16. Black aluminium

This black aluminium fence is simple, yet provides the added security that the property needs. The other elements of the entrance are quite scarce and minimal which makes the fence look neat. The electronic gate is a great idea to be able to easily drive your cars in and out of. There is really no fuss with this place!

17. Fresh cottage vibes

This is a modern take on a white picket fence. Get fresh cottage vibes with the low ground covering plants, white fence, and white rose bushes behind the fence. This fence idea is super simple but really stands out and packs a punch!

18. Vertical hardwood

Here is another great example of hardwood as a fence. This design really provides a lot of privacy and security as you can’t really see what’s beyond the hardwood. Add a letterbox that has a large round hole ready for a newspaper and a smaller hole ready for your letters!

If having privacy is something that is important to you, we actually have an entire article just on privacy fence ideas that you should look at as well.

Vertical wooden fence
Source: Shutterstock

19. White picket fence

How sweet is a white picket fence! The white picket fence is the perfect choice to compliment the grey house and white accents. It can have a neat garden that also serves as a fence.

20. Custom carved stainless steel

Wow, this is a design you don’t see every day! If you’re after something a little different and something that nobody else has, perhaps you need to get a custom carved stainless steel fence! The gated area is a more straight across style however it still has a creative design across it. And the side fence has an interesting curve in it as well as also featuring a similar design to the gate to create cohesiveness.

white fence
Source: Scott Webb on Unsplash

21. Matchy matchy

Oh, this property is just so sweet. If I was walking up to this house I would certainly be ‘Oooohing’ and ‘Aaaaahing’ with excitement at all the beauty! I love that the white picket fence perfectly matches the porch fence of the house which really brings the two areas together, even though they are so far away!

Front fence
Source: Orchard Cottage Leura

22. Modern render

I just love a modern render. This half front fence is just enough to contain the boundary of the house whilst still complimenting the rest of the building work. I love how the black roof slats have been incorporated into the front fence which looks great next to the white render. This is overall a very cohesive look!

Front fence
Source: Red Ink Homes Southwest

23. Pretty pastels

If you’re after something a little more colourful, then this is for you! On one side we have pretty pinks, oranges and blues which give a delicious pastel gelato look and then on the other side we have a white and grey look! Which one would you pick?

Front fence
Source: Chipin Away Constructions

24. Wooden character

This little wooden front fence has so much character! I love how the natural texture and pattern through the wooden slats has been preserved and is definitely a feature of this fence. There are darker pieces placed next to lighter pieces which work so well! If your property is on a hill, then varying the heights of your fence sides will also bring balance to the overall instalment.

Front fence
Source: Luke Collins Building

25. Grey stone fence

Here is another lovely stone fence! I love the fact even though the actual house build doesn’t incorporate any stone throughout the design, the stone has still been used as the fence portion. And it really works so well. Especially as the tones of the stone are in the same colour palette as the house. How very clever!

Front fence
Source: Hastie House

26. Hedge wall

If you don’t really want a traditional looking fence at the front of your property, how about trying a hedge wall? Hedges look so effective when done and maintained right. If your hedge is full enough, it will also provide security and privacy, just as a normal fence would.

hedge fence
Source: Tessa Wilson on Unsplash

27. Concrete and timber front fence

Rustic and purposely unfinished. This concrete and timber fence would work so well with a contemporary or urban style property. The unfinished look of the concrete has been purposely placed by the designer to give a very trendy look whilst the timber slats are uniform and finished nicely. What a clever and creative design!

28. Custom laser cut fence

Here’s another way to really customise your front entrance; a custom laser cut fence. When speaking to a laser cutter about your design, the options are really endless! I particularly love this yucca inspired design as when its shadow falls on the ground, it really looks like it could’ve been caused by a garden full of yuccas –how cool!

29. Breeze walls

Breezy, easy and trendy. These breeze walls are so in fashion right now! Its intricate design really brings in an interesting juxtaposition against the very plain and simple building. These walls provide security and privacy whilst also making a bold statement.

30. Two-tone

How great is this two-tone front fence! It’s nice to pair muted navy from the fence with the details of the houses columns, window borders and front door. Whilst a natural wood finish nicely compliments the exposed brick on the side of the house and stairway.

31. Minimal bold fence

Clean lines, white on white, minimalism and simplicity.  Make the front fence have the same white render as the house as well as the black side fence that matches perfectly with the house number. Also what a cool idea to turn your house number sideways!

32. Landscape design

This one is for plant lovers! If you want to incorporate plants into your front area, then look no further. Even if your house is on a slight hill, a front concrete planter can allow for a seamless meeting of the flat surface and the slanted pathway. The garden bed looks great in front of the main fence area which is spaced out just enough to be able to see through.

33. Classic brick

Classic and traditional. I know that rendering is all the rage right now but exposed brick fencing is just a classic that we can’t really ignore for its affordability. This brick fence installation is ever so neat and streamlined.

Long modern brown fence made of bricks and iron on the street in front of the road
Source: Shutterstock

34. Sophisticated black steel

Even with a narrow entrance, you can still create a very sophisticated look with your front fence! I love this black steel that is spaced out just the right amount and doesn’t intrude any views looking in or peering out. The black steel against surrounding greenery also gives off a very chic look.

black steel fence
Source: Shutterstock

35. Creative and feminine

Have little white flowers, circles and geometric patterns whilst the fence has more of a Moroccan feel, however still keeping with the theme of the gate. I could just imagine this little gate idea being the topic of conversation for guests visiting your place!

36. Something fancy

If you’re after something with a little more pizzazz than a plain wooden fence, then this design idea is for you! Try a black and white leaf design on either side of the gate which really frames the entrance nicely. The timber can also be finished off with a lacquer that makes all the slats look very uniform.

37. Half and half

This is for you if you’re wanting to still look out your fence and still have some privacy! By having a half concrete and half railing fence, you can enjoy privacy as well as still being able to see through to the outside world. I also love the pillars on either side of the gate that is a contemporary brick style and have been matched perfectly to the colour scheme.

38. Earthy and timeless

But what if I don’t want a fence all the way around my property? Well, I’m so glad you asked! A stand-alone stone instalment will do just the trick. An earthy and timeless piece not only defines the boundaries of your property (just as a fence would) but also doubles as a mailbox. How convenient!

39. Stone feature fall

Here is another great way to incorporate stone in your build, and this stone wall can be used as a feature between the two timber fence installations. It is also a great backdrop for a garden bed! The timber slats tend to match perfectly with the soil. And why not add a large timber handle on the gated entrance?

40. Vertical vibes

Try matching your front fence to your house! Varying widths can be been used to create a visual difference. The lower level of the house should feature timber that is the thinnest and most spread out, the upper level may have the thickest timber that is completely touching. Finally, the front fence is in between the two with shorter and longer pieces across the boundary.

41. Laser-cut character

A laser-cut design really adds a lot of personality. The other features can be very simple from the white concrete sections to the horizontal timber slats. You get glimpses of the warm and welcoming house through a laser-cut design!

42. Timber slats

Here’s another way you can use timber slats for your front fence! Use a deep red tone in the timber that matches perfectly with the light blue house paint behind. Add in a streamlined mailbox that is minimalistic and simple whilst not taking any attention away from the timber slats.

43. Bold block work

If the building work on your house is already bold, why not go for something similar at your front fence? Your place can have a large stone wall that also works as a backdrop for the front garden bed. And I love the idea of a large pillar that features an oversized house number!

44. Painted brick with steel infills

Have your front fence perfectly matches the monochrome colour palette of the house. You can have bricks that have been painted white to match the exterior walls of the house as well as the black steel infills which match the paintwork of your carport roof.

45. Greys and greenery

Why not add a front fence is made up of a gate that has the same colour as the house and a little hedge that sets the boundary of your place? I also love the idea of symmetrical gardens that are featured at the front of the property as well as on either side of the entrance of the house.

46. Cottage meets modern

Make your heart sing with this setup! With a monochromatic colour palette, your white cottage style house can go with the black modernised front fence addition.—a black picket fence! So often we see white picket fences, but why not switch it up by painting it black. So cool!

Even if you don’t like painting, why not look into fence staining as an alternative. It will still highlight the natural timber just not as bold.

47. Grand entrance

This entrance is just so grand and inviting. The front fence and gate area provides security as well as a welcoming entrance for guests. And I love the addition of the black steel fencing that has a subtle yet elegant design.

black steel fence
Source: Annie Spratt on Unsplash

48. Wrought iron

How cool is a wrought iron front fence! I can just imagine this place being somewhere in England with its vintage detail. Have three little hedges that line the sides of the driveway and welcome you into the area. The wrought iron parts of the fence also have hedges can be placed behind to provide another level of privacy.

Would you like a fence like this? Well, I can see why and you can easily get this as well by finding an iron fencing professional near you. Also, if you’d like to know how much does other style of fencing costs, such as chain link fencing etc., visit our updated chain link fencing installation costs.

49. Curved aluminium arch

This front fence idea would definitely fit right in somewhere in Tokyo! A curved aluminium arched entrance would make you feel like you are entering somewhat of a portal. And I love the way the border details of a gate to match with the arch perfectly.

50. White and stone

And last but not least is a lovely white and stone front fence—another execution on the white picket fence. And absolutely love the idea of a front pergola area that acts as a gatehouse. The stone is also a very nice touch that seamlessly joins the natural elements of the greenery to the more man-made elements like the fence.

So there we have it – 50 front fence ideas! Know that you have some fencing ideas, the next step is to look at fence installation. I especially love the white picket fences as they are just so idyllic and something I’d love to have at the front of my house. And I absolutely love the idea of bringing in natural elements like stone to create an organic feel. Which ones were your favourites? Leave a comment below and let me know!

25+ Perfect pool ideas

A backyard isn't complete without a pool, no matter what the size!

25+ Perfect pool ideas

A pool is one of the most desired items for a home. It’s hard to go a summer without splashing around in the sun, a cool drink in hand, and friends around you. You may be worried that your backyard isn’t big enough but these days there are so many different designs for all property sizes. We’re going to explore these smaller plunge pools and all the way up to lap pools with these beautiful pool ideas to help plan your next backyard makeover.

Don’t forget there are plenty of professionals who can help guide you with your plunge poolpool fence installation and once it’s all done, your regular pool cleaning and pool pump repairs.

1. Plunge pool ideas

Just because you’ve got a small yard doesn’t mean you have to miss out on having a pool. You can create a small plunge pool with a tiny space! Take inspiration from this backyard.

plunge pool ideas
Photo by Adheesha Paranagama on Unsplash

2. Natural tones

For a quintessentially Australian flavoured pool area, go for warm wood decking and nature colours in your pool furniture.

pool-ideas-nature-tones
Source: Photo by Roberto Nickson on Unsplash

3. Grow vines

For a stunning and simple courtyard pool area, whitewash your perimeter walls and plant up trailing vines to contrast beautifully against the white walls. Add in some oversized container plants for further interest!

pool-ideas-lots-of-plants
Source: Photo by eric montanah from Pexels

4. Trees galore

What better way to create a relaxing pool area than by planting plenty of trees. I love these ones… You really can’t go wrong with palm trees! But in general, large trees will add plenty of shade so you can rest and relax without getting burnt by the sun. You’ll see that greenery is used with most of these pool ideas and important not to leave it until the last minute when you’re planning your pool area.

trees by pool
Photo by atman studios on Unsplash

5. Banana leaf plants

Give your pool area instant tropical vibes by planting up banana leaf plants. Add in a thatched umbrella and some deck chairs and it’s resort time baby!

pool-ideas-tropical-vibes
Source: Photo by Maria Orlova from Pexels

6. Moroccan pool vibes

Why hello, Morocco! This pool is indeed from a gorgeous villa in Morocco. But there’s no reason why you can’t recreate this look at your own home. You’ll need Moroccan tiles, planter pots, and outdoor furniture in all sorts of colours, patterns and textures. You might want to consult a builder and a designer to see how you can create a space like this.

Moroccan pool ideas
Photo by Toa Heftiba on Unsplash

7. White walls

Just looking at this design makes me feel at peace. There’s something so tranquil about the combination of greenery against stark white walls. To create this design, keep things simple! Strip everything back to a plain white background with minimal furniture. And focus on making your pool area green with life.

pool in backyard
Photo by John Fornander on Unsplash

8. Fence it in

One of the last things people think about when it comes to designing their pool area is the fence. But it’s one of the most important parts, as it’s often the first thing people see when they look at your pool area. If you want your pool area to be the real hero, then install a glass fence like this one.

glass-pool-fence
Photo by R ARCHITECTURE on Unsplash

9. Simple and chic

Go for clean contemporary styling by opting for a monochrome colour scheme in your paving, surrounding walls and pool furniture. A mix of white, black and grey always looks modern and chic.

pool-ideas-contemporary-style
Source: Photo by Toms Rīts on Unsplash

10. Build in seating areas

Extend the timber decking of your pool area out to create a dedicated seating area for lounges and deckchairs. And want to camouflage your pool fence? Consider planting hedges to disguise it!

pool-ideas-hedges
Source: Photo by Vincent Rivaud from Pexels

11. Mediterranean vibes

Terracotta tiling around your pool is one way to give your pool area a lovely Mediterranean vibe. I love the criss-cross pattern of this design. And planting citrus trees around the pool is another way to evoke those flavours.

pool-ideas-mediterranean-vibes
Source: Photo by Maria Orlova from Pexels

12. Minimalist

Keep it simple with white pool surrounds, concrete paving, streamlined timber pool furniture and a simple pop of colour from a beach umbrella.

pool-ideas-minimalist
Source: Photo by Giorgio Trovato on Unsplash

13. Tropical pod

These days you can find woven pool furniture in all shapes and sizes and one cute option is a little pod-style daybed. These make a style statement while being super cool and comfy, with the woven material allowing the breeze through.

pool-ideas-furniture
Source: Photo by Engin Akyurt from Pexels

14. To infinity…

There’s nothing more relaxing than an infinity pool. If you’re seeking that LA lifestyle in your backyard, well then this is the pool idea for you!

infinity pool
Photo by João Mansano on Unsplash

15. Space for entertaining

If you love hosting guests over at your house every weekend, then you’ll want somewhere for everyone to congregate. A large alfresco area will do the trick. I love this one – it has a long wooden table with plenty of chairs. Plus, that outdoor kitchen is sure to come in handy around dinner time.

entertaining area with pool
Photo by Jean-Philippe Delberghe on Unsplash

16. Tropical huts

An easy way to create a tropical vibe for your backyard pool is to add some simple timber and thatched roof huts. Perfect for entertaining or just resting in the shade, you’ll be transported straight to Fiji with a decorative addition like this.

pool-ideas-thatched-hut
Source: Photo by Jason Boyd from Pexels

17. Green grass

I know we’ve looked at a lot of fancy pool areas but I want you to know that you can keep it simple too. Take this space for inspiration. Get help with your lawn maintenance so that it’s always in tip-top shape.

pool in backyard with grass
Photo by Bernard Hermant on Unsplash

18. Timber touches

Light timber is very in style right now, and there’s a good reason why. It’s minimal and it looks great with everything. I love how these timber-framed chairs create the perfect seating area to one end of this pool. And the small stump-like table provides the perfect solution for holding drinks.

timber decking around pool
Photo by Jonathan Borba on Unsplash

19. Narrow pool

I love how this pool design doesn’t let space hold it back. If you’ve got a strip of land on the side of your house, install a pool! A pool will still be a welcoming refresher on hot summer days, even if it’s small – you won’t regret this decision.

narrow pool
Photo by The Anam on Unsplash

20. Stick to a colour scheme

This pool area is oh-so-pleasing to the eye, and there’s a reason why – the colours are consistent. There’s timber, peacock blue and natural tones throughout. Plus, the lovely pop of blue from the pool, which really adds to the finish.

blue and white pool colour scheme
Photo by Hutomo Abrianto on Unsplash

21. Decking

There are so many options for decking around your pool, so you want to make sure you make the right choice for your outdoor space. You can choose concrete decking, paved decking, wooden decking or even bamboo. But what I like about wooden decks is that they are so much more flexible than paved or concrete surrounds, which makes them more child friendly in the event of a fall. So this is something to keep in mind if you have a young family.

timber pool decking
Photo by Drew Dau on Unsplash

If you’re thinking about a DIY deck, take a look at our how to DIY build your own deck guide. Otherwise, find a decking pro in your local neighbourhood.

22. Take me to Greece

If there was a pool of my dreams, this would be it. This space is absolutely perfect, and it whisks me away to Greece! The good thing is that you don’t have to go to Greece to experience this kind of pool. You can create a design like this in your backyard. Just ask a builder to help you complete the job!

Santorini pool ideas
Photo by Drahomír Posteby-Mach on Unsplash

23. Bali style pool

If you can’t travel to Bali, bring Bali to you with a resort-style pool with a couple of statues that will complete your zen zone!

Pool with statue
Photo by Drahomír Posteby-Mach on Unsplash

24. 1950s style

Take inspiration from the hills of Pasadena – this pool area is chic yet relaxed. This makes for a great spot for plenty of people to sit, chat and enjoy each other’s company. If you need extra seating in your outdoor area, a simple bench seat like this will do the trick.

modern minimalistic pool
Photo by Florian Schmidinger on Unsplash

25. Water feature

If you’re looking for one way to spruce up your pool area, then you can’t go past fancy water features. I love this white/black combo that uses a charcoal leather stone for the wall. The texture of the stone wall, paired with the industrial style scupper on top of the smooth curves of the concrete ball blends hard and soft elements, making for pure perfection.

fountain water feature with pool
Photo by Florian Schmidinger on Unsplash

26. Classic blue and white

Finally, how dreamy is this little plunge pool set up? While your home may not be as high up in the clouds as this slightly surreal image is, having a clean whitewashed wall is always a lovely contrast against pool water.

pool-ideas-greek-whites
Source: Photo by Icarius on Unsplash

There you have it, 25+ incredible pool ideas. I hope they’ve helped demonstrate that installing a pool is possible even in a tiny outdoor space. My favourite designs are the narrow pools because I just love how they make such clever use of small areas. But I’d love to hear yours. Which designs were your favourites? Comment and tell me. And if there’s anything you think I missed, make sure you share that too.

20+ of the most elegant English gardens

Take a little inspiration from the royals and design your very own English garden!

20+ of the most elegant English gardens

Nothing is more quintessentially English than a green-hedged, rose-covered English garden. Summer and gardens are highly celebrated in the UK, as everyone is keen to make the most of the warmer weather outdoors.  In fact, over 30,000 people attend The Queen’s Garden Parties in London and Scotland. So yes, a garden is a big deal and that’s why we have put all of these stunning English garden ideas together just in case you’re looking for a bit of inspiration for your own home.

So what makes a garden English? Is it the rich-coloured roses, the climbing vines or large sprawling trees? Here are the 4 key factors to achieve the perfect English garden:

Romance

One of the characteristics that make an English style garden so special is the romance that’s created with climbing rose bushes, sweet decor and tones of pinks and reds dotted throughout.

Organic

The landscape in England is vast and lush, so creating an organic look with overflowing plants, flowers and produce will look oh so divine!

Order

If you’re not into that overflowing, unkempt look then creating order is for you! Another way you can design a very opulent looking garden is by giving everything in the garden a specific place and keeping it all very neat. One way to do this is by incorporating a well-manicured hedge display.

Whimsical

All in all, you want your garden to look right out of a fairy-tale or a storybook. So think kings and queens, princes and princesses, fairies and elves, and all the magical characters in between. Imagine where they would like to live and enjoy creating a story about them within your very own garden.

If you’re wanting to create a garden fit for royalty, then an English garden is what you need. Check out these 20+ English garden ideas to get your creative juices flowing.

1. Bloom covered cottage

How gorgeous is this little hideaway shed, all covered in foliage and blooms? It’s straight out of a fairytale! And what a stunning array of red and pink flowers?

English-garden-with-blooms
Source: Photo by Jean Carlo Emer on Unsplash

2. Bursting windowboxes

An easy way to bring in a little English garden charm if you don’t have a lot of space is to pot up some colourful and whimsical window boxes. Remember the trick to layering a window box: have a thriller, fillers and spillers!

English-garden-windowbox
Source: Photo by Steve Sharp on Unsplash

3. Flower archway

How beautiful is this archway? I would love to take a stroll along this stunning pathway and take it all in. Creating this kind of design would take a lot of patience – installing the arbour, then training the plant vines up and around the instalment. But boy oh boy would it be worth it!

english garden archway flowers
Photo by Carlita Benazito on Unsplash

4. Symmetry at the gate

Create a welcoming entrance with English garden flavours by decorating either side of your timber gate with the same dramatic flowers. Here, it’s hydrangeas which come in such lovely pastel shades.

English-garden-gate
Source: Photo by Jonathan Borba on Unsplash

5. Climbing purples

Here we have some purple blooms that look as if they are climbing up the side of this heritage building. An English garden up a wall! I love how the shape of the flowers almost look like a covering of purple snow that has settled on the roof of the building. This building is such a show stopper.

garden vines on building
Photo by Beth Macdonald on Unsplash

6. Rosebush

If you live in an inner-city area, you don’t have to just settle for a place with no garden. This stunning rose bush is a beautiful pop of colour against the white building exterior. In this instance, the rose bush also doubles as a fence that provides privacy.

roses in an english garden
Photo by Lina Kivaka from Pexels

With roses, pruning becomes super important to make sure that they stay healthy and continue to grow.

7. Overgrown opulence

This overgrown garden looks like it is a part of a very opulent, magnificent manor. This goes to show that you don’t need to always have a manicured garden, as an overgrown and organic style can look just as breathtaking. I love how many different colours and varieties of plants have been used.

english garden wall
Photo by Annie Spratt on Unsplash

8. Assorted pots

If you want the English garden look but are limited for space, grab an assortment of pots and a variety of plants. You’ll have your very own garden in no time. And the beauty of doing it this way is so that you can completely customise the size and look of your garden, no matter how big or small your space is.

potted-plants
Photo by L’odyssée Belle on Unsplash

9. Garden bunting

This reminds me of my aunt’s garden in England with the cute little strings of bunting running through the yard. They blow in a gentle breeze, making for a very pretty scene. The rest of the garden is in a limited palette of greens and whites so the pastel colours in the bunting really add a special touch.

Thatched roof with a english garden
Photo by Megan Andrews on Unsplash

10. Country living

What a stunning country garden this is! Here is another example of an overgrown style garden that looks oh so lush and healthy. I love the river as well, it’s like a house out of a Jane Austen novel.

english country garden with pond
Photo by David Tip on Unsplash

11. Teapots and teacups

Make your garden feel that bit more British by incorporating some quirky containers for your flowers. And you can’t get much more British than tea! So scour the op shops to find some vintage kettles to repurpose, or even some cute little teacups for a miniature English garden.

English-garden-teapots
Source: Photo by Annie Spratt on Unsplash

12. Thatched cottage

It doesn’t get much more English than a thatched roof and a garden full of blooming flowers! I can almost smell the sweet flowers and hear the cows mooing in the background.

wild flowers
Photo by Judaline Goon on Unsplash

13. Hedges

Pick a hedge, any hedge. We’ve got round, triangle and every odd-shape you can see below. If you like this and want a hand with the design, hedge planting and hedge trimming are two areas you might need a helping hand with.

hedges in garden
Photo by Emma Whanstall on Unsplash

14. Secluded seating

This English garden scene would be perfect if you have a large acreage property. Or you could even take some ideas from it and utilise it on a smaller scale. I love the little secluded seating area that reminds me of that beautiful spot at the end of the movie Notting Hill. This would be the perfect place to relax with a picnic and a good book.

garden bench in an english garden
Photo by Darren Richardson on Unsplash

15. Green and lush

This is for you if you prefer a tidy and neat garden. This garden looks like it gets a lot of water with those bright green colours! I love the hedges that are lining the area as well as the hedge arrangement in the centre of the space. This is definitely something you could recreate on a large or small scale.

hedges in garden
Photo by Erwan Hesry on Unsplash

16. Secret garden

This little door reminds me of the entrance to the secret garden – full of colour and greenery! The side that we can see is merely a taste of what’s to come on the other side.

roses in english garden
Photo by Annie Spratt on Unsplash

17. Climbing blooms

This home is quintessentially English with its cottage-like feel and the climbing blooms up the side of the building. I can only imagine the history that this place holds – its walls would be hundreds of years old!

yellow house
Photo by Peter Mason on Unsplash

18. Fountain courtyard

Make a statement with this fountain courtyard! If you have the space for it, an extravagant fountain is just what you need for your English style garden. Fit for royalty, this area screams extravagance and opulence.

fountain in garden
Photo by Peter Herrmann on Unsplash

19. Bursting with colour

This garden has so many colours and plant varieties, you would have to be a keen gardener to keep them all looking this good! The overflowing garden along with the chimney make this home look very cosy.

bright flowers
Photo by Yoksel 🌿 Zok on Unsplash

20. Vintage style

Finally, your English garden will look that much more authentic if you add in a few antique, vintage style pieces, the more weathered the better. Cracked paint on flowerpots can also have its own charm!

English-garden-vintage-charm
Source: Photo by Luca Barth: https://www.pexels.com/photo/purple-and-yellow-flowers-in-bloom-9036431/

So there we have it, 20 English garden ideas! I absolutely love all the gardens with the multitudes of plant varieties as well as the gardens that have arbours with roses climbing over them. What do you think? Which English garden ideas do you want to incorporate in your yard? Let me know in the comments below!

25+ Pool landscaping ideas for backyards

There's nothing more Australian than cooking on the BBQ by the pool with a cold drink in hand! Bring this dream to life with a newly landscaped pool area.

25+ Pool landscaping ideas for backyards

Have you ever caught yourself scrolling through endless Instagram photos and Pinterest pictures daydreaming about your next summer escape? There’s no better way to do this than to create a peaceful pool oasis to not only focus on the pool, but it’s surrounding area to suit your needs. So it’s time to dive into pool landscaping!

If you don’t have a pool yet, consider what kind of pool could work in your space (above ground, below ground, lap pool, plunge pool). And if you do have a pool, think about how landscaping can enhance the area e.g. lawn, low-maintenance plants or a tropical paradise. But before you get started, I recommend asking yourself the following questions:

  • What’s my budget for my pool area?
  • Are there any restrictions for landscaping my area?
  • What safety requirements do I need to have in place?
  • What time frame do I want this projected completed in?

And now it’s time to get the creative thoughts flowing. Be inspired by these 25+ amazing pool landscaping ideas.

1. Green wall

If you prefer to keep things more simple, then you can’t go wrong with an all-encompassing green hedge or leafy bushes. This space looks like it’s straight out of a magazine with the white walls, oversized black framed windows and the bright blue pool in the foreground.

Looking to add a hedge or green wall to your space? Find an affordable hedge planting expert for the job.

pool-landscaping
Source: Photo by Ferdinand Asakome on Unsplash

2. Plenty of greenery

If you can’t decide what kind of plants you want in your pool area, why not go all out and combine them all? Think a mix of fresh purple bougainvillea with tall palm trees, towering trees, and lush leafy greens of all shapes and sizes.

3. Among the palm trees

While living near the beach is a good excuse for planting palm trees in your yard, you don’t need a coastal property for permission to plant them! Palm trees will instantly make your outdoor space feel more relaxed. And they look pretty impressive when they grow nice and tall.

pool-landscaping-palms
Source: Photo by CHUTTERSNAP on Unsplash

4. Add fun elements

If spending time outdoors is a priority for you, then why not go all out with a fun installation? How about a slide going into the pool – so much fun for the kids (and the kidults!). If you’re thinking about incorporating a slide with your pool, you can make it appear more “natural” by adding large rocks on either side.

5. Wild and free

While orderly pool areas are something to admire, there’s nothing wrong with keeping things a little more au naturel. Don’t be afraid to make the most of what you’ve already got–hedges, bushes and all! Just be sure to give it a little trim from time to time so it doesn’t get too overgrown.

pool-landscaping-nature
Source: Photo by Bele Niza on Unsplash

6. Mediterranean style

Transform your outdoor area into a Mediterranean dream with a U-shaped pool design, surrounded by simple palm trees and small shrubs. Get the authentic look with a mix of rustic stone and mosaic tiles.

7. Santorini style

If Greece is more your style (and I mean, who wouldn’t want a Grecian-inspired space to lounge around in), then go for natural blues and whites. The key here is to keep things simple. You don’t want to go overboard with colour, but you can play around with textures and patterns. Be inspired by the gorgeous tiles in this beautiful setting.

pool-landscaping-mediterranean
Source: Photo by Alex Azabache on Unsplash

8. Grass pool landscaping

Just because you’re landscaping your pool area, doesn’t mean you need to planting trees. For a low maintenance option, you can always stick to green grass. All this will require is a regular mow and water, and you’re set.

9. Hamptons pool landscaping

There are few places that have more grandeur than America’s classic seaside spot, the Hamptons. With its exclusive beaches, great open spaces and fancy architecture, it’s definitely the place to be. But while we can’t all escape to this delightful collection of towns, we can bring a bit of Hamptons luxury to our own backyards.

If you want to recreate this classic style, think plush white lounges and daybeds, and pool chairs. You really can’t go wrong with the Hamptons colour scheme of neutrals plus a dash of blue – so decorate with a mix of these colours for the perfect finish.

hamptons style pool landscaping
Source: Photo by Iosi Pratama on Unsplash

10. Outdoor shower

A handy addition to every pool is an outdoor shower area. It provides the perfect place to rinse off before and after a swim in the pool. You can even add handy hooks for hanging your towels.

On the hunt for something a little bit different when it comes to outdoor showers? Check out these other outdoor shower ideas for your home.

11. Make it interesting

Landscaping around your pool doesn’t have to be boring. Go all out with a mix of beautiful timber decking or stone pavers, an elevated fountain that pours water into the pool and a pergola which provides a great area for entertaining.

pool-landscaping-feature-plants
Source: Photo by Jonathan Borba on Unsplash

12. White pebbles

Add little details to your pool edging by filling any gaps. For instance if you have large pavers and timber decking, spruce it up with white and natural pebbles and green succulents.

This is a great example of modern paving and if you want some more paving ideas or succulent garden ideas we’ve got that covered too.

13. Simple pool landscaping

Not all pool landscaping requires plants. Exude deluxe relaxation by paring things back—sometimes less is so much more. Instead of a jungle effect, why not stick with a perimeter of large natural stone pavers and a stone dwarf wall around your pool. You can still have a regulation pool fence behind it, but you might like to disguise it with a hedge!

pool-landscaping-hedge
Source: Pixabay on Pexels

14. Tropical pool landscaping

From one extreme to another… Well, sometimes more is more! If a jungle oasis is more your style, go all out with hanging plants. This works especially well if you have a multi-levelled home with a balcony that you can hang vines or pots from.

jungle pool landscaping
Source: Photo by Christian Lambert on Unsplash

15. Winding paths

Why not design your outdoor area to have a mix of structured and unstructured elements for a striking look. It might be something like a grey stone path leading to the house, a winding black fence, a glass barrier and simple grey tiles around the pool. If you want to keep the gardening simple, just add a single tree for interest.

16. Create symmetry

If you like everything inside your house uniform and in its place, then you’re going to want to make sure the landscaping around your pool does the same. You can do this by employing symmetry with vases, shrubs and hedging. Most importantly, you’ll want to make sure your yard is always tidy and trimmed.

symmetry in pool landscaping
Source: Photo by Thor Schroeder on Unsplash

17. A row of greenery

Have you got a small backyard? The good news is that you can have a pool – you’ll just have to be smart about it! Opt for a little plunge pool with glass edging on one side, opening it up to the rest of the yard.

You can also add a privacy fence around the pool area too.

18. Create a waterfall

There’s nothing like the restful sound of trickling water! So if you want to take your pool area to the next level, why not install a cool feature piece like this one? It’ll be sure to impress guests and create a lovely ambience for your next poolside dinner party.

pool landscaping with waterfall
Source: Photo by Ralph (Ravi) Kayden on Unsplash

Want a fountain feature of your own? Look for someone in your neighbourhood who can help with your water feature requirements.

19. Indoor-outdoor

One of the great things about living in Australia is that you can spend most of the year outdoors. With this in mind, an integrated indoor-outdoor space is the way to go! Keep things simple with natural timber decking and a strip of dark greenery along the fence.

20. Desert style pool landscaping

Take inspiration from Palm Springs and create your very own desert oasis in your backyard. While you may not have the advantage of a classic rocky backdrop, you can still incorporate desert elements. Think minimal greenery, cactuses and large rocks. And when it comes to your furniture choices, go all out with a pops of yellow and blue!

desert style pool landscaping
Source: Photo by Taylor Simpson on Unsplash

21. Coastal pool landscaping

You don’t have to plant hedges and bushes to create a beautiful pool area. Simply fill any gaps around the border of your pool with white pebbles and plant small hardy shrubs like succulents. Then add in big, rustic pots with your favourite outdoor plants. And when it comes to creating a nice area to sit, go Boho and use rattan chairs, natural baskets and a bamboo umbrella.

coastal-style-pool-landscaping
Source: Photo by eric montanah from Pexels

22. Bamboo fencing

Get your inspiration from the villas of Bali with a jungle-style pool area. You can recreate this look in your own yard by installing a bamboo fence and planting hanging vines along the walls. Plus, a daybed or two will help to get you in the holiday mood all year round.

23. Luxury pool landscaping

One way to add life to your pool area is to install large pots or boxes of flowers. This is an easy low-maintenance option for anyone who wants to enjoy the smell of fresh blooms without the added maintenance of having to trim them back all the time. Plus, they look oh-so-fancy!

pool landscaping with pots
Source: Photo by Trev Morris on Unsplash

24. Multi-level entertainment

Create an entertainer’s delight around your pool area. If you’re planning on having friends around for BBQs this summer, think about how you can maximise your outdoor living area. Consider a sunken entertainment area and a simple deck above, handy for taking your drinks from the pool to the house!

25. Resort-style

When you ensure your lawn is well manicured, your home will feel much more like a resort. And if that’s the vibe you want to create, go all out by adding fancy coloured lounge chairs with rolled-up towels on them. Have a lot of plants? Just make sure you’ve got a plan to maintain the space–having a regularly gardener booked in can prove handy!

resort style pool landscaping
Source: Photo by The Anam on Unsplash

There you have it, 25+ amazing pool landscaping ideas. Which one do you want to use for your pool redesign? I personally love the classic Greek style outdoor area but you might prefer something a little more modern like concrete or timber panelling. Comment and tell me which one you like best!

50 Great garden edging ideas for your backyard

Make your garden stand out with defined edging!

50 Great garden edging ideas for your backyard

Garden edging is one of the most overlooked aspects of garden design – but it can make a huge difference to the overall appeal of your outdoor space. Whether you use it to define flower beds, create raised sections, pronounce garden paths or act as a border between pavers and grass, lawn edging is sure to add character to even the most simple of gardens. But it’s something that you might not realise that you can be a bit creative with, so let’s take a look 50 gorgeous garden edging ideas.

Having a garden border is more than just making your garden look pretty, it makes the surrounding grass easier to look after. This way you don’t need to worry about trimming around any awkward edges.

1. Bamboo edging

This is an eco-friendly option that not only looks beautiful but also protects your plants. Bamboo edging is a great option for a DIY garden project because it is flexible and easy to cut to size. This kind of edging is designed to be placed above the ground, so it prevents rotting and lasts longer!

garden-edging-ideas-bamboo
Source: Photo by Maksim Shutov on Unsplash

2. Rusty pipes

This may not be the first option you think of when you consider edging for your garden. But it’s a great way to upcycle unwanted pipes that wouldn’t be used otherwise. You can also add a little more detail by filling the pipes with stones or even planting succulents and cacti inside them. It’s great for a rustic garden.

3. Terracotta tile

If traditional is more your style, then you might want to go with classic terracotta tiling. This is a design that is always on trend because it perfectly highlights your gorgeous garden. Add some terracotta pots to your front porch or back deck, and you’ll have a consistent style throughout your outdoor space.

4. Pallets

Pallets are a great DIY building material, and with good reason – you can usually find them for free! Check Gumtree or ask local businesses for their leftover wood pallets. Cut them yourself, or get someone to do it for you, and then paint them white or any colour you desire. For a ‘vintage’ look, leave the wood slightly unfinished.

5. Stone garden edging

This is an elegant choice that will last the test of time. Choose large pieces of stone to pull this look off, and fill in the gaps with sand to hold it all together!

garden-edging-ideas-stone
Source: Photo by Iván Tejero on Unsplash

6. Horizontal logs

This is an effective garden solution that can also serve as a planter box for your herbs, flowers and vegetables. Use a single log or stack multiple logs to create height.

7. Wrought iron fencing

This is a simple yet beautiful way to define your garden bed, border or path. Wrought iron edging not only adds a bit of pretty detail to your garden, but it’s also a practical addition to protect your garden and flower beds.

garden-edging-ideas-wrought-iron
Source: Photo by Joshua Olsen on Unsplash

8. Garden beds

Garden beds elevate your plants and protect them from getting damaged. They also separate your fertile soil from what is natively grown in the ground, giving you more control over the nutrients your plants receive. If you set your garden beds to drain over the rocks, you protect the roots from drowning, which is the number one cause of plant rot.

9. Plates

If you’re looking for a quirky option, then why not use decorative plates? You can find secondhand plates at op shops or vintage stores. Choose different shapes and sizes or even different colours to line your garden.

10. Woven wattle

You simply can’t deny the charm of woven wattle – and the great thing is that it’s actually really easy to make! Not only does it look great, but wattle can actually insulate young seedlings by blocking the wind. It can also elevate an otherwise average raised bed into a charming focal point of your garden.

garden-edging-ideas-woven-wattle
Source: Photo by Alexander Schimmeck on Unsplash

11. Curved brick edging

Add a touch of detail to your garden by swapping out the usual straight bricks for curved bricks. Even the most simple of styles will look good! And the great thing is that you don’t have to move your garden beds. Simply pave your bricks around your existing gardens, and voila – you’ve got charming garden edging.

12. Terracotta pots

Layer small terracotta pots around your garden bed and include larger pots with herbs, flowers or other plants in the centre of your bed.

garden-edging-ideas-terracotta
Source: Photo by Annie Spratt on Unsplash

13. Glass bottles

You probably have plenty of these lying around or use them regularly enough to collect them. Simply clean out glass bottles of any kind – wine bottles, soft-drink bottles or even pasta sauce bottles – and push them head down into the soil on the outside of your garden bed.

garden-edging-ideas-glass-bottles
Source: Photo by Nicolas Horn on Unsplash

14. Pebbles and rocks

Use large rocks to complement the pebbles on your garden path. This is a really simple approach that looks good, especially if you’re going for a more natural look. And the great thing is that you can find pebbles and rocks anywhere – by the beach or in the hinterland. Alternatively, you can find them at your local plant shop or Bunnings store.

garden-edging-ideas-rocks-pebbles
Source: Photo by John Mark Arnold on Unsplash

15. Hedge

This is a classic garden edging idea that is inspired by European gardens. Hedges will add a formal look to your backyard and keep everything green.

However, you need to keep in mind that hedges will require a lot more maintenance than your simple plants or flowers, and will be much less forgiving if there are any problems. You’ll need to make sure that your hedge always looks well-kept with regular hedge trimming.
garden-edging-ideas-hedge
Source: Photo by Jon Tyson on Unsplash

16. Broken concrete

If you have pieces of concrete lying around from a recent home renovation, put them to good use by lining your garden bed with them. The jagged edges are good for a more wild, unstructured garden with a mix of plants and flowers.

17. Poured concrete

This is a simple yet effective garden edging solution that will last the test of time! It isn’t prone to rotting, warping or separating, even in extreme weather conditions.

18. Scrap wood

This is a great option if you have some lying around! But be careful – unless it’s been treated, very few timbers will last more than a few years on the ground. It won’t be long until rot and termites find them. However, there are some timbers that are resistant to both. Use Australian turpentine, cypress and cedar to stay on the safe side. If you aren’t sure what type of timber you’re using, be careful not to bring the edging up to any building as termites are likely to migrate from the edging to the timber in your house.

19. Woodblocks

Timber blocks look great as edging but you should take the same caution as with scrap wood. Select your timber with care or make sure it has been treated before using it to line your garden.

20. Wood logs

This is another great timber solution for your garden. You can have a bit of fun with wood logs. You can make them the same height, place them in height order or change things up a bit by making different levels throughout.

garden-edging-ideas-wooden-logs
Source: Photo by Zuzana Kacerová on Unsplash

21. Cinder blocks

Cinder blocks or concrete blocks are a cheap and easy option for lining your garden. You can also paint cinder blocks any colour you like, and add extra plants like succulents and cacti in the middle!

22. Gabion edging

Gabion walls are not only a great retaining solution but the combination of natural river rocks, timber and mesh looks great in every outdoor setting.

23. Use light to highlight your edging

Light edging is a great idea for a modern garden. Simply use rope lighting, which you can find at Bunnings or on Ebay, and line it around the edges of your garden. Be sure to turn them on in the evening so you can enjoy the gorgeous glow–better still go solar!

garden-edging-ideas-lighting
Source: Photo by Rendy Novantino on Unsplash

24. Rock and brick pattern

Shake up your style by using a mixture of patterns in your garden edging. Combine rock, pebbles and brick together for a great look.

25. Mosaic art

If you’re after something a little bit different and colourful, consider lining your garden with mosaic tiles. You can connect this edging to your outdoor tile setting to make it seamlessly flow to the garden bed. Choose a base colour, like white or black, and add in a couple other colours and styles to bring it all together.

garden-edging-ideas-mosaic
Source: Photo by Peyman Farmani on Unsplash

26. Steel fencing

This is a handy option to hold your raised garden bed together. Use steel on its own for a more industrial look or combine it with wood to soften it and match your wooden fence or outdoor furniture.

Fences need to be well planned and organised, especially when it comes to getting the right approvals. Finding the right fencing contractor for you is a great place to start.

27. Raised edging

Use timber planter boxes (or build your own) to raise your garden bed. This helps your flowers and plants stay contained to one spot and makes them easier to maintain.

garden-edging-ideas-garden-beds
Source: Photo by Jade Seok on Unsplash

28. Formal edging

Use curved and straight concrete edging for a more formal look. To keep your garden consistent, stick to just a few plant options and keep them in a similar colour scheme.

29. Detailed with refined borders

If you like the clean-cut look, choose edging that has defined corners that will be sure to make your garden stand out. This works really well next to hedging, as the straight lines of garden edging complement the box-shaped hedges.

30. Plastic stone-look

If you’re after something that’s low maintenance and affordable, then plastic stones might be the best option. You can find these on Ebay, from Bunnings, and even from garden centres. They are usually interlocking, which makes putting them together really easy!

31. Drainage edging

This is a smart landscaping hack that is often overlooked. But if you have issues with drainage or simply get a lot of rain in your area, you might want to consider drainage edging. Stones or gravel will allow water to easily pass, and you can even plant some cute succulents for extra appeal.

garden-edging-ideas-drainage-edging
Source: Photo by Aknazar Arysbek on Unsplash

32. Patio bricks

Stack patio bricks on top of each other to create garden edging for a raised flower bed. This is a great way to tie your colours into your existing patio design.

33. Shells

Line your garden bed with large seashells to create a coastal vibe. Gather shells in different shapes, colours and sizes from the beach or purchase some online to create this coastal vibe.

34. Natural sandstone garden edging

If you’re looking to reproduce the rustic-looking garden of times gone by, then you simply can’t go past natural sandstone. It’s a classic design that will last the test of time and look great in years to come.

35. Rope terracotta

Terracotta rope-top garden edging provides a touch of Victorian elegance and is an attractive border solution for flower beds. The terracotta colour, combined with the rope top finish, will give your outdoor space a more traditional look.

36. Scalloped

If you’re looking for edging with a contemporary twist, look no further than a scalloped design. The flowing curves and clean lines add a touch of sophistication to any garden, whether it’s traditional or modern!

37. Add a few layers

If you can’t decide on one style, then why not line your garden with multiple types of edging material. Use rough pieces of concrete to create a raised garden bed, then add stones or pebbles around it, and add a final layer of brick pavers.

garden-edging-ideas-mixed-materials
Source: Photo by Scott Webb on Unsplash

38. Coastal rope

A coastal rope design is perfect for bringing beach house vibes! It uses simple white rope through wooden holes in the garden bed. You can add shells to the gap between the garden bed and the grass to create a unique, beach-inspired look for your coastal home.

garden-edging-ideas-coastal-rope
Photo by Glen Carrie on Unsplash

39. Glow-in-the-dark log edging

If you want to light up your garden with something different, why not crack some logs open and add warm LEDs. Of course, this is going to take a little bit of work but the finished result is pretty impressive!

These light-filled logs can be used as a border for your garden or serve as a stool or small table for a garden BBQ. Because each log will be different, this will be sure to add a beautiful ambience to your outdoor area. These would also look great at Halloween.

40. Raised bed in stone finish

Stone is another classic solution for garden edging. Use stone as a foundation and border for your raised garden, and use similar colour tiles and pavers throughout your outdoor area to maintain a consistent look.

41. Pine raised bed

Treated pine is designed for long-term outdoor use, so it will be protected against nasty termites or fungal decay. So it’s not only an attractive option, but it’s a practical choice for your garden.

42. Steel planters

Steel planters make a clean, simple look for your garden beds – and they look great against white or light grey stone pavers. Use small rocks or white pebbles to fill in the gaps between your planter boxes.

43. Simple pavers

You can’t go past pavers, especially when they’re simply lined up against one another. This is an easy garden edging solution to maintain, and it’s something that you could install yourself (if you’re into DIY) or get someone else to complete over a weekend.

44. Tiered

If you’re wanting to create levels in your garden, then you must use edging to hold it all together. There are so many different options, but simple curved steel edging will work a treat and will ensure your plants are the main feature. Fill each level with gravel or stones and add in your favourite plants like succulents, cacti, spider plants, or herbs.

Looking to build a retaining wall like this but still not sure of the final look? I’ve put together my favourite retaining wall ideas here to help you get inspired.

45. Aluminium edging

When it comes to garden edging, it’s really important to not only choose what looks great but also what’s going to last. While steel is strong, perfectly holds any shape and is not affected by erosion, it isn’t resistant to corrosion. However, the process is slow and it may take decades before your steel garden edging needs to be replaced.

On the other hand, aluminum garden edging is softer than steel edging and a perfect choice for any curvaceous installations. Aluminium garden edging doesn’t rust but, because of its softness, it can bend and lose shape over time. So when it comes to your edging, make sure you think about your exact garden situation before you make a choice!

46. Terracotta lookalike edging

If you’re after terracotta rope borders to create a classic look but don’t want to break the bank to afford this option, then consider lookalike edging. This design is made in moulds to replicate traditional terracotta garden edging – and it’s a great solution to the traditionally expensive edging.

47. Marble

This will look good in any backyard, but especially in a contemporary home. But beware, marble can get expensive! So before you go ahead with this option, make sure you know the exact measurements and how much marble edging you will need so you can make an informed decision.

48. Graphite

This is an extremely strong and weather-resistant option that is also super soft and smooth. You can find graphite in different shades of grey from light through to dark, almost black options.

50. Granite

Granite is another tough option for your garden edging. It also comes in a range of colours from yellow to grey to dark grey and everything in between. It’s a natural stone, which means it will work in seamlessly with your green garden, plants, grass and stones.

I hope that by reading through all of these garden edging ideas, you’re inspired and ready to take on your next garden project! I know it might seem like a lot of work, but you’ll be so glad once you’ve completed it because your garden is going to be looking fantastic.

Remember to always check and double check the specifications and measurements of your garden so you can source the right amount of edging for the job. And why not have fun with your garden edging by choosing something a little bit out of the box. After all, you can always change it in the years to come.

Comment and let me know which option you’re going to choose!

Step by step instructions on how to build a retaining wall

From rock walls to timber - what's the right material for your retaining wall.

Step by step instructions on how to build a retaining wall

Retaining walls are an excellent design addition to your garden and a problem solver. You can build a retaining wall if your garden has a slope to stop the uphill becoming a downhill. You can also make retaining walls to add to the architectural interest like building raised garden beds, terraces, and paths. The good news is, learning how to create a retaining wall is easy; follow our retaining wall ideas.

You can build a retaining wall using different materials and style to suit any garden, and since they are all DIY, you can make your dream wall for less.

Make a Plan

Before you start building a retaining wall, you’ll need to come up with a design. If you anticipate your wall to be over a metre high, you need to get authorisation from the local council and hire an engineer to design and certify the wall. Once you get the design, gather the materials that you need.

Timber

If timber is your preferred material for building a retaining wall, get treated pine sleepers or hardwood sleepers. These two types of timber offer excellent value for money.

1. Dig a Trench

Use set-out paint or any other marker that you have to mark the area that you’re going to work on, then add a string line to guide you.

Start by digging at the bottom of the slope – this is the level base for the retaining wall.

Dig holes and insert vertical supports using the thicker sleepers. The vertical slopes should be at least 75mm thick. Once you dig the trench, clear an area, at least 500mm wide for the wall and drainage. Remember to break up any rock that you encounter when digging the channel to get a levelled base.

2. Lay the Foundation Row

After levelling the trench, lay the foundation row of timber.

When laying the timber, start at one end of the trench and put a 6X6 on the ground. Adjust the timber to keep it straight. You can use a hammer or a sledgehammer to make any adjustments and confirm that the timber is inline using a level.

Once the timber is in line, secure it in place using a piece of rebar driven straight into the soil.

Continue with the next piece of timber and install a row of foundation timbers. Check to ensure that the timber is level across the length.

timber-retaining-wall

3. Installing the Remaining Rows

Space the supports every 1.5m for 3m long sleepers, and 1.2m for 2.4m long sleepers. Ideally, the horizontal sleepers should be 50mm thick. Lay the flat sleepers against the horizontal supports, check the level and secure them using a bolt. You can screw the sleepers from the front or back, but if you’re doing it from behind, be careful not to drive the screw out through the front.

Using a hand saw, cut off any excess timber to make the ends even.

Paint the walls to match your outdoor area or garden.

Concrete Blocks

Interlocking blocks are great for a DIY retaining wall project because they don’t need mortar. The interlocking bricks come prefinished, and this means that once you lay them, you don’t have to do anything else to make them look good, saving you time and money.

1. Preparing the Foundation

After marking the area, start digging the trench. The first row of concrete blocks should be buried halfway, so you should take this into account when digging the trench.

If the trench slopes, you’ll have to create the steps using a torpedo level. Creating the steps is the best way to keep the wall level.

Compact the base of the trench using a ground tamper or a vibrating plate compactor. Many people make the mistake of downplaying this part but if the soil is loose, the wall will settle, and this will affect its stability.

2. Lay Crushed Stone Base

Always use crushed stone instead of gravel as the base of your concrete retaining wall.

Why crushed stone?

Crushed stone is expensive, but it’s the best material for your base. Crushed stone has sharp angles that interlock, this makes it easy to compact and when compacted, it stays that way. The crushed stone base also offers better drainage than gravel.

When laying the gravel, leave the stone not more than 0.01 metres over the final height. The stone levels up to the final height after compacting.

3. Laying the First Course

After laying the first course of the concrete blocks, use a torpedo level to keep the course lined up. This is an important step, so take your time until you get it right. The first course should be at the centre of the trench.

4. Clean Up

Make sure that there are no small pebbles or any other debris on the surface of the blocks to maintain the alignment. Any block that is not in line affects the block above it, and so on, causing an ugly bump at the top of the course.

5. Retain Drainage

Retaining wall drainage is key to building a strong and long-lasting retaining wall. After laying a few rows, backfill the wall with the crushed stone until it matches the height of the wall then put a perforated drain tile on the rock.

Install a drain gate and drain tee fittings every 6m to 15 m depending on the amount of rainwater expected down the wall.

You need to cut one block down to find space for the drain gate and screw the parts together to keep the unit intact when you add more rock.

Go Natural

If you want a natural-looking retaining wall, use granite or sandstone instead of timber and blocks.

You need to prepare a base similar to a concrete block foundation and then move on to laying the bits of rocks together.

When building a sandstone or granite retaining wall, you need to find rocks that lock together. Once you lay the foundation, add mortar to hold the stones in place. Lay another bed of mortar between the rocks as you level up. Complete the walls by filling the joints at the front with more mortar. Wipe with a sponge or a soft cloth for a smooth finish.

You can also build a natural-looking retaining wall using dry stack stone using the following steps:

  • Set cornerstones at both sides of the granite steps and either end of the granite steps.
  • Set the flat stones between the cornerstones and lay a tie-back stone every 1.5m for extra stability.
  • Keep laying the flat stones up the wall until you get to your desired height.
  • Confirm stability of the wall every few levels.
  • Lay capstones as the final course to get a flat and smooth top.

Remember to toss the unwanted or leftover stones behind the wall and once you’re done building the wall, fill it up with gravel up to the top level. Add some mulch or lay some coloured stones on the top level to add to the beauty.

Call the Experts

Learning how to build a retaining wall takes time and dedication. Building the actual wall also takes time, commitment, and energy, a lot of energy. You have to dig up a trench, pile up the stones, concrete blocks or timber, mix the mortar and fill up the back of the wall with rock and gravel. If you don’t call your mates to help you out, building a small retaining wall can last days or even weeks.

Whether you want to build a new retaining wall or repair an old one, you will find plenty of retaining wall experts near you. A retaining wall builder has the tools, skills, and expertise to build or repair a retaining wall and have your garden look amazing. You can get free quotes now from highly rated and trusted retaining wall experts.

FAQs on How to Build a Retaining Wall

How much does it cost to build a retaining wall?

The cost of building a retaining wall depends on many factors such as the type of material used, the size of the retaining wall, the qualifications of the builder and the rates in your area. A DIY project is cheaper because you get to build the wall yourself, but the wall might not be up to standards.

What is the cheapest material for building a retaining wall?

Natural stone is the cheapest material especially if you have it on-site and it doesn’t need cutting, but it’s also the most expensive if it has to be cut.

How high can I build a retaining wall?

Retaining walls that exceed a certain height must be designed by an engineer and approved by the local council. For example, in Queensland and Victoria, any wall over one metre must be approved. In NSW, you need authorisation if the wall is over 600mm, other places 800mm.

Indoor gardening ideas

Indoor gardening is a great way to achieve a stylish look, and mood enhancing sense of tranquility. Having plants indoors "Indoor gardening ideas"

Indoor gardening ideas

Indoor gardening is a great way to achieve a stylish look, and mood enhancing sense of tranquility. Having plants indoors not only brings a room to life; it helps with air quality. Here are some beautiful indoor gardening ideas to try at home, the office, or even in the little café you’ve been dreaming about opening.

vertical indoor gardening
Source: woo home

Terrariums

Terrariums are gorgeous placed on a table or hanging from the ceiling (and they make great gifts)!  The word ‘terrarium’ is used to describe a miniature garden in a container, often made of glass and usually sealed, but can also refer to open-air containers.  They can be soil based, soil-free, sand based or water based.

water terrarium indoor gardening
Source: Etsy

You can purchase pre-established terrariums from garden centers, gift shops and online, or you can enjoy making your own. Get creative and try using random glass objects, such as a light bulb, water jug, or fish bowl, and fill them with succulents, indoor ferns, air plants, moss and florals.

indoor gardening terrariums
Source: Uncovet Blog

Vertical gardening

Bring your indoor area to life by installing a vertical garden. Vertical gardens are perfect for those with little space. Often mounted or hanging, you can choose to utilise your vertical garden for purely aesthetic purposes, or make it into your own little indoor herb or vegetable garden.

herbs vertical indoor gardening
Source: The Domestic Heart

vertical indoor gardening
Source: Karma Stream

Living walls

Living walls, or green walls are the ‘next level’ in vertical gardening. You can create a fixed or moveable feature wall with tumbling greenery, or brightly coloured flowering plants. Make it extra special by installing some down lights or water-proof fairy lights that you can switch on in the evening.

Depending on your design, to set up a living green wall, you might need a:

  • Free-standing or mountable structure
  • Layer of water-proofing (plastic) to protect the wall behind
  • Layer of fabric for your plants to grow on, and
  • A drip irrigation system with appropriate drainage.

Once you’ve got the structure sorted out, you can then select and install your plants.

Airtasker have some very talented gardening professionals available to set your green wall up for you.

living green wall indoor gardening
Source: studio m interior design

Suspended indoor gardening ideas

Suspended indoor gardens and upside down gardens are stunning indoor gardening ideas that will make your space feel extravagant.  Imagine the serenity of having a rainforest canopy above your floating kitchen bench, or in the middle of your family room.

suspended indoor gardening
Source: Happy Interior Blog

suspended indoor gardening
Source: woo home

Upcycled planters

Mason jars, glass jugs, light bulbs, old lanterns and vintage trunks are all perfect items to recycle and revitalise by using as a planter for your indoor garden. Hunt down inspiration on Pinterest and head to your local second hand store to find a bargain item in need of some upcycling love.

indoor gardening tulips planter
Source: Pinterest

lightbulb indoor gardening
Source: 1001 gardens

Succulents

Succulents do exceptionally well in most indoor gardening situations. They come in a wonderful variety of shapes, sizes and colours and are generally readily available at gardening centers and nurseries.

succulents indoor gardening
Source: Stagetecture

Air plants

Tillandsia (a.k.a air plants) are the brown-thumb’s best friend; they literally need hardly any attention because they thrive on oxygen (hint: over-watering will kill them). However, due to recent changes in import restrictions, they are not so easy to get in store anymore. When sourcing air plants, it’s best to purchase them online from a specialist retailer like Air Plant Décor, who will package your plant up delicately and have it delivered with full care instructions. Place them in terrariums or on unique air plant holders.

air plants indoor gardeningSource: Craft Organic

air plant indoor gardening
Source: Idle Hands Awake

Love our indoor gardening ideas, or have a few ideas of your own you’d love to share with us?  Let us know in the comments below!

How to grow vegetables in your apartment

Apartment living has it’s perks; no lawn to mow, no garden beds to weed. It is nice to have the "How to grow vegetables in your apartment"

How to grow vegetables in your apartment

Apartment living has it’s perks; no lawn to mow, no garden beds to weed. It is nice to have the satisfaction of growing your own vegetables though. Whether you’ve just got an indoor area, a small balcony, or if you’re lucky enough to have a rooftop, you’ll find there are a number of vegetable gardening ideas that will suit your apartment.

potato apartment vegetables
Source: Pinterest

Here’s how to grow vegetables in your apartment

1. Container planting

Container planting is a great option for growing vegetables like broccoli, cauliflower, bush tomatoes, climbing beans, root vegetables, lettuce and salad leaves. Containers come in all different shapes, sizes and materials. Do some homework on the required growing conditions of whatever it is you’d like to plant to and check the size required. The best thing about container planting is if you do move out, you can take your crop with you.

Wooden planters – construct your own using old pallets (often free from industrial sites if you ask politely) or find some gorgeous planter ideas online

vegetables gardening wooden planter
Source: Pinterest

Need some help putting your wooden planter together? Get some help from an Airtasker handyman in your neighbourhood.

Plastics planters – plastic pots are cheap and readily available from gardening and hardware stores, or you can recycle old plastic bottles to make your own apartment planters

vegetables gardening plastic planters softdrink bottles
Source: Just Imagine

Terracotta and ceramic pots – they look great, especially for things like citrus and olives – but beware they can get a bit heavy

cauliflower vegetables terracotta pot
Source: Balcony Garden Web

Smart pots – made from porous, lightweight material, they encourage drainage and root growth, and can be washed and folded up when not needed

Tip: A small hessian bag will work just as well for planting potatoes.

smart pot vegetables gardening
Source: Nutriculture

3. Herbs and micro-herbs in tins

Use old tin cans and biscuits tins to house herbs and micro herbs. Although they’re not technically vegetables, they are perfect for growing indoors and outdoors in apartments.

vegetables herbs tin gardening
Source: Pinterest

4. ‘No dig’ wheelbarrow veggie patch

A wheelbarrow is a fantastic way to create a mini, movable vegetable patch that you can chase the sun with. The ‘no dig’ or ‘lasagna’ (layered) method of preparing a garden bed will work great for this style of gardening as it provides maximum nutrients with little effort to maintain. Follow the steps below to get started:

Step 1
Scout out a pre-loved wheelbarrow at a second hand store or pick up a cheap one from a gardening and hardware retailer. Make sure you bring your wheelbarrow to your balcony or rooftop before filling, otherwise it will be too heavy to move.

Step 2
Create some drainage by either drilling holes in the base (you’ll need to keep a container underneath the wheelbarrow to catch any excess water that leaks through), or by filling the bottom few inches with light stones.

wheelbarrow vegetables
Source: Lushome

Step 3
Prepare the ‘no dig’ garden bed:

  1. Start with a layer of newspaper – wet it
  2. Add a layer of mulch – lucerne hay or sugar cane mulch works well
  3. Add a layer of manure – chicken, cow or horse manure work well for vegetable growing
  4. Add a layer of straw
  5. Add another layer of manure (clearly this type of gardening is best kept to outdoor areas)
  6. Add a layer of good compost
  7. Depending on how deep your wheelbarrow is, repeat

Check out the ABC’s step by step guide to No Dig gardening. If you’d rather leave the garden bed construction (read: manure layering) to someone else, get an Airtasker gardening professional to help you out.

Step 4
Plant your vegetables. It’s up to you to decide if you want to start with seeds or seedlings (for beginner gardeners, seedlings are a great head start). You can even use vegetable scraps from your crisper; they’ll do remarkably well! Try celery, shallots, carrots, lettuce and chili.

5. Root vegetables in glass

Make a masterpiece out of your indoor vegetable garden by planting brightly coloured root vegetables or herbs in a glass jar or container. Start collecting mason jars, vases or vintage jugs and try planting a spring mix of carrots, spring onions and raddish. Most root systems prefer to be kept in the dark while the leaves enjoy a little light, so tinted glass containers are ideal for planting vegetables and herbs that require a decent amount of sunlight.

herbs vegetables mason jars
Source: Wonderful DIY

Strawberries 

Not technically a vegetable, but so great to grow in an apartment that we couldn’t leave them out!  Strawberries do well in containers or hanging baskets. There are even varieties that require no sun and can be completely grown indoors, such as the Alpine variety.

Mushrooms

Don’t have much sunlight available? No worries! Mushrooms love cool, dark places. Get a complete starter kit online for as little as $20 (Enfield Produce Pet and Garden Supplies).

mushroom kit vegetables
Source: Mushroom Kit

Have you got any more fantastic vegetable gardening ideas suitable for apartment living? Leave us a comment below.

Beginner’s guide to: Gardening

If you’re embarking on your first gardening project and you’re not sure where to start, our beginner gardening tips will "Beginner’s guide to: Gardening"

Beginner’s guide to: Gardening

If you’re embarking on your first gardening project and you’re not sure where to start, our beginner gardening tips will help you succeed.  Knowing where to start, planning and understanding your garden design will be the key to your success. Before you get down to the local landscaping store, there are a few considerations you need to make.

gardening roses and bench seats
Source: Pinterest

What type of gardening do you want to enjoy?

How do you want to use your garden? Are you doing some landscaping to finish off a newly constructed home, or giving your existing garden a facelift? Will this space be used as an entertaining area, children’s play area, veggie patch or chook pen? Do you want to build a feature garden? Understanding the purpose of your garden will help you plan the design.

tuscan gardening
Source: Pinterest

Landscaping and layout

Think about the space you have and how you might make the most out of it by carefully planning the layout. Garden goers with large, country back yards are blessed in their options. But if you’re in a terrace house in suburban Sydney and don’t have more than a 4 meter squared courtyard, you’ll need to be a little bit smarter with what you have. Draw up your design and experiment. Yates have a really handy Virtual Garden tool that you can use; it takes in to account your climate, garden size, what type of garden you’re interested in, and your level of gardening expertise.

Design ideas

A little bit of design inspiration never goes astray. Again, thinking about the space and how you want to use it, seek out plants, grass, garden accessories and possibly even outdoor furniture to complete your design. Are you into water features? Would a flower arch complete your garden’s English tea party look? Would a grape vine work nicely with a Tuscan theme? Landscaping centers often have mini display gardens that you can walk through, and there is plenty of design inspiration online.

beehive gardening
Image credit: Harold Lloyd
Source: Homestead Revival
Get your own homegrown honey by having a quaint little back yard beehive.

wheelbarrow flower gardening
Source: Italia Post
Find an old wheelbarrow in a second hand store and bring it to life with some brightly coloured flowers.

We also have some great small backyard design ideas and quirky garden design ideas for you to look at.

Drainage and ground preparation

When planning your garden, don’t forget to consider things like drainage and ground preparation. You don’t want half of your backyard flooded and turning in to a mud puddle every time you get a sprinkling of rain. You may need to level the ground, dig it out, and even prepare the soil if it’s lacking nutrients. If you have a bit of labouring work ahead of you, think about when the right time to do it will be; there’s no point in scheduling a landscaping job in the ‘wet season’ (okay, ‘wet weeks’ in Australia); mud and rain won’t allow for much productivity.

lawn and turf gardening
Source: DIY Network

Read up on what you are planting

Research is key for beginner green thumbs. Know whether the plants, grass, flowers, vegetables, etc. you are interested in will do well in your climate, how to care for them, and what their maintenance requirements are. For example, how much water does Sir Walter grass need? Will it do well in a hot climate? How much sun does it need? What are the best conditions for laying turf and how long will it take to settle?

Tip: ‘Sun-mapping’ is a thing – how much sun does your garden actually get and where? Spend a day outside to find out.

sunshine gardening
Source: Thiên nhiên

Spacing plants appropriately

When designing a dream garden, something many enthusiastic beginners neglect to think about is spacing of plants. If you’re constructing a tropical paradise of different varieties of palm trees to surround your pool, anticipate for them to get big. They’ll drop fronds, seeds and maybe even coconuts; they can grow over roofs, pools and block gutters. Do some research on the species you want to use and space plants appropriately; they grow.

Maintenance

Once you’ve established your garden, to keep it looking amazing you’ll need to have a good maintenance routine in place. Think about this in the planning stage. Consider:

  • Lawn care – aerating, watering and mowing
  • Weeding
  • Hedging
  • Pruning
  • Fertilising
  • Cleaning (e.g. bird baths)
  • Pest control
  • Irrigation, sprinklers
  • Gardening tools and equipment, e.g. hoses, shovels, etc.

gardening hose
Source: hey there, home

Budget check

Budget check = Reality check.  Now that you’ve got your design planned out, measure out your requirements (i.e. 10 meters squared of that beautiful Sir Walter turf) and cost it out before you get started. Don’t forget to consider ongoing maintenance costs as well; think in terms of money, time and effort.

Get ready to get started!

By having a good, well planned garden design, you’ll be on the right path to green thumb success. If you’ve identified certain tasks that you’d like to do yourself, think about your skills and experience and consider watching some online videos, or getting advice from a professional before you start. If for example, you don’t want to level the backyard or lay turf yourself, Airtasker have plenty of landscaping professionals available to assist. Get a free quote today.