How to prepare for bushfire season

Considering how easily bushfires can start and spread, it’s in your best interest to learn how to prepare for one.

How to prepare for bushfire season

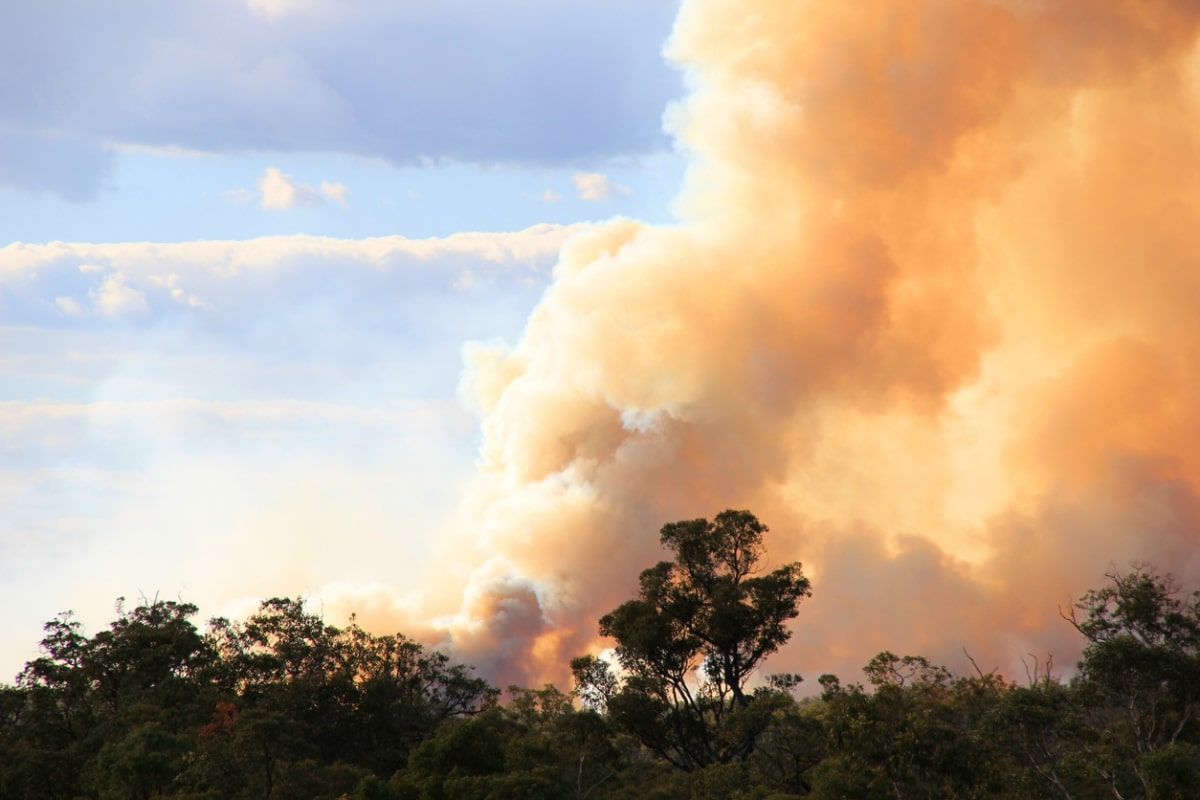
The El Nino weather system is returning to Australia this summer, and the country is expecting its worst bushfire season since 2019-20. However, according to research by NRMA Insurance, only around ¼ of the Aussie population knows how to prepare for a bushfire.

Following preventive measures is crucial to your and your loved ones’ safety, given the devastating potential of bushfires that can cause catastrophic loss of life, limb, and property.

Here’s a guide to help you create your own bushfire preparedness strategy to ensure your home and family are ready for any bushfire emergency.

Step 1: Know the bushfire risk in your area

A bushfire warning sign showing extreme fire risk

Understand the Australian Fire Danger Rating System

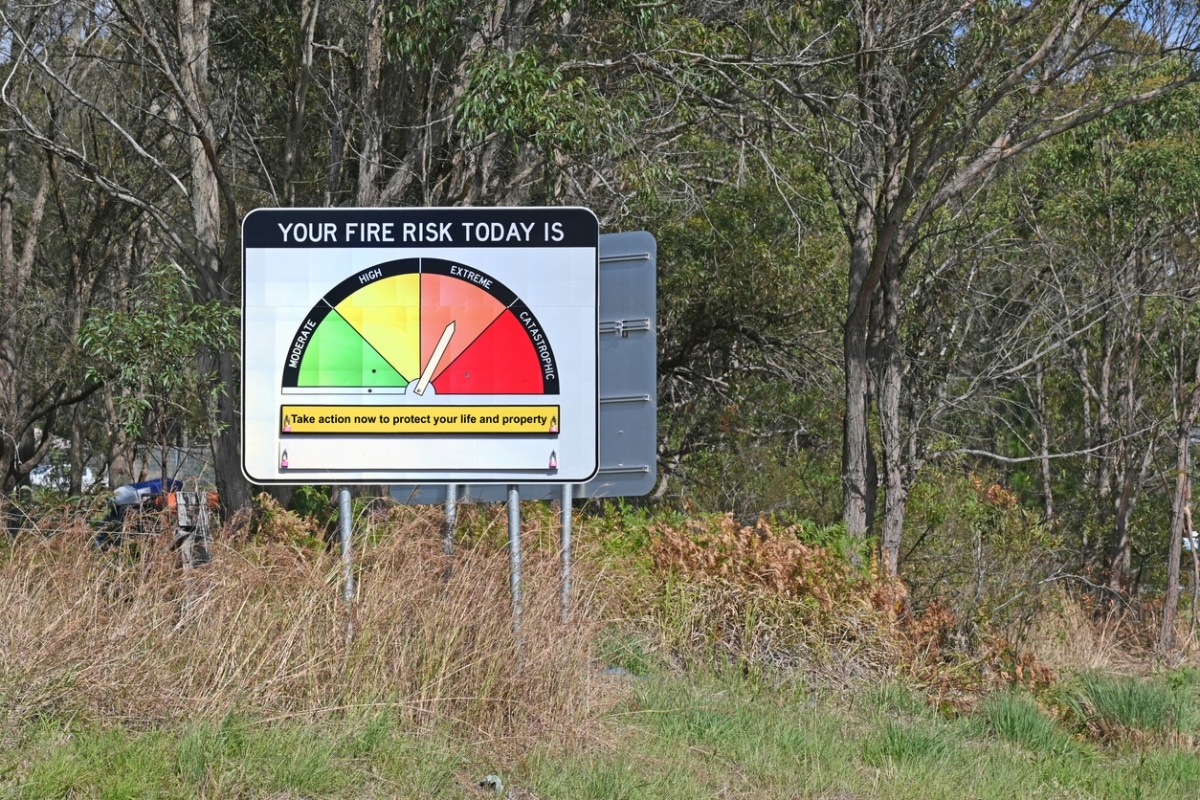
The Australian Fire Danger Rating System (AFDRS) is a vital tool in bushfire preparation as it helps you assess the potential danger of a fire occurring in a specific area. It also contains crucial information to aid you in making sound decisions about bushfire hazards and necessary precautionary measures.

The AFDRS levels are as follows:

  • Moderate: Plan and prepare 
  • High: Be ready to act
  • Extreme: Take action now to protect life and property
  • Catastrophic: For your survival, leave bushfire-risk areas

Check your local council’s fire and safety services 

It’s prudent to check your local council’s fire and safety services to see if they can help you assess how vulnerable your area is to fires.

Online assessment tools are an easy way to help you better understand the potential threats to your home and property. Here are a few helpful sites that you can check out: 

  • Bush Fire Household Assessment Tool – The NSW Rural Fire Service (RFS) uses this to assess your location’s bushfire risk.
  • Bush Fire Prone Land Map – You can enter your address and check if your land is in a bushfire-prone area.
  • Fire Near Me – Log onto the Fire Near Me website or download the app to stay up-to-date with the latest fire news from the NWS RFS.
  • Bushfire At-Risk Register (BARR) – If you live around Victoria, you can check if your child’s school, kindergarten, or daycare is at risk for bushfires.

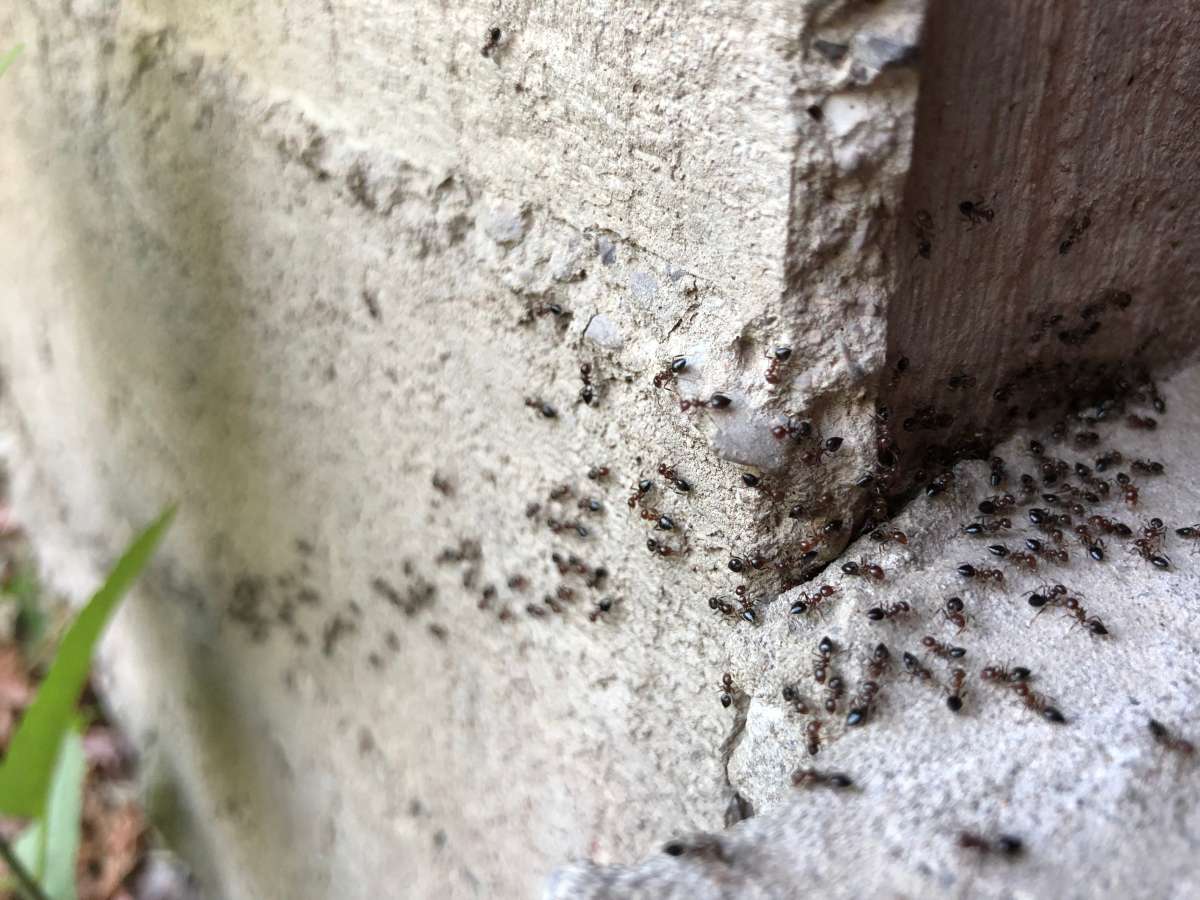
Identify bushfire hazards around your home and property

Recognising potential risks like fuel sources, vulnerable landscapes, and structural weaknesses is integral to bushfire preparedness.

Doing so helps you implement preventive measures to ensure the safety of your home and family in the face of a bushfire. Such measures include:

Step 2: Develop a bushfire survival plan

Mother explaining their bushfire survival plan to her family whilst preparing emergency backpacks.

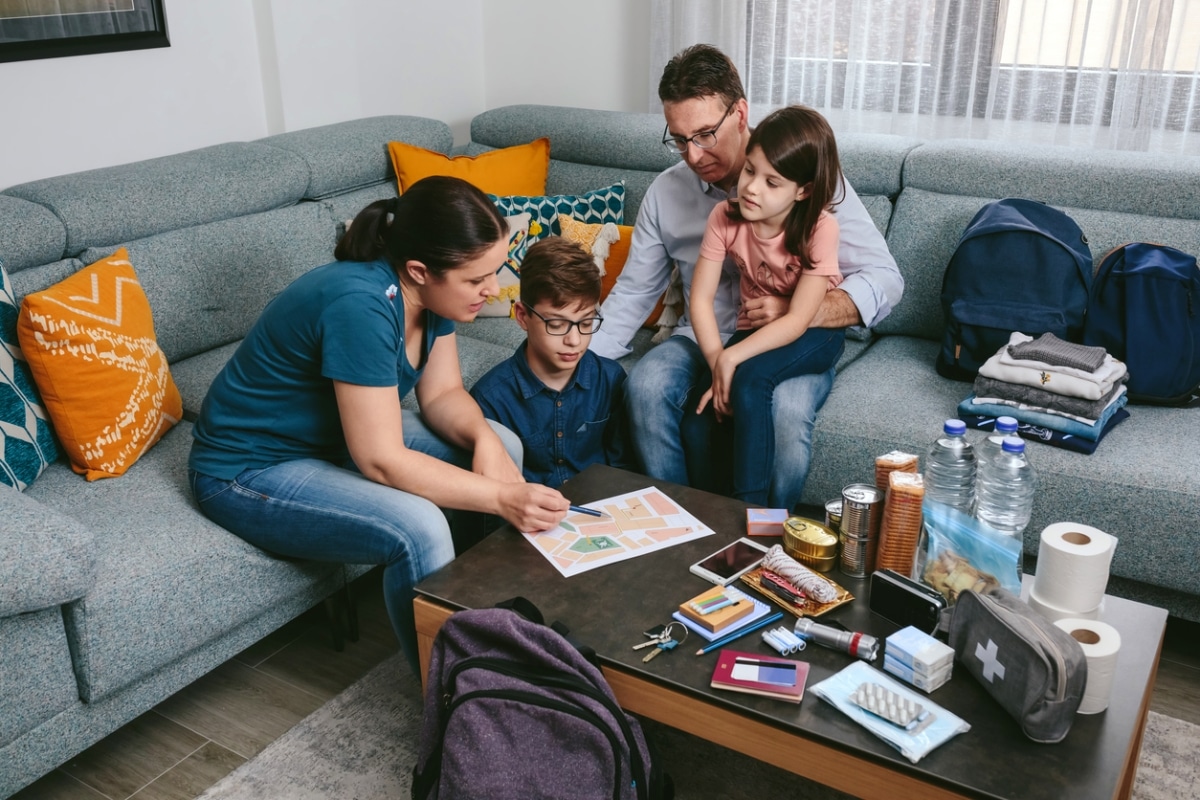
Decide whether to stay and defend or leave early

Every emergency plan needs to be well-thought-out. The choice between staying or leaving will ultimately depend on your and your family’s ability to defend the property against an encroaching fire effectively:

  • If staying to defend, know your bushfire action plan

When a bushfire occurs, you and your family must create a plan with a clear set of steps to take in the event of a fire, such as monitoring updates, safeguarding vulnerable areas, and having necessary firefighting equipment.

  • If leaving early, plan your evacuation route and destination

It’s essential to identify the safest and quickest routes to escape the affected area and pinpoint designated evacuation centres or secure locations to seek refuge with friends or family not affected by the bushfire. 

Practice your bushfire survival plan with your family and household

Practice makes perfect. But in this case, practice means better chances of securing the safety of your home and family. Regular drills and simulations help to familiarise everyone with the necessary protocols of bushfire preparedness and ensure you can act swiftly during a real emergency.

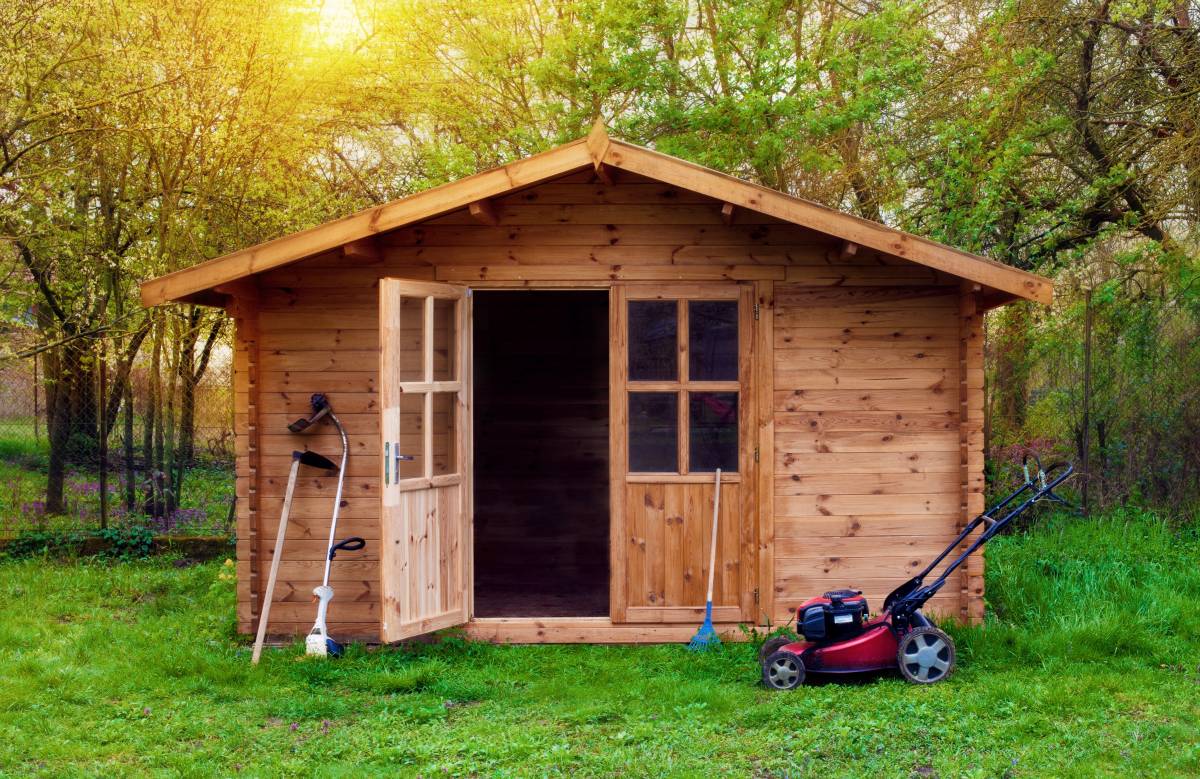
Step 3: Bushfire-proof your home and property

A couple at home raking and tidying autumn leaves into barrow

Being prepared for an emergency is always better than scrambling to escape. Here are a few things that you can do to bushfire-proof your house:

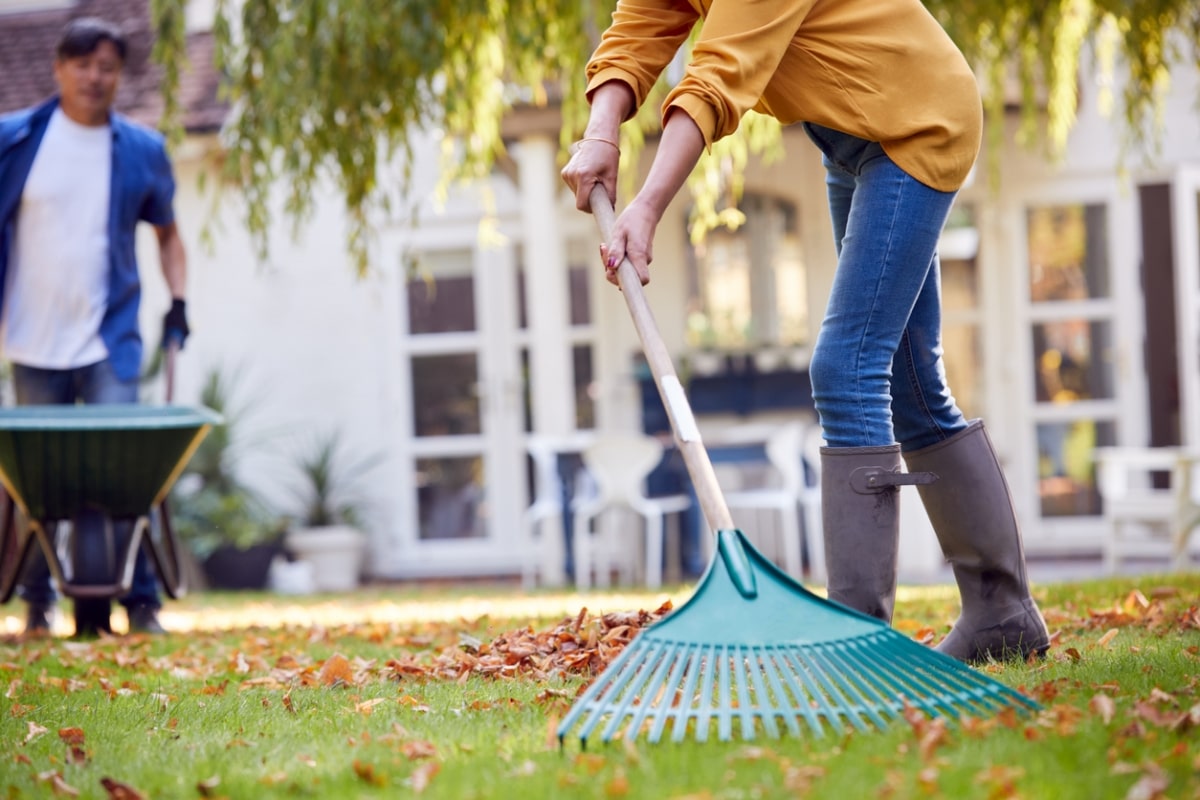
Observe regular home maintenance

Proper maintenance can go a long way when it comes to protecting your home:

  • Regularly clean your gutters, roof, and downpipes for leaves and other flammable debris. 
  • Mow your grass in both your front and back yard regularly. Be sure to cut grass, rake fallen leaves, and dispose of them immediately. 
  • Clear any flammable materials around your home and yard, such as wood stacks, paper materials, containers, hanging baskets, and outdoor furniture.
  • Avoid discarding tree loppings, grass clippings, and other materials that could aid a fire on your property, council reserves, or bushland.
  • Ensure your garden hoses are long enough to reach your property’s perimeter boundary or at least 1000 meters. 
  • Trim or prune low-lying branches from any trees around your property, at least two meters from the ground.
  • Keep a sufficient water supply in store for emergencies, preferably through a water tank. 
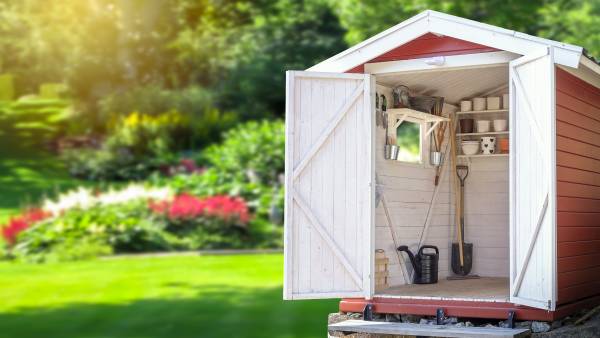
  • Ensure you have all the necessary tools, such as rakes, shovels, buckets, and mops.
  • Keep protective clothing such as fireproof boots, eye protection goggles, and fire masks in an accessible area for everyone at home.

Install permanent safeguards on your home

Aside from regular maintenance, installing permanent safeguards can help bushfire-proof your home:

  • Install ember guards on your roof vents and chimneys.
  • Place fine steel wire mesh screens on your windows, doors, vents and weep holes.
  • Fit metal screens on your windows and doors, and avoid plastic ones. 
  • Enclose open spaces under your decks and floors.
  • Make sure to seal all gaps in the external roof and wall cladding.
  • Plant trees or shrubs with low oil content. They’re less likely to ignite in a fire.
  • If you have a pool, dam or water tank, install a Static Water Supply (SWS) sign on your property for firefighters to get a water source during an emergency.

Step 4: Prepare your emergency kit

A woman preparing an emergency kit, which includes canned food, bottles of water, extra clothes, medication, and personal hygiene items.

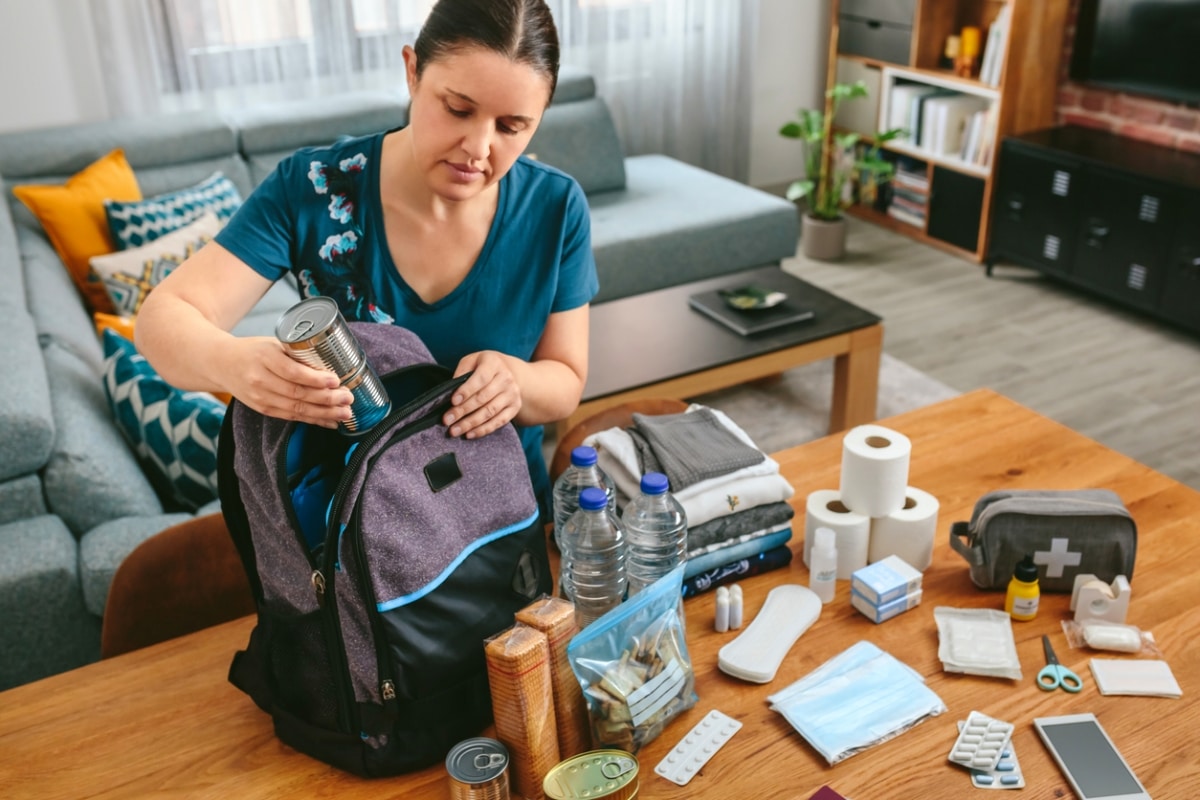
It’s never a good idea to evacuate your home empty-handed or worry about leaving things behind. Not only an emergency kit is essential, but should you lose your home to a fire, you have everything of value on hand.

Here are a few tips:

  • Store your emergency kit in a safe and accessible place.
  • Pack your emergency essentials, such as:
    • Non-perishable food and potable water
    • Medication
    • Important documents
    • Personal hygiene items
    • Clothing
  • Ready pet carriers for each of your pets

Step 5: Know what to do during and after a bushfire

A bushfire scene

We all know planning for an emergency does not compare to actually being in one. If you find out there’s a bushfire that’s heading towards your home, here’s what you should do:

  • It’s easier said than done but stay calm.
  • Follow your bushfire action plan and the instructions from emergency services.
  • Immediately close your windows, doors, and vents.
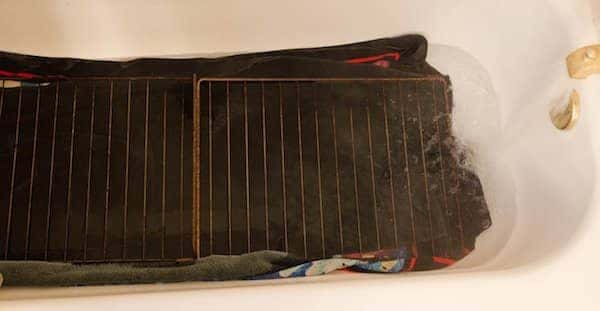
  • Soak any towels and rugs, then lay them across external doorways, windows, and vents.
  • Fill your sinks, baths, buckets, and bins with water.
  • Keep your pets in one room and ensure they are ready for transport.
  • If you have a roof access hole, put a ladder underneath so you can quickly check for spot fires from your roof.
  • Move your furniture away from the windows.
  • Turn off your gas mains.
  • Move flammable items away from your house.
  • Block your drain pipes with sacks of sand, and fill your gutters with water.
  • Drink plenty of water to avoid dehydration.
  • Patrol your home and property to put out any embers or spot fires.
  • Spray water on the sides of your home and roof using your garden hose. Also, wet your garden and any wooden decks near or beside your property. 
  • Move any firefighting equipment inside so it won’t burn.
  • If you can no longer defend your home or plan to evacuate, be aware of the dangers of smoke, embers, falling trees and power lines as you escape.

Prep for bushfire season with Airtasker

Considering how easily bushfires can start and spread, it’s in your best interest to learn how to prepare for one.

If you need advice or help with any preparation tips discussed above, Airtasker is ready to assist you. From risk assessment and evacuation planning to safeguarding your property, Taskers can offer comprehensive solutions to help prevent bushfires from destroying your home.

Remember, when it comes to the safety and security of your home and family, it’s always best not to leave things to chance. Stay safe!

Book a Tasker today.

How to make a DIY candle, step by step

No stress; making your own candles can be fun and simple!

How to make a DIY candle, step by step

If you are a lover of candles, you’ll know two things; a) you can never have enough and b) they can get expensive. Learning to create your own DIY candle is a solution for both of these issues.

Endlessly customisable, making a classically beautiful candle is very easy. Whether keeping them for yourself, giving them as gifts, or even creating a little candle-selling side hustle, this is a fun hobby to learn. Read on for our simple tips to create some DIY candles you will love.

The materials you’ll need

  • Candle-making soy wax
  • Large candle wicks
  • A chosen bottle of fragrance oil
  • A spatula
  • One heat-proof container
  • A double boiler
  • Thermometer
  • An old pair of chopsticks or pencils

How to make a DIY candle: Step-by-step

As we’ve mentioned, this is a very simple DIY task for any candle enthusiast. So here are our eight simple steps to make your own:

Step 1: Measuring the wax for your DIY candle

Before you start the DIY candle-making process, you need to ensure you are working with a clean, flat surface. It’s also a great idea to protect the area with some newspaper or paper towels. This can be a messy process, so be sure to move anything you don’t want to get wax on.

Depending on the size of your container, measure the amount of wax you need to fill your container, and double it. This will be the amount of wax you need to melt.

Step 2: Melting the wax

Pour the wax into a double boiler to melt it. fThis will often take around 10 to 15 minutes, and you’ll need to stir it frequently during this time.

Step 3: Adding the fragrance 

One of the great things about making your own DIY candles is you can choose whatever scent you like to suit your mood. When the candle wax has melted, add fragrance oil to the mix. Your wax package will provide some instructions on how much of the oil to add, so make sure you stick to this recommendation.

Simply pour the oil into your melted wax, then stir the mixture for a few seconds. You can also skip this step altogether if you like, but we definitely recommend adding it to make your candles exude a lovely smell.

DIY candle kit
Source: Jocelyn Morales via Unsplash

Step 4: Attaching the wick

It is vitally important that you attach the wick to the bottom of your container before pouring in the wax. Do this by attaching the wick by dipping it in the melting wax. This will make it easy to stick it to the bottom of the container.

Allow this to sit for five minutes, at which point it will harden and stick. Alternatively, you can also use superglue to attach your wick (be sure to allow this to dry for the recommended drying time).

Step 5: Pouring the wax

Before pouring the wax into your container of choice, let it cool for a few minutes. The temperature on your thermometer should read 140 degrees which lets you know it’s time to pour.

Slowly pour the wax while holding the wick in place and refraining from pulling on it. Make a note to leave a small amount of wax in the boiler that you will use for topping off your candle later on.

Step 6: Securing the wick

You need to prevent your wick from moving around in the melting wax by securing it in place. You can do this with two old chopsticks! Lay them across the top of the container and sandwich the wick in between them, so it remains centred while the wax hardens.

The wax will need about four hours to set at room temperature. Always make sure you check that this is the case before moving the candle.

Step 7: Adding a touch more wax

In many cases, the candle will have hardened with a top that has cracks or holes in it. For those who want a cleaner finish, simply reheat the remaining wax, pour it on the top of the candle, and allow it to harden.

Step 8: Cutting the wick

Your remaining candle wick should be less than half an inch long. You’ll know that you need to trim the wick if, when lit, the candle has a very tall flame or some excessive flickers. If this happens, cut a little off the top.

Popular candle variations

Floral candles

A nice touch that can be added to a candle, especially those with a floral scent, is flower petals. Use an old paintbrush, gather some of the wax and use it to adhere the dried petals to the side of the container. Make sure you do this before you pour the wax in the container (so just after step four if you are following the steps above). You can create a more colourful candle by mixing petals and leaves of different types. If you have a floral fragrance oil that matches the petals, you’ve just created a very impressive candle!

Colourful candles

Another great way to create a unique candle look is by adding chopped-up crayons into the melting wax (this would happen during step two above). Grab around 12 to 15 crayons per candle that are preferably in the same colour family. Throw them into the wax mix and see what stunning visuals you can create!

Buried treasure candles

This can be a fun option for candles that you are giving as a gift. Find a small, inexpensive “treasure” like a small toy or piece of jewellery and place it in the container before pouring in the wax (step five). Pour the wax on top to bury the treasure and create a little surprise when the candle burns down.

If you don’t want the treasure to be a surprise, you can make it a visual feature by using a gel wax that will show the item and the progress of the burn until it can be accessed!

DIY candle holders
Source: Hanna Balan via Unsplash

Frequently asked questions

Is it cheaper to make your own candles?

Once you are set up with the initial equipment required for candle making, you can bring the cost per candle down with each one you make. Be aware that there can be a significant upfront cost, but this will become much cheaper than buying pre-made options over time.

Why don’t my homemade candles smell?

If your candles are not producing a strong enough scent, lower the temperature during the step when you add the fragrance oil. The reason why the scent may be weak is possibly due to burning off by heat in the melted wax.

How can I make my candles smell stronger?

If you want a stronger smell from your candles, try the following:

  1. Always use the recommended percentage of fragrance oil per the instructions on your wax
  2. Weigh your fragrance oils on a scale to get the right amount
  3. Gently and thoroughly stir the melted wax when adding the fragrance
Is DIY candle-making profitable?

Candle-making can be a profitable home business with high-profit margins due to a low cost per unit. This is also not a time or labour-intensive task, so it is relatively low-impact on your schedule. Time is money, after all!

Fill your home with candles! (A fire-safe amount at least)

Now you know how to make your own DIY candle, you can make as many as you like! We always recommend the safe use of candles – keep a fire safety kit as part of your DIY candle kit at home and never leave candles burning when you head out or fall asleep.

Once you have mastered the art of DIY soy candles, you’ll always have a great gift idea or creative outlet for how to spend your time. So flex that artistic muscle, experiment with some unique creations, and hone those candle-making skills!

5 DIY Halloween decorations to make your home look spooktacular

‘Tis the season to be spooky!

5 DIY Halloween decorations to make your home look spooktacular

October 31st is upon us, you know what that means! Expect little vampires, Frankensteins, ghosts, zombies, and all sorts of costumed characters come a-knocking to your door yelling “trick or treat!” 

In keeping with the spirit of the season (pun intended), make sure your home looks wickedly welcoming for your trick-or-treaters. While you could put up store-bought decor, why not make your home uniquely spooky with DIY Halloween decorations? 

You don’t need to be a master crafter; all you need is a few materials, scissors, glue and a dash of creativity. Read on for easy decorating tips that might come in handy!

1. Realistic cobwebs

Your neighbours will likely use some form of fake cobwebs to decorate their homes for Halloween, like stretched-out cotton. There’s another way to make realistic-looking cobwebs with little effort. 

Materials

  • Hot glue gun
  • Hairdryer or vacuum cleaner you can set to blow
  • Rubber gloves
  • Safety goggles
  • Table
  • Old newspapers or paper towels

Step-by-step directions

1. Plug in your hot glue gun and vacuum or hairdryer. Let the glue gun heat the glue for a bit. 

2. Once the glue gun is ready, aim your hairdryer or vacuum cleaner at what you want to coat with cobwebs. Don’t forget to set the vacuum cleaner to “blow” and expose its nozzle!

3. Turn on your hairdryer or vacuum cleaner and point the glue gun’s nozzle towards the blast of your dryer or vacuum. Release the glue gun and direct the spray of hot glue on the area or object you want to cover with “cobwebs.”

If you’re going to cover an object like a fake skull or candelabra, place the object on a table covered with old newspaper or paper towels first.

4. Repeat as necessary on objects or areas you want to cover in cobwebs. You can even make several passes to create a thicker layer. You can also use glue sticks in different colours to make the cobwebs look even ickier.

Red sticks give the impression of blood-drenched cobwebs, while green can give them a more otherworldly effect  – it’s as if alien spiders made them!

Pro-tip: Take the appropriate safety precautions, like wearing goggles and gloves. You’re using hot glue so take extra care. Keep any pets and kids at a safe distance. As this technique is a good idea for DIY outdoor Halloween decorations, this is also an excellent way to apply DIY Halloween decorations to your bedroom.

You can spray these cobwebs to the windows, corners of your ceilings, and on outdoor spots like your porch. To keep your DIY Halloween decorations kid-friendly and safe, choose areas that are visible but away from the reach of pets, trick-or-treaters and candle flames.

Photo area for Halloween with festive attributes. Fireplace, pumpkins, candles, skulls, bones, candles, chair, monsters decorations for Halloween indoors.
Source: Shutterstock

2. Easy-to-make pumpkins

Nothing screams “Halloween” more than pumpkins! These will bring your porch to life with its vibrant orange hue and enhance a spooky atmosphere. If you don’t want to go through the trouble of buying, gutting, carving out pumpkins, this is a more accessible and much less messy alternative.

This DIY Halloween decoration idea will also work well without pumpkins.

Materials

  • Scissors
  • Wire cutters
  • Flexible aluminium dryer vent hose, four inches in diameter
  • Glue
  • Spray paint
  • Coloured paper
  • Wine corks
  • Safety mask and goggles 

Step-by-step directions

1. Take the dryer vent hose. Then, using a pair of scissors, cut a length of about 24 inches. Use the wire cutters as necessary. 

2. Fold the ends into each other to form a “pumpkin,” then glue the ends together. 

3. Once the glue is dry, take your dryer vent pumpkin to a well-ventilated area. Spray-paint the pumpkin in your desired colour. Start with the top, let it dry, then flip the pumpkin over and spray the bottom, then let it dry.

You can paint them a bright orange or try other exotic colours like black or beige for variety.  

4. Make the pumpkin stem by gluing a wine cork on top. Cut the coloured paper in the shape of leaves and glue them onto the stem. You can also use real dried leaves if you find some in your backyard.

To make it stand out even more, glue on a bow made from coloured string or paper. You can also make eyes and a mouth from black paper. 

As this is easy and inexpensive to do, you can make as many of these pumpkins as you want. Display them on your porch, hallway, table setting or any other spot you want to decorate. 

3. Balloon spiders

They’re fun, easy, and highly customisable! Make this easy DIY Halloween decoration of a giant black spider. Here’s what you’ll need:

Materials

  • Two black balloons, one larger than the other
  • Black crepe paper
  • Cellphone tape
  • Black twine

Step-by-step directions

1. Inflate both black balloons and tie off their bases securely with black twine. 

2. Attach the two balloons to make the spider’s head and body. 

3. Cut eight long strips of black crepe paper of equal length and width. 

4. Tape four strips on either side of the larger balloon. 

5. Tape the finished spider to a high corner of your living room, dining room or porch. 

You can get more creative by adding googly eyes or drawing fangs and eyes with a white or red marker. Why not draw a tell-tale red hourglass shape on the spider’s rump to make it into a black widow? Or add pink glitter and make them look elegant yet spooky? 

Don’t forget to warn anyone with arachnophobia! 

4. Witches’ cauldron

Another simple but effective DIY scary Halloween decoration is the witches’ cauldron. This is one of the more popular DIY Halloween witch decorations you can do, and your decor would be less without it!

Materials

  • Dry ice 
  • Metal bucket painted black
  • Glass bowl
  • Rubber gloves or tongs

Step-by-step directions

1. Paint your metal bucket black, then set it aside to dry. 

2. Once set, place some dry ice on the bottom of the bucket. Don’t hesitate to use a lot of dry ice to create the desired amount of mist. 

3. Place a bowl large enough to fit on top of the container. 

4. Fill the bowl with candies for trick-or-treaters or other goodies. Place the smokey cauldron on a table close to your doorway or make it part of your table setting.  

Halloween. little witch child cooking potion in the cauldron with spell book
Source: Shutterstock

5. Diabolical door

This is a scary but otherwise cute DIY Halloween decoration that may make trick-or-treaters, guests, and delivery persons chuckle before knocking on your front door. 

Materials

  • Cardboard boxes
  • Black paint or permanent marker
  • Red spray paint
  • White permanent marker
  • Tape 
  • Fake spiderwebs 
  • Plastic chains and other spooky accessories

Step-by-step directions

1. Cut or tear long strips of cardboard from boxes. They should be thick and long enough to mimic wood slats that have boarded up your front door. 

2. With the white and black markers, draw fake nails on the corners of each cardboard slat. 

3. To make your door fit DIY asylum Halloween decorations, get creative with red spray paint and write frightening messages like “HELP US” or “STAY AWAY – INSANE ASYLUM!”.  

3. Attach the fake wood slats on your front door with tape or any adhesive that won’t damage your door’s paint. 

4. Appy fake cobwebs (see tips above) on the door and slats. 

5. Feel free to combine your door with other decorative touches like plastic chains, tiny toy spiders, googly eyes. To complete the experience, get the kids in cute DIY Halloween costumes to greet visitors. Or answer the door with a resting witch face (creepy make-up artists and face painting pros are easily available on Airtasker).

Remember that these are only some of the many possible DIY ideas for your Halloween decorations. While you’re at it, explore more Halloween decor ideas on the blog

Pull out the stops on making your house look haunted without breaking the bank! And don’t fret if you may not have the time to make and put up these decorations for trick or treat, you can always book an expert to help you realise your vile vision for your decorations. Have a Haunted Halloween!

How to make a DIY face mask to prevent the spread of Covid-19 

Store-bought fabric masks simply don’t always fit right.

How to make a DIY face mask to prevent the spread of Covid-19 

Face masks have become a part of our daily lives, and masks are not going away any time soon. Mask mandates may be loosening in some places, but face masks are still required in some establishments. There’s also no telling if or when Covid-19 cases go up again.

That said, we might as well opt for economical and environment-friendly face masks for everyday use. You don’t want to keep spending money on disposable face masks. Disposable masks are also not great for the environment. National Geographic says 129 billion face masks are used every month globally. That’s around 3 million face masks per minute! Imagine tons of extra waste going to landfills and finding their way into the ocean.

The benefits of using a DIY fabric facemask 

Fabric face masks not only save you money but also limit plastic waste. DIY face masks are also customizable to your fit and style. Store-bought fabric masks simply don’t always fit right. And ill-fitting masks are less effective in preventing the spread of viruses.

Here’s everything you need to know about face masks. Follow along and scroll through our step-by-step guide to making a DIY face mask. We listed down several methods, so you can pick one based on your skill level and preference.

This guide is not for medical-grade face masks. If you’re a health worker or in need of a medical-grade mask, don’t try to make your own PPE. DIY fabric face masks are ideal for low-risk everyday settings.

3 ways to DIY easy face masks 

You’re probably wondering, “What kind of DIY face mask should I use?” It depends on your sewing skills, so we’re giving you three methods for making a DIY fabric face mask. The first method is the easiest and fastest way to make a face mask—no sewing required! But if you’re looking to make a sturdier face mask, method #2 or #3 is the way to go.

Whether you have zero sewing skills or are a seasoned sewer, you’ll find some useful tips and ideas in this guide. Choose the method that works best for you, and have fun making your DIY face mask.

Where to get fabric for your face mask:

Easy DIY face masks method #1: No sewing 

Source: Karryl Katigbak

A t-shirt is all you need to quickly and easily make a face mask. If you have some old t-shirts in your closet, you can cut these up and repurpose them as face masks.

Just make sure not to use a shirt with holes or worn fabric. Ideally, you should choose a shirt with 100% cotton. The more opaque the fabric, the better.

Materials 

  • A t-shirt
  • Scissors
  • Optional: Coffee filter or paper towel

How to make a no-sew face mask with a t-shirt

  1. Measure – Measure your face from the top of your nose to underneath your chin. The usual length would be around 7-8 inches.
  2. Cut out the bottom of the shirt – Cut out the bottom part of your shirt to your measurement. You can cut more than you need and just trim the fabric later.
  3. Cut out a square into one side – Cut out a 6-inch square or elongated c-shape from one side. Then, cut the top and bottom strips in half to make ties for the mask.
  4. Try on the cloth – Put the cloth over your face and tie it around your head. Adjust the fit until it’s snug around your nose and chin. At this point, you can cut out any excess fabric.
  5. Optional – Place a coffee filter or paper towel inside the mask. Secure with a safety pin.

Alternative: Bandana face mask 

If you prefer a no-sew, no-cut method, the bandana face mask is a great alternative. And you can make this face-covering in under 60 seconds!

Do keep in mind that this method won’t work on all types of bandanas or scarves. If it’s too thick, it won’t be breathable. If it’s too thin, it won’t provide enough protection. The best material to use is 100 percent, tightly woven fabric. Again, the more opaque, the better.

Materials 

  • A bandana or scarf
  • Hair ties or rubber bands (2 pieces)
  • Optional: A coffee filter or paper towel

How to make a bandana face mask

  1. Fold – Fold the bandana in half. Then, fold the top and bottom, so each side meets the middle.
  2. Insert the ties – Slide a hair tie onto each end of the bandana (i.e. left and right side). Then, fold the sides toward the middle. Tuck each side into each other if you can.
  3. Optional – Insert a coffee filter or paper towel into the cloth and secure it with a safety pin. Make sure to change the coffee filter or paper towel regularly.

Easy DIY face masks method #2: Sewing by hand 

Person sewing a face mask by hand
Source: Kelly Sikkema on Unsplash

This pattern is for a slightly rounded mask. If you prefer the rectangular-type mask, you can skip right over to method #3.

Materials

  • Cotton fabric (10-11 inches)
  • Needle and thread
  • Rubber bands or hair ties (2 pieces)
  • A plate or something round for the template (10-12 inches in diameter)
  • Scissors
  • Pins

How to hand-sew a rounded mask

1. Make the base pattern.

  • Place the plate on top of the fabric and draw around the plate.
  • Cut out the fabric to get a circle.
  • Fold the circle in half, then fold it again. You’ll end up with 4 rounded triangles, like a pizza with 4 slices.
  • Cut out each shape, so you get 4 pieces of cloth.

2. Assemble the pieces.

  • Place two shapes on top of each other. One shape should be facing up, while the other one is facing down (i.e. the correct sides are facing each other). Repeat for the other two shapes. After this step, you’ll have two pieces.
  • Sew along the curved edges of each piece.
  • Unfold your two triangles to get two dome-like pieces.
  • Stack the two domes on top of each other.
  • Pin your mask in place and sew around the edges. Leave a small gap on one end.

4. Turn the mask right side out.

  • Pull the cloth through the small gap. Careful not to tear your fabric!
  • Stitch up the small gap.

5. Insert the elastics

  • Make a hem on both sides by folding each pointy edge over itself. Sew in place.
  • Insert one elastic through each hem. Use a needle or safety pin to thread the elastic through the hem.
  • Tie up the ends of the elastic. And there you have it!

Easy DIY face masks method #3: Using a sewing machine 

Making a purple mask using sewing machine
Source: Sarah Le on Unsplash

This method might seem a little daunting, but it’s actually easy if you take it one step at a time. If you don’t have a sewing machine, go ahead and sew this mask by hand. Now’s your chance to practice your running stitch!

Choose a fun pattern and sew to your heart’s content. These face masks also make great gifts you can give out to friends and family.

Materials

  • Cotton fabric (around 15 x 8 inches)
  • Elastic (2 pieces, 7 inches each)
  • Sewing machine
  • Needle and thread
  • Scissors
  • Pins

How to make a rectangular face mask using a sewing machine

  1. Make the base pattern.
  2. Cut your fabric to 15 inches by 8 inches.
  3. Fold the cloth in half.
  4. Draw 3-inch lines on the top and bottom edges of your fabric. Then, sew along these lines. The space between your marks will make a pocket for an optional filter.
  5. Insert the elastics.
  6. Move the seam to the center.
  7. Insert an elastic into each side (top and bottom) of the cloth.
  8. Pin each corner on each side of the mask to hold the elastic in place.
  9. Sew along the edges to close up the sides and secure the elastic.
  10. Make the pleats.
  11. Press the fabric to turn it right side out.
  12. Mark each side by placing pins 1 inch from the bottom. Keep placing pins all the way across. Space out the pins, following these measurements (bottom to top): 1″ – 1″ – 1/2″ – 1″ – 1/2″ – 1″
  13. Fold the fabric, lining up the pins on both sides.
  14. Sew along the edge on both sides to keep the pleats in place

If you want to master your sewing skills, you can book some online sewing lessons. But if you need several face masks made or want a professional touch, you can hire a seamstress instead.

Does your face mask fog up your glasses? A properly fitted mask can prevent this problem. To keep air from escaping through the sides, create a seal on the upper part of your mask. A foldable item like a paper clip, twist tie, or folded piece of aluminium foil should do the trick!

How to make your face mask more effective

According to the World Health Organization, fabric masks should ideally have three layers of material. Three-layer fabric masks provide better filter efficiency than cotton masks with only one layer.

The WHO recommends this combination of materials for fabric face masks:

  1. Inner layer – Absorbent material, such as cotton, a cotton-polyester blend. Since the inner layer comes in direct contact with your face, this fabric should easily absorb droplets that you exhale. Choose a light color like white, so it’s easy for you to tell when your mask is soiled or wet. You can use a woven or knit cotton t-shirt. Make sure the fabric is breathable and comfortable.
  2. Middle layer – Non-absorbent material like polypropylene or other non-woven fabric. This fabric will act as the filter and go into a pocket between the inner and outer layers of your mask.
  3. Outer layer – Non-absorbent material like polyester, polyester blend, or polypropylene. The outer layer should be hydrophobic to repel droplets.

You can incorporate these materials into the DIY face masks we’ve listed above.

Frequently asked questions

How do I clean my reusable face mask?

Wash your reusable face mask every day or whenever it gets dirty. You can wash your face mask with a washing machine or by hand. When using a washing machine, you can include your mask with your regular laundry. Check the fabric label for the appropriate washing machine settings. When handwashing, use tap water, and laundry detergent or soap. Dry your mask in a warm or hot dryer. Otherwise, you can hang your mask under direct sunlight or lay it flat to let it dry.

How do I check if my face mask fits properly?

Make sure your face mask covers your nose, mouth, and chin. There should be no gaps above, below, or on the sides of your mask. Also, your mask should stay in place and not shift when you speak or move. Air shouldn’t pass through the edges of your mask to prevent the virus from getting in or out.

When should I wear a face mask?

Wear a face mask in areas where Covid-19 may be circulating. These areas include crowded places like malls, restaurants, schools, and public transport. If it’s impossible to stay 1 meter away from people, it’s best to wear a mask. You should also wear a mask in rooms with poor or unknown ventilation. The same goes for your home if you’re having visitors. When in doubt, wear a mask.

How do I properly wear and remove my mask?

Clean your hands before you have to touch your mask at any time. Wash or sanitize your hands before you put on or adjust your mask. You should also clean your hands after your touch your mask. When not wearing your mask, don’t wear it on your chin or around your wrist. Instead, keep your mask in a clean ziplock bag or plastic bag. Practice social distancing at all times even when wearing a mask.

Should I wear a mask while exercising?

No. You shouldn’t wear a mask while doing intense exercise. A face mask will limit your breathing capacity during such physical activities. Instead, stay at least 1 meter away from people while you exercise. Indoor areas should have enough ventilation. Better yet, limit your outdoor workouts and exercise in a spacious area in your home. You can hire a personal trainer who can coach you via Zoom and keep you on track with your fitness program.

The best DIY face masks are the ones you’ll use properly to protect yourself

Imperfect is better than nothing. It’s better to wear an imperfect mask than not wear a mask at all. So if your DIY face mask turns out less than perfect, wearing it when you go outside could still make a difference. For added protection, you can pair your DIY cloth mask with a disposable surgical mask underneath – note that you can’t really DIY medical face masks. (Here’s how to layer masks for additional protection!)

Should you need extra help or a volume of customized face masks for your company or loved ones, consider hiring an expert seamstress on our platform.

Additionally, your face mask will be most effective through proper use, storage, and cleaning. Don’t forget to practice social distancing and regularly disinfect your home, too! You can even hire a professional to deep-clean your sofa or carpet every once in a while.

Many things may feel out of our control nowadays, but practical solutions can alleviate your worries and keep you safe. With simple habits like wearing homemade masks, we can slow the spread of the coronavirus and get through this pandemic together.

40 School holiday activities for the entire family

The school holidays are upon us! Here's how you can keep the kids (and kids at heart) entertained.

40 School holiday activities for the entire family

The school holidays are here again, and you’re running out of ideas to keep the kiddos preoccupied.

Don’t fret! Whether you’re looking for something they can enjoy doing indoors or outdoors, we’ve got you covered!

Check out our list of fun and educational activities the kids can do by themselves, with their siblings, friends, and even the entire family!

1. Read a book as a family

Enter the magical worlds of Harry Potter, Willy Wonka, and Aslan! Now that they’re on break, they have all the time in the world to read their favourite adventure books or fantasy novels.

Make it a family affair for the younger ones and set aside storytime sessions to tickle their imaginations.

2. Play pretend and dress up

little boy playing dress up
Source: Jessica Rockowitz via Unsplash

There’s nothing like a free school holiday activity to keep everyone entertained, and this one involves dressing up! Who says you have to wait for Halloween?

Let your kids channel their favourite movie actors or cartoon characters and turn it into an amusing game of guess who!

Bust out a couple of old costumes or formal wear, or even some of your own clothes and accessories they can mix and match. Have them choose and watch them transform before your very eyes!

3. Brush up on school lessons

Now that school has taken a break, your kids can also use the extra time to brush up on subjects they struggle with.

You can make your own worksheets for them to work on or hire an online tutor who can help with various lessons so they’ll be ready once classes resume.

Check out these Listings:

4. Take up dance lessons

Has your child ever expressed interest in ballet? Or maybe they love doing dance challenges on TikTok? Whatever the case may be, why not take their talent to the next level and sign them up for dance lessons?

girl taking online ballet classes at home
Source: olsim photo via Shutterstock

Not only do they get to express themselves through their favourite steps or routines, but they also get to stay active. If you’re looking for something remote, you can find dance instructors who can take the sessions online.

5. Schedule an online party with friends

If your kids are looking for fun interaction with their friends during the school holidays, why not set up an online party? It’s quick and easy, and you have plenty of options as well.

You can organise a virtual movie marathon and have them watch the latest Disney films or maybe even arrange a few online games like charades, Pictionary, or Heads Up!

6. Start a diary

Settling into a routine is important even during school holidays. Set a time every day for your kids to write down all the things they did during the day and what they think was most memorable for them.

They can also start a bullet journal to jot down their thoughts, favourites, goals, or whatever they feel like writing. Doing this can help improve their language skills, and they can even have something to read back on when they’re all grown up!

7. Go on an indoor scavenger hunt

Who doesn’t love a good scavenger hunt? Leave a trail of clues or riddles all over the house and have everyone hunt for hidden treasure, which could be anything, really!

A mini treasure chest filled with your kids’ favourite treats, the newest video game for the whole family to enjoy – it’s all up to you!

8. Make your own in-house gym

Roll out the yoga mats and bring out the jump ropes! Regular exercise can do wonders for our immune system, so get everyone involved in fun fitness activities.

If you’re not sure where to start, you can get a professional fitness trainer to develop indoor-friendly fitness routines that require little to no equipment. For extra safety, ask if they can offer their sessions online so you won’t have to worry about going out.

9. Get creative with art lessons

kids learning arts through online art classes
Source: Natalia Deriabina via Shutterstock

Transform your kids’ play areas into their own art studios this school holiday! Art tutors can hold virtual painting or drawing lessons that can be perfect for beginners or budding artists.

You can also have your kids join online art classes with Bondi Paint Club or participate in Art Est’s School Holiday Online Program.

10. Connect through video games

School holidays can mean more time for your kids to indulge in their favourite video games! Give them a specific time during the day to play fun games like The Legend of Zelda, Super Mario Odyssey, or Animal Crossing.

Keen to join in on the fun? You can opt for multiplayer games like Overcooked! 2 or Mario Kart and make it family game night!

11. Go cycling together

boy riding a bicycle
Source: RODNAE Productions via Pexels

Another way to keep active is to cycle through parks and bike trails in your city! If you’re on the lookout for Queensland and Western Australia biking spots, you can easily go around Jim Soorley Bikeway or Burns Beach for a scenic ride.

Make sure to have all your bikes assembled and safety gear ready to go before anything else.

12. Spark creativity with writing prompts

There’s no better time to let their imagination run free than during the school holidays. If your kids have always been the writing type, you can prepare writing prompts and activity books to encourage writing as a talent!

13. Start a scrapbook

Get the washi tapes, coloured markers, and glitters out for this one. Scrapbooking is another fun way to bring out their creative side! Show them a few decorating tips and tricks to preserve their favourite memories with friends and families in an artistic way.

14. Conduct science experiments at home

kids doing science experiments at home
Source: MART PRODUCTION via Pexels

Doing science experiments can be a unique learning school holiday activity as well. Museums Victoria created an entire playlist of crafts and activities based on different scientific concepts if you’re looking for ideas. These experiments are great for both kids and grown-ups, which can make for great bonding experiences!

15. Get crafty with DIY

Aside from science experiments, you can also have the entire family try their hand with DIY crafts. ClassBento offers various virtual classes for all ages, and they even deliver craft kits that have everything you need for your project straight to your home!

The possibilities are endless, from watercolour painting for beginners and crafting polymer clay earrings to making a DIY Turkish mosaic lamp!

16. Set play dates

We bet your kids would want nothing more but to run around parks and fields with their friends. If you live around Brisbane, you can take your kids to South Bank to explore their many play and water park areas.

If you’d rather stay indoors, a virtual meet-up is always a good idea. Hire a child entertainer to do a few magic tricks or a puppet show for a fun twist!

Check out these Listings:

17. Beat boredom with board games

Put aside all your devices and play some good old-fashioned board games with the entire family. There are tons of games to choose from!

Lead an ancient civilisation in 7 Wonders, acquire the most money in Monopoly, or win an exciting match of Hedbanz against mum and dad.

18. Keep busy with activity and sticker books

girls colouring with markers
Source: Alan Rodriguez via Unsplash

You can never go wrong with activity books to keep the little ones preoccupied. Get them a colour-by-numbers book and watch them use every crayon in the box!

Animal sticker books are also a great option as your kids can delight in learning fun facts while meeting each cute, cuddly, or strong creature in their natural habitat.

19. Learn a new language

Younger kids are at the perfect learning age to develop fluency in various languages. Aside from improving their cognitive skills, learning a new language can also make them feel more connected with different cultures.

If they’re up to trying something totally new, why not encourage them to sign up for language lessons? They can take their pick, whether it’s French, Spanish, or Korean!

Check out these Listings:

20. Have a movie marathon

Nothing says school holiday like a good, old-fashioned movie marathon! Set up your home theatre, bring out the popcorn, and cuddle up in blankets for this one. You can even come up with a theme (superhero movie night, perhaps?) or let the kids call the shots!

21. Immerse in performance arts

This year, Parramatta’s Riverside Theatres has prepared an exciting school holiday lineup. Go on a little field trip with the whole family and introduce the kids to the wonders of interactive shows and performance arts!

22. Learn how to play an instrument

boy learning how to play the guitar online
Source: antoniodiaz via Shutterstock

Whether it be piano, guitar, or violin, learning a new instrument is a classic holiday activity that can carry over to the next school year. Enrolling them in music lessons doesn’t just keep them busy, but it also hones your child’s fine motor skills and work habits.

Check out these Listings:

23. Power through power walks

Going on a power walk around the neighbourhood can also be a great way to stay fit and active during the school holiday. While it can be tempting to just lay on the couch all day, nothing beats stepping outside and getting some fresh air. Go ahead and let the kids tag along, too!

24. Host theme nights at home

Give your family something to look forward to by coming up with theme nights at home! Prepare a full Mexican spread for Taco Tuesdays, or get everyone to dress up and recreate silly family photos from 10 years ago for Flashback Fridays.

You can also surprise the kids with a “Yes Day” where you just say yes to whatever they ask for. Sugary cereal for breakfast? Sure! Maccas for dinner? Say no more!

25. Join a baking or cooking class

If your kids love helping around the kitchen, why not consider booking an online cooking class? Guide them as they learn the basics, discover new recipes, and even meet new friends virtually. Soon enough, you’ll have your very own little sous chefs cooking dinner alongside you!

26. Explore the wonders of marine life

SEA LIFE Melbourne offers a plethora of activities for kids who have a profound fascination with marine life.

They can choose to explore any of the 12 interactive zones, which include a Penguin Playground where they can meet King and Gentoo penguins.

They might also enjoy SEA LIFE Melbourne’s Interactive Wonder Wall exhibit where they can draw and colour their own jellyfish and watch it float on the interactive screen!

27. Stay cool by the pool

little gitls swimming in pool
Source: Juan Salamanca via Pexels

If you have a swimming pool at home, take advantage of sunny days during the school holiday and go for a swim! The kids will surely love playing around with water guns and inflatables while making a splash.

Just make sure that your pool is in tip-top shape before the kids go in. Oh, and don’t forget the sunscreen!

28. Master the art of macramé

If knitting and crocheting are too difficult for your kid’s little hands, you can introduce them to macramé! It’s basically tying knots and forming patterns out of them, making it an easy crafts project for children.

ClassBento has plenty of online macrame workshops perfect for kids and beginners – start with something simple like a keyring, then maybe they can try their hand at wall hanging pieces.

29. Nurture little green thumbs

Adding garden chores to your kid’s daily routine can be beneficial to their overall well-being. Not only does gardening increase their physical activity, but it also exposes them to nature and the joys of growing plants and fresh food.

You can have them water the plants, pick out flowers, or even take out the weeds. If there’s ample space, you can even give them their own gardening area where they can plant their own seeds.

30. Bring out the bling

Crafting jewellery also be a fun and productive school holiday activity, so take out the bead kits for your little divas at home!

Help them experiment with different styles, colours, and patterns for all sorts of accessories.

They can make friendship bracelets for their BFFs, handmade earrings for themselves, or even dainty necklaces that can make for lovely gifts.

31. Playtime in the playground

If you live near your local playground, you can bring the kids over for some fun afternoon playtime. Being cooped up indoors for days can take a toll on anyone, so it’s always good to have some time outdoors to break the monotony brought by the lockdown.

Just make sure to wear a mask, sanitise, and follow your LGA’s safety guidelines when going out.

32. Organise a themed photoshoot

Your kids will definitely go crazy over this one! Set up a makeshift photo studio at home and transform them into models for the day. You can also hire photographers if you don’t have the equipment at home.

Get inspiration from their favourite Marvel characters, or you can also dress them up for a Spring-themed photoshoot!

little girl posing in front of camera
Source: Yuganov Konstantin via Shutterstock

Want to take things up a notch? Take a cue from actual shoots and do craft services! Get their favourite desserts delivered for snacks in case they need a break from posing for the camera.

Check out these Listings:

33. Get them into theatre

Keen to introduce your kids to theatre and musicals during the school holiday? Disney+ lets you watch the remarkable story of Alexander Hamilton, while Threshold offers an audio-led experience that allows you to bring the theatre to your living room.

34. Take a trip to the museum

Depending on where you are in Australia, visiting museums can be done either virtually or in person. The Art Gallery of NSW’s Together in Art features artist-led projects where kids can submit artworks based on a particular theme.

They even have art-making videos and free downloadable activities on their website so your child can keep the creative juices flowing.

Meanwhile, if you’re within Queensland, take the trip to Queensland Museum’s SparkLab where your kids can geek out on live science experiments and out-of-this-world exhibitions.

35. Go camping

Camping with the whole family will surely make this school holiday a memorable one. Pitch a tent in your backyard, roast some s’mores, and just enjoy each other’s company.

little girls inside indoor tent with lights
Source: HQuality via Shutterstock

If you don’t have the space, set it up in your living room! You can even use twinkly LED lights to give the illusion of stars once you turn off the lights.

36. Book a pottery-making class

Local studios like Clay Sydney offer classes and courses who want to try their hand at pottery! They also have a “Clay at Home” option where they deliver pottery kits to your doorstep, so you won’t have to worry about gathering materials.

You can also book an instructor that specialises in decorating so your kids can bring their marvellous pottery creations to life!

37. “Visit” the zoo

Even zoos have found a way for kids to see their favourite animals from home! Taronga Zoo launched a live stream platform so that your kids can see what the kangaroos, koalas, and meerkats are up to!

38. Train like Karate Kid

Introduce your kids to martial arts so they can channel their inner Karate Kid while on holiday. Find a martial arts class online where they can learn the fundamentals. This school holiday activity can even become part of their routine once school is back in session.

Check out this Listing:

39. Stroll through majestic gardens

Take time to smell the roses during the school holiday! It can get incredibly dull to be around the same four walls of your home, and your kids might be feeling it, too.

Drop by the Royal Botanic Garden Sydney for stunning views of the Sydney Opera House or glimpse wildflowers at Kings Park Perth.

40. Go on a lovely picnic

family enjoying outdoor picnic
Source: Kampus Production via Pexels

Whether you’re laying out your picnic blankets in a nearby park or just in your backyard, you’re sure to have a wonderful time! You can even pack up a picnic basket with your kids’ favourite snacks and juice boxes as you enjoy a laidback afternoon with the family.


These are just some of the many fun school holiday activities that kids (and kids at heart!) can enjoy without having to go far.

With a bit of inspiration and creativity, you can keep the whole family entertained and make quality time more meaningful than ever. Have fun!

How to stay fit when lockdown forces you onto the couch

Fitness is hard enough let alone being stuck within the walls of your home; we've found some tips to help.

How to stay fit when lockdown forces you onto the couch

For some people, gyms closing during a lockdown is a real issue; for others, it creates the perfect excuse to continue not going. Either way, learning how to stay fit in a lockdown is crucial for several reasons. Good physical fitness improves your immunity along with your mental health, two things that we want in tip-top shape whilst handling a pandemic!

We know lockdown seems like the perfect reason to grab a bag of chips and sit on the couch; it’s your civic duty to do this after all! However, it’s always good to balance everything out and remain active, even if it means just walking around the house to reach 10,000 steps a day.

So how do we keep fit when we are only allowed outside for an hour and confined to our homes the rest of the time? If you happen to live in a gym, this article isn’t for you; if you don’t, read on.

The first hurdle for how to stay fit: Lack of motivation

For many people, going to the gym is what inspires (or forces) a workout. Take that out of the equation, and it can be easy to skip leg day and all of the other days as well. That said, it’s important to prioritise your workouts so you can keep your mind and body healthy.

Making your workout part of your schedule (preferably early on in the day) is a great way to beat the lockdown blues. It fills a portion of your day and can even energise you for whatever you have happening afterwards, even if it’s just a day of binge-watching TV shows (you’ll watch those shows with gusto – go good, guys!)

Set the alarm, get up a bit earlier than usual, or set a timer to stop for a workout in the middle of the day. Make use of your one or two hours of allowed exercise time and go for a run or walk; we promise you will feel much better about everything if you do.

How to stay fit and healthy
Source: Alonso Reyes via Unsplash

Create some specific goals

Just like you may be taking up a lockdown hobby and learning Spanish or the guitar, set some fitness goals to aim for as well. A structured training regime will keep you on track and self-motivated. The silver-lining of training at home means fewer external distractions so that you can achieve more.

Maybe you want to leave lockdown with abs or be able to run your 5km distance allowance and back comfortably? Whatever it is, working to achieve a specific outcome and planning how you’ll make it happen makes you more likely to keep at it.

How to stay fit with online workouts

It has never been easier to get professional coaching for home workouts – and lots of it is for free. YouTube has no shortage of professional trainers offering online classes, from yoga to Pilates and even weight training.

Related: How much does a Pilates class cost?

You can also pay a small monthly fee for a range of app-based workouts and meal plans. Want to train with Chris Hemsworth? Easy, his Centr app is as low as $10 a month with all the classes and meal advice you need, and it even offers a free trial to help you see if it’s for you.

There are also the Millionaire Hoy HITT workouts on YouTube free of charge. You can even find an online personal trainer to conduct your classes via Zoom if you want to level up. Remember, when it comes to staying fit in a lockdown, you can also get creative and try to keep things fun. Do TikTok dance videos and Wii Tennis count as a workout? You betcha!

Maintaining a balanced diet

Staying fit isn’t all about physical exercise; you also need to couple it with healthy and fresh food. One of the biggest pitfalls of lockdown is snacking. You are at home, bored, watching TV… it’s easy to crack open another bag of potato chips to go along with it! So avoid buying snacks during your weekly shop to remove the temptation.

Focus on buying foods that will boost your energy and immune system, and it never hurts to add in some supplements like Vitamin D, Vitamin C and Zinc to improve your immunity.

Looking after your mental health

The final piece of the fitness triangle, along with physical exercise and diet, is mental health. Just 30-60 minutes of exercise a day improves your lung capacity and heart function, which leads to positive mental health when coupled with a good diet.

Many things can brighten up your headspace in lockdown, from meditation to Zoom calls with friends to do an online quiz. Find what works for you and make it part of your daily routine.

How to set up a home gym/fitness equipment at home + hacks

If you’re lucky and have a spare room or garage space, great; if not, find a small area in your home to set up a basic home gym to get started. The most important thing is creating an inviting fitness space that can fit an exercise mat at the very least.

  1. Make enough space or clean out the spare room
  2. Order some basic equipment (yoga mat, skipping rope, kettlebells) 
  3. Ensure you have a Bluetooth speaker or headphones 
  4. Optional: Add bigger equipment like a bench press or exercise bike
  5. Set up a TV or small monitor for Youtube videos and remote fitness instructors

You can find Taskers who can help with clearing your space and even some who can assist with home gym assembly. You can also kick-start your training routine with a range of fitness experts.

Equipment 

You don’t have to max out the credit card on Amazon and fill your house with gym equipment. For example, the treadmill for your cardio workout can become a quick run outdoors, and dumbbells and barbells can be large bottles of water or cost-effective resistance bands. You can also rent gym equipment to get you through the pandemic then return to avoid clutter later.

Storage-friendly solutions

Storing your gym equipment is made easier if you tailor your workouts around accessories like a jump rope or smaller dumbbells. A folding exercise bench or compact weight rack can be a great option for those who have a little more room and want a more intense workout.

How to stay slim and fit
Source: Dane Wetton via Unsplash

Frequently asked questions

How do you stay active during the COVID-19 quarantine?

Take an online exercise class, many of which are free on YouTube. It’s also a good idea to walk as much as possible. Walking around or walking on the spot helps you remain active. It is also vital that you reduce your sedentary time by standing up as much as possible throughout the day. Interrupt your sitting time every 30 minutes and consider a standing desk if possible.

How long should I exercise during quarantine?

The World Health Organisation (WHO) recommends 150 minutes of physical activity with moderate intensity each week or 75 minutes with vigorous intensity. You can also do a combination of both throughout the week.

What are some exercises that you can do to stay physically active during quarantine?

The following are good at-home exercise options during lockdown:

  • The Bridge: Plant your feet firmly with the knees over heels. Lift the hips as much as possible and slowly lower them. Repeat 10–15 times and rest for 30–60 seconds for five sets to strengthen the glutes.
  • Chair dips: Hold onto a chair seat and place your feet about half a meter away. Bend your arms, lowering your hips to the ground, then lift yourself back up by straightening your arms. Repeat 10–15 times, rest for 30–60 seconds, for five sets to strengthen your triceps.
  • Chest openers: Interlace your fingers behind your back, then stretch your arms to open your chest forward. Hold the position for 20–30 seconds, stretching your chest and shoulders.
  • Child’s pose: This common yoga move requires you to sit with your knees on the ground and hips on heels. Place your belly on your thighs and actively stretch your arms out in front of you. Bring your head as close to the ground as possible for a full-body stretch.

Prioritise your health and wellbeing during lockdown (and at all other times)

As annoying as lockdown can be, it’s always worth prioritising your fitness. The benefits you’ll see will be well worth the effort, plus it helps kill a lot of time!

If you are inspired, we have a bunch of Taskers that can help with everything from home gym equipment assembly to personal training. You can consult with a professional nutritionist to help you keep track of your diet.

Trust us; the hardest workout is the first one. Once you get going, you may get a little addicted to how good you feel! Couple this with the benefits of working from home, and you’ll see that lockdown doesn’t have to be so bad (don’t get us wrong, we still want out). Hopefully, your lockdown fitness routine becomes a staple of your schedule well into the future, and you live a healthier, happier life moving forward!

Make sure to check the lockdown restrictions in your state or area before booking home or mobile services.

How to disinfect your home to stay comfy and safe during lockdown

Your home is your safe space, especially in lockdown, so let's make sure it stays that way!

How to disinfect your home to stay comfy and safe during lockdown

So there’s this pesky virus floating around, and it’s the reason why we’re stuck inside. Since we are confined to our homes, multiple games of Uno, the darkest corners of Netflix, and the same damn pair of sweatpants every day, it’s important to learn how to disinfect the right way. To help, we’ve turned to the Center for Disease Control and Prevention (CDC) because, as their name suggests, they know a thing or two about disease prevention!

The good news is, it’s pretty simple. A standard household soap or detergent reduces the number of germs on a surface and decreases the risk of infection. This alone can be enough to remove most virus particles in the home.

Disinfecting your home is a crucial way to reduce transmission of COVID-19. Read on to find out how to keep your space sparkling clean and virus-free!

When and how to disinfect homes the right way

  • High-touch surfaces (doorknobs, tables, handles, light switches, and countertops) should be cleaned daily and after you have visitors (when that is allowed again).
  • Other surfaces should be cleaned when they are visibly dirty or more frequently if you have high-risk family members.
  • Clean with a suitable product for each surface, and always follow the label instructions. 

Reducing the contamination of surfaces

Limiting the contamination of surfaces in your home from airborne particles or contaminated hands is also a good idea. This can lessen the amount of cleaning you have to do whilst also ensuring things are as safe as possible. Consider these tips:

  • Ask visitors to wear masks.
  • Isolate people who may be ill.
  • Wash your hands regularly, especially when coming home from outside activities.
man washing his hands thoroughly
Source: Sean Horsburgh via Unsplash

How to disinfect your home safely

It is important to disinfect your home regularly because it kills any remaining germs that may be hanging out on surfaces while also reducing the spread of germs. Follow these steps to disinfect your home, and always remember to keep disinfectants out of the reach of children:

  1. Read the directions on the label.
  2. Wear personal protective equipment (PPE) such as gloves, glasses, or goggles.
  3. Start with visibly dirty surfaces and opt for household cleaners containing soap or detergent before disinfecting (some disinfectant products have a cleaning agent – the label will verify).
  4. Keep the surface wet with disinfectant for whatever period the label recommends.
  5. Always make sure you have some ventilation while using disinfectants. Open doors and windows or use fans to improve airflow.
  6. Wash your hands with soap and water immediately after disinfecting.

How to use chemical disinfectants safely

  • The directions on the label are important. Follow these carefully to ensure you are practising safe and effective cleaning methods.
  • Wear PPEs, especially if the directions on the product label recommend it.
  • Ensure adequate ventilation. 
  • Extra disinfectant doesn’t mean you are extra clean. Stick to the amount recommended on the label.
  • If you need to dilute the water, stick to room temperature (unless the label says otherwise); germs aren’t like the Wicked Witch of the West, so boiling water isn’t always effective.
  • If you are diluting cleaning or disinfectant solutions and putting them in a DIY container, make sure you label them. We don’t want anyone thinking it’s your freshly squeezed orange juice by mistake!
  • Store chemicals out of reach of children and pets.
  • Never mix chemicals to try and create your own super chemical. It doesn’t work and is very unsafe.
  • Do not eat, drink, breathe, or inject disinfection products, as this will cause serious harm.
  • Your pets are probably particularly filthy as we (and they!) know mud is fun BUT you must never try and clean them with surface cleaning or disinfection products. To be clear, the dog is not a table.
  • People with asthma may have it triggered by specific cleaning and disinfection products. You can learn about reducing your chance of an asthma attack while disinfecting here.

How to disinfect home surfaces and gadgets

Various areas of the home and certain gadgets require different disinfecting processes. For example, the method for how to disinfect iPads is different to how to disinfect sofas. Here are some of the key ones:

Soft surfaces (carpet, rugs, and drapes)

  • Clean with soap and water or with cleaners specifically made for these surfaces.
  • Launder whichever items are possible with the warmest appropriate water setting (ensure they dry completely before popping them back to their spot).
  • Disinfect if needed.
  • Vacuum regularly.

Laundry items

  • Use the warmest setting allowed.
  • Dry all items completely.
  • Clean the clothes hamper as well.
  • Wash your hands after touching dirty laundry.

Electronic items

  • Consider using a wipeable cover on any electronic items (phones, tablets, touchscreens, remotes, keyboards) to make cleaning easier.
  • Always check the manufacturer’s instructions when it comes to cleaning electronic devices.
  • Be aware that many cleaning products for electronic items contain alcohol which dries quickly.
cleaning work table
Source: Towfiqu barbhuiya via Unsplash

How to disinfect your iPhone or iPad

Your iPhone or iPad (or other similar devices) are handled regularly, so it is important to clean them regularly (you’ll need some lint-free cloths). 

  1. Power down the device.
  2. Wipe with a dry lint-free cloth.
  3. Avoid any liquids or moisture getting into the openings.
  4. Avoid compressed air or incorrect cleaning products.
  5. Use specific electronic disinfectant products and follow the steps on the packaging.
  6. Allow the device to dry properly before using (this will be quick).

Frequently asked questions

What is the best household disinfectant for surfaces during COVID-19?

Standard household cleaning and disinfection products will effectively eradicate the virus from surfaces. Cleaning and disinfecting households during COVID-19 involves surface virucidal disinfectants that include 0.05% sodium hypochlorite (NaClO) and other cleaning products that feature ethanol (at least 70%).

What is the recommended bleach concentration to disinfect surfaces from COVID-19 in non-healthcare settings?

In non-healthcare settings, sodium hypochlorite (bleach/chlorine) can be used at a concentration of 0.1% (1 part of 5% strength household bleach with 49 parts water). Alcohol at 70-90% is also effective for surface disinfection.

Is fumigation effective against COVID-19?

In indoor spaces, the routine application of disinfectants to surfaces by spraying or fumigation (misting) is not recommended to combat COVID- 19.

How do you properly wash your hands to avoid getting COVID-19?

It is important to wash your hands often and thoroughly using soap and water for roughly 20 seconds. An alcohol-based hand sanitiser is also effective if your hands are not visibly dirty. Avoid touching your eyes, nose, and mouth if your hands are unwashed. If putting on or taking off gloves and masks, it is essential to wash your hands.

A cleaner lockdown is a more pleasant lockdown

While lockdowns are about keeping us safe in our homes and away from the virus, you must ensure your home itself is also safe. The instructions above are simple and a great way to fill all this extra time at home!

If allowed based on your state’s lockdown rules, plenty of Taskers are available to help with cleaning around the home. You can also get other forms of assistance during this trying time with grocery delivery and fresh food delivery.

Make sure to check the lockdown restrictions in your state or area before booking home or mobile services.

If you are reading this article because cleaning has become your new lockdown hobby, we have some more helpful reading for you! One of the trickier places to clean is the oven, so learn the best way to get in there for a clean with this helpful article.

Stay safe during lockdown and keep a clean home so we can all do our part and say “bye, Felicia” to this virus once and for all!

Discover minimalist storage: How to build floating shelves

Is it magic? Good floating shelves look like they defy physics!

Discover minimalist storage: How to build floating shelves

Built-in shelving isn’t always a practical option, and it can look cluttered and over-bearing at times. With some easy-to-create DIY floating shelves, however, you can install your own storage whenever and wherever you like while also achieving a stunning display method for books, photos, and more.

DIY floating shelves look good and don’t require much space. With our simple steps below, they are a great option for rooms that are short on square footage. These shelves allow you to utilise vertical space while adding a touch of your personality to the room. We love to load our DIY floating shelves up with draping plants to really give the room some life!

DIY floating shelves can be an easy woodworking project for those comfortable with power tools. The practical tips below will help you achieve an affordable, custom décor piece that you’ll be able to build in any sized space.

Easy DIY floating wall shelves: The materials you’ll need

You may be sitting there asking, “why don’t I just buy some floating shelves from IKEA?” This certainly is an easier option (although they will still require some DIY set-up), but the biggest issue here is the less custom look. When you pre-buy your floating shelves, you are restricted to certain colours, sizes, and shapes.

For the same price or less, in some cases, you can create your own DIY floating shelves that are tailored to your home’s aesthetic. To do this, you’ll need to gather these materials:

  • 2” x 10” pine board
  • Mitre or circular saw
  • Pencil
  • Drill
  • Hand or bench router with a dado router bit
  • ½” paddle bit
  • Sandpaper (medium grit)
  • Old cloths
  • Stain or paint
  • Paintbrush
  • Adjustable Floating Support Invisible Brackets
  • Level
  • Drill press (optional)
  • Polyurethane (optional)

How to build simple floating shelves DIY: Step-by-step

We have tried to make the steps below as simple as possible! We recommend putting aside about half a day to build these DIY floating alcove shelves (not including any drying time). You’ll have a custom, high-quality storage solution that looks great in no time at all!

Step #1: Prepare materials and cut boards down to size

If you aim to make this process as cost-effective as possible, we recommend buying a larger piece of wood that can be cut into smaller sections. Do this using a mitre or circular saw and customise the size based on the space you plan to hang them in.

Larger shelves will need to consider extra support, as it is important you don’t put more weight on your shelves than they can handle. This will lead to some serious drooping (and will look terrible/be dangerous).

easy diy floating wall shelves
Source: Hello I’m Nik via Unsplash

Step #2: Notch the back of the shelf to allow for the hardware

Use a hand router to create a notch on the back of your freshly cut planks so the hardware can be installed. In most cases, the notch should be 1/2” deep; however, this may vary with different pieces. Check the instructions on whichever hardware you purchase before creating your notch.

Do not skip this step! The notch is important as it will prevent a gap when you hang the shelves between the wall and the shelf due to the hardware. We’re aiming for a professional, clean look after all!

Step #3: Drill the hardware holes

You have some options when it comes to drilling your holes. If you’re using a hand drill, opt for a paddle bit to drill holes in which your hardware should just slide into place. Aim to make these holes about 4” deep, and always follow the instructions that come with your hardware to note any required exceptions.

If you are less than confident when it comes to straight holes, start with the paddle bit, then finish with a drill press. The reason why we recommend this is the paddle bit makes it easier to start each hole accurately.

Step #4: Sanding and staining

We’ll mention that staining can also be painting; it just depends on the final look you are going for. Find a well-ventilated area and give your shelves a sanding to get rid of any rough edges. Wipe them down to get rid of any extra sawdust, then apply your stain or paint of choice.

Your home’s aesthetic is the deciding factor here, but you can paint your shelves white to have them blend in with white walls or opt for a more rustic look leaving the wood as is and bringing it out with a subtle stain or gloss. The choice is yours, but this is one of the primary advantages of DIY floating shelves; you get a more customised look!

Get creative and think about this when choosing your initial materials as well. You can use reclaimed wood or create DIY pallet floating shelves for a more weathered look. Just ensure that when applying stain, you wipe off the excess and let each coat dry to reach the desired finish. Cover the shelves with a coat of polyurethane lacquer if you are going for a glossy look with your staining. Be sure to let all of the pieces dry completely before hanging.

Step #5: Hanging the shelves

Once everything is dry, you are ready to install the hardware. Some hardware requires wood-framed supports, but we prefer to buy the type that avoids this. It makes things a little easier while providing the bonus of the floating shelves being able to handle more weight.

Decide where you want to place your DIY shelves, then mark and measure the hardware spots on the wall. Floating shelves under TVs is a popular choice. Use a level to ensure the shelf is straight and attach the hardware to the wall with the supplied instructions. From there, you simply slip your shelves over the hardware via the drilled holes, and you are good to go!

To be safe, let your shelves sit on the wall empty for a few hours to make sure there are no issues before you load them up with display items.

how to make floating shelves diy
Source: Amin Hasani via Unsplash

Frequently asked questions

What material is used for floating shelves?

The sizes and specifics of DIY floating shelves vary; this is one of their benefits as you can customise them to suit your needs or wants. Generally, you’ll use 2″ x 3″ wood, cut into your chosen lengths. The specific type of wood comes down to the look you are hoping to achieve and what will best match your home’s aesthetic.

Do floating shelves need studs?

It is always best to attach floating shelves to a wall stud, as this provides the most support. You can use a stud finder to locate these in your walls. This is a hand-held device that detects metal with a magnet. This is the optimal spot for hanging anything in your home, not just floating shelves.

Are floating shelves strong enough for books?

Yes, however, the size of your shelving will dictate how many books it can hold. Usually, the hardware you purchase for your shelving will identify a weight limit, and we strongly recommend you stick to it, so you avoid any accidental collapses!

What screw should I use for floating shelves?

If possible, your screws or fittings should be 50mm screws with plastic Rawlplugs when fixing your shelves to concrete or brick. You can use 40mm screws when fixing to wooden joists, and for plasterboard, 65mm metal plasterboard anchors.

Adding floating shelves as storage can make your place look stylish!

DIY floating shelves are a great way to add some storage in spaces that may seem unusable or bare. They also double as visual improvements to the aesthetics of your home, and you can sit ornaments and art on them to create a 3D feature wall of sorts.

If you are a little fresh when it comes to DIY projects, there are plenty of Taskers who can help achieve the same outcome as the steps above. Search the shelf hanging experts and wall-mounting professionals that can come and get the job down properly, giving you the peace of mind that everything will stay up where it should!

We also have plenty more helpful reading that can inspire you to add some more features to your walls and build your DIY skills. Check out our article on the best hanging plants for small spaces and our tips for the best way to wall mount your TV. You can also take your wall-mounting one step further with this piece that discusses how to save space in your home by hanging appliances on the walls.

By learning some simple DIY skills, you can make your home a more functional and enjoyable space, just as it should be! Get creative, good luck, and we hope you love the results!

Create the best storage for your ride with a DIY bike rack

Are you even a real cyclist if your bike isn't hanging on display?

Create the best storage for your ride with a DIY bike rack

It’s as simple as this; if you have a bike, you need a bike rack. It is so easy to create a DIY bike rack; why wouldn’t you put your pride and joy on display? But, more importantly, you can get it up and out of the way to avoid a trip hazard or, even worse, damage to your sweet ride!

A simple, sturdy bike rack clears up space in the garage or yard. Unfortunately, in urban areas, there is a combination that requires bike racks desperately; small apartments and bicycles as the primary mode of transport. Luckily, we have some easy DIY bike and scooter rack options to solve the problem.

Most home designs are not tailored towards the pedal-pushed, so create your own storage solution with these multiple DIY bike rack ideas today.

How to make an easy DIY apartment bike rack

Let’s start with a quick step-by-step for a DIY bike rack that will work in most areas before getting to some more alternative solutions. To create a DIY multiple bike rack, follow these steps:

Step 1: Measure the wall space

Decide where you will be hanging your bike(s), preferably with about 12″ of space per bike and another 12″ on either side of the bike for room to move. Take two 2x4s and cut them each down to your required length.

Step 2: Mount the 2x4s on the wall

The bottom 2×4 should be mounted about 65″ from the ground to allow your bike enough room to hang freely from the hooks (always measure the length of your bike first to confirm this is enough).

The upper 2×4 should sit roughly 14″ above the lower 2×4 so you can stagger your bikes, avoiding a clash of the handlebars. Mount the 2x4s to the wall with 3 ½” screws driven into the studs (use two screws per stud).

DIY apartment bike rack
Source: Adolfo Félix via Unsplash

Step 3: Mount the bike hooks

Mount your chosen hooks 24 – 26″ from one another on the same row. This gives you enough room to take individual bikes off the rack without knocking any others that may be hanging up. After mounting the hooks on the lower 2×4, centre the upper 2×4 hooks between the lower ones. Mount the hooks by pre-drilling the holes with a ⅜” drill bit, then thread the hooks into the hole.

Alternative DIY bike rack ideas

You may not want to hang your bike rack on the wall or just be looking for some other storage methods – well, we have you covered with these clever ideas:

DIY PVC bike rack

With a little bit of PVC, some pipe cement and a handsaw, you can build a DIY bike rack that is large enough to hold a bicycle collection without needing to put anything on a wall. Create a stand that holds the front tyres of the bike in the PVC tubing, and you’ve got yourself a lightweight frame that can be moved from one location to another with ease.

Pre-made bike racks

We realise an off-the-rack solution isn’t really “DIY”, but many sporting goods stores offer portable ready-made bicycle storage products. We just thought we’d mention it for those who aren’t confident with tools!

Scrap wood bike rack

Grab a bunch of scrap wood and create a stand that will fit the front tyre of your bike rack in it to prop it up. The good news here is that only straight cuts are required, so your woodworking expertise can be minimal. You can even paint or stain your creation to help it suit your home’s aesthetic a little better.

Handlebar bike rack

Use a bike to hold your bike. This is perfect for the bicycle enthusiast! Find an old, second-hand scrap bike (or even just parts of one), specifically the curved handlebars, and if you can find a vintage racing bike, even better. Mount them to the wall using a metal flange and hang your bike from them like they are a hook.

DIY pallet bike rack

The easiest DIY bike rack to create involves a shipping pallet, as it literally needs no alteration whatsoever. The slats of a pallet are perfectly spaced to hold a bicycle wheel. You can either lean the pallet against a wall in your garage or garden or let it sit on the floor, and you’ve got yourself the easiest DIY bike rack of all time. You may even be able to find a pallet for free! It doesn’t get much simpler than that.

5 DIY bicycle maintenance tips

Bicycle maintenance is important, and we have five basic and useful tips & tricks for even beginner mechanics to help you be safe and get more out of your rides. We recommend the following:

1. Keep the drivetrain clean and lubricated

You can avoid that annoying loud rattling sound coming from the chain and sprockets by making sure you have enough lubrication on your chain and sprockets. These are not cheap to replace, so ensure regular cleaning and lubricating of the drivetrain with disposable rags, bike oil, and degreaser.

2. Keep your tires inflated

If your tire pressure is too low, you have to work harder to achieve speed, and you’ll get flats easily. Find out the suggested pressure of your tires (usually written on the side), and always make sure the rear tire has more pressure than the front. We recommend checking your tire pressure once every two weeks.

3. Keep nuts and bolts tight

All screws, bolts and nuts should be checked regularly to ensure they are not loose. Newer bikes have a maximum torque limit, so it’s important to be aware of that.

4. Check and change brake pads (if necessary)

If you often pull the brake lever until it touches the handlebar, you need to adjust the brake pads. This can be done by tightening the adjusting barrel in the brake lever. Keep both pads and the braking surface clean, as dirty ones can wear out a lot faster.

5. Fix that flat tube

Every bicycle rider should know how to fix a flat tire. There is no shortage of good videos on YouTube explaining how to prepare and glue the patch on your tire. If you notice a lot of flats on the same wheel, the inside of the rim may have a sharp object or protruding spoke that is causing the issue.

DIY Pallet Bike Rack
Source: Jonny Kennaugh via Unsplash

Frequently asked questions

Do you really need a bike rack?

A quality bike rack is often considered worth it for the peace of mind if nothing else. Most bicycle racks are very affordable or easy to make DIY, so there is no need to put your expensive equipment at risk. In the long run, a bike rack will be a worthwhile investment of your time and money.

Is it safe to hang a bike by one wheel?

It is perfectly safe to hang bicycles by one wheel. There is only one exception for bikes that have speciality aero carbon rims. These rims are very light with carbon that will flex if squeezed.

Is it bad to hang your bike upside down?

It is recommended that you avoid turning your bike upside down or even on its side as it may cause the brake not to work correctly. This could lead to a serious accident. Always operate your bike lever before riding the bicycle to check that the brakes operate as they should.

Take care of your ride with a bike rack today

If you are precious about your bicycle (as you should be), make sure it has a safe home to live in when you’re not our pushing the pedals. We’ve given you a few DIY bike rack options so you can pick the best option for your space or aesthetic and get to work.

If you want to take care of your bicycle even more, check out these Taskers who offer a professional bicycle service. A regular service is important to keep you safe out on the road and ensure the longevity of your bike.

After you’ve made your DIY bike rack, check out our garage storage ideas blog to neaten up your space. The garage is often the spot where everything gets dumped, so bringing in a touch of organisation will make your life a lot easier!

Save money and DIY: How to reupholster your sofa

That old sofa isn't as far gone as you may think...

Save money and DIY: How to reupholster your sofa

Let’s be honest; we throw out way too much stuff. We’re not here to inform you about the scary state of our landfill limits, but we can all agree, things could probably last longer than they do. This is where learning how to perform your own DIY sofa reupholstering can help!

Sofas are big. We know this. So any chance we get to avoid having one go in the trash is a good thing! Plus, there are other benefits to a DIY sofa rescue, such as cost savings and the chance to create a very original piece to add to your home aesthetic.

Found a vintage sofa that needs a makeover? Want a cost-effective way to update your old sofa that’s become threadbare? Learning to perform a DIY sofa reupholster is a fun and challenging way to achieve a new look. Read on to learn how to add “do-it-yourself upholsterer” to your list of skills.

The materials you’ll need to reupholster

Reupholstery is essentially the process of removing the old fabric and replacing it with something new. There are some essential tools and materials you’ll need to complete this project, and they include:

  • Staple remover
  • Staple gun and staples
  • Pliers
  • Strong scissors
  • New fabric
  • Flathead screwdriver
  • Notebook and pen
  • Sewing machine (optional)
  • Trim or cord (optional)

How to perform a DIY sofa reupholster: Step-by-step

Reupholstering a sofa isn’t the easiest DIY project you can do. It takes time, patience and requires a bit of note-taking. Our step-by-step guide breaks everything you need to do down:

Step #1: Study your sofa 

Before you begin any reupholstery project, you need to truly understand the piece of furniture you are working with. The goal is to able to easily reconstruct it once you have pulled it apart. The time you spend planning will make things much simpler later on.

Some things you should be looking out for include:

  • Where are the staples? 
  • Is there a slipcover? 
  • Are the buttons tufted? 
  • Is there visible cording?
  • Is there any damage under the fabric?

Take whatever notes and photos are needed for future reference and save a significant amount of time later on.

Step #2: Remove the bottom cover

It is pretty standard for your sofa to feature a lightweight layer of fabric on the underside known as the dust cover. This is the last piece of fabric placed on the sofa so for us reupholsterers, it’s the first to come off. Use a staple remover or needle-nose pliers to pull out all of the staples holding this cover on and place it to one side.

Reupholster sofa DIY
Source: Christelle BOURGEOIS via Unsplash

Step #3: Remove the upholstery fabric 

Once the dust cover is out of the way, you should be able to see the other upholstery pieces. Now it’s time for a little deconstructed sofa DIY work. Make a note of the layering, remove the top layer of upholstery fabric and use your staple remover to get rid of any remaining staples. Take notes and photos with every piece of upholstery that is removed so you can put it all back together.

It is important to know the order in which you removed each piece, where they fit, and how they were oriented. Make notes of how and where the fabric was attached and any special considerations like cardboard pieces or tack strips. The idea is to be able to replicate these details when you put the new fabric on.

Step #4: Cut the new fabric

The good news is, you have all of the measurements you need from the couch’s old fabric. Use these to the exact shape and size out of whichever new fabric you have chosen to give your sofa its new look. 

You pretty much have complete freedom when it comes to choosing your new upholstery fabric, but it is important to note that thinner fabric will show signs of wear quicker than something more robust. On the other hand, it will be a much harder task to staple heavy-duty fabric to the sofa when it comes time to do so.

Step #5: Attach your new fabric

This is where your notes will come in very handy as a guide. Once all of your pieces are cut to the correct size, attach your new upholstery fabric to your sofa. Work in the reverse order to the removal of the old fabric, with the last piece removed being the first that you attach, and so on. 

Use a staple gun to attach the fabric to the frame, and always refer to your notes and photos if you run into a spot that doesn’t look quite right. It is also very important to pull the fabric taut when you attach it to avoid any weird looking drape or wrinkle due to loose fabric.

Step #6: Reattach the dust cover

You are now back where you started! Finish off by restapling the dust cover on the bottom of the couch. This will cover all of the staple work, creating a tidy look for your new sofa.

Optional steps for those with more DIY energy

There are two more things you can do to give your new sofa a great look if you are still hungry for more DIY work:

  1. Add trim if you want to cover up staples, and add another classic sofa look to your new piece. Buy some matching cord and use fabric glue to attach it for a more finished look.
  2. Sew some matching pillow covers if your couch has back or seat cushions. You can follow the same steps that you performed when deconstructing the upholstery, using the old covers as a pattern to cut the new fabric. Alternatively, you can go off-script and create some matching pillows from scratch to add some comfort and a unique look to your new sofa.
DIY sectional sofa bed
Source: Bence Balla-Schottner via Unsplash

Frequently asked questions

How can I reupholster my couch myself?

It is possible to make reupholstering your sofa a DIY activity; simply follow these steps:

  1. Study your couch
  2. Remove the bottom cover
  3. Remove the old upholstery fabric
  4. Buy and cut the new fabric
  5. Attach the new fabric
  6. Reattach the dust cover
  7. Add trim (optional)
  8. Sew pillow covers (optional)

How much does it cost to get a sofa reupholstered?

Professional sofas reupholstering can cost anywhere between $1,000 to $2,500. Check out our highly detailed sofa reupholstering price guide for the differences in price given your chosen fabric, size, and sofa state. Performing the task yourself can be significantly cheaper as you only need to pay for the new fabric!

How easy is it to reupholster a sofa?

Reupholstering a sofa is not the easiest DIY project you can do. You need to account for removing the old upholstery, cutting and adding the new upholstery, and sewing some cushions (if you want). This can take a bit of time, especially for those who are less handy with fabric work. Still, it is a fun task and quite rewarding when looking at a new sofa you created!

Can you reupholster a couch without removing old fabric?

If you want to save time, you can reupholster an old sofa without removing the old fabric. Instead, tuck your new fabric over the top of the old one and staple it with your staple gun. This will, however, require heavy-duty staples. Most people remove the old fabric first as it may smell or create a different look when pulling the new material over the top.

Take on the challenge and reupholster your old sofa!

It may seem a little tricky, but with some careful planning, you should be able to give that old sofa a fresh new look. Once you learn this skill, you’ll never have to shell out for a brand new sofa again!

If you love the idea of a reupholstered sofa, but the requirements are a little out of your skill (or time) range, there are plenty of professional Taskers offering upholstery and repair that you can contact. With so many options to recycle, throwing that old sofa away should be the last consideration on your list!

To learn more about the cost of upholstery  cleaning or sofa repair, check out our handy price guide and cleaning cost guide. This will be very helpful for those who are tossing up between attempting a DIY task, looking for a professional to save their beloved sofa, or buying something brand new.

Be as loud as you like: How to soundproof your home effectively

Turn the volume up to eleven in your new soundproof room!

Be as loud as you like: How to soundproof your home effectively

Despite popular belief, sticking foam and egg cartons on your walls in an attempt to perform your own DIY soundproofing is a pointless exercise. It doesn’t look great, and they do very little to soundproof a room. However, if you want to lower your noise pollution, we have some easy and more effective DIY soundproofing solutions below.

You may be a musician looking to set up a home studio, or you could be a homeowner looking to cut out pollution from traffic or noisy neighbours. Unfortunately, professional soundproofing can become very expensive when you factor in installation costs and materials, but there are some DIY options that are not only effective but inexpensive and easy to install yourself!

What is soundproofing?

When understanding soundproofing, the key is not to confuse it with sound absorption. Sound absorption reduces the amount of sound that travels in an area, lessening the echo. Soundproofing, on the other hand, is about blocking sound from entering or leaving a room.

There are four main soundproofing elements to consider:

  1. Mass: as the more mass a structure has, the less sound is able to enter the space.
  2. Decoupling: which is the process of separating two sides of a wall, making it harder for sound to pass-through
  3. Absorption: which is about reducing echo and the distance a sound can travel (not blocking sound completely)
  4. Damping: which is about reducing resonance with materials that convert the kinetic energy of sound waves to heat

Understanding how to achieve effective soundproofing

Absorption and diffusion help with echoes, but as we’ve mentioned, soundproofing is how you block outside noise. Soft materials absorb sound waves more effectively than hard materials, and surfaces with lots of angles are a great way to diffuse sound waves. This is why lots of recording studios are covered in soft angled foam.

To soundproof effectively, you have to stop the sound waves from entering the room. This requires dense materials, and if possible, should be considered during construction. It is much easier to reinforce a room at this point rather than after it’s finished.

Six inexpensive DIY soundproofing methods

An inexpensive way to soundproof a room is by adding mass, like heavy household items (far more effective than egg crates). Let’s dive into six ways to DIY soundproof your room on a budget, starting from the cheapest to the more expensive.

Method #1: Adding furniture in the room

This is the easiest method as you’ll probably need some furniture in the room anyway! The heavier the piece, the more mass in the space, which in turn improves soundproofing.

Just as when you empty a room, you hear sounds echo more, and things get louder; the reverse happens when you fill a room up. Lightweight, flat-pack furniture made of inexpensive materials are no good here; instead, opt for things like:

  • Sofas and armchairs
  • Wardrobes, armoires, and dressers
  • Bookcases full of books (a great sound-absorbing mass)
  • Tables

Furniture adds mass to a room and will dampen and absorb sound, stopping echoes and reverberations. So basically, leave your minimalist designs for another room!

Method #2: Carpets and rugs

Soundproofing the floor should be a consideration as it is just as important as the walls (especially in apartments or if your floors are made of concrete). Noise that travels through the floor is known as impact noise; people walking around or building work are examples.

Combat this with heavy carpets or rugs, which improve the heat insulation of a room as a bonus! This easy-to-install option will reduce impact noise as carpets and rugs have excellent sound absorption qualities.

If you want to take this one step further, adding underlay can improve an already effective solution. While underlay is designed to improve heat insulation, it also adds mass and improves soundproofing.

diy soundproof bedroom
Source: Soundtrap via Unsplash

Method #3: Door Seals

Loads of sound leaks under doors, especially when they don’t fit properly into their frames. DIY soundproofing a door just requires some acoustic sealant tape which is a roll of tape with a rubber seal that can be stuck onto a door.

Perfect for blocking small gaps, you can use the tape on the door’s bottom, sides, and top. You can also install a mounted seal that attaches directly to the door with a drop-down seal made out of metal and rubber. Another option for door soundproofing is switching to a heavier door to reduce noise pollution.

Method #4: Acoustic sealant

Windows are another source of noise pollution, specifically because of the seals (much like doors). Acoustic sealant is a great way to make your own DIY soundproof window inserts as it is specifically designed to soundproof a room, offering a more effective barrier than standard caulk as it remains flexible, moves with the building, and keeps a tight seal.

Simply apply it anywhere there’s a gap to make things more soundproof. You can also apply the sealant around electric fixtures and lighting, which have small gaps that can be a source of noise pollution.

Method #5: Weather stripping

Weather stripping was originally designed to stop drafts and air leaks, but it also blocks noise pollution. Air is a carrier of sound, so reducing the amount of air also helps to provide a soundproof barrier.

Weather stripping is available in various forms; the choice depends on how permanent you want it to be and what it is made from. Most external doors already feature weather stripping, but adding it to interior doors will help soundproof a room.

The most common weather stripping material is EPDM rubber, a thermoplastic mix that is very effective at blocking sound as it is very dense. These strips sit between the door and the frame to stop air from escaping.

Method #6: Soundproof Curtains

There are many soundproof curtains options that help to shield windows (a weak spot for soundproofing). Unlike walls, windows don’t have a lot of mass, meaning there isn’t much that you can do about them apart from sealing the joins as mentioned above.

Enter soundproof curtains, which much like the furniture; the heavier, the better. Aim for options that have several layers of material, which will also be good at insulating the room.

diy soundproof music room
Source: Dylan Posso via Unsplash

Frequently asked questions

What materials can block sound?

Some of the best soundproofing materials include:

  1. Mass-loaded vinyl sound barriers
  2. Acoustic mineral wool insulations
  3. Acoustic sealant
  4. Soundproof foam panels
  5. Soundproof blankets
  6. Green glue soundproofing compounds
  7. Resilient sound channels
  8. Soundproof drywall

How can I DIY soundproof a room?

Some easy ways to achieve DIY soundproofing are as follows:

  1. Add more furniture to the room
  2. Put down carpets and rugs
  3. Add door seals
  4. Use acoustic sealant for windows
  5. Add weather stripping
  6. Add soundproof curtains

What is the cheapest way to soundproof a room quickly?

Three cheap and efficient ways to soundproof a room involve using furniture and decor:

  1. Use curtains which serve as a great barrier thanks to their sound dampening abilities
  2. Add area rugs to reduce noise generated by the floor
  3. Add thick upholstered furniture

How can I make a DIY soundproof wall?

An inexpensive way to soundproof a wall yourself can include any of the following:

  1. Fit bookshelves to the walls and fill them with books which are great sound absorbers
  2. Fill empty spaces to prevent echoes
  3. Hang drapes along the walls (the thicker, the better)
  4. Hang heavy drapes over the windows
  5. Fit an extra layer of drywall
  6. Add acoustic foam around the room

Be as loud as you like with these cheap DIY soundproofing methods

The methods provided above all put emphasis on sealing gaps or blocking possible air leakages. They are inexpensive and effective ways of soundproofing a room on a budget. Just remember the rule that good soundproofing means adding mass to the space, and you should be fine!

If, however, you want to take things to another level, you can find a range of very skilled Taskers who can offer some professional soundproofing services. If you really want to turn those amps up, or you live in a particularly noisy part of town, this may be the best option for you.

Once you are all set with a soundproofed room, it’s time to make some noise! Check out our blog on how to tune a ukulele, then plug it into an amp and turn it up a lot because ukuleles aren’t very loud to begin with. Rock on, young uke player, rock on.

Budget tips during lockdown: How to save money at home

Stack that paper (no not the toilet variety).

Budget tips during lockdown: How to save money at home

At this point, you may be feeling like there isn’t a lot to love about lockdowns. While we don’t necessarily disagree, there are some small positives that we should all focus on! One example is the bank balance! With a few tips for how to save money when you are stuck at home, combined with the fact that we aren’t crushing our accounts at da club every weekend. Who knows? We all just may come out of lockdown with a new Tesla*! (*Tesla not guaranteed).

While not going out is less than fun, it does afford some financial benefits, as can all of this spare time we suddenly have. Let’s dive into how you can put it to good use with some lockdown money-saving tips that will help the bank balance to look good!

How to budget and save money fast

Tip #1: Limit the online shopping

Ooft, this one stings. Online shopping is one of the saviours of lockdown. There are really only two days in lockdown, ones where packages arrive and ones where they don’t. Hands up, who else is craving human contact so badly that they are trying to develop a deep friendship with their amazing delivery person?

Well, a little bit of self-restraint is needed to fight the temptation of online shopping. It’s fun to click a button and do away with your month’s budget without feeling like you’ve spent anything, only to emerge from lockdown with 50 different variations of the Monopoly board game and a heap of regret.

Combat this by putting restrictions on certain websites to make the checkout process more time-consuming. Avoid storing your payment details, do away with your buy-now-pay-later services, and at the very least, leave the items in the basket overnight. This not only helps to ensure you actually want what you are buying, but you may also get one of those “did you forget something, here’s 10% off” emails!

You may also benefit from limiting your screen time to just work or chatting with friends, so you don’t buy 20 new pairs of sweatpants out of web-surf boredom.

Tip #2: Utilise free entertainment

Surely by now, you have exhausted all of the options on Netflix? Before you go down the road of re-watching Tiger King, be creative with some free, fun things you can do at home.

Spend some time learning how to cook your favourite meal from scratch, invent your own family games, get crafty and creative with some new hobbies or read one of those many orange Penguin books you have laying around the house for looks! You may even come out of lockdown with a new skill or passion as a result!

poker night
Source: JT on Unsplash

Tip #3: Streamline the streaming 

Just because you have run out of Amazon Prime, that doesn’t mean you should add Disney+. Streaming service fees can quickly add up and significantly dent your wallet.

Try to only have one provider on the go at all times. Are you done with Amazon? Cancel it before you sign up to Stan. Can you share with a friend to get two platforms for the price of one? There are plenty of free streaming services like SBS On Demand and ABC iView available that will give you hours of streamed entertainment without you having to spend a cent.

Tip #4: Pay off those loans

Interests may be really low at the moment, but loan rates are still higher than savings rates (they always will be). Rather than letting these tips or your nights in result in a bigger savings balance, pivot and have them create a lower loan balance.

This is a great way to save money in the long term. Always have an emergency savings buffer in your account, but chuck the rest off those loans and avoid the piles of interest that can build up over the years.

Tip #5: Buy insurance

We know it’s weird to say “buy insurance” in an article about saving money, but we live in unprecedented times. Those holidays or AirBnB weekends you are planning have never been riskier, so make sure you get insurance to avoid losing the money from flights or accommodation (if the next lockdown rolls around unexpectedly).

Tip #6: Claim all work expenses against tax

Lockdown means that many of us are now working from home, which we previously have never done. There is a bigger benefit to this than spending all day in sweatpants (or no pants!). You can claim lots of costs associated with working from home, such as washing and travel (even though there isn’t much of that).

Speak to your tax accountant about the many new work-from-home things that can lower your tax bill substantially. Also, remember that tax refunds can be backdated, so consider the things that may be relevant from lockdown one.

Tip #7: Shop around and find the best deal

You have a little extra time so use it to research the best deals on literally everything. Look at your phone deal, health insurance, energy provider and more. On online marketplaces like Airtasker, you can compare rates and get affordable handymen to fix leaks and other emergency expenses. Imagine if you could save $10 per month on those things alone, that would be an extra $360 in your pocket each year for a little bit of research!

There are plenty of comparison websites available that can make the research element even easier as well. There is no excuse not to save!

Tip #8: Redo your budget

Lockdown is a great chance to take another look at your budget and the areas where you’re spending the most. There are things in the list above that you can start with and likely many other areas where you can cut back such as food expenses and groceries. That being said, here’s our guide to meal planning in case you’re unable to get takeaways from your local restaurant. Or you simply don’t have the time or patience to cook during this stressful pandemic.

How to plan meals and do meal prep during lockdown

Another great money-saving way to soak up some time is with meal prep and planning. This also has the dual benefit of ensuring you are sorted for breakfast, lunch and dinner! Consider the following:

  1. Consider meal planning as an activity and take an hour to plan meals for the week; this will also take the stress out of cooking.
  2. Make a list of meals and snacks you love and tape it inside the pantry door, so you have a shortcut that simplifies meal planning.
  3. If you have kids, involve them in the task. They love autonomy and responsibility and are more likely to eat the food if they’re involved. Let them unpack the food delivery, find recipes and help write the plan.
  4. Always make double and freeze it; your future self will thank you.
  5. Research new meal plans by finding free options online. There is no better way to stay healthy and challenge yourself to create some new recipes.
meal prep food
Source: Ello via Unsplash

Frequently asked questions

How can I save the most money on utilities?

When thinking about how to save money on utilities, there are some simple things you can do around the house, including:

  1. Switch to energy-efficient bulbs
  2. Change air filters regularly and keep vents clear
  3. Replace old appliances
  4. Buy a smart thermostat
  5. Turn off lights and powerpoints when not in use
  6. Seal doors and windows

How can I save money on food and still eat healthily?

Eating healthily doesn’t have to cost the earth, in fact, there are ways you can learn how to save money on food and eat healthy, such as:

  1. Planning your meals
  2. Sticking to your grocery list
  3. Cooking at home
  4. Cooking larger portions to create leftovers
  5. Never shopping when you’re hungry
  6. Buying whole foods
  7. Buying generic brands
  8. Avoiding highly processed food

How can I save money on a budget fast?

When it comes to how to budget and save money fast, there are a few starting points to keep in mind:

  1. Learn to budget and gain an in-depth understanding of your finances
  2. Focus on avoiding or getting out of debt
  3. Create a designated savings account
  4. Automate savings and bill payments
  5. Put a spending limit on your credit or debit card
  6. Streamline your streaming services

Rolling out of lockdown like a boss

Picture this; you’ve put our money-saving tips into play, and you’re now ready to leave lockdown with a stacked bank account (possibly even a top hat and cane that you’ve bought with the extra funds to complete the look).

To make lockdown a little easier, check out the Taskers, who are available to help with things like grocery delivery and fresh food delivery for those looking to stay healthy.

We also have a stack of other How To guides that you can read through to entertain yourself, boost your skills, and do some good around the home! We recommend starting with our guide on how to clean the oven. Many people say that oven cleaning is therapeutic! We also don’t need to say this, but you have to have a clean oven. So, embrace the task and have fun!

Make sure to check the lockdown restrictions in your state or area before booking home or mobile services.

How to create a DIY projector screen for the best movie night ever

Get ready for the ultimate movie night anywhere in your home or garden!

How to create a DIY projector screen for the best movie night ever

Are you a hard-core movie buff? Do you secretly love school holidays when you and the kids can make a batch of popcorn, build a blanket fort and watch children’s classics, pretending you’re in your own private movie theatre? Ever wanted to up the ante and create your own DIY projector screen for a home theatre? Read on to learn how!

A night at the movies

In terms of history, motion pictures are a relatively recent cultural norm that has only been made possible by the unprecedented technological advancements of approximately the last hundred years.

The first projected motion picture presented to an audience was achieved by the Lumière brothers in Paris, France, in 1895. Since then, the technology explosion of the last 60 to 70-years has seen silent, grainy black and white movies and television shows evolve into stunning 8K high-resolution motion pictures with crystal clear high-definition surround sound.

Traditionally, home theatres have been a luxury afforded only by the rich and famous. However, as technology has become more affordable, compact and powerful, people worldwide have been making their childhood dreams come true by creating epic home theatres for their families and friends to enjoy.

For those of us that have felt the pinch of recent international economic instability, this dream still feels allusive. So the question is, can you achieve your dream home theatre on a budget?

Well, for those of you who don’t mind a bit of a do-it-yourself challenge and putting in some elbow grease, the answer is yes! 

Read on to learn how you can make your home-cinema dreams come true with some ideas and tips on how you can install a DIY projector screen into your home.

Projector screen DIY
Source: Tusik Only via Unsplash

Finding a projector

Although big-screen TVs have been a dominating force in the world of modern audio/visual media, real cinephiles, like audiophiles with vinyl records, believe nothing beats a projected image via a projector.

Projectors have, in the past, been a hefty financial investment, one that generally does not make the budget essentials list. However, with the rise of e-commerce, finding a high-definition projector at a budget price online has become easier than ever before, and you have the added benefit of having access to a global market.

Online shopping has made projector sales a competitive market, and many traditional retailers are more than happy to close a good deal. Make sure you use this to your advantage when bargaining at your local hi-fi store; you’d be surprised how much you can knock off the ticketed price.

Another bargain hunters paradise is the second-hand projector market. You can often find high quality, brand name projectors on social media marketplaces or websites like eBay and Gumtree. 

Projector owners often treasure their projectors and take good care of their investment. Usually, the owner is either selling their projector due to lack of use or upgrading to a later model.

Of course, online spending does come with risks, like complicated returns if faults are found or no after-sales warranties or guarantees. If this kind of possible outcome bothers you, then your bargaining skills at a new or refurbished goods retailer may be a better option.

However, the fact remains that achieving a quality DIY projector screen solution for your home will require a good quality projector. Although there are bargains out waiting for you, like all purchases, you will generally get what you pay for.

DIY projector screens and projector screen paint

Now that you have secured your most crucial piece of home theatre equipment, your projector, you will now need to decide how and what you will project your favourite films onto.

There are many different options when choosing the right projection application, including:

  • Freestanding projector screens
  • Wall hung projector screens
  • Retractable electric projector screens
  • DIY projector screen paint and more

Read on to learn more about the most common DIY projector screen solutions for your home theatre.

Freestanding projector screens

If you want a home theatre setup that you can pack down after each use, this may be the best option. These types of screens come in a wide range of designs and sizes and vary in price considerably depending on the brand and design.

Sizes can range from anywhere between 60-inches to 120-inches. Some may have a pack-down frame that requires assembly, which then has the material screen hung on fastening points.

Other freestanding projector screens may have manual, springloaded, or electronic systems that retract the screen after use and keep it crease-free, protected and clean. These can cost a little more but are worth the investment long-term.

Wall-mounted and retractable projector screens

Wall-mounted projector screens can be removable, permanent or retractable. Generally made of the same material as a freestanding projector screen, these screens can be stretched and fastened onto hooks or permanently adhered to the wall.

Some wall-mounted projectors have a manual or electronic retraction system. However, these wall-mounted DIY projector screens can be pricey, and a central unit must be fitted to the wall. 

If you choose a powered retractable wall mounted projector screen, power may need to be run by a qualified electrician also if you want the unit to be wire-free.

If you want to get really fancy and have some dollars to spend, then you can get an electronic retractable projector screen that can be installed into the roof, making the screen invisible until you need it. 

Again, you can find bargains online, and online prices may give you some bartering leverage if you want to buy retail. 

If buying online, do your research, make sure the supplier is reputable, and return policies are in place. For example, if you are purchasing an adhesive or wall fastened DIY projector screen, the chance of a fault would be unlikely.

DIY black projector screens

For the most part, projector screens have been uniformly white to maximise the projector’s image quality. However, as projector resolution has evolved into high-definition, black screens have been developed.

The main benefit of using a DIY black projector screen is that a black surface better reproduces the darker portions of the image. This is similar to dark, backlit LED flatscreens.

DIY black projector screens have not been perfected. This means particularly bright images can give off a rainbow or shimmer effect. Some viewers may find this unpleasant to the eye. 

DIY projector screen paint

You may not have considered that you have a perfectly good projector screen already installed in most rooms; the wall!

The main issue with using a plain white, untreated wall as a DIY projector screen is that the undulation, imperfection and rough finish of the wall can dramatically reduce your image resolution quality.

DIY projector screen paint is designed to produce an ideal surface for a clean and clear projected image. 

There is a range of speciality DIY projector screen paints on the market. The right one for you depends on factors such as:

  • The power or “Lumen” rating of your projector
  • Ambient light in the room
  • What kind of images you will be projecting

Either way, DIY projector paint is effective, both for image quality and affordability. This space can also double as a live projection picture show. Show family photos, holiday snaps and memories while entertaining friends and guests.

DIY black projector screen
Source: Chirayu Trivedi via Unsplash

Frequently asked questions

Can I use standard fabric as a DIY projector screen?

The answer to this question is yes, with a maybe. Standard white fabric may be too thin and lack density to give you a high-quality image. 

The white, reverse side of blackout curtain cloth can be a good alternative; however, you may be able to pick up a real screen for cheaper than the blackout cloth. So, unless you have some extra laying around, a screen may cost a lot less than you think.

What kind of lighting is best when using a projector?

As a rule of thumb, the blacker the room, the better. However, depending on what you are watching, some ambient light can be better. This is especially the case when watching personal footage, documentaries, or sports. Anything where interaction and conversation are likely.

If a dimmer switch and downlights fall within your budget, all your bases are covered. Easily move between pitch black and mood lighting with one of these!

Can I use modern multimedia and devices on a projector?

Unless you are buying an older projector model, most modern projector units have HDMI, USB and high-definition media ports. These allow you to run DVD and Blu-Ray players, or attach your PC, laptop, tablet or smartphone directly into the system.

Get the popcorn ready

Now that you have a bunch of DIY projector options, it’s time to plan the movie night. If you really want to level up your home cinema game, there are some people who can help! Search a range of taskers who offer home theatre set-upwall hanging and mounting services and home theatre design.

We also have another article that can provide some outdoor entertaining ideas. Pretty soon, your home will be the ultimate place to hang!


How to tune a ukulele so it sounds great

Make no mistake, out-of-tune ukuleles sound as bad as all other out-of-tune instruments.

How to tune a ukulele so it sounds great

There are many key elements of becoming a great uke player, but the most important first step is learning how to tune a ukulele. Let’s be honest; it’s pretty much a musical dealbreaker if your instrument is out-of-tune!

Your family, neighbours, and audience will thank you for learning this crucial first step, and you’ll be well on your way to creating the beautiful sounds the ukulele is capable of.

The ukulele needs to be tuned frequently to offer its best sound, roughly every 15 minutes. Cheaper ukuleles require more frequent tuning when compared to the higher-end models. Read on to learn everything you need to know about how to tune a ukulele, and you’ll be on your way to becoming a master!

Standard ukulele tuning

Tuning is a matter of preference and also dependent on the other instruments you are playing with, the type of songs you are playing, and a host of different possible variations. To start with, however, the standard tuning of a ukulele sees the open strings most commonly tuned to the notes G, C, E, and A. 

Some prefer to string their ukulele with a different option of a low G string (Linear Tuning) for a more rounded sound rather than a high G (Reentant Tuning).

If you’re used to playing the guitar, the high g-string may seem odd. In standard reentrant tuning, the strings do not go from lowest to highest. This gives a bright and charming sound with an even tone because the strings are in a smaller range.

The variance of tuning the g-string down an octave, linear tuning, arranges the stings from lowest to highest for a broader range that is fuller and resonant. To do this, you will need a special set of low G strings based relevant to your ukulele size. It would be best if you did not tune down High-g ukulele strings an octave.

How to tune a ukulele the quickest way

There are various versions of the ukulele, including soprano, concert, and tenor, but the tuning process’s essentials remain the same. The fastest and easiest way for how to tune a ukulele is with a chromatic tuner.

A chromatic tuner detects a note’s pitch and lets you know if it is sharp or flat relative to the note you are aiming for. You can find many variations of this tuning device, including pedals, units that clip on to the headstock of your ukulele, apps for your smartphone and more. 

If you are playing live, a pedal tuner will likely be your best option. You can have this hooked up to your ukulele at all times and turn it on via a footswitch which makes for quick tuning – even while playing. Many musicians have a pedal tuner as one of the key pieces of equipment in their pedalboard. It works alongside a range of other effect pedals that can alter the sound of your instrument like delays, distortions and more.

Person playing a uke
Source: Aaron Burden

How to tune a ukulele by ear

This form of tuning takes a lot of time and practice, and you train your mind to understand where a note should sit naturally. To learn this method, listen to the various notes’ pitches as a point of reference and hum along to get the note in your head. You’ll need to do this before plucking the strings.

Once you’re confident you have the pitch in your head, pluck the string you are trying to tune. If the string’s pitch is higher than the correct sound, your string is sharp. If the pitch is lower, your string is flat. Turn your tuning pegs until the pitches line up.

How to tune a ukulele if you’re a lefty

If you are a dominant left-hander, you will need to re-string your strings in the opposite order and then tune them accordingly. Avoid flipping the ukulele or play it upside down, as you will likely find it easier to play “left-handed” if by re-stringing the ukulele in the inverse.

You’ll need to push through a little awkwardness at the beginning while you are learning to play like this, but it will make things much easier later on.

How to tune a ukulele to alternate tunings

While we have mentioned the standard tuning option, there are many others. Above all when it comes to music, there are no rules so long as what you are doing sounds good!

Tuning is a matter of preference above all else, but along with standard tuning, here are some of the other popular ukulele tunings that you can try out.

Baritone tuning (D, G, B, E)

Baritone ukuleles and even tenor ukuleles can use this tuning which is the equivalent to the tuning of the last four strings on a guitar. Also known as “G tuning”, this option will give a full warm sound.

Slack-key tuning (G, C, E, G)

You can’t play the ukulele without wanting to attempt some Hawaiian music! When doing this, slack-key tuning is the go. This will allow you to strum the open strings and create a C major chord. This form of open tuning has the top g-string in either reentrant or linear tuning, so you can tune it to the “G” note above middle C on a piano or opt also to go down the octave.

English tuning (A, D, F#, B)

This is also known as “D tuning” and has the same intervals as standard ukulele tuning. The difference is that every string is tuned up a whole step higher. To use this tuning, you’ll also need an English tuning string set. This is often most popular for soprano ukuleles or banjoleles as it offers a slightly sweeter tone.

Canadian tuning (low A, D, F#, B)

A slight variation on English tuning, Canadian tuning sees the top a-string tuned down an octave. You’ll usually see this option used for concert and tenor ukuleles.

How to know when to change your strings

If you regularly play your ukulele (daily, for example), the general rule of thumb is to change the strings every three months.

It would be best if you changed your strings because as they get older, strings begin to sound duller. All strings will inevitably wear out, so if you want the best sound possible, it’s a good idea to change them.

Despite the many debates on the internet, there is no one “best set” of ukulele string. Sound is subjective, you’ll need to vary your stings based on your tuning preference, and every ukulele responds differently to different strings. The best bet is to experiment and see not only which strings sound best on your ukulele but also which ones you simply prefer the sound of!

Close up with a uke
Source: Mitchell Luo

Frequently asked questions

What notes are the 4 strings on a ukulele?

While tuning is a matter of preference in most cases, the standard tuning of a ukulele sees the open strings most commonly tuned to the notes G, C, E, and A. A popular variation is using a low G string (Linear Tuning) for a more rounded sound than a high G (Reentant Tuning).

In standard reentrant tuning, the strings do not go from lowest to highest. This gives a bright and charming sound with an even tone because the strings are in a smaller range.

What notes to tune a ukulele to?

The most commonly tuned notes for a ukulele is G, C, E, and A, working from top string to bottom. Along with standard tuning, there are some other popular ukulele tunings that include:

  • Baritone tuning (D, G, B, E)
  • Slack-key tuning (G, C, E, G)
  • English tuning (A, D, F#, B)
  • Canadian tuning (low A, D, F#, B)

You can experiment with these to find a sound that you like and are comfortable playing. Be aware, in most cases; you will need to use the right strings for each tuning as they will vary in thickness.

You are now on your way to becoming a ukulele master!

Learning how to tune your instrument correctly is a key step in creating some beautiful sounds. You can always experiment with tuning, especially if you plan to make your own music and find a unique sound to make your own.

If you are looking for some ways to improve your skills even further, check out the many taskers who can teach you! You’ll be able to find guitar lessons and various instrument tutoring, not only for the ukulele but a range of other instruments. While you can learn on the ukulele on your own, music lessons are a great way to improve your ukulele skills much quicker

Learning a musical instrument is one of the best skills you can work on. Whether you are playing for yourself or hoping to perform in front of people, the process of learning and creating music is exceptionally fulfilling. Always remember to have fun and never stress about your rate of progress. Practice truly does make perfect, so be patient, and you’ll be a pro-uke player in no time at all!

How to prune tomato plants to ensure a healthy, delicious crop

You'll never need to buy tomatoes again if you learn these handy pruning tips!

How to prune tomato plants to ensure a healthy, delicious crop

When it comes to how to prune tomato plants, a level of discussion exists over whether you actually should or not? In reality, failing to prune your tomato plants will cause problems. Yes, you can still grow good tomatoes without pruning, but pruning is key if you want to improve the quality of your fruit.

Tomatoes do not require pruning or deadheading, but there are benefits to it. Let’s discuss these, along with how to prune tomato plants below.

Why you should learn how to prune tomato plants

The main reason why it is recommended that you prune tomato plants is energy usage. As with many other fruit and vegetable plants, pruning allows your tomato to direct its energy toward producing fruit instead of foliage.

Unpruned foliage becomes new branches, and these will form fruit, but we generally prefer quality over quantity when it comes to tomatoes. Pruned tomato plants produce larger fruit earlier in the season and are better protected against pest and disease problems.

Finally, a properly pruned tomato plant means that all foliage receives adequate sunlight and photosynthesises are more efficient, leading to improved growth and fruit production.

Knowing which tomatoes to prune

One exception to the rules of pruning is if you are growing determinate tomatoes. These plants develop all of their fruit at once, which means pruning could become the unnecessary sacrifice of tomatoes.

On the other hand, indeterminate tomatoes produce fruit regularly throughout the season, so knowing how to prune indeterminate tomato plants is very important. In addition, pruning this variety of plants encourages several large tomatoes instead of extra foliage, as explained above.

In conclusion, tomato pruning isn’t essential, but it does help. So, if you are entering a tomato-growing competition, prune; if you aren’t that fussed, save some time!

How to prune indeterminate tomato plants
Source: Markus Spiske via Unsplash

How to prune tomato plants

If you would like to prune your tomato plants, luckily, it’s very simple. You’ll want to start by looking for the small tomato “suckers” that can be found in the “V” space that sits between the main stem and the branches.

These suckers will grow into full branches on an unpruned plant, creating more foliage and then fruit. So if you want to make sure that your tomato plant does not overtake its space, this is where pruning comes in.

To prune, remove these suckers, which, if small enough, can be pinched off with your fingers. Larger suckers will require a pair of clean pruners. Always ensure your pruners are clean and disinfect them as you move from plant to plant to avoid spreading diseases. If you are diligent and remove the suckers when they are small, you’ll avoid putting too much stress on the plant.

If you have low-hanging branches, give them some height with a stake or remove them entirely. The goal is to avoid having your plant’s leaves touching the ground, as this makes them more susceptible to bacteria and viral infections. These issues will quickly spread through the rest of the plant, which you’ll want to avoid.

That’s how easy it is to prune! So keep an eye out for the suckers while watering or weeding, and give your plant a quick prune to enjoy bigger fruits.

How to prune cherry tomato plants

Cherry tomato plants are classed as indeterminate and are actually best grown in a cage instead of something like a trellis. The cherry tomato plant benefits greatly from regular pruning as it improves the quality of the fruit.

To prune a cherry tomato plant, follow these steps:

  1. Prune all of the leaves in the lower portion of the plant’s stem
  2. If a stake supports the plant, pinch back shoots selectively to leave two or three main stems. If in a cage, leave up to four or five
  3. Pinch back suckers in the leaf axils where the leaf stem meets the main stem
  4. Monitor for symptoms of disease or pests often evident due to squiggly lines on leaves, spots or fuzzy growth. You may also see pests visibly feeding on the plant
  5. Dispose of the diseased parts of the plant

Other tomato pruning methods

The method listed above in which you carefully remove the sucker is known as the simple pruning method. Some other methods may be used as well:

Missouri pruning

The Missouri pruning method reduces the shock to the plant and is done by pinching only the tip of the sucker. This allows the last two leaves on the stem to remain to let the plant produce more energy for tomatoes while lowering the stress and increasing shade to the fruit. The only downside to this method is that new suckers will grow quickly as more plant remains.

Root pruning

Pruning the roots will speed up the maturing process of the plant. This purposely creates stress on the plant, interrupting its natural growth cycle and forcing it to mature faster. If you want to try root pruning, the best time is when the first tomato clusters ripen.

For this method, use a pitchfork or a spade placed a few inches from the base of the plant, roughly 8-10 inches into the soil. From here, simply cut halfway around the plant, and you are done.

Top pruning

The final method is top pruning which should be done roughly one month before the end of the season. This involves removing the growing tip of each main stem above the last blossom. This method directs all of the sugars and nutrients towards the fruits, increasing the chance of red tomatoes rather than green for your harvest. Just make sure you do this four weeks before the end of the season.

How to prune cherry tomato plants
Source: Dan-Cristian Pădureț via Unsplash

Frequently asked questions

When should I trim my tomato plants?

The best time to start pruning tomato plants is when they grow to be roughly two feet off the ground (30-60 cm. tall). If you begin pruning when they are smaller than this, the plant may be in too much shock to recover from the pruning. You’ll notice branches coming off the main stem of your plant that are perfect for pruning when it reaches this size.

Should I trim lower branches on my tomato plant?

It is a good idea to keep the bottom 6 to 12 inches of your tomato plant trimmed. You can cut the lower leaves and stems away while they’re small to conserve the plant’s resources and protect it from a disease that can be picked up off the floor and onto lower branches.

How do you prune tomato plants for maximum yield?

If you are pruning your tomato plant for better structure and health, start by getting the plants off the ground and giving them plenty of room. Never prune or tie the plants that have wet leaves. If you have determinate tomato plants, you won’t really have to worry about pruning at all other than removing the suckers below the first flower cluster.

Need a little help to ensure your garden can flourish?

When it comes to tomato plants, you’ll see by the instructions above that pruning is a pretty straightforward task. For other sections of your garden and specific plants, however, that may not be the case.

If you do not have the greenest of thumbs, there are plenty of Taskers who can help you with your pruning! Hand the job over to a professional and enjoy peace of mind knowing that your garden is positioned for health and quality growth while also saving yourself some time!

If you would like to work on your own pruning skills, we have a range of articles that can help. For example, learn how to prune rosesthe best ways to prune lavender, and how to tackle that apple or lemon tree for some improved fruit harvesting.

For many people, garden tinkering with tasks like pruning can be both relaxing and therapeutic! Take a little time to reconnect with nature and enjoy the benefits of a healthy garden that you have created with your own hands. Plus, fruit and vegetables taste way better when you have grown them yourself!

How to build a DIY dining table that will impress your guests

No more TV dinners with your brand new DIY dining table.

How to build a DIY dining table that will impress your guests

Every home needs a dining table, but there is a real sense of accomplishment when it’s a DIY dining table! You’ll be able to impress your guests with the fact that YOU BUILT the piece of furniture that is holding up their food and drinks!

As another benefit, if you use 100% reclaimed wooden planks, you’ll achieve the look of a rustic industrial DIY dining table while also recycling materials. It may take a while to prepare the wood to achieve a smooth finish, but the result will be truly stunning.

You can use any reclaimed wood for a project like this and completely customise it to the size of our room. Reclaimed wood can be tricky to work with (cue the splinters), but the outcome is worth it, and you’ll save a few trees in the process! Just make sure the wood is completely dry before you begin, and read on to learn how to create a stunning DIY dining table.

The tools you’ll need

You’ll need a few basic and specialist tools before you begin:

  • Wrecking bar
  • Electric or hand plane
  • Claw hammer
  • Rubber mallet
  • Biscuit jointer
  • Circular, plunge or sliding mitre saw
  • Belt sander
  • Clamps and ratchet straps

Building a DIY dining table: Step by step

Step 1: Clearing the boards

When working with reclaimed wood, you’ll need to start by removing things like existing screws and nails. This is where you’ll need the wrecking bar to help. Make sure you are starting with dry and clean wood.

Step 2: Plane and sand each piece

Use an electric or handheld plane (or a thicknesser) to sand and clean up the boards even more. Once planed, sand each piece with a belt sander to leave a nice smooth finish. The smoother the wood, the easier and more effective the next step will be. Optional: you can stain wood depending on your preferred table. Going for a farmhouse style? Weathered, white-washed wood gives off rustic vibes – perfect for a DIY farmhouse dining table. Or why make a DIY pallet dining table with pallet wood and paint it in a chevron pattern? It’s up to you.

Step 3: Joining the pieces together

Ensure you have clean and dry wood. Use a biscuit jointer to cut an even groove into the side of the wood and ensure a good straight join along each piece. Place a small piece of wood (a biscuit) to line up the two pieces evenly against each other (this also adds a bit of strength to the join). Clamp some beams across the top and bottom of your planks to ensure a completely flat finish, then glue the pieces together.

DIY extendable dining table
Source: Jorge de Jorge via Unsplash

Step 4: Gluing

Sash clamps can be used to straddle the width of your boards with ratchet straps to account for the length. Make sure you glue your boards on a flat even surface, so you know that the whole piece will be perfectly flat. You want to avoid bowing in the wood or joins, or you’ll be stuck with a wobbly table!

Use wood glue, and be aware that it dries pretty quickly. That being said, we recommend that you leave this section to dry overnight, just for some peace of mind in knowing the glue has properly done its job.

Step 5: More sanding

When your tabletop is glued properly, it’s time for more sanding. The goal is to get the tabletop as smooth as possible in preparation for the filling of any gaps and imperfections.

Step 6: Filling gaps

The tabletop will need some epoxy resin to achieve a perfectly smooth finish. A simple wood filler will also do the same thing. As you are using reclaimed wood, it is quite likely that it is in a bad way with lots of holes and imperfections. Tape off the areas you need to fill with resin, then mix and pour it all in one go. There will only be a couple of hours before the resin starts to set, so you need to prepare your surface so you can work quickly.

You can use basic electrical tape to cover the joins and gaps that exist on the underside of the tabletop. This is important as it will prevent any resin from leaking through the bottom. Mix the resin in a small cup, then pour it in the required areas.

Let the resin set overnight in a well-temperature controlled room (roughly 18 degrees Celcius) to ensure the resin does not cloud over.

Step 7: Final sanding

That’s right, one more round of sanding is required. Plane the whole surface, then do the most sanding you have ever done in your whole life. Keep in mind that you are dealing with resin, so you may need a 1200 grit paper to achieve a super-clear finish.

Step 8: Attaching the legs

You can pre-buy your legs in a style that suits the aesthetic of your home or have a welder create a custom look for you for a pretty low price. Depending on the style of your legs, you’ll have various methods of attachment. Usually, however, they will have a plate that you’ll screw into the underside of your tabletop.

Step 9: Wood protection

Whether you’re using pallet wood or making a DIY pine dining table, the final step is protection. Keep in mind; it will be housing food and drinks, possibly some poker or board game nights, so the inevitable drink spill will eventually happen. The good thing about reclaimed wood is it already has a used look, so some stains or drink rings often blend in much better than on a sparkling new table. Still, it’s best to protect your surface.

Apply a wood stain or oil and lightly sand after each layer. It is up to you how many you wish to apply; you’ll be driven by the look each layer creates and your personal preferences. Allow the stain to dry, and you’ll be staring at a new dining table that you have made yourself! Feel free to make it al fresco and proudly show off your DIY outdoor dining table.

DIY farmhouse dining table
Source: Francesca Tosolini via Unsplash

Frequently asked questions

How do you make a table step by step?

A simple overview of the steps required to build a table is as follows:

  1. Cut the wood
  2. Build the uprights
  3.  Connect the long supports to the legs
  4. Attach the casters (if applicable)
  5. Secure the MDF
  6.  Join the 2x8s
  7. Sand and sand some more
  8. Attach the top to the MDF

What materials do I need to make a table?

There are a number of modern table and countertop options when it comes to materials, inclusive of:

  1. Granite
  2. Glass
  3. Wood
  4. Marble
  5. Stainless Steel
  6. Tile

How much overhang should a tabletop have?

Overhang is the amount of tabletop that projects out over the base. This will vary depending on the design of your table, but a rough amount should be four inches along the sides and ends.

How do you secure a wobbly table?

Small rubber stoppers can be a good way to prevent your table from wobbling. You can attach them to the legs depending on which side of the table requires a little more support. Alternatively, you can sand the taller legs down to reach a stable height across all four.

Other ways to improve your dining room

The dining room table is an important part of any home as it provides a place to gather, share a meal, converse and during off-peak dining times, work on various projects!

The living room can often be one of the most used areas of the home. If you need a little help to make it something extra special, there are plenty of Taskers available for that exact reason! You can find people to help with dining room painting, to give a new coat of paint to the room to match your new DIY dining table.

There are also many Taskers who can help with a range of other furniture-related needs such as refinishingfurniture delivery and other furniture repair needs.

Finally, we have some other articles to help you turn your dining area into one of the most exceptional areas of your home. Have you ever wanted to design a boho style dining room? We have the guide to do that right here. Need some more ideas? Check out our dining room ideas article for some inspiration. Make sure your dining room is a comfortable and functional area that represents you, and you’ll enjoy every minute you spend there!

Make them shine: How to clean coins without losing their value

If there's one thing that definitely needs cleaning, it’s coins. Read on to learn how to clean coins the right way and maintain the quality of your coin collection.

Make them shine: How to clean coins without losing their value

We’ve all heard about dirty money. While the saying isn’t always meant literally, there are situations where it most certainly could and should be. Learning how to clean coins is a handy skill for collectors who happen upon rare pieces that, when cleaned, can be worth a lot more than the number etched into them!

In this article, we’ll explore different ways how to clean old pennies without devaluing them. You’ll learn how to keep the unique colour of your coin collection, learn about homemade cleaning solutions, and explore the do’s and don’ts of coin cleaning.

But first, let’s address a question that may be on your mind: Do you really need to clean your coins?

Should you even bother cleaning your coins?

It’s important to note that many professional cleaners recommend that you simply do not clean old coins that may hold some value.

Generally speaking, an antique metal currency should be left alone to preserve it, but if there is an unbearable amount of grime and grit on the coins, and you planning on displaying them, give them a clean. The same goes for cleaning your precious silver.

Is it necessary to clean coins

Just keep in mind that cleaning or polishing rare coins will often devalue them. If you’re planning on selling them, we recommend that you get an appraisal before attempting a clean. Or book an expert to clean your rare coins and jewellery collections.

But, if you happen to be in possession of some coins that have sentimental value to you and you do not have any plans to sell them, then there’s no harm in cleaning the coins and make them a little nicer to look at.

Another reason why you may need to clean your coins is if you have normal everyday coins that are simply extremely dirty. These days, in particular, cleanliness is very important. Coins get passed around and can collect all kinds of bacteria.

So, if you are planning on keeping your coins for a while, possibly in the piggy bank or jar, give them a clean first. It’s always better to be safe than sorry by keeping everything nice and clean! Follow the steps below and make those coins shine to look their best.

How to clean coins without damaging them: A step-by-step guide

Coins can get very dirty and easily corroded. There are a number of ways to clean change using different cleaning solutions and homemade methods that will return excellent results.

Step 1: Determine your coin’s value

When it comes to cleaning old coins to preserve the coins’ patina, it is essential to determine the coin’s value. If you are worried about ruining the coin, speak to a coin dealer first for a cleaning recommendation.

Determining the value of your coins

Step 2: Prepare your homemade cleaning solution

Before you clean your coins, make sure to prepare first your cleaning agents. A simple homemade solution for older coins is as follows:

  • 4 cups of divided distilled water
  • 1 tablespoon of mild hand soap
  • 2 plastic containers
  •  A clean, soft cloth
  • An old, soft-bristled toothbrush

Step 3: Soak the coins in the soapy mixture

Fill a plastic container with two cups of the distilled water and stir in the mild hand soap. This will create a soapy mixture that will work wonders on your dirty coins.

Once the soapy mixture is ready, carefully place the coins into the container, ensuring they are fully submerged. Allow them to soak in the solution for about 10 to 15 minutes. This gentle soaking will help loosen any grime or dirt clinging to the surface of the coins.

Step 4: Gently scrub and rinse the coins

Take the coins out and lay them on a clean, soft cloth. From here, use the old, soft toothbrush to gently scrub each coin, then place them in the second container with the other two cups of clean distilled water.

Step 5: Dry your coins

Let your coins sit for five to ten minutes, then allow them to dry naturally on a clean cloth.

Euro coins stacked on each other in different positions
Source: Shutterstock

How to clean corroded coins for everyday use

If you want to clean your everyday change, you can opt for a more abrasive technique. Ensure that you are dealing with coins that have no collectible value first as there is a chance that this method will damage the patina, and as a result, the value of the coin (over and above its standard value).

How to clean corroded coins

Here’s how to clean corroded coins for everyday use:

  • Prepare a solution of warm, soapy water in a watertight jar and add a small amount of sand.
  • Seal the coins in the jar with a tight lid and shake it as if you were making James Bond a cocktail.
  • Remove the coins and rinse them under warm water, then use a clean, soft cloth to dry them.
  • Refrain from rubbing the coins as the remaining sand may damage their surface.

How to clean coins with a soaking method

Another great way on how to clean coins without damaging them is by soaking them in isopropyl alcohol and salt. These two ingredients are coarse and acidic, which is an effective way to target built-up dirt.

Here’s how to do it:

  • Combine one cup of isopropyl alcohol and two tablespoons of salt in a medium bowl.
  • Mix the solution, then add the coins to the dish, allowing them to soak for at least two hours or longer if they are particularly grimey.
  • When ready, rinse the coins in distilled water. It is important that you do that and avoid the use of tap water as there are chemicals in it that will erode the coins.
  • Finish off by letting the coins dry on a clean, soft cloth, gently dabbing them and turning them over to ensure both sides dry properly.

How to clean copper coins with olive oil

Olive oil can clean your coins as the oil is an effective way to penetrate and loosen the dirt on the surface. However, be warned, this is not a quick method by any means.

If you’re already set on cleaning your coins with olive oil, here’s how:

  • Grab a plastic container, place the coin inside and cover it completely with olive oil.
  • Let it sit like this for at least a month or more, changing the olive oil if it becomes discoloured.
  • When ready, remove the coin from the bowl and clean it with soap and distilled water. You can gently scour the coin with an old toothbrush to target any last remaining grit.

Did you know? Olive oil is also an effective way to clean brass. Just dab it on a clean cloth after you have removed the tarnish and rub the oil gently over the surface to enhance the shine and reduce the risk of tarnish over time.

How to clean coins with baking soda

Another popular option that you likely have laying around the house is baking soda. This is a popular homemade metal polishing solution or option for cleaning jewellery.

Euro coins
Source: Shutterstock

Here’s how to clean your coins with baking soda:

  • Take two tablespoons of baking soda and add water until you have a thick paste.
  • Massage the pass around the coin with your fingers in small circular motions.
  • Rinse the coin with distilled water when done and dry it with a clean, soft cloth.

Key takeaway

Restore your coins with the cleaning tips we’ve mentioned above and get that spare change looking shiny and new. This is particularly important for collectible, high-grade, uncirculated coins, but it is vital that you exercise caution. The incorrect cleaning of valuable and collectible coins may reduce their value, so if in doubt, leave these to cleaning professionals.


Frequently asked questions

How do professionals clean coins?

In professional coin collecting circles, the general rule for cleaning coins is not to clean them at all. Coins that look dirty or worn out are often still more valuable than those that are newly cleaned. Coins undergo a natural process over time, known as toning. This is where oxygen or sulphur reacts with the coin’s metal causing a reflective quality known as mint lustre.

Cleaning products remove the lustre and add tiny scratches that can render the coin worthless. For these reasons, many professional coin dealers steer people away from cleaning. Play it safe and have your coins assessed and valued if you think they are worth something before cleaning them.

How do you clean coins without damaging them?

There is a simple homemade solution that is a great way to clean older coins without damaging them. The process involves distilled water, a tablespoon of mild hand soap, clean cloths, and an old, soft-bristled toothbrush.

Fill a plastic container with distilled water and stir in the mild hand soap in which you will soak the dirty coins for 10 to 15 minutes. After this, take the coins out, lay them on a clean, soft cloth, and use the old, soft toothbrush to scrub each coin gently. Place them in the second container with clean distilled water, let them sit for five to ten minutes, then allow them to dry naturally on a clean cloth.

What liquid cleans coins the best?

A simple solution of warm, soapy water in a watertight jar with a small amount of sand is a great way to clean coins that you don’t mind might get damaged. Seal the coins in the jar with a tight lid, shake it, remove the coins, and rinse them under warm water then allow to air dry.

Another effective liquid option is soaking the coins in isopropyl alcohol and salt. These two ingredients are coarse and acidic, which is an effective way to target built-up dirt. Once again, you’ll want to leave these coins to air dry on a clean cloth once you have soaked them in the mixture.

Easy DIY: How to build your own mud kitchen

The best mud pies come from the finest mud kitchens, we can help you build one!

Easy DIY: How to build your own mud kitchen

In a world of screens and toy unboxing videos and whatever else, it’s always good to encourage some old-fashioned outdoor fun with your little ones. As we all know, one of the most enjoyable outdoor elements is mud, and with the mud kitchen, DIY play areas are simple to create!

But what is a mud kitchen? A fair question and the answer may not surprise you. A mud kitchen is a pretend outdoor kitchen where you and the kids can create culinary mud masterpieces.

So how do you create a mud kitchen? DIY lovers rejoice because there are no rules. You can make them intricate or simple, big or small. To help, we’ve gathered some tips to inspire your kids’ mud kitchen DIY task to ensure hours of muddy fun!

How to make a mud kitchen: DIY tips

Tip 1: Start with a stack of old pallets

As we’ve mentioned, there are no rules when it comes to pallet mud kitchen DIYs, so you can make them out of pretty much anything. The easiest materials will be recycled pallets or bits of timber, anything that can replicate benches and stovetops to form the structure of a makeshift toy kitchen.

If you already HAVE a toy kitchen, well…you can save a lot of time by moving it outside *wink*.

Tip 2: You have to have a stovetop

If you think that cooking actual food in your real kitchen would be tricky without a stovetop, we can guarantee it’s even harder to operate a mud kitchen without one. You need an oven and a stove somewhere in your set-up, so we recommend painting the stove elements onto a piece of timber.

You can even use or find an old microwave to really set the scene. Just make sure you remove the power cords first.

outdoor mud kitchen pots, pans, and utensils
Source: Shutterstock

Tip 3: Include the cookware and utensils

Whether you have old crockery around the house or find the nearest yard sale and pick up a stack for a few dollars, you have to include cookware. You wouldn’t want to get dirty while you eat your mud food, after all.

Include old pots, pans, containers, measuring cups, and anything else you don’t need in the real kitchen and use some hooks to hang various implements on display to give your mud kitchen an authentic look. (It also makes it easier to find these utensils while mud-cooking.)

Nothing screams mud kitchens more than some classic old wooden spoons, ladles, and spatulas hanging around the mud kitchen area. Keep it rustic with some knocked nails straight into the fence.

Tip 4: Include shelves for storage

Your mud kitchen set-up could benefit from some shelves to keep track of all the different cooking items. You can bolt some to the back fence as part of your defined mud kitchen area and use your pallets to form benches underneath.

Top these off with some cute jars and accessories to ensure your kitchen is worthy of Instagram, of course.

Tip 5: Ensure the correct kitchen uniform

A few waterproof aprons and gumboots should be part of every mud kitchen uniform primarily because mud kitchens are not bound by the health codes of standard kitchens, which is why they can become quite dirty.

Tip 6: Everything and the kitchen sink

Mud kitchen implements get extra dirty, so include some plastic buckets as a makeshift sink area which can easily be hosed down when playtime is over.

Alternatively, you can knock things up a level with a real kitchen sink from a second-hand building yard!

Tip 7: Define the menu

Mud pies? Sure, everyone knows about the classic mud pie. Your mud kitchen, however, should be more unique. Craft a range of delicious dirt-themed dishes on a menu so the guests of the mud kitchen know what they can order.

Add a chalkboard for the daily specials and laminate some muddy meal plans, so they survive the mess.

Tip 8: Set the table

Add a table and chairs as an extension of the mud kitchen to form an outdoor mud cafe. Opt for a plastic tablecloth to save the washing, or match the outdoor decor by using a tree trunk table and chairs.

If you set it up nicely, the kids may even want to have real meals outdoors as well!

Tip 9: Diversify your food options

While spoonfuls of soil are a staple in the mud kitchen, don’t be afraid to diversify a little. Fruit made of rock, leaves, flowers, gumnuts, and other “ingredients” in jars and baskets allow you to offer a wide palette of plant-based treats to compliment the main dish.

Tip 10: Mud, the main dish is mud

The mud pie is, after all, the reason why customers visit your kitchen. Be creative with mini mud cakes in cupcake wrappers or old reusable muffin moulds to make sure that your mud cake creations look better than they will likely taste. Who knew that DIY mud recipes could be so fun?

Building your mud kitchen DIY frame

Once you have found your pallets, the following steps will help you to craft the frame of your mud kitchen.

The tools and materials you’ll need

  • Wood saw
  • Drill and drill bits
  • Sander – electric
  • Pencil
  • Pallets x 2
  • Marine ply – 1200mm x 600mm
  • Timber screws – 50mm or 20mm
  • L-brackets
  • Wingnut – 6mm / Bolt – 6mm
  • Cup hooks – 32mm
  • Protection

    Step-by-step instructions

  1. Start by cutting one pallet in half. These will be the sides of your kitchen. Give the edges a light sand with an electric sander to avoid splinters. You can paint the sides of the kitchen at this point to get creative with your look.
  2. Attach your sides to the timber length you’ve picked for the top by flipping it upside with the pallets placed on either side with the slatted sides acing out. Drill pilot holes that are slightly smaller than your screw to prevent the wood from splitting, then drill your screws. The base of your kitchen is now complete!
  3. Use L brackets, flip your kitchen onto its side, then position your brackets under the bench to allow for a back to be added to your kitchen.
  4. Grab a steel mixing bowl and attach it to the bench with a nut and bolt as a makeshift sink. Drill a hole through the base of the bowl and attach using a bolt and wing nut.
  5. Attach some hooks to hang utensils
girls playing in their outdoor mud kitchen
Source: Shutterstock

Frequently asked questions

How do you make a homemade mud kitchen?

A homemade mud kitchen can be made in a variety of ways depending on which materials you have available, how big, and how permanent you would like it to be.

A simple way to create a mud kitchen is with these steps:

  1. Assemble the frame that will be used for the cooktop using 2x4s or old pallets
  2. Add legs to stabilise
  3. Create a lower shelf frame if required
  4. Add a durable top, shelf top, and backsplash using fence boards or plywood
  5. Sand the frame to ensure there will be no splinters
  6. Add a makeshift sink and hooks to hang utensils

What mud do you use for a mud kitchen?

The type of mud you use will depend on the favoured palette of your customers – kidding. An easy way to gather the mud you need as the key ingredient in your mud kitchen is the soil from purchased loam topsoil as opposed to pulling it from your garden. Pop down to your local garden centre for a cheap bag and make sure you avoid compost. Firstly, it’s a little gross, and it does not behave like soil for fun mud play. After all, you want to be a five-star rated mud kitchen, right?

How do you make a mud kitchen with an old sink?

Using an old kitchen sink in your mud kitchen is great as it will make everything look far more realistic. You should be able to find a very cheap, old kitchen sink at a local scrap metal outlet or online via a community board or second-hand website.

Once you have the sink, cut the posts and frame to fit, providing a surface area for your sink, then add backboards and hooks to hang utensils. You can design and add whatever you like to give your mud kitchen a realistic feel that matches the sink.

Have fun making and using your pallet mud kitchen today!

Remember, the building of your mud kitchen should be fun! This is a cost-efficient way to get your kids (and yourself) outside with a new play area that can easily be taken down when the novelty wears off.

If you love the idea of a mud kitchen but simply do not have the time to put one together, you can search a range of skilled Taskers to assemble your outdoor furniture for you. They can build a mud kitchen or any other kind of furniture you may like!

If you are considering adding some more ‘grown-up’ furniture to your backyard, check out our blog on which outdoor furniture may be best for you. Hopefully, you can find some design inspiration there and turn your backyard into a more inviting and comfortable space!

DIY: How to build a shed you’ll love!

What is a classic Australian backyard without a shed?

DIY: How to build a shed you’ll love!

Does your DIY itch need a scratch? Have a space in the backyard that is just asking for a project? Learning how to build a shed is a great, simple project that not only increases your storage space at home, but it gives you a place to craft even more projects!

Every backyard (that has space) needs a shed, so we’ve detailed the steps, some tips and techniques for the perfect shed. Whether you build the shed from scratch or get a little help from a contractor, this info will come in very handy!

While the specifics of shed building will be very particular to the type of shed you build, read on for some higher-level steps that are crucial to any shed build then tailor as necessary for your chosen plan.

How to set up your shed foundation

Step 1: Clearance to Build

Firstly, it is very important before you build anything on your property that you apply for a building permit. This will ensure you can pop a shed up in that area of your home legally. Even though it is your property, your shed may affect someone else’s view, and the last thing you want to do is go to the trouble of building a shed, only to have to tear it down.

Get all the necessary approvals and permits first, which may require you to submit a set of shed plans to ensure your project adheres to building codes. If you want to lower the risk of possible rejection, call ahead and determine what is and isn’t allowed on your property.

The biggest restriction will likely be height. If you understand your parameters first, you can design your shed around them and ensure the approval of your plans.

Step 2: Picking your site

You’ll want to confirm the exact spot where your shed will sit on your property. This is a crucial step that isn’t as easy as it sounds. If you choose poorly, your shed won’t be standing for long. 

Follow these simple rules to pick the best spot:

  1. Avoid building at the bottom of a hill or in a spot where water collects
  2. Don’t pick a spot where your shed will be entirely surrounded by trees and ground cover as this will restrict sunlight and airflow 
  3. Never violate code-required setback distances which determine how far away your shed must be from side, front, and rear property lines

Keep in mind that your location should allow for easy access when you need to carry heavy tools in and out of your shed. In some cases, your yard may not be that big, meaning the location is somewhat already picked for you. if so, keep access in mind when choosing the dimensions of your shed.

Step 3: Ensure you have all of the tools you’ll need

It’s always good to be prepared before you begin to save time (and frustration) when your project is underway. No matter how big your shed will be, you’ll need a range of carpentry hand tools and power tools, including:

  • A hammer
  • Tape measure
  • Framing square
  • Combination square
  • A level
  • Chalk reel
  • Handsaw
  • A flat pry bar
  • A cordless drill 
  • Impact driver 
  • A job site table saw (helpful not necessary)
garden shed with tools inside
Source: Shutterstock

Step 4: Create a strong foundation

The first thing you’ll need to create is a strong base. The most common foundations are solid concrete blocks or pressure-treated wood timbers that have been set directly on the ground. You’ll want to ensure that your base is perfectly level to support the shed’s floor frame. 

Protect the foundation from soil erosion by setting them on a 4-in.-deep bed of compacted gravel. You’ll be fine to compact this by hand if you are building a small shed, but for larger areas, you’ll save time by renting a plate compactor. Ideally, your garden shed foundation will be set slightly off the ground to help with water drainage. 

It is important to note that if you are buying a prefabricated shed, you’ll still need to perform this step to create the foundation. 

Step 5: Build a floor frame

Your floor frame should feature a mudsill, floor joists and perimeter band joists. It is crucial to weather-proof your frame as it will sit close to the ground, making it prone to rot and wood-eating bugs. Build your floor frame out of pressure-treated lumber, and if you are buying a prefabricated shed, ensure it has a floor frame made with treated construction-grade lumber.

For the floor deck, you’ll need at least a ¾-in. exterior-grade plywood. The thicker, the better. This may raise the cost a little and be harder to install, but you’ll be glad you created a solid floor down the track. Pressure-treated plywood for the floor deck is always a good idea for longevity.

Step 6: Roof framing

The hardest step of the process is framing the roof, as you’ll need to make a lot of repetitive, angled cuts. Start by assembling the rafters and ceiling joists into roof trusses, then raise them and set them on top of the walls. This will be much easier than building the roof frame one board at a time.

You can essentially use your completed floor deck like a giant workbench for the creation of roof trusses. Ensure you take the necessary time to get this right.

Step 7: Door placement

You’ll either have a hinged or sliding door on your shed. Hinged doors take up less space and are more secure, sliding doors are easier to install but require additional wall space on either side.

The best positioning for your door is on one of the sidewalls. this will allow you to access items no matter where they sit in the shed. there is nothing worse than having to dig through everything to get the shovel hanging at the very back!

DIY Sched: Materials List

Most materials lists will vary greatly dependent on the type and size of shed you are building. To give you a rough guide, however, here is a standard list of materials required to build a typical shed:

  • Corner/fence posts 90x90mm x 2.4m (Quantity 4)
  • Cement 25kg (Quantity 1)
  • Sharp sand 25kg (Quantity 1)
  • Waterproof sheeting (Quantity 1)
  • CLS C16 timber 38x63mm x 2.4m (Quantity 60)
  • LogLap cladding 125mm x 22mm (224m total length)
  • 3×2 C16 construction timber 45x70mm x 3m (Quantity 8)
  • 3×2 C16 construction timber 45x70mm x 3.6m (Quantity 6)
  • OSB3 18x1220x2440mm (Quantity 5)
  • OSB3 12x1220x2440mm (Quantity 6)
  • Roof felt 10m (Quantity 2)
  • Door hinges (Quantity 4)
  • A mix of screws – 80mm – 50mm 
  • A window (optional but recommended if possible)
lush garden with shed
Source: Shutterstock

Mistakes to avoid

It’s unlikely you are building a shed just for the aesthetic look. You probably have some functional ideas in mind for it as well, namely maximising the extra storage. If so, ensure you consider your storage requirements before building. Make an inventory of the things you plan to keep in your shed and account for a little room to move as well.

It is also important that you consider the climate. Some shed materials will not be able to handle the harsh weather. Steel seems like a durable choice for a shed, but in hot regions, a steel garden shed will be unbearable in summer.

Finally, ensure that price is not the most significant factor in the building of your shed. Cheap materials can become brittle in the heat, and you’ll spend more replacing sections or even the entire shed, far sooner than if you had opted for a more durable material.

Frequently asked questions

Can you build your own shed?

Absolutely! You’ll want to first get a permit to be able to build. Once you have that, you can often build your own shed for a lot cheaper than paying a builder. This even includes the slightly easier method of building your own shed with a flat-pack model.

The advantage of building your own shed is the ability to completely customise your design. You can fit to your space, or to the items you are hoping to store. So long as you have the tools required and the right quality materials you’ll be able to create your own custom garden shed.

It’s the DIY project that keeps on giving

You will get many uses out of your freshly built shed. It may even be a home that inspires plenty more DIY projects in the future! As long as you focus on sturdy construction with quality materials, you’ll be able to enjoy your garden shed for many years to come.

If you really want the shed but with less of the DIY input, there are plenty of expert taskers who can help with shed installationBunnings prefab shed installation and other garden shed repairs and builds to ensure you have a high-quality result that you can trust.

While you are at it, why not read our blog about a range of other backyard ideas that will boost the value of your home as well as the enjoyment of your outdoor areas? There are always new skills to learn and your home can benefit from some well-executed projects today.

How to (safely) get rid of pesky ants inside and outside home

These little guys sure can cause some problems...

How to (safely) get rid of pesky ants inside and outside home

Ants are extremely common around the world, and while they are a vital part of your garden’s ecosystem, they are not so fun at parties. Especially the kind that takes place inside your home. For this reason, you’ll want to know how to get rid of ants, so these houseguests don’t take control of your pad!

When considering how to get rid of ants, you have both natural and not-so-natural options.  The top five most common types of ants in countries like Australia are:

  1. Carpenter ants
  2. Fire ants
  3. Bull ants
  4. Sugar ants 
  5. Black Ants

Defence over offence

Firstly, it’s far easier to avoid and ant problem the deal with one. If you do not want to attract ants don’t leave a buffet of food out for them. Much like your return trips to your favourite restaurant, ants will keep on coming if you are supplying the yums.

Keep your home clean and free of crumbs or food scraps to cut down the number of ants inside and avoid the issue entirely if possible. Also be aware of spots that may get missed during your clean, such as under the fridge or the oven.

How to get rid of ants naturally

A natural way to get rid of ants in one go is to find the nest and make a hole in its centre with a spade. Pour boiling water into the hole, until no more ants surface from the nest. Brutal, we know, but effective.

It is important to note that doing this, understandably, will anger the ants, so gardening gloves and closed-toed shoes are recommended.

Locating the source in the first instance can be hard, so create an ant trap with a mix of peanut butter, sugar, Borax and water. A teaspoon of each should do the trick, simply place the mixture near the ants, and they will ingest the bait, taking it back to the nest which will kill off the entire colony. 

If you want to just target the areas of your home that seem to keep collecting ants, you can use a range of essential oils to repel and kill them. The best five options for this are: 

  1. Patchouli
  2. Peppermint
  3. Orange
  4. Cedarwood
  5. Vetiver

Simply dilute a couple of drops of the oil in water and vodka then pour it into a spray bottle. Spray on the affected areas and allow them to dry. For an effective treatment, repeat every few months to ensure the ants do not return.

How to get rid of ants in a nicer way

If all of the above sounds incredibly cruel (it is), you may want to try a method that takes a little bit more time but is far nicer to our tiny ant friends.

You can remove ants from your home by hiding their tracks by using apple cider vinegar to wipe down any area where you have seen the ants go. This will deter the ants from coming back!

To really drill it home, you can set out food that will repel the ants such as bay leaf, pepper and cinnamon (or any other strong-smelling herb). 

While doing these things won’t get rid of the ants immediately, they will eventually find a new food source and move on and you will have avoided the use of any harsh chemicals around the home. 

black ants on bread
Source: Shutterstock

How to get rid of ants with chemicals

The most effective way to get rid of ants comes with some warnings, especially if you have pets or small children around the house. Ant killer insecticide granules will kill ants and create a strong barrier to keep them out, but must not be ingested by humans or other animals.

Another pesticide for use inside the home is Ant-Rid, which works in a similar way to the natural mixture mentioned above, but much faster. There is also a range of ant smells surface sprays that will combat ant issues as well as cockroaches, spiders, and other insects.

How to get rid of ants outside

If you are finding that the ant problem is bigger outside of your home, you may want to apply an anthill treatment, especially if you have multiple ant hills in your yard.

It is important that you are cautious when applying this treatment as it is very chemical-heavy. You can find anthill treatments in solid or liquid forms, and it is vital that you read the accompanying instructions to use the treatment correctly. Choose a day with good weather, so the ants are out and about. If using a solid treatment, you will need to activate it with water.

Another option is to apply insecticide to your entire yard. This is a time-consuming method; however very effective in completely eliminating your problem. If you opt for this process, be sure to mow your yard first as it makes it easier for the insecticide to get into the soil. Cut the grass and apply the insecticide via a spray option. You’ll need to reapply the insecticide at least once a month to ensure full protection.

green ant on dewy green leaf
Source: Shutterstock

How to get rid of green ants

The green ant can be extremely dangerous as they have a poisonous sting, which can cause a strong allergic reaction and anaphylactic shock. If you are unlucky enough to find yourself with a green ant infestation, you’ll want to sort the problem out sooner rather than later.

Similar to the above process, you should begin by targeting the nests if you are able to find them. Use a granular ant bait that the ants will share with the rest of their colony. This type of bait is a poison, and the ants will do the job of taking it to the spots you can’t reach.

You’ll know this has taken effect if the activity of the nest lowers. This is a sign that the ants have consumed the bait and died. From here, use a soil spray that is specific to the green ant to ensure they do not come back. Apply the spray to the nest areas or anywhere else where you may have seen groups of ants.

An important thing to keep in mind here is that if your home or garden has been invaded, your neighbours probably have been as well. If you are the only one dealing with the problem, your unwelcome visitors will likely return. Ant families transfer quickly from other properties, so let your neighbours know about the issue.

For a full and thorough treatment, opt for granular insecticides or a non-repellent spray with repeated applications to ensure a long-lasting solution and a safe home.

Frequently asked questions

Why do I have ants in my house?

Ants are often always in search of food or a place two nest. It’s basically their two favourite hobbies. This means that even small amounts of food can attract hordes of ants.

The good news is, ants are nature’s cleaning crew so you can cross vacuuming off your to-do list, however, the creepy feeling of loads of ants in your home may not be worth it. Ants more commonly appear indoors in summer when they are more active and are usually in search of water.

In winter, heavy rains can flood the ant’s nest outside, forcing them to relocate somewhere dryer, like your house.

How do I get rid of ants overnight?

The most effective all-natural solution to get rid of ants fast is Borax, which is commonly found in a lot of ant-control products anyway. 

The easiest solution to make at home requires the following:

  • 1 cup of warm water
  • 2 tablespoons of Borax
  • 1/2 cup of sugar

Mix the above ingredients together let some cotton balls soak it up. Leave this near the ant trails overnight, and your creepy crawly problems should be solved.

How long does it take to get rid of ants?

Lengths of time can vary based on how in-depth your ant problem is and which removal method you choose. For a fast and aggressive method, you can use a range of chemical ant-rid products. These should not be used if you have small children or pets around the home, however.

There are more natural solutions like a mixture of Borax and sugar, which are very effective and will often solve your ant problem overnight.

You’re all set for no more surprises inside

Follow the steps above, and that shock of a row or group of ants indoors should be no more! If you need a bit of help, or if your pest issues are bigger than just some ants, find a Tasker who specialises in pest control easily

You can also extend your cleanup skills by learning about how to manage pests in the garden, or to get rid of cockroaches (arguably a little more fright-worthy than ants). You can also help with prevention by learning how to keep your oven clean, as it’s one of the main spots where food can build-up to attract bugs. Read all of these, and you’ll likely have the most immaculate house on your street!

How to tile a wall the right way

It's easier than you think to tile a wall with these steps

How to tile a wall the right way

So you want to learn how to tile a wall? Good on you for taking the first step and deciding it may not be as hard as some might think! You are also correct, as with some patience and the right preparation, learning how to tile a wall can be easy and even a little fun.

Wall tiles are a popular choice for wet areas of the home like the kitchen or bathroom, as they are not affected by moisture like wallpaper or paint can be. They are also a robust, stylish option that can increase the aesthetics and value of your home. Tiles also come in a lot of colour and pattern options, so you can really flex your design muscles!

To achieve a professional-looking tiling result, follow the steps for how to tile a wall below and take control of the look in your home. These instructions apply for large projects, full rooms and even just a small, feature splashback in the kitchen.

Everything you need to tile a wall

how to tile infographic
Source: Airtasker

It’s always a great idea to have everything you need ready to go before starting a project like this. Here are the tools and supplies you will need to tile a wall:

  • Tiles of your choosing
  • Grout
  • Adhesive
  • Protective coverings
  • A bucket
  • Clean sponges
  • Sugar soap
  • Pencil and tape measure
  • Spirit level
  • Gloves
  • Tile spacers
  • Grout float
  • Notched trowel
  • Tile cutter
  • Timber baton
  • Screws
  • Drill 
  • Silicone sealant and caulking gun

Steps to tile a wall

Step 1: Preparing the area

When learning how to tile a wall, the first step is to lay some protective covering on the floor to keep it safe. Look for any cracks that need repair. The surface you are about to tile should be flat, so sand away any lumps and bumps at this stage.

Use a clean, damp cloth to wipe down the wall you will be tiling, and it’s a good idea to run some sugar soap over the space as well. Let the wall to dry completely before moving to the next step.

Step 2: Priming

Some tiles require you to prime the wall, and in wet areas, a specialist waterproofing product is a great idea. 

Another element to consider is how much weight your wall can handle as tiles are quite heavy. If you need to strengthen the wall, you can use Hardiebacker boards to allow the wall to hold more weight.

Brown wall tiles
Armando Castillejos

Step 3: Preparing the tiles

Measure the wall height and width then multiply the two measurements to find the metre-squared value. This will give you an idea of how many tiles you’ll need (although it is always good to have extra to account for breakage).

Step 4: Marking the wall

Find your starting point by figuring out where the centre of the wall is. Mark it with a pencil, then use a tile as a measure to mark the width and length of the tiles to get an idea of where they will lay. Always aim to have at least half a tile at the very bottom of your wall, and rearrange your pattern if necessary to ensure this is the case. 

Find the pencil mark that is closest to the floor and use a spirit level to draw a line horizontally across the wall. Fix a timber baton to the surface as a guide to tile up from.

Step 5: Preparing the adhesive

Your chosen adhesive will have instructions for how to mix it. If you are using small tiles, a pre-mixed adhesive will likely be ok. If you are using larger ones, a cement-based adhesive that you mix yourself will be needed. 

Mix the adhesive in a bucket according to the packet instructions and once mixed, apply the adhesive with a notched trowel. Hold the trowel at a 45-degree angle and spread the adhesive over the wall. Ensure an even coverage then make grooves in the adhesive in the same direction.

Pro tip: Only cover enough of the area that you can tile before the adhesive hardens. Aim for one square metre at a time.

Step 6: Tiling the wall

Push the first tile gently onto the wall, twisting to ensure it sticks. Use a tile spacer on each edge and wipe away the excess adhesive with a cloth. Continue this action with the rest of the tiles until you’ve covered the whole area.

When you reach the edges, you’ll likely have to cut some tiles into the right shape. You can do this with:

  • A manual cutter for straight cuts
  • An electric cutter for thick tiles, right angles or curved edges
  • A tile scribe for thin tiles

Step 7: Drying time

Once you have secured the edge sections to the wall, wait for whatever amount of time the instructions for your adhesive state for drying times. When dry, remove the spacers and wipe away any excess adhesive.

Step 8: Prepare the grout

Mix some water and the grout powder in a bucket in a small amount as this will set quickly. Use a grout float to push the grout into the spaces between your tiles. Wipe away the excess grout with a damp sponge. 

After about an hour, you’ll need to wipe the wall again to get rid of any residue. At this point, you can use a grout profiler to smoothen all of the grout lines. The key is to make sure the grout does not get to wet throughout these steps as it may weaken the finished grout.

Step 9: Sealing

The wall tiling process’s final step requires you to use a silicone sealant to seal the edges. This will ensure a watertight finish keeping your wall, tiles and grout safe. 

Place the sealant in a caulking gun and squeeze it along the edges of the wall. You can also use a sealant profiler to take away any excess. If you just want to use your finger for this that is fine but make sure you are wearing gloves. Allow the sealant to dry for 24 hours before using the area or making it wet. At this point, you should be staring at a professionally tiled wall that you’ve done yourself!

White wall tiles
Mitchell Luo

Frequently asked questions

Where do you start when tiling a wall?

You can find your starting point by figuring out where the centre of the wall is. Use a pencil to mark the spot then use one of the tiles you ware about to lay as a measure to mark the width and length of where they will lay. 

Always aim to have at least half a tile at the very bottom of your wall, and rearrange your pattern if necessary to ensure this is the case. 

Can you tile directly onto a painted wall?

Some tiles require you to prime the wall, and you will need to consider how much weight your wall can handle. Tiles are quite heavy, so if you need to strengthen the wall, you can use Hardiebacker boards to allow it to hold more weight.

You will also require adhesive which you will apply with a notched trowel. Hold the trowel at a 45-degree angle and spread the adhesive over the wall. Ensure an even coverage then make grooves in the adhesive in the same direction before sticking your tiles into place.

How do you prep a wall for tiling?

Start by looking for any cracks that need repair in the wall. The goal is to ensure the surface you are about to tile is flat, so sand away any lumps and bumps if necessary. Use a clean, damp cloth to wipe down the wall with sugar soap and let the wall dry completely before tiling. Make sure you have everything you need for tiling on hand before moving on with the next steps as well.

Are you ready to tile a wall?

You now have all of the information you need for how to tile a wall and are ready to get to work. We are sure you’ll be very happy and accomplished upon completion, and find your new skills to be very handy.

If you are a little less confident or have decided that the steps above are too complicated or time-consuming for your schedule, there are tilers who are ready to help out. You can find specialists in splashback tilingporcelain tile installationterracotta tiling and more.

If you have successfully completed the task yourself and are now hungry for more DIY tiling jobs to do around the home, move on to some of our other helpful blogs! You can find some inspiration for splashback ideas, step-by-step instructions for how to remove a tile floor and a range of bathroom tile ideas for your next project. 

Tiles are a robust option that can be timeless when the right design and pattern is chosen. Consider the look you want and research which patterns and layouts are available for your tile choices. Learning how to add them to your home properly is a very worthwhile use of your time, so get ready and tiling today!

How to clean your bathroom so it sparkles

From mould and bleach, to shower scum and window cleaner - here's the best way to clean your bathroom

How to clean your bathroom so it sparkles

There is one area of the house that no one likes to clean, and it also happens to be the area that really needs to be spotless to ensure it does its job; the bathroom! Knowing how to clean bathroom areas correctly ensures you have a healthy space in which to clean yourself!

We know, it’s annoying, but we can all agree that a sparkling clean bathroom is much more enjoyable than a dirty one. Sorting out the showers, bathtubs, toilets and spaces takes a little bit of time, but read on to see our bathroom cleaning checklist of sorts which can help! 

Make the task a little easier and learn how to clean both effectively and efficiently, ensuring you don’t miss anything. Once you know what you are doing and get into the habit of regular cleaning, the task becomes a lot easier!

How to clean bathroom areas to look like new

1. Remove all of the items

An effective clean is certainly not a lazy clean. Make things easier for yourself by emptying the entire bathroom instead of as you go. Shampoos, soaps, toothbrushes, towels and rugs all have to go so you can clean all areas properly. Use this as the point to empty the bathroom trash bin as well.

2. Dusting and sweeping

Use a duster to give an overall clean to begin and focus on corners, light fixtures, vents, and other areas that often get neglected. When you have performed an initial dusting, sweep or vacuum the floors to get the dust balls, hair and other debris. These will only create a bigger mess later when they get wet.

3. Use an all-purpose cleaner on the shower and bathtub

Use an all-purpose cleaner (or dedicated shower cleaner if you prefer) on the shower and bathtub, ensuring you clean the shower track and inside of the door. Allow the cleaner to soak for a little while, and if it has been some time since your last clean, use a harsher acidic cleaner for stubborn grime build-up.

A clean bathroom look
Sidekix Media

4. Clean other surfaces

If using an all-purpose cleaner, you can spray it on to a microfiber cloth and wipe down the other remaining surfaces which may include:

  • Towel racks
  • Shelving and baseboards
  • Doors
  • Blinds and windowsills

Always work in sections and start from the top of the room, left to right, all the way to the floor.

5. Clean the floor

Use a mix of warm water mixed with your all-purpose cleaner or a dedicated floor cleaner to wipe or mop your tiles or concrete. 

6. Go back to the shower and bathtub

The cleaner that you sprayed on your shower and bathtub earlier should have done its job by now. All that is required from you is a light scrub to get rid of the loose dirt and build-up. From here you can wipe the walls, floors and other surfaces one final time if any missed spots reveal themselves.

7. Put your bathroom back together

Pop all of the removed items back into their spots and give them a wipe if necessary. Dust can build up on shampoo bottles and the like very easily, so you don’t want to bring that back into your now clean bathroom. If you have a shower door, wipe it with a little glass cleaner for a streak-free finish.

8. Clean the vanity

It’s good to leave the sink until later in the process as you have likely been washing your microfibre cloth as you go. Spray the all-purpose cleaner on the faucets and surrounding countertops, let it sit, then wipe with a clean cloth. You may find some build-up in your soap dish/area which requires a scrub sponge to loosen. Wipe the mirror with glass cleaner to ensure no streaks.

9. Clean the toilet

The step everyone hates! Squeeze a toilet-specific cleaner under the lip of the bowl then scrub with a toilet brush. Spray the outside of the toilet, including the back parts that no one ever sees with the all-purpose cleaner. Wipe it all down with a clean cloth.

10. Set yourself up for future spot cleans

The above steps tell you how to clean bathroom areas efficiently and effectively, but life will be much easier for you if you keep it tidy between cleans as well. Set yourself up with a few ket things to help ensure this happens:

  • Keep a hand-held vacuum for a daily pick up of hair and other dirt in the bathroom
  • Ensure your drain has a hair catcher to avoid build-up (this can save you serious plumbing issues down the track as well)
  • Squeegee shower walls and glass after each shower
  • Wipe the vanity area regularly

Extra considerations and tips

Here are some extra cleaning points to consider to ensure you get the absolute best result possible from your clean.

Tile grout cleaning

With a tile-lined shower, the grout will benefit considerably from a good weekly scrub:

  • Mix a 3/4 cup of household chlorine bleach with water
  • Use rubber gloves and scrub the mixture on the grout with a stiff brush (avoiding the surrounding surfaces)
  • Let sit for a few minutes, scrub again and rinse

Keep in mind that over time, your grout will wear away and eventually need replacement.

Other bathroom cleaning tips:

Use a disinfectant bathroom cleaner on the bathroom sink and wipe faucet handles with a disinfectant spray or wipe, letting the solution sit on the surface for a little while to kill all of the germs

  • Let the toilet bowl cleaner sit for up to five minutes before scrubbing and use a stiff-bristled toilet brush
  • Remember that the toilet brushes need cleaning as well so spray them with a disinfectant after use
  • Be sure to open the bathroom windows and door while cleaning and turn on the fan if you have one, to avoid cleaning fumes and hurry the drying process
  • For a tougher scrub, look for a cleaning product which contains micro-scrubbers and foaming cleansers that dissolve

Finally, always remember to vacuum the dust that sits on and inside the grill of the bathroom fan. Give the detachable parts of the fan a clean with a soap and water solution, just ensure that you do not wet any of the internal parts. Soak the removable grill in sudsy water for a little while then rinse and dry.

A clean bathroom vanity
Christian Mackie

Frequently asked questions

Where do I start to clean the bathroom?

The best way to start an effective bathroom clean is by emptying the entire bathroom before you begin. Shampoos, soaps, toothbrushes, towels and rugs should go so you can clean all areas properly. Next, use a duster to give an overall clean and focus on corners, light fixtures, vents, and other areas that often get neglected. 

When you have performed an initial dusting, sweep or vacuum the floors to get the dust balls, hair and other debris, then you can move onto cleaning the individual sections of the bathroom. Always start at the top of the room and work your way down, moving left to right.

What household items can I use to clean my bathroom?

An easy and effective bathroom cleaner is a mixture of 1 ½ cups of baking soda with ½ cup of warm water and ½ cup of liquid soap. You can also create a mixture of 2 tablespoons of white distilled vinegar, or apple cider vinegar with water. These are natural ways to clean that avoid the use of harsh chemicals.

What is the easiest way to clean a bathroom wall?

If you have painted walls in your bathroom, vacuum them with a soft brush attachment then wipe them down with a dusting agent and electrostatic dusting wipe. If you have walls made of tile you can use the same cleaning solution you are using on the rest fo the bathroom with a clean, microfibre cloth. Always start at the top of the wall and clean downwards.

Your hard work will pay off with a shining clean bathroom!

Once you have used the steps above to create a system that works for your particular bathroom layout, you’ll find each clean even easier. As mentioned, it’s a great idea to perform spot cleans to minimise the intensity of your deeper cleans.

If time is not on your side, your deep cleaning jobs can be handled by a range of skilled taskers who specialise in things like tile grout cleaningmould removalmoppingshower cleaning and more. Save yourself the hassle while ensuring the job is done right!

If you are looking for some other ways to improve your bathroom, we have a selection of blogs that will provide some very helpful information. Read about bathroom tile ideasvarious colour scheme options, and how to achieve the look of a modern or Hamptons-style bathroom. We also have a range of ideas for your shower or bath and a fun little piece that helps you design an outdoor shower for something different! Make the most of your bathroom by giving it a little spruce, and thoroughly enjoy the time you spend within it.

How to tile a shower perfectly

Revamp your shower with new shiny (or matte) tiles with these easy steps

How to tile a shower perfectly

You might be thinking that you need a professional tiler to transform your shower from drab to fab, but actually, with a bit of know-how, it’s a DIY project that anyone can do. So let’s learn how to tile a shower yourself from design and mortar to cutting tiles and applying grout.

Steps to tile a shower

Step 1: Choosing your tile design and layout

Always start with a design plan, so you need to know what

  • Tile colour – will the shower  walls and floor be different
  • Tile type – do you want matte or a shiny finish
  • Tile pattern – classic square or something more modern like a fish scale tile pattern

When you have chosen this, you’ll need to calculate how many tiles you will need. Calculate this by multiplying the width by each wall’s height, then add 10% to allow for breakage and or future repairs.

Pro tip: If opting for a ceramic tile, find boxes with the same dye lot number. When that is not possible, mix tiles from different boxes to minimise how noticeable colour variations will be.

Step 2: Planning the pattern

Start by placing a tile horizontally in the centre along the length of the wall. It can be beneficial to do a dry-fit at this point to ensure you don’t have too small of a tile at the end of your rows. If you do, adjust the layout so that a have wider tile lands on the sides.

Do the same from the top of the wall to assess your vertical pattern. Aim to have a full, uncut tile at the top of your wall so that the cit tiles will sit at the bottom where the shower pan might be out of level.

If you need to cut your tile’s bottom row (which will be very likely), start your installation on the second row. Mark the spot for the second row, ensure it is level, then drill a wood board into the wall to serve as a guide.

Step 3: Applying the mortar

Mix your chosen mortar based on the instructions on the pack to reach a peanut butter-like consistency. Spread the paste over one small section at a time with the notched side of a trowel so that you create a texture. Your tile manufacturer likely lists a recommended trowel notch size to help you decide which trowel will be best to use.

It is important not to spread too much mortar over a large area as you want to avoid it drying before you get to it. Work is small, manageable batches so that the drying time for each tile is sufficient.

Step 4: Cutting the tiles

When the mortar is spread, push the tile firmly into position. When you reach the ends, use a tile cutter to shape as needed, and a tile hole saw to cut any required curves. If you have exposed edges, a bullnose can be used for their cuts.

Ensure tile spacers are placed in between the tiles with consistent gaps and continually check that everything is level throughout the process. Run a small test to ensure the mortar is sticking by pulling a tile off the wall and ensuring every part of the mixture is sticking. If it is not, you’ll need to move to a larger size trowel.

Pro tip: If you are using a bullnose, fill a plastic sandwich bag with the mortar and cut 1/2-inch off the corner. This will make it easier to apply the mortar with a technique similar to a piping cake icing bag.


Tiled shower wall
DAVIDCOHEN

Step 5: Tiling the bottom row

When the full row of tiles are in place, remove your wooden guide board and cut the tiles’ bottom row (if necessary) to stick them into place. Be sure to leave a 1/4-inch expansion gap at the very bottom of the section.

Step 6: Application of the grout

Once the mortar for your tiles has dried for 24 hours, remove the spacers and prepare your grout. Mix in small batches and apply but working it into the spaces with a spatular in diagonal motions. It would be best to use unsanded grout to avoid scratching the surface.

Allow the grout to dry then use a wet sponge to wipe away the excess, being careful not to remove grout from the joint. When the grout is completely dry, you can use a grout haze remover to ensure a clean tile face.

Pro tip: Wait a few days of drying then apply a grout sealant and silicone sealant to the corners and edges to ensure your area is waterproofed.

How to tile a shower floor slope

When looking at bathroom tiling yourself, a small slope towards the drain is vital to ensure water:

  1. Measure the length from the drain opening to the furthest wall
  2. Multiply the measurement by 1/4 inch to calculate the slope and place a bubble level from the drain opening to the wall
  3. Ensure the wall’s side of the bubble level matches the calculation of your calculated slope
  4. Place a mark at the appropriate height
  5. Score a line around the floor’s perimeter to show the floor’s slope

When tiling, use the bubble level as a guide. It is also important to verify that the slope does sit above the curb; you will need to lower the drain opening if it does.

How to install a shower drain for tile

If you are installing a compression-style shower drain fitting, which is often the most popular, you’ll need to trim the drainpipe first. The drainpipe should sit about 3/4 to 1 inch below the shower drain lip. Trim the drainpipe with a hacksaw so that the cut is flat and level.

Apply a bead of silicone caulk to the top of the shower drain opening, then place the drain into the opening with the rubber sealing washer over the drain assembly tailpiece that sits under the shower base. There will likely be a mounting nut that you can thread onto the tailpiece then tighten with channel-lock pliers.

Wipe away any excess caulk then position the shower base with the drainpipe extending up. Place the rubber compression gasket into the drain opening, thread the compression nut and tighten. Most compression-style drain fittings come with the tool you will need to tighten the nut. When tightened, the rubber gasket compresses against the drainpipe, creating a watertight seal. Seal the edges with silicone and allow it to cure for a full 24 hours before it gets wet from the shower.

Raquel Navalon Alvarez

Frequently asked questions

How do you prepare a shower wall for tile?

A good base is important when tiling a wall as it will dictate the quality of your tiling result. To ensure the wall is ready:

  1. Find any rough patches or divets
  2. Fill them or sand as necessary to reach a smooth straight surface
  3. When complete, wash the wall with sugar soap to remove any excess grit
  4. Leave to dry completely before you begin tiling

Can I tile my own shower?

Yes! Tiling is a DIY task anyone can do if the right amount of preparation and time is given to the project. The key is making sure you have a quality base to tile, be it walls or floors, and you double-check your measurements and placement positions for your tiles before placing them in their spots. If you take your time and ensure each step is done properly, you should end up with a professional-looking result!

Where do you start when tiling a shower floor?

When tiling a shower floor, it’s a good idea to start in the middle and work outward. Avoid starting on the edge and use a level board which has been screwed in place along the edge. This will create a line that keeps your tiles in place until you reach the edges. It is also vital that you use the proper spacing between your tiles to allow for the grout.

A new look for your shower is just a few steps away!

Now that you have read this article, you have all the necessary steps to tile your new shower! Take your time, double-check measurements and placings, and you should have a completed project that you can be proud of for many years to come.

If the task understandably still seems a little bit advanced, or more time-consuming than you initially planned for, a range of skilled bathroom tiling taskers are just a few clicks away. You can find specialists in floor tilingregroutingscreeding and other general tiling tasks to help you realise your perfect bathroom.

Those with the DIY bug will find a range of other helpful articles for when it comes to designing a new look. Find inspiration for your shower or bath areageneral shower ideas and for a bit of fun, how to create an outdoor shower! Have a little read, improve your skills, and make sure your bathroom is one of the most comfortable areas of your home.

How to Clean the Oven?

Cleaning the oven, one of the easiest house cleaning chore… to ignore. Close that oven door, and BOOM you can "How to Clean the Oven?"

How to Clean the Oven?

Cleaning the oven, one of the easiest house cleaning chore… to ignore. Close that oven door, and BOOM you can pretend all is well for a couple of more months (at least)! “No one else sees the inside,” your inner procrastinator whispers, “It’s what comes out of the oven that counts”.

But this is one chore you really shouldn’t ignore for too long – ovens accumulate grease and spilt food which can result in excessive smokiness and even, run the risk of a grease fire.

Plus, the longer you wait to clean your oven, the harder it gets to do – so take a deep breath, buckle down and get cleaning!

Here’s an easy, non‐toxic solution for oven cleaning:

A. Clean your oven racks

1. Remove the racks from your oven.

2. Sprinkle baking soda over the racks, then spray with vinegar – watch out for the bubbling effect as the baking soda reacts to the vinegar.

3. Place the oven racks in a large bucket large enough to soak your racks (you can use your bathtub too! Note: If using the tub, lay down some towels at the bottom of the tub first).

4. Fill the bucket or tub with enough hot water to cover the racks and let it sit overnight.

5. The next day, scrub the oven racks with the coarse end of a sponge. Rinse thoroughly.

oven-rack-tub-cleaning
Source: Appliance Video

B. Make your own cleaning solution

Clean your oven with items that can be found in most household pantries: vinegar, coarse salt and baking soda.

1. In a spray bottle, combine 1/3 cup of vinegar with 2/3 cup of water.

vinegar baking soda oven cleaning
Source: Dailymail

2. Spray the inside of your oven including the inside of the door with the vinegar and water solution.

3. Sprinkle baking soda all over the oven – put more on any stubborn caked on areas.

4. Sprinkle a thick layer of coarse salt over the baking soda.

5. Spray the oven again with your vinegar and water solution.

6. Leave to sit overnight.

C. Use some elbow grease

Now I didn’t say you can get away with zero scrubbing. But the good news is, with your pre-clean and your homemade solution, the rest of the oven cleaning shouldn’t take much time at all!

oven-cleaning
Source: Slightly Steady

1. With the coarse side of a sponge, scrub the oven. Prepare to be amazed at how easy all that muck comes off!

2. Spray again with the vinegar and water solution to remove the last of your oven debris.

3. Wipe everything down with old towels or paper towels. Voila, all done!

Time spent cleaning: 2 -3 hours
Time spent getting other things done while the racks clean: 8 hours

Bonus tip:
Now that your oven is nice and clean, use it to make your whole house smell amazing:

Put two teaspoons of vanilla into an oven-proof coffee mug and place in a 150 degree Celsius oven for an hour.

This article was written by Airtasker – Larling P.