How to hang out washing correctly: The ultimate cheat sheet

Say goodbye to excessive ironing and high electricity bills. Learn expert tips and tricks that will change the way you hang out washing and help you save more time and money in return.

How to hang out washing correctly: The ultimate cheat sheet

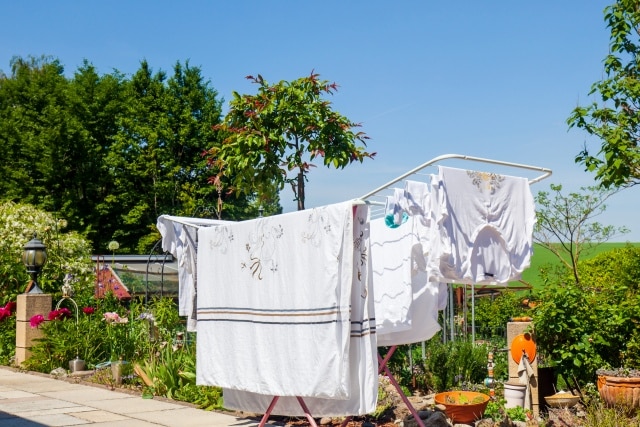
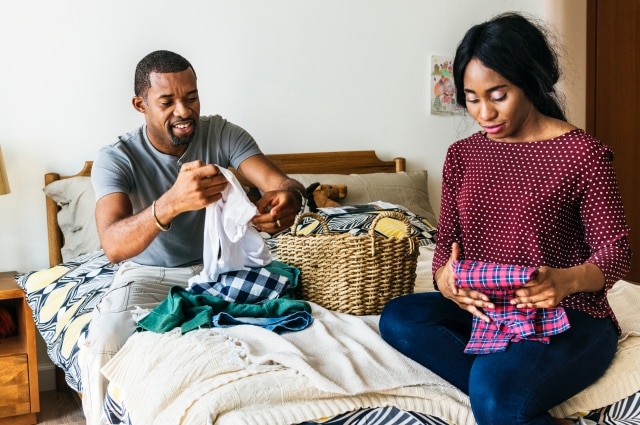
Before you throw that soaking wet washing into the tumble dryer, consider that each load generates more than 3kg of greenhouse gas, stacks up your electricity bill and isn’t actually great for your clothes.

This cheat sheet will show you how to hang out washing correctly to save time, money, the environment, and of course, your favourite t-shirt!

Find a Tasker

Need help with your home project?

Get more done with Airtasker.

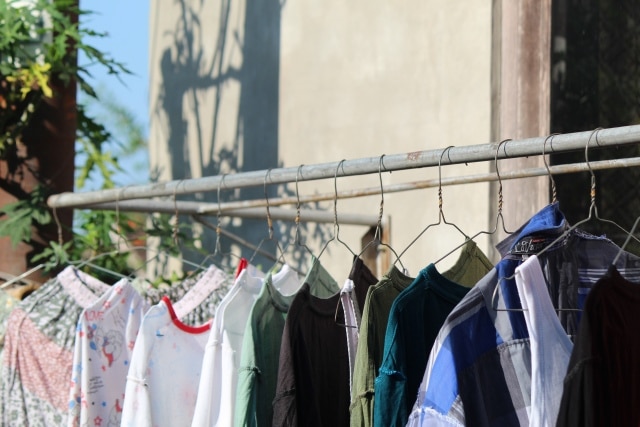
1. Use hangers to dry without creasing

Hang t-shirts, shirts and dresses directly onto coat hangers as soon as they come out of the washing machine to reduce the need for ironing. As water drips out of the fabric the weight of the garments will make them dry crease-free.

How to hang out washing - Use hangers to dry without creasing

Plus, putting your clothes away in the wardrobe will be a breeze!

Give each item a good shake before you hang out your washing to remove creases from the spin cycle. Then, hang to dry on a plastic coat hanger. This method eradicates creases in most  “quick dry” fabrics but stiff cotton shirts or linen garments will still need a quick once-over with the iron.

When hanging wet garments avoid wooden hangers that can warp from moisture or metal hangers that can rust and stain clothes.

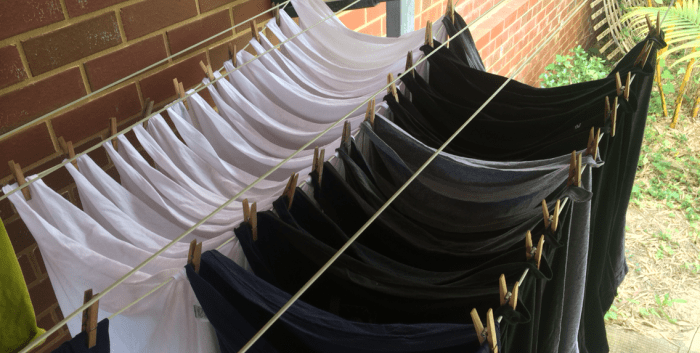
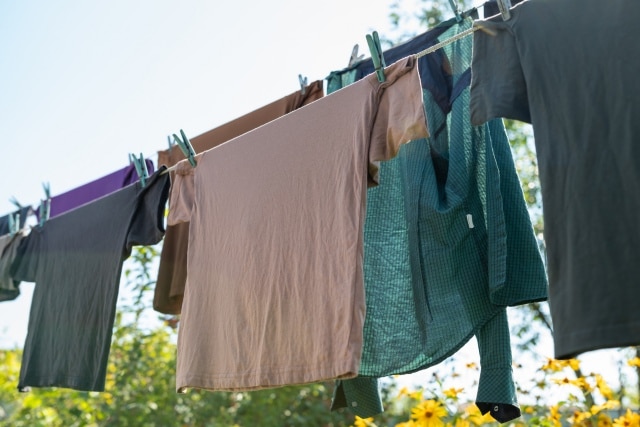
2. Overlap corners of washing to save space

It doesn’t take long to run out of space on the washing line on days when you find yourself contending with multiple loads of laundry.

How to hang out washing - Overlap corners of washing

The correct way to hang clothes on washing line and maximise hanging room is by overlapping the edges of your clothes when pegging them down. More space, less pegs – win, win.

Watch out with heavy fabrics as the layered corners can take longer to dry.

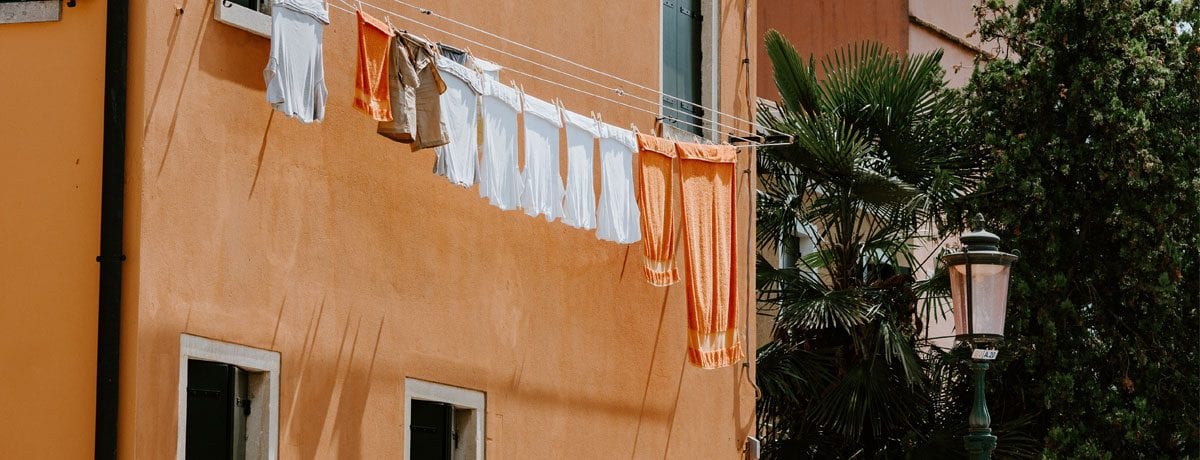
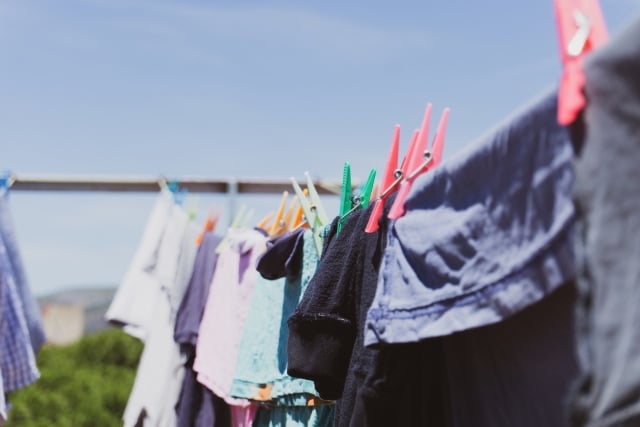
3. Hang across, not along, the line

Ultimate laundry hacks | Airtasker
MIND BLOWN. Image: Imgur

A brilliant hack to help accommodate supersized laundry loads is to hang out washing items across rather than along the line. Just make sure there’s plenty of airflow and light around your washing line or clothes horse to ensure wet clothes don’t become musty and smelly before drying out.

Find a Tasker for your next home project!

4. Hang your socks together

Avoid playing annoying games of ‘sock snap’ by hanging pairs together to dry using a portable hanging peg dryer.

How to hang out washing - Hang your socks together

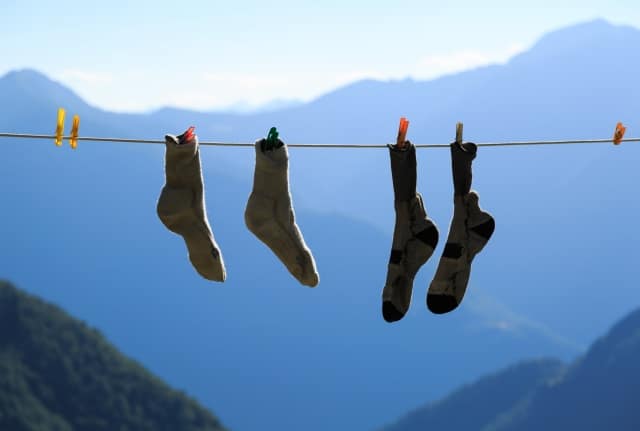
This is a cost-effective hanging solution that you can pick up for just a few dollars at Bunnings and most discount variety stores. this nifty invention provides a dedicated spot to hang socks, which makes it easier to keep pairs together while freeing up precious space on the line for other items.

Wash your socks in a mesh lingerie bag to avoid losing one in the washing machine!

5. Utilise sunshine to fade stains

Stuck with an annoying stain that has resisted your best attempts to remove it with specialised detergents or an overnight soak? Hang your clothes to dry outside and harness the power of the sun. Nature’s stain-fighting superhero, sunshine can lessen the appearance of a variety of stains and has the added bonus of helping to make whites appear brighter. Plus, it’s free!

How to hang out washing - Utilise sunshine to fade stains

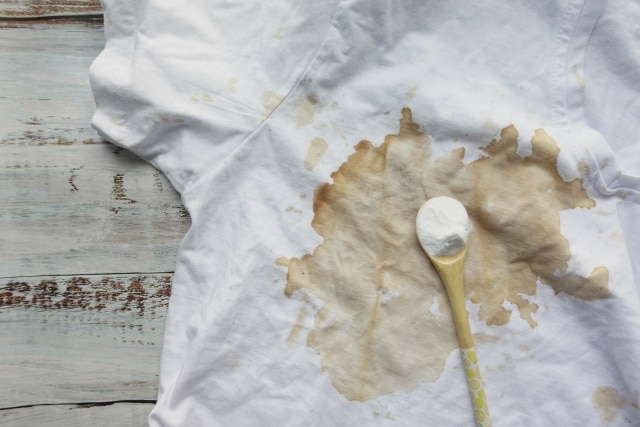
6. Tackle stubborn stains with household ingredients

To attack hard-to-shift coffee, wine and food stains make a paste with vinegar and baking soda. Apply directly to the stain then leave for five to ten minutes before washing as normal.

How to hang out washing - Tackle stubborn stains

When it comes to pesky makeup stains, particularly foundation or fake tan, apply dishwashing detergent directly to the stain prior to washing then run through the machine on a hot cycle.

7. Turn clothes inside out to stop fading

While sunshine is great for making white clothes shine, it’s the enemy of bright colours and darker hues. Colour-rich items fade quickly in direct light so you’ll need to hang them in the shade or turn them inside out, to minimise sun bleaching.

How to hang out washing - Turn clothes inside out

8. Add protection over your clothesline

If you want your clothes to dry as fast as possible but don’t want to risk fading or having your clean laundry ruined by a surprise downpour or a bird with good aim, consider rigging up a tarp above your clothesline. A handyman can install hooks to make this easy to put up and take down.

Protect items drying on a clothes horse by threading the handle of a golf umbrella between the centre rails and voila, you have protection from all elements (and birdlife!).

Find a Tasker for your next home project!

9. Hang cleverly to avoid peg marks

Peg marks are the pits – but you can avoid them with these hanging hacks.

Hide ugly peg impressions by pegging dresses from the hem and t-shirts from the armpits along the sleeve seam.

How to hang out washing - Hang cleverly to avoid peg marks

As a general rule peg tops at the hem, and bottoms at the top. For jeans, shorts and trousers fold the waistband seam over the washing line and peg in the seam, or flip and peg at the leg hem.

Socks and undies are a debatable category! Some people recommend hanging by the toes or crotch to preserve the elastic in the bands, others think this will make these areas wear through faster.

10. Remove excess water from handwashing

Clearly clothes will dry faster when not dripping wet. Remove excess moisture from hand-washed garments by laying them flat on a towel before rolling them up and squeezing them out. The towel will absorb a substantial amount of water while preventing your clothes from looking crinkled and wrung out.

11. Dry knits flat to avoid stretching

For materials prone to stretching, such as jersey or wool knits, lay the item flat to dry. An outdoor table, chair or even a trampoline can become a temporary drying space. Put a towel down underneath to prevent the clothing from absorbing any surface stains.

12. Organise as you hang

Save time sorting by allocating a section of the clothesline to each person in your family, or if you live on your own, allocate each line to a particular type of clothing. Then as you unhang and fold the dry clothes they will be neatly ordered.

How to hang out washing - Organise as you hang

Go the extra mile with separate baskets for each family member that can be easily deposited in each person’s room.

13. Tumble dry in less time by adding a towel

Of course, it’s not always perfect drying weather.

For days when there’s no sunshine in sight, speed up the time it takes for a load of wet laundry to dry in the tumble dryer by adding a dry towel at the start. The towel will help absorb excess moisture, reducing drying time (and the cost of running the dryer)!

How to hang out washing - Tumble dry

As a final point

Mastering the art on how to hang out washing correctly is more than just a mundane chore—it’s a game-changer for your wallet, your time, and the environment. And with just the power of hangers, turning clothes inside out, and the natural energy of the sun, you’ll be able to improve your laundry routine by a lot.

Remember, drying time for clothes outdoors can vary depending on weather conditions and fabric types, so it’s important to plan accordingly. Generally, it takes anywhere from 2-3 hours for clothes to dry outside, but it can also last for the whole day. Factors such as weather conditions, humidity levels, temperature, and the type of fabric can all impact the drying time.

But, if you find yourself pressed for time or in need of assistance, Airtasker is here to help. Find a skilled Tasker who can handle your washing and ironing needs, ensuring that your garments are meticulously cared for from laundry to drying. 

Home and garden pests in autumn

Do uninvited guests (bugs, not people) seem to be taking over your home? Then this is for you!

Home and garden pests in autumn

With the heat starting to lose its sizzle and the days starting to feel a little bit cooler, autumn is the prime time for all of those household nasties and garden pests to take over. So let’s take a look at what you need to keep an eye out for to avoid any surprises in your home. It can be a bit of a shock to find a spider, cockroach or do we dare say – a rat!

If you do stumble across an uninvited guest, don’t forget you can always post a task for a spider removal (you’re not alone here, see below) or even complete household pest control inspection.

Spider Removal

Need to remove a spider (possibly) huntsmen from my bathroom. It might be dead, but too scared to look. Will still pay if nothing is there for the inconvenience. Not sure how much to charge, but can negotiate.

Get a FREE Pest Control quotes

List of Home and garden pests in autumn

1. Mice and rats

Let’s get the worst one over and done with. Rodents are the biggest pests of all because not many of us would put up our hand to catch one ourselves, not to mention how hard they actually are to catch. But let’s take a look at why they come into your home in the first place.

Just like us, rodents love the warmth and dryness of our homes and they’ll look for safe areas where they can set up their own little homes, such as your ceiling and floors. As they tend to come out for food at night it can take some time for you to realise that they are even there.

It’s definitely worth calling in the professionals for this one but also make sure that you check around your home for any gaps that need to be plugged.

2. Cockroaches

These seem to be more of a year-round pest and you’ll usually find them in your kitchen, unfortunately. The reason that they become more of a problem in autumn and winter is that as the weather cools it’s prime breeding time and also as we move inside to eat/ live, they go also go inside to where their food supply is.

Minimising their access to food is really important, so make sure that you’re not leaving food out, clean up your crumbs, use airtight containers, ensure your bin is tightly sealed and that you’re not keeping food near the floor.

You can use sprays and insecticides but that will only get the ones that you can see. A trained pest controller will be able to look for where the eggs are hatching and try to nip the problem in the bud.

3. White ants

White ants (termites) are extremely destructive and are still active during the cooler months. They absolutely love timber and will chew on your fences, interior walls, floors etc and have a costly and devastating impact.

Getting an inspection yearly can mean that even if they are present hopefully the damage is kept to a minimum.

You can also source materials that are termite resistant (e.g. stainless steel) for fencing, sheds etc. But if you still want wood, look for varieties such as redwood, juniper and cedar as they aren’t as attractive to white ants.

4. Slugs & snails

We spend a lot of time in our gardens both in terms of upkeep and also enjoying the great outdoors.  So when you spend countless hours at the nursery, preparing flower beds, planting and waiting for your garden to take shape, it can be crushing when snails and slugs attack your beautiful garden.

Autumn and winter is when they are at they’re in full-flight and so it’s important to protect your plants with water-resistant and pet safe bait and spray.

 Tip: You can buy snail traps and fill them with beer.


Need some help in your garden in autumn? Take a look at these autumn gardening tips.

Got any other autumn pest control tips and tricks? Let us know in the comments below!

Back to School with Airtasker

Next week, kids all around Australia will go back at school for the new year and this only means one "Back to School with Airtasker"

Back to School with Airtasker

Next week, kids all around Australia will go back at school for the new year and this only means one thing: preparing all the mundane school requirements for each child. It’s likely you’re a parent (or know of one!) with an extremely long to-do list to complete before next week so juggling everything over the next week is guaranteed to be a potential nightmare.

So, we’ve looked at some tasks for smart back-to-school hacks and come up with a few preparation ideas to help busy parents out!

Screen Shot 2017-01-18 at 3.43.10 PM

Sewing on name tags
Make sure you have all your kid’s uniforms labelled and ready to go. Children have a habit of misplacing their jumpers and bags and the costs add up at the end of the year!

Meagan M. from Queensland did exactly that, by getting an Airtasker to help her sew hems onto four school dresses and name tags ironed on, she was able to send her daughter to school stress-free. She had a great experience and said,

My daughter is changing school and going to high school and we have just brought her a series of new uniforms. I don’t have any sewing skills or equipment. We had this incredible lady who came and picked it up and she had it done by the afternoon, it was extraordinary. She dropped them off and they were ironed, she took up the hem and sewed some labels on it too. She was an interior designer, so she had lots of sewing experience and was a mum to ten.

Contacting Books
One of the biggest annoyances for parents is getting the small air bubbles out of contacted books – using a ruler or your thumb to slowly smooth out the pockets of air – and if you can’t do it perfectly, the kids complain! Why not outsource this task of applying contact to someone who is skilled at it?

Apply Contact to school books

Trimming hair
Juggling life’s events and taking your kids to the local hairdressers can a demanding task but an essential one. Instead of shuffling the kids into the car or bus and taking them to the shopping mall, get a hairdresser to come to you with Airtasker, so you can focus your time on the other back-to-school tasks.

hair trims for school

With the extra time you now have on your hands this week, take a look at how to make an outdoor playground at home, which you’ve been promising your family for the last few months!

6 Awesome fridge tips and tricks

Is cleaning and organising the fridge your least favourite chore? We have scoured the internet for the best tips and "6 Awesome fridge tips and tricks"

6 Awesome fridge tips and tricks

Is cleaning and organising the fridge your least favourite chore? We have scoured the internet for the best tips and tricks to help you stay on top of your fridge situation; here are six of our favourites.

1.   Clean your fridge religiously

Exactly what you didn’t want to hear, right? To keep your refrigerator in tip-top condition, you need to keep it clean so it can function properly. And the more often you do it, the less effort is involved. If you only clean it out once or twice a year, you might find it has to work harder to keep things cool. Having a shelf full of expired products that you’ll never be able to use is a waste of space and energy. Do a basic clean just once a month, and you’ll find your fridge functions better, and looks much more inviting!

Tip: Using a food-safe solution to wipe your fridge out regularly is a good idea. Try a commercial product like Vanilla Fresh (or mix up your own DIY solution); it’ll tidy up surfaces and deodorise things nicely.

DIY vanilla fridge wipe
Source: CHUBBY HUBBY

2.   Sort your fridge with baskets

Using small baskets to sort different products on shelves and in doors (and even in the freezer) is an awesome way to get some organisation going in your refrigerator.  Not only will using baskets help you sort the contents of your fridge, but the base of the basket also acts as a protectant layer to capture any spills or food mess; instead of having to clean a whole shelf when the milk leaks, you can just clean the basket. You could even have a basket for nutritious snacks to help keep you on track with a healthy eating plan.

fridge basket
Source: HAPPY go lucky

3.   Label everything

Using labels on baskets, shelves, doors, and drawers is an excellent way to achieve fridge utopia! Labelling by product category, meal type or by ‘use by’ date are popular fridge organisation ideas. You can do this in your refrigerator, freezer and pantry!

fridge labels
Source: Better Homes and Gardens

4.   Put things in the right spot

You can actually optimise the shelf life of your refrigerator contents by storing products in the best spot possible. Squawkfox has a fantastic guide on what to store where in your refrigerator. For example, don’t store milk in the fridge door because the temperature fluctuates too much. Instead, store it on a middle shelf.

fridge organisation
Source: Squawkfox

5.   Keep a list of the contents on the door

What smarter way to shop than having a full view of what you do and don’t have? Make use of the space on your outer fridge door by keeping an inventory of what you’ve got and what you need. Some popular ideas include using magnetic shopping lists, whiteboard markers, or even painting the door with blackboard paint.

fridge door lists
Source: The Kurtz Corner

6.  Use a Lazy Susan

What a brilliant idea; a spinning mini shelf in your refrigerator! By using a Lazy Susan to organise your condiments and canned and jarred items, you can easily see and reach what you’ve got available to top your gourmet sandwich with.

Airtasker has a great network of experienced domestic cleaners with some awesome fridge tips and tricks up their sleeve! Let them do your fridge cleaning and organisation for you.

Your guide to house maintenance

If you want to keep your home in good condition, a diligent house maintenance routine is essential. Investing time, money "Your guide to house maintenance"

Your guide to house maintenance

If you want to keep your home in good condition, a diligent house maintenance routine is essential. Investing time, money and effort in regular maintenance and odd jobs is a much better option than having to deal with costly, unexpected repairs. To help you stay on track, we’ve put together a guide to house maintenance.

Regular house maintenance

Keeping up with regular cleaning and house maintenance will put you a step ahead.

Every week or fortnight:

  • Vacuum, sweep and mop floors
  • Clean and dust all surfaces
  • Scrub kitchen sink
  • Clean insinkerator
  • Clean microwave
  • Wipe down rangehood
  • Scrub bathrooms and toilets
  • Whipper snip and mow (you can do this less often in winter)
  • Clear dead leaves and branches
  • Remove debris from the pool and check the filter

At least once a month:

  • Clean dishwasher
  • Test smoke detectors
  • Clean oven
  • Scrub cooktop
  • Clean rangehood filter
  • Clean wheelie bins
  • Weed garden beds

house maintenance rangehood filter
The rangehood filter can get very greasy if left unattended. Use some baking soda and dish soap to clean it yourself, or hire an Airtasker house cleaner to help you out.
Source: one good thing BY JILLEE

Every few months

In addition to your regular house maintenance tasks, every few months you should:

  • Wash windows and screens
  • Clean drains (use a drain cleaner and be careful to follow the safety instructions)
  • Gerni driveways and patios
  • Trim hedges
  • Check and clear roof gutters
  • Check hot water system and drain any sediment
  • Test electricity box safety switch
  • Check and clean garage door (including the rolling mechanism)
  • Check water meter is working and clear it of roots and debris
  • Clean fireplace and chimney
  • Clean air conditioner filter
  • Clean washing machine and dryer
  • Completely clean out refrigerator and cupboards

house maintenance hot water system
Source: The Family Handyman

The big spring clean

Every six months is the perfect time to round the whole family up and do a big spring clean. As winter is coming in to spring, or summer is moving in to autumn, scrub the house top to bottom, rotate your wardrobe, and do a big clean out of things you don’t use or need anymore. If you have clothes, cooking utensils, and other household items in good, working condition, post them on gumtree, or donate them to your local charity.


house maintenance DIY blinds cleanerSource: one crazy house

Know how much does solar panel cleaning cost, visit our updated solar panel cleaning price guide.

Odd jobs

On top of all of the above-mentioned house maintenance tasks, there are a number of odd jobs you’ll need to take care of:

  • Clean blinds and curtains
  • Clean window and door runners
  • Fix leaking taps and shower heads
  • Re-grout shower and bathroom tiles
  • Replace fly screen
  • Fix blown light bulbs
  • Fix dodgy door knobs
  • Clean mailbox
  • Check and repair roof tiles

If you’re in to home improvement and making things more efficient, you could also add these tasks to your ‘to do’ list:

  • Install power saving LED bulbs
  • Set up water efficient irrigation system
  • Fit water saving taps and shower heads
  • Install mesh gutter guards

house maintenance water efficient faucet
Source: Pinterest

If you’re looking for any assistance with your house maintenance or home improvement jobs, check out Airtasker’s handyman services, available seven days a week.

How to clean your fireplace

It’s nearing the end of winter, and although cleaning out your fireplace is probably the last thing you want to "How to clean your fireplace"

How to clean your fireplace

It’s nearing the end of winter, and although cleaning out your fireplace is probably the last thing you want to do, it’s important to stay on top of it so that there’s less cleaning required at the end of winter. Here’s some helpful tips on how to clean your fireplace.

cosy fireplace
Source: nous decor

Be prepared to get messy

Soot, smoke, ash, and crumbling chunks of charcoaled timber… be prepared for things to get more than a little messy.

  • Smock up – an artist’s smock, old apron, or even a plastic poncho will do.
  • Gloves – something heavy duty and made of fabric.
  • Drop sheet – you’ll definitely need a plastic drop sheet, or an old bed sheet that you’re happy to dispose of for the floor. Tape it down around the base of the fireplace door/opening, and a bit past the sides.
  • A mask – if you haven’t cleaned your fireplace in a while, it might be worthwhile wearing breathing protection and an eye mask to protect you while you get grubby.

fireplace drop sheet
Image credit: Ashley Poskin
Source: apartment therapy

Get the right tools and materials

Before you start, get yourself sorted out with the many bits and pieces you’ll need to clean a fireplace. You probably already have some of these items as part of your fireplace ‘tool kit’ or in your cupboard.

  • Wire brushes specifically for chimney and furnace cleaning – long and short handle
  • A scraper/small shovel
  • Dustpan and brush (that you don’t mind getting covered in black soot)
  • Vacuum cleaner – a hand held one or one with a brush attachment would be perfect
  • Used coffee grounds – if you’ve got some (we’ll tell you why below)
  • Scrubbing brush
  • Paper towel/drying cloth
  • A bin, bucket or cardboard box – or you can just use the drop sheet if you’re not going to miss it
  • Hearth or fireplace cleanser – either a commercial product or homemade version

Tip: Apartment therapy have some great homemade cleanser ideas that use typical cupboard products like cream of tartar and vinegar.

fireplace tool set
Source: Etsy

Basic steps for cleaning the fireplace

  1. Remove any chunks of wood or debris from your cold, dry fireplace (yes, let that furnace cool down first or Darwin will get you)
  2. Dislodge any out of sight objects up the chimney using a long stemmed brush
  3. Brush the sides of the inner furnace with a heavy duty or wire brush
  4. Sprinkle used coffee grounds over the ash – their weight and moisture help cling to the ash and prevent it from flailing around your living room
  5. Scrape or shovel the ash and small burnt leftovers out
  6. Brush the inner sides out with a dustpan and brush and if you have one available, go over it with a vacuum cleaner to remove the majority of the particles
  7. Use a hearth or fireplace cleanser of your choice to scrub the insides of the furnace walls, glass and door (don’t forget to clean the grate and fireplace toolkit too if they need it)
  8. Clean the exterior with the product of your choice
  9. Wipe everything out
  10. Collect all of your rubbish and dispose of it
  11. Allow to dry completely before using again

Okay, so you’re all set to get your Chim Chim Cher-ee on!  If you’d rather let someone else be an ‘appier bloke, find an Airtasker to ‘shake ‘ands with you’.  They’ll cheerfully spend time rolling around in the ashes and smoke.

If you’re keen to know how much does fireplace installation cost, visit our latest fireplace installation price guide.

DIY Kitchen Hacks and Tips

The smells and sounds of the kitchen make it one of the most exciting and appreciated parts of the household. But sometimes "DIY Kitchen Hacks and Tips"

The smells and sounds of the kitchen make it one of the most exciting and appreciated parts of the household. But sometimes the process of cooking and cleaning up can be so time consuming, that it dampens the excitement. Here are some great DIY kitchen hacks and tips to help make cooking in, cleaning and organising your kitchen a little bit easier, and loads more fun!

Freezing things in ice cube trays

Don’t waste food; freeze it! Using ice cube trays to freeze things like curry pastes, tomato paste and lemon juice is easy and thrifty!  Once frozen, just pop the cubes into a freezer bag, label, date and defrost as needed.

 Kitchen hack tip: Pureed baby good freezes really well and saves busy mums plenty of time. Freeze ice cube trays of mashed pumpkin, mixed greens, a meaty casserole, etc., then once frozen put in to separate freezer bags. Defrost one block of each for a complete meal for babies 6-12 months old.
Ice cube tray DIY kitchen hacks and tips
Source: Yahoo! News

Cleaning the microwave

Working in the hospitality industry is a great place to pick up great kitchen hacks like this one! To clean a filthy, baked on, crusty microwave, pull the glass microwave tray out and spray the inside surfaces with Spray and Wipe. Place a microwave safe mug of water inside and zap for 40 to 60 seconds (depending on your microwave’s wattage). The mess will soften and easily wipe out with a clean, wet Chux.

cleaning microwave DIY kitchen hacks and tips
Source: Martha Stewart
Image credit: Johnny Miller

For some other ways to clean the kitchen, here are 4 natural kitchen cleaning products for your home.

Microwave meringues (seriously…)

While we’re on the topic of microwaves… you will have your MIND BLOWN by how easy it is to make microwave meringues (yes, they look a little different, but they taste just as good)! Try this recipe from BBC goodfood, and you’ll never spend another minute of your life ‘gently beating egg whites until stiff peaks form’ again!

  1. Stir 1 lightly beaten egg white in to 300g sifted icing sugar and roll into balls.
  2. Place 3 balls at a time on to a microwave safe plate and microwave on high for 1½ minutes.
  3. Let them cool and serve with cream and fresh fruit – insanely good!
microwave meringues diy kitchen hacks and tips
Source:The Kitchen Mccabe

Line shelves and drawers with paper

Line your pantry shelves and kitchen drawers with paper so leaking products (e.g. oils and vinegars) don’t leave stains, and utensils don’t leave scratches. If you’re renting, do this when you first move in to a place, and all you’ll need to do when you vacate is remove the paper and do quick wipe with a microfiber cloth.

drawers lined with paper diy kitchen hacks and tips
Source: the kitchn

Cleaning fry pans

Most people know the old bi-carb trick, but did you know that adding a little detergent can make the cleaning process even easier? To clean a burnt fry pan, generously sprinkle bi-carb soda over the burnt parts, and squirt a little dishwashing detergent in the pan. Gently top it up with water so the bi-carb doesn’t move, and put the pan on the stove on full heat. Just as it comes to the boil, turn the heat off off so it doesn’t boil over and let it sit for between 15 and 30 minutes, depending on how burnt the pan is. The baked on grime should come straight off.

bi carb soda diy kitchen hacks and tips
Source: bellabox

Knot plastic bags

Knot plastic bags for reuse before stuffing them in to a plastic bag holder – it makes them much easier to pull out.

knotted plastic bags diy kitchen hacks and tips
Source: Pinterest

Freeze mince in flat portions

To make defrosting time quicker, freeze mince in sandwich bags, flatten and remove the air before sealing. A sandwich bag holds roughly 500 grams of mince and will defrost quickly and easily in a shallow water bath. This trick works with almost any food product.

mince frozen flat in sandwich bags diy kitchen hacks and tips
Source: Southern Living

Curtain rods and wall hooks

Using short curtain rods or even small towel racks, are a great way to store rolls of garbage bags, paper towels, and kitchen cleaning products. Temporary wall hooks are also a fantastic idea for storing saucepan lids on the inside of the cupboard doors, and hanging utensils.

If you’re not quite confident with installing rods and hooks by yourself, Airtasker has plenty of handymen (and women) waiting to help you out.

cleaning products curtain rod diy kitchen hacks and tips
Source: Apartment Therapy

Hassleback potatoes hack!

Of all of the kitchen hacks around, this is sure to be a favourite. When making hassleback potatoes, put a skewer through the bottom of the potato before cutting it; it stops you from cutting right through the potato.

Why didn’t anyone tell us this earlier?!

skewers in hassel back potatoes diy kitchen hacks and tips
Source: A Muse in My Kitchen
Image credit: Linda Lyell

Get more juice out of citrus

To get the most juice out of your citrus fruits, microwave limes, lemons and oranges for up to 20 seconds and roll them on the bench before cutting and juicing them.

lemon juice diy kitchen hacks and tips
Source: Nutrition Secrets

Do you have any other great DIY kitchen hacks and tips you’d like to share?  Please leave us a comment.

Home Staging Tips When Selling Your Home

If you’re thinking about taking advantage of the current real estate market, it’s important think about how your house currently "Home Staging Tips When Selling Your Home"

Home Staging Tips When Selling Your Home

If you’re thinking about taking advantage of the current real estate market, it’s important think about how your house currently presents itself. Home staging can mean all the difference as you aim to appeal to the emotional feelings of potential buyers.

Staging your home can make all the difference when you’re hoping to get a few interest bidders to battle it out on auction day. Here are our home staging tips when selling your home:

Street appeal
You’ve probably heard it all before but people make up their mind if they like a house or not in under a minute… So that means they have either a positive or negative feeling before they even step inside the doorway.

To make sure your home is looking top notch think about spraying the driveway, that your home has house numbers, that it looks presentable with greenery and any exterior painting is done.

home-staging-street-scape
Source: I build new

De-clutter
There could be a hundred or so people going through your home in a viewing so it’s important that they find it easy to move around in. People also don’t want to see an untidy home and even though you might think it’s not cluttered, it’s good to get another opinion from an honest friend.

Cleaning
After you’ve taken out the clutter, you’ll need to give the house a clean. It will take more than a regular weekly clean to get your home in tip top shape. Make sure you set aside adequate time for your home cleaning.

Keep it Neutral
Do you have brightly coloured walls? You might want to consider toning it down as it can be quickly off putting for potential buyers. That’s not to say that you can’t still have a feature wall or two.

10_Simple_Home_Staging_Tips_Every_Seller_Should_Know
Source: Bobvila

Painting
When was the last time you gave your lounge room or bathroom a fresh coat of paint? Updating the colour can make it brighter and make it look fresh. If you have a limited budget, this is where it should be spent.

Short on time or need some help, you can outsource the house painting on Airtasker.

De-personalisation
You want people to imagine living in your home, so it makes sense to remove items and pictures that are of you and the family. You can easily replace these with landscape imagery.

Furniture
If your couch is looking a bit worse for wear or if you need some extra furniture to complete a room, let’s say the dining room. There are plenty of home staging companies out there that you can rent furniture from for a couple of months. They can even help style your whole home so that it looks amazing for open viewings.

New Linen
This may not seem important, but having lovely new looking towels neatly folded in the bathroom or crisp sheets on the bed can really change how people perceive your home.

Hiding spaces
Thinking about hiding the clutter in the cupboards, wardrobe or shed? Think again, people will look – humans are curious after all.

Don’t go overboard
Whilst it’s tempting to go ‘The Block’ on your home and stage dining scenes, it is a very unnatural approach. What you really want is (as you might say in the clothing world) effortlessly chic. This means making it look inviting, lived in, natural and that the home always looks great.

home staging tips dining room
Source: Nicashomes

Outdoors
Your backyard is almost as important (if not more – sometimes) than the inside. For prospective buyers with young families having grass and a play area for the kids is very important. However regardless of whom the buyer is, it should look clean and tidy. If there’s a lot of work to be done and you may need help with hedging, cleaning gutters and mowing the grass regularly for opens.

garden-home-staging-tips
Source: Bruce Angels

5 Top Flooring Trends for Home Design

The right flooring will set the tone for any space that’s why you should always favour quality and designer options. "5 Top Flooring Trends for Home Design"

The right flooring will set the tone for any space that’s why you should always favour quality and designer options. Carpet Court has the top flooring and home design trends and tips to help you decide which style is best for your space. It’s about general styling with the addition of new colours and textures.

Trend One – Neutral Tones with interesting texture

Neutral tones have been in season for a while now and it is not going anywhere. This style is now mixing with textures for a modern improvement. The texture adds a contemporary feel with timeless patterning. Incorporate this trend into your home with textured carpets and provide further comfort to your space.

Try Carpet Court’s Charming range that has 100% wool additions in GREY SMOKE.

Trend Two – Greys

Grey is that new neutral colour and the perfect base of a room as it is not overpowering. This popular hue should be matched with a trending colour palette with timber accents.
It is an alternative to warmer hardwood stains providing cooler tones to surface floors.

Try recommend Carpet Court’s Stained Oak Timber in Coconut.

Trend Three – Blinds

Enhance your space with contemporary blinds for simply shading. The trend aims to still let light come through to create a welcoming ambiance and results in your room looking larger. Sunscreen Blinds from Carpet Court reduce glare and UV light and this approach is the perfect complement to a bold room. This product also adds another element as fabric of the blind is textured.

Trend Four – Rugs

“Exceptional spaces start with flooring and end with the right rug,” could not think of truer words to explain how important it is to get the right rug for your space. Rugs are the ultimate versatile option for bringing a room to life, effortlessly.
The latest trend in for rugs is the dip dyed rug movement with a two-toned gradient. It is original and enhances colour and interest and can be the statement piece in your space.

This style will work complementary with the grey flooring stated above.

Try recommend Carpet Court’s Hyam in Blue for grey floors.

Trend Five – Large Tiles

Bigger is better – tiles has had an explosion of sizes. The movement towards larger tiles works well for those wanted to make there space feel larger and save time laying them down. Bigger tiles also mean there is less grout to clean. The style looks sharp, when adding them to your home understand that they are heavier and harder to work with so it is worth it to hire a professional.

The large tiles with work well with the Sunscreen Blinds as it will continue the light and welcoming atmosphere.

If you’d like to know how much do polished concrete floors cost, check out our updated concrete floor polishing price guide.

Refresh Your Home With Airtasker

Home cleaning isn’t the only thing you can get done on Airtasker, in fact you can get a worker to "Refresh Your Home With Airtasker"

Refresh Your Home With Airtasker

Home cleaning isn’t the only thing you can get done on Airtasker, in fact you can get a worker to do almost anything for any budget.

We’ve put together a few ideas of how an Airtasker can help you around the home and make your life just that little bit better.

Tasks Under $50

Clean a 1 bedroom apartment – $20
Babysitting – $20
– Dog walking – $20
Baking food – $30
Groceries delivered – $20
Window cleaning – $40
Garden Maintenance (mulch/weeding) – $45

Man-Is-Removing-Wallpaper

Tasks Under $100

Move around furniture– $60
Lawn mowing and whipper snipper – $65
Hang a door – $75
Repair lights – $80
Hang pictures on a wall – $80
Trampoline assembly – $90

airtasker plumbing and handyman

Tasks Under $200

Repair walls with holes – $120
Plant vegetable garden – $120
Furniture assembly – $125
Install kitchen cabinet – $135
Move pipes – $200
End of lease cleaning – $200

Airtasker moving furniture

Tasks Under $500
Landscaping steps – $320
Tiling work – $300
Clean garden and swimming pool – $300
Paving and turf laying – $500