Buzz off! How to make a DIY fly trap and rid your home of pests

Buzzing with frustration over pesky flies? Learn how to rid your home of pests with an effective DIY fly trap.

Buzz off! How to make a DIY fly trap and rid your home of pests

Flies can be a bit of a nuisance when they are in your home. How come they can find their way in so easily, but always have trouble leaving? Sometimes, you need to take action, and our DIY fly trap is the key to a pesticide-free solution.

It is also important to note that flies multiply, so you won’t want them hanging around for too long. You can prevent them by making sure you take out the trash and keep your food locked up.

If you do find yourself with a fly issue, however, we have some simple solutions on how to make your DIY fly trap and send these flies on their way.

How to make a DIY fly trap with a bottle

Making a DIY fly trap is easy. Here’s what you’ll need to do:

Step 1: Prepare your materials

For this DIY fly trap, you first need to prepare all the materials you’ll need. This will include:

  • An empty plastic bottle
  • Scissors or a sharp knife
  • Duct or packaging tape
  • Some DIY fly trap bait (we’ll break down the options below)

Step 2: Choose your fly bait

Flies are attracted to decaying organic materials, but the type of fly you are dealing with will often dictate the best form of bait. There are two primary fly types that will likely be paying you an unwanted visit:

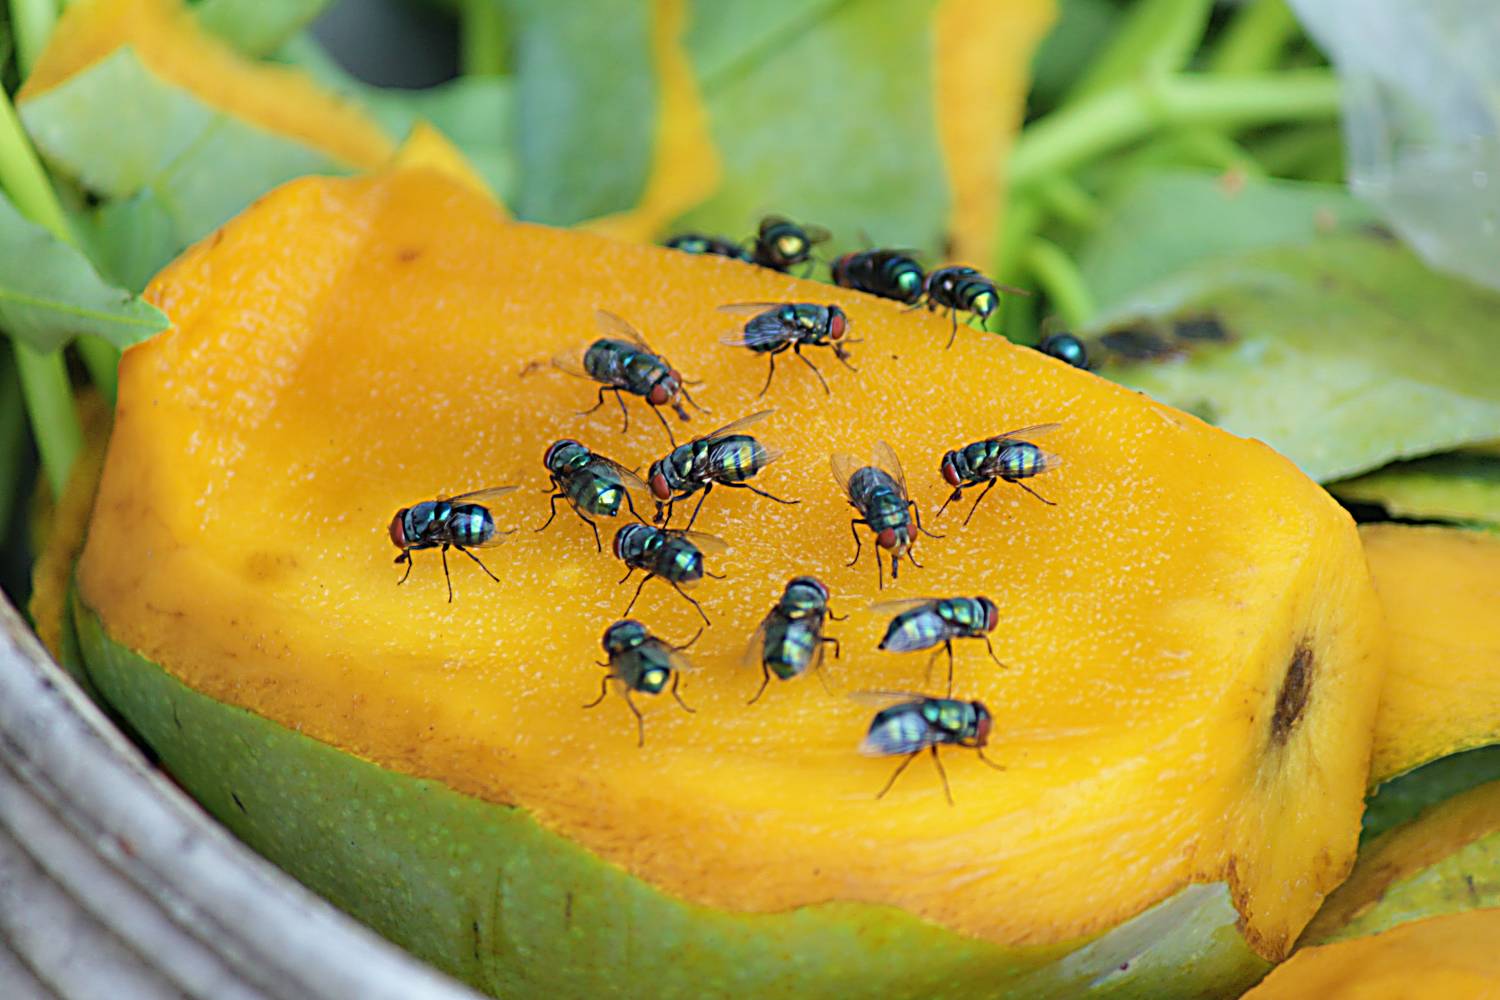
  1. House flies/blowflies: The most common fly types are attracted to fruits and vegetables. They love sweet things, so rotting fruit is a great bait option. The more rotten, the better. They also love poop, but we understand if you don’t want to use that as bait.
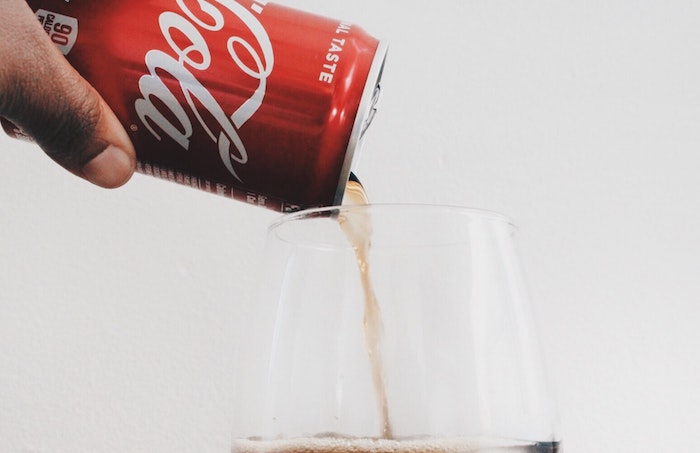
  2. Fruit flies: Funnily enough, fruit flies also love fruit – go figure. They prefer things that fermented, but anything sugary, like juice, wine, beer, and cider, will attract them on in. That’s right; fruit flies love to party. They’ll even drink vinegar!
Flies on fruit
Source: Shutterstock

We recommend experimenting with a few different kinds of bait to find out which option works best in your trap. You may like to try a combination of things. Basically, any old food scraps, the older, the better, should work fine. The key thing that attracts the flies is the smell, so the smellier the bait, the more effective it will be.

For fruit fly trap, the riper, the better, and you can use apple cider vinegar for your trap. Or try fruit juice, wine, beer, or any combination of these things to trap fruit flies and sucker them in.

Pro-tip: You want to keep bees out of your trap (we need them healthy, out and about doing their thing), so add a splash of vinegar to whatever bait formulation you create, as that will help to attract flies but keep the bees away. Additionally, to help ensure that the flies don’t get out, add a little soap to the top of your bottle.

Step 3: Assemble the trap

Assembling the trap is easy, just follow these steps:

  1. Cut the top off the bottle at the widest section
  2. Fill the bottom half of the bottle with your chosen bait mixed with some water
  3. Invert the top half of the bottle, then rest it on the bottom half
  4. Tape the outer edge to hold it in place

Step 4: Use the DIY fly trap

That’s it! Simply place this DIY fly trap wherever you see the most flies hanging out.

Usually, this might be next to a garbage can or by the sink. The flies will be attracted to the bait and will fly down into the bottle. From here, they will be unable to find their way back out, so you can release them back into the wild then re-set the trap.

How to make a vinegar DIY fly trap (indoor materials)

Another kind of DIY fly trap that you can make from things around the home involves vinegar. This is particularly effective if you are dealing with fruit flies. Simply follow these steps to create one:

  1. Use a shallow dish or bowl
  2. Fill it with an inch of apple cider vinegar
  3. Mix in some sugar
  4. Trap made!

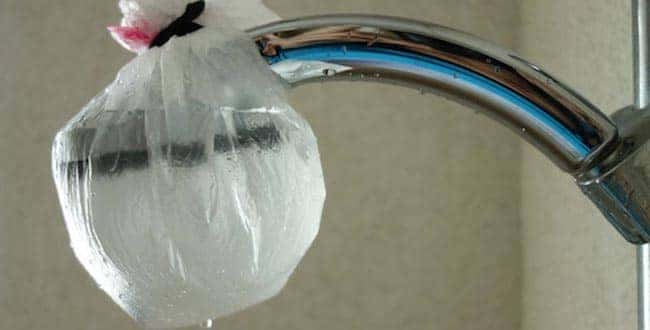
This trap is very effective as flies can’t resist the smell. It may be a good idea to cover the bowl with cling wrap and poke a few holes that large enough for the flies to get through (don’t worry, the trapped can’t get out).

How to make a DIY wine bottle fly trap

Fruit flies have one thing in common with most of us – they love a delicious drop of wine! In particular, reds! (However, they also enjoy a white).

This means it can be very easy to make a wine bottle fly trap after you have finished the contents. All you need to do is:

  1. Take an almost empty bottle that has roughly an inch of wine left in it
  2. Wrap a large piece of paper into a cone shape that has a hole just big enough for flies to fit through in it
  3. Pop the paper cone in the opening of the bottle, then tape it in place

This trap will work in a similar way to our first plastic bottle trap suggestion. The fly will find its way in to get to the wine but not out, thanks to the tiny hole.

This method essentially works with any cup or jar if you don’t have a wine bottle. Fill it with some sweet bait, place the paper cone on top and you are all set. Once again, we recommend placing the trap wherever you notice the most flies.

Domestic fly on window against sky
Source: Shutterstock

Takeaway

Flies can be a bothersome presence in our homes, but there are effective DIY solutions to deal with them without resorting to pesticides. You can create a DIY fly trap using a plastic bottle, vinegar, or a wine bottle. And the best thing is that the process is simple and requires basic household items.

By selecting the right bait and assembling the trap correctly, you can attract flies and prevent them from escaping. Remember to place the traps in areas where flies are commonly found, such as near garbage cans or sinks.


Frequently asked questions

How do you make a good homemade fly trap?

A simple way to make a DIY fly trap at home is with vinegar and dish soap. Simply grab a shallow dish or bowl and fill it with roughly an inch of apple cider vinegar. Add a tablespoon of sugar and mix the two together. From here, you can add some fruit-scented dish soap, then leave the dish uncovered or cover it with plastic wrap that has holes punched in it.

This vinegar and dish soap fly trap will attract the flies that have invaded your home. Try to position it somewhere where you see a lot of the insects hanging out for full effect.

Which bait works best in a homemade fly trap?

There is a variety of liquids that will work well in a homemade fly trap, and we recommend trying a few different options to see which is most effective in your home. Fruit juice, vinegar and red wine are often the best options, and you can also use solid bait like rotting vegetables and fruit.

No matter which option you go with, be sure to add some water and a drop of soap to keep the flies in your homemade trap.

What liquid do you put in a fly trap?

Flies, like most of us, have a penchant for sweet foods, which luckily makes them very easy to trap. An effective DIY fly trap simply needs a plastic container with a lid, old fruit or vegetable scraps (old bananas and apple cores are effective).

For the liquid, any type of vinegar, sugary option (fruit juice, for example), water, and dish soap is all you need for a homemade trap that will do the job.

Keeping your home pest-free for good

Now you have some helpful tips for capturing those flies that just don’t know when to leave the party with some stuff from around the home. The best DIY fly trap is one that you can use right away with supplies you already have. This is an effective method for a few pesky flies; if however, the problem is getting a little bigger, you may need some expert help.

This goes for a range of other pest infestations as well. We have a selection of expert pest control Taskers who can help you deal with whichever pest you have in the home. We certainly recommend attempting a DIY solution if it’s easy, but sometimes the problem requires more drastic action. It is also vital to put a stop to infestations before they grow, as they can get out of hand quite quickly.

We also have a very helpful article that can give you a bit more information about pests in Autumn, to help you prepare and prevent. When it comes to keeping your home pest-free, a big part of the process comes down to prevention.

There are some things that you can do around the home before there even is an issue to prevent one. Make time to clean your home periodically (or book a house cleaner!) especially wherever there’s food around. This is obviously much more preferable than having to get rid of pests after the fact. Have a read, learn some helpful tips and make sure your home remains the comfortable spot it should be!

How to clean vertical blinds at home

Ever wondered what the best way to clean your specific style of verticle blind is?

How to clean vertical blinds at home

There is a reason why vertical blinds exist in most homes; they are functional, look great, and work well on large windows and patio doors due to their durability in high traffic areas. However, when it comes to maintenance, most people are a little unsure about how to clean vertical blinds to ensure they do a sufficient job without damaging the materials.

When deciding how to clean vertical blinds at home, regular upkeep will have them looking their best. The following step-by-step instructions for standard vertical blinds (not cellular vertical blinds) will make sure your home is one step closer to looking fabulous all the time while getting total longevity out of your vertical blinds.

How often should you perform the clean?

Usually, an annual thorough clean is enough, but this can change and be required a little more regularly if the usage and location of your blinds is a little more high-traffic. The easiest way to determine this is quite simply with their appearance. If your vertical blinds are beginning to look a little dirty, or it’s coming up to a year since you cleaned them, it’s time to initiate the following steps.

With this being said, the more often you perform a clean of your vertical blinds, the less time it will take you to complete the task. Once you understand how to clean vertical blinds, and know which cleaning materials are best for your specific blind type, you’ll be able to complete the task faster each time.

How to clean vertical blinds without taking them down

While you can remove your vertical blinds to clean them if you would prefer, it is not a necessity and will likely save you a significant amount of time if you don’t. If you do want to remove them, you’ll need to ensure you have enough space and take a fair bit of care to ensure you don’t damage the blinds. It is important to note that removing them for a clean may not produce the best results.

If you want to know how to clean vertical blinds fast, follow these steps:

  1. Go with the ‘as needed’ approach and vacuum the blinds with an upholstery wand attachment
  2. Give them a quick dust
  3. If still dirty you’ll want to spot clean the areas of concern

When it comes to dusting and washing, the method will depend on whether or not your blinds are vinyl, PVC, plastic, or fabric.

The best way to vacuum vertical blinds

When it comes to vacuuming your vertical blinds, you’ll just need your regular household vacuum with a brush or blind-cleaning attachment. Vacuum slowly with blinds closed (side to side) to avoid bunching slats on one end, then:

  1. Ensure blinds are full to one side
  2. Vacuum the slats individually top to bottom
  3. Move wide slats side to side if needed
  4. Turn blinds to the other side and repeat

Ensure that you always vacuum from top to bottom so that you do not accidentally lift the slat off the hooks. Follow the length of the vanes, as opposed to going across the blind.

If possible, avoid using a vacuum that is too powerful as it will grab the blinds and increase the risk of damage. The same thing can happen if you use a vacuum that doesn’t have an attachment.

What’s the best way to dust blinds?

No matter what sort of material your vertical blinds are made out of, sometimes vacuuming isn’t enough. This does not mean you need to wash the blinds! After you vacuum, feather dusting is a great way to get rid of that remaining dust. You can also use a white glove or paintbrush to achieve the same result.

If you do opt for the popular method of a feather duster, however, follow these steps:

  1. Completely close the blinds (side to side)
  2. Open and close blinds (rotation of vanes)
  3. Use up and down strokes to dust one vane at a time
  4. Reverse the blinds and repeat

For white glove cleaning of vinyl, PVC, or plastic blinds:

  1. Close blinds (side to side)
  2. Open blinds fully (rotation of vanes)
  3. Put on the white cloth gloves and glide your hands over the vanes carefully
  4. If this begins to be ineffective, be sure to brush the dust off the gloves or wash between uses

If you decide to use a paintbrush for your  cleaning, follow these steps:

  1. Close blinds entirely (side to side)
  2. Open and close (rotation of vanes)
  3. Give the blinds a wipe with a paintbrush, preferably one that has natural fibers as opposed to plastic (wide, high-quality paintbrush is preferable) Tap the brush periodically
  4. Reverse blinds and repeat
Pro tip: Use a high-quality feather duster that pulls dust as opposed to rags or cloths, which will not clean as effectively.

What is the best way to wash vertical blinds?

For vinyl, PVC, plastic, and painted wood blinds that require a wash, first, you will need:

  • High-quality sponges
  • A mild cleanser
  • Some clean towels
  • A bucket of water
  • A microfiber cloth (optional)

Once you have all of this, follow these steps:

  1. Close all windows and doors to prevent wind and dust while cleaning
  2. Place the clean towels under the vanes to collect any drips
  3. Wet the sponges in a mild solution of soap and warm water (avoid hot water)
  4. Wash one side of the blind at a time if you are only using one sponge, use two to wash both sides simultaneously
  5. Squeeze the excess water from the sponge
  6. Squeeze the sponge gently and slide down the blind slowly

You can wipe a single vane in sections, intermittently cleaning the sponge to avoid a build-up of dust. If you want to avoid leaving water spots, use an almost-dry sponge to do a light drying pass at the end. You can also dry the blinds with a microfiber cloth. Ensure that you refresh your bucket of water when required to avoid washing with a dirty sponge.

Once again, during this process, it is a good idea to use minimum pressure on the vanes to avoid pulling them out of their clip or damaging the blinds. Always make sure you are using quality sponges to avoid leaving sponge particles on the blinds, making them dirtier than before you started! Always avoid using abrasive soaps, and if you like, while the vanes are dry, you can wipe them with a dryer sheet to reduce any static build-up.

Pro tip: Lemon oil or wood preservative is a great way to protect wood blinds with a stained finish.

How to clean fabric vertical blinds

If your vertical blind and inserts are made of fabric, you will need some slight tweaks on the way you perform a clean to ensure they last and look amazing for as long as possible.

When it comes to spot cleaning fabric vertical blinds, blot the area in question with a mild cleansing solution. It would be best if you first tested the solution in an inconspicuous area to ensure it doesn’t cause any damage. From here, use a soft cloth or sponge and softly blot the stain, allowing it to dry thoroughly. Use a fair amount of care while doing this not to harm the material.

If you need to perform a more in-depth clean other than dusting or spot cleaning, refer to the blind manufacturer cleaning instructions, as they will vary quite significantly across the many product lines. Many people make the mistake of washing their blinds via immersion, heat, or chemicals, which can damage some blinds but be great for others.

Keep in mind, however, that these more aggressive methods should only be used if the general instructions of the manufacturer allow it. Most manufacturers will strongly advise against putting any fabric blinds into a dryer.

Frequently asked questions

Can you machine wash vertical blinds?

You can; however, it would be best if you were to put the blinds in a pillowcase before putting them into the machine. You should also always check the label to see if they are safe to wash in a machine.

How do you machine wash vertical blinds?

To wash your vertical blinds in a machine, first, you must remove the blinds from their hooks and follow these steps:

  1. Fold the blinds in half
  2. Place inside of a large pillowcase
  3. Tie it shut
  4. Place inside the washing machine
  5. Add detergent and run on a gentle cycle

What’s the easiest way to clean blinds?

This is dependent on the type of blinds you have; however, a wet sponge method that follows a decent vacuum and dust is appropriate for most blinds. The more regular the clean, the easier each clean will be!

Need a little help with your vertical blinds?

If you are a little time poor and the task of getting your vertical blinds cleaned is being pushed down the to-do list, get a little help! There are plenty of people who can help with blind cleaning, saving you time while ensuring your blinds look their best.


How to clean silver quickly and effectively

Here are some easy peasy ways to clean your silver

How to clean silver quickly and effectively

We’ve all experienced the shock of opening up a drawer of silver and discovering that it suddenly doesn’t appear as it should. You’re not the only one left thinking about how to clean silver.

Actually it’s not just the silver dinnerware but many items can be subject to tarnishing such as; necklaces, coins, rings, cutlery, plates, dinner sets, chains, sterling silver, bracelets, ornaments, tools, and more.

You are probably wondering… Is it possible to clean silver? What methods are available for polishing silver? Can your tarnished silver ever look new again?

Thankfully, there are some easy peasy solutions for cleaning your dirty silver goods. Anybody with the right resources should be able to follow these quick cleaning methods. So with a little bit of time, determination and hot tips, I know that you’ll be able to refresh your silverware as well.

how-to-clean-silver-cutlery
Source: Tracey Hocking

There are three commonly recognised procedures for cleaning silver, including the baking soda method, the foil method, and the coca-cola method. To give you a better understanding of each individual home remedy for cleaning silver, we are going to outline the steps required for each process with the pros and cons.

But what is tarnished silver?

Your silver can tarnish (discolour) when it’s exposed to moisture, air or other chemical compounds that cause a layer of corrosion. Products that are made from silver are often mixed with other metals, and it’s these additional metals which often react with the air, pollution, other chemicals (hairspray, perfume etc) causing the silver to tarnish.

But luckily it’s only on top layers, so it can be easily removed with one of the methods below and elbow grease. Keep in mind that tarnishing will only get worse over time, so it’s important that you get cleaning as soon as possible so that it’s not a huge task.

Top tip: the quicker you put an end to tarnishing silver, the easier your cleaning process will be.

How to clean silver with baking soda

When most people enter into adulthood, it isn’t long before they realise that baking soda is the answer to everything, and in this case, it is the top-notch fix yet again. Similarly to cleaning your oven with baking soda, cleaning silver with baking soda is one of the most commonly employed methods for eliminating evidence of tarnish.

All you will need to carry out this process is a food-safe quality container, baking soda, polishing cloth, and ample water.

jewelry in baking soda
Source: Pinterest

Steps for cleaning with baking soda

  1. Grab your container and fill it 75% with warm water.
  2. Add 3 tablespoons of baking soda (more if you have a large quantity of silver or a large container).
  3. Mix the baking soda into the water gently with a spoon or mixer.
  4. Gently drop your silver items into the container. You may need to have multiple containers ongoing if you are trying to clean an entire dinner set or various pieces of jewellery.
  5. Place the lid on and leave to rest overnight.
  6. Next morning, remove the silver from the container and softly wipe with a clean polishing cloth.
  7. Assess what progress has been made to remove the tarnish. If you are satisfied, dry the silver completely and consider it a job well done. If there are still dark stains on the silver, you may need to repeat the process from the beginning until desired results are achieved.
Top tip: If you happen to have some vinegar in your pantry, a small amount of this can also be added to the baking soda mix at step two. However, this is not an essential requirement.

Understandably, the baking soda method for cleaning silver is mostly loved for its simplicity and effectiveness. However, depending on the severity of your dirty silver and how much silver you need to be cleansed, you may need to repeat the process up to five times to achieve a satisfying outcome.

Baking soda pros:

  • The materials don’t cost much (most people will already have some Tupperware and baking soda at home)
  • It doesn’t require much effort on your behalf
  • When done correctly, the method has high rates of effectiveness
  • There are many ways of cleaning with baking soda
  • There’s a very low risk for your own safety with baking soda

Baking soda cons:

  • You cannot use the silver while it is being cleaned overnight
  • Your Tupperware container might require a few cycles in the dishwasher to get rid of the baking soda tang
  • You may need to repeat the steps multiple times to achieve a solid result, and this could ultimately take a couple of days

How to clean silver with foil

Foil is another great multi-use product and it’s the second most popular way of cleaning dirty silver is with foil.

You’ll need plenty of aluminium foil, a plastic container or tub, a microfibre cloth, and some boiled water.

silver cleaning in foil
Pinterest

Steps for cleaning silver with foil

  1. Line your sturdy plastic container with aluminium foil. Cover the base and sides.
  2. Wrap each individual piece of silver with foil, ensuring it is enclosed tightly within the foil wrap.
  3. Place foil-wrapped silver into the container.
  4. Fill the container with boiling water.
  5. Remove the silver after five minutes and unwrap from the foil. (Be careful as both the silver and the foil will be extremely hot. You might like to wear protective gloves.)
  6. Clean immediately with a soft, clean microfibre cloth.

This method is effective because of how the hot aluminium reacts with the tarnishing coat on your silver. The chemicals within the black tarnish actually get transferred from the silver good and onto the foil via the water channel. When you remove the foil wrapping, you may even be able to notice the dark stains are now present on the foil rather than the silver.

Foil pros:

  • The method is quick and often complete within fifteen minutes
  • The process is known to be relatively effective, with most people reporting that it has a positive impact on the appearance of their silver
  • The materials needed are not expensive nor hard to find
  • It is considered by some to be a more natural cleaning product compared to other cleaning methods

Foil cons:

  • You need to be careful of your own safety, as the boiling water can burn your skin easily
  • It isn’t known to be as effective as the baking soda cleaning method

How to clean silver with coke

We all know that fizzy drinks are delicious to drink,  but they might also be useful for cleaning tarnished silver. The cola method for cleaning silver is very similar to the baking soda method.

All you need is a reliable plastic container, a cotton-based cloth, and a bottle of cola drink.

cleaning-silver-coke-cola
Source: Leighann Blackwood

Steps for cleaning silver with coke

  1. Fill your container 75% with bubbly cola soft drink. The bottle of cola must be newly-opened to ensure optimal fizz.
  2. Place your silver into the container and leave for at least one hour.
  3. Remove the silver and rub gently with your cotton-based cloth.

Interestingly, this method works because the strong acid component of the cola draws the tarnish from the silver items, leaving them free from any dirty coating. The best results will occur when you use room temperature cola rather than a chilled beverage.

Coke cleaning pros:

  • It is a simple method
  • The process is 100% safe
  • The entire method only takes an hour or so to complete

Coke cleaning cons:

  • The cola can sometimes leave a sugary residue on your silver which needs to be scrubbed off
  • Your silver might also be sticky after the procedure, so you will need to give it a thorough wash in soapy water

But wait, why not use all three methods!

For the most awe-inspiring outcome cleaning your coins, jewellery, cutlery and homewares, our recommendation is to complete each method after one another, or all together in one go.

You can combine both baking soda and cola into one mixed solution, pour it into a container, add your foil-wrapped silver goods, and leave to rest overnight. When you unveil the items in the morning, they will just need a quick wipe with a cloth before you can see the positive outcome.

So, if you are wondering how to clean silver quickly, how to clean silver that has turned black, and what is the best home remedy for cleaning silver, we suggest heading to the shops for some foil, baking soda and cola.

How to use silver polish

If you head to the hardware or grocery store and walk to the ceiling aisle,  you’ll see a few different silver cleaning products. You’ll see a liquid polish and also disposable cloths.

If you use the liquid you must wear gloves and you can use a sponge, cloth or cotton ball to rub onto the tarnish. This will take a bit more effort than the above set and forget methods.

You can also use the disposable polishing cloths that have been chemically treated to buff away any impurities. These are just not as environmentally friendly as the above methods.

How to store silver

Ok, so how do keep your silver from tarnishing again?

Well, heat and humidity quicken the tarnishing reaction, so make sure that you keep it away from these changing climate zones e.g. an attic or basement.

Often when you purchase silver items, you’ll get a material bag (think the Tiffany & Co blue bag) to put it in. Now, these aren’t for no reason, they are often treated with chemicals to stop the tarnishing process.

There’s also acid-free tissue paper that you can use for your items before putting in a sealable bag. You may want to add silica gel as well to absorb any moisture found.

But never put rubber and silver together as rubber can corrode silver.

FAQs

What is the best home remedy to clean silver?

Well, it depends on your preference but the most economical option for a home remedy to clean silver is baking soda. We usually have it in large quantities due to baking so to put it in a container with your silver and leave overnight is a cheap and easy solution.

How do you clean silver that has turned black?

If your silver has turned black it means it’s tarnished. It can occur in a few different colours and there’s no need to be alarmed, you just need to give it a good clean. You can use baking soda, foil, or the silver polishing products as a great place start.

How do you clean silver quickly?

If you need to clean silver quickly the best way is to either use a liquid silver polish from the shops or the aluminium foil method if you want a low-tox sustainable approach. This will have your silver sparkling again in no time.

A DIY guide on cleaning your venetian blinds

Venetian blinds make a beautiful window covering for your home or office.

A DIY guide on cleaning your venetian blinds

Whether vinyl, wood, aluminium, fabric or faux wood blinds, many people do not like cleaning these bendable slats. The thought of cleaning Venetian blinds is enough to put you off. Why? Cleaning blinds take a lot of time, and no one knows whether they are doing it right. Luckily, this guide has easy and effective ways to teach you how to clean Venetian blinds, so maybe, just maybe, you might enjoy it.

There are three easy ways of cleaning Venetian blinds, namely;

  • Vacuuming to blow off the dirt
  • Light cleaning to remove dust and dirt
  • Deep cleaning to remove dirt, dust, grease and stubborn stains

Tools for the Job

The three methods of cleaning Venetian blinds namely, vacuuming, dusting and scrubbing depend on the material of the blinds or how much dust has accumulated. Assemble the following tools before you attempt to clean Venetian blinds:

  • A vacuum cleaner fitted with an attachment
  • A microfibre cloth or you can buy a microfibre mini blind duster from the store

Light Cleaning Your Venetian Blinds

Light cleaning means easy and less time-consuming methods that should be undertaken once every few days without taking down the blinds. Light cleaning is useful because you don’t allow dust or debris to collect on and in between the blind slats. With consistent light cleaning, you eliminate the need to give your blinds a deep clean.

Light-dusting the blinds using a feather duster is the simplest method, but for the best results, you should clean each slat individually using a microfibre cloth. No worries if you don’t have a microfibre cloth, you can use anything from old cotton cloths, antistatic cloths to old socks. Check the local household store for Venetian blind slat cleaning products; you will find a few that do the job well.

For Venetian kitchen blinds, you’ll most likely spot grease and other stain marks. You need to clean them off with a cleaning solution and water. Use window cleaning products or the specialised Venetian blind sprays that leave the slats in an antistatic state, that cuts the amount of dust that attaches to the slats.

Quick tip: Do not use just any Venetian blinds cleaner on your slats as many products in the market aren’t suitable. Also, if you’re using the water and household cleaning solution method, use only a small amount and quickly dry the slates to avoid spreading the dust.

Vacuum cleaning is another light cleaning method. When cleaning using a vacuum, add an upholstery attachment or other Venetian blind attachments. When vacuuming, keep the suction levels low to avoid sucking in the slats and damaging them. This is important, especially if you have aluminium or PVC slats.

Light clean the inside and outside of your Venetian blinds but if you’re not getting the expected level of cleanliness, give them a deep clean.

Deep Cleaning Venetian Blinds

You need to lightly clean your Venetian blinds regularly to postpone deep cleaning them. But sadly, many Venetian blinds sit for months before receiving the cleaning attention that they deserve. Even if you light-clean them, dust will accumulate in those hard to reach places, and this can only be addressed by deep cleaning.

For this method to work, you need to take your Venetian blinds down and place them in a bathtub and remember to lay some towels on the bottom and side of the tub to avoid scratching. Put enough water into the tub and add a suitable cleaning solution for your blinds. Allow the blinds to soak for about two hours and use a soft brush to remove the loosened dirt and grease on both sides. After cleaning the blinds, dip them again in clean plain water and rinse them in the shower.

If your blinds cannot fit in your bathtub, you can clean them outdoors. You can hang them on the fence, or wash them in your driveway, lawn or path using a garden hose. You must lay a blanket or any other material to protect your blinds; this also ensures that they do not pick up more dirt. You need a soft brush, water, and cleaning solution to scrub them down gently. Clean and rinse them a few times to get the desired level of cleanliness.

After cleaning, airdry the blinds by hanging them up to prevent the formation of water stains. After drying, you can hang them back to their rightful place.

How to Clean Different Types of Venetian Blinds

Faux Wood Blinds

These are the most commonly used window coverings. Faux wood blinds are easy to clean, and you can vacuum the dust off.

  • Before vacuuming, close the blinds and hold the bottom rail.
  • Vacuum on the side and then turn to the other side.
  • Remember to use the lowest suction setting to avoid warping the slats.

If your faux wood blinds have grime and grease, you need to give them a thorough cleaning using white vinegar.

  • Mix equal parts of vinegar and water in a bowl
  • Dip a microfibre cloth in the solution and wipe each slat at a time and remember to cover both sides.

White vinegar cleans off the dirt, grease, and grime leaving the slats clean as new.

Wood Blinds

High-end wood blinds have a unique finish that doesn’t hold dirt and stains. Cleaning wood blinds is easy, and you can wash them with a clean cloth. If you want to polish them, apply furniture polish on the cloth and wipe each slat.

Tip: Wood blinds and faux wood blinds are absorbent, and you shouldn’t clean them with water or any other form of liquids. The timber slats can take in water and then warp when drying. Also, some of the colour finishes on faux wood and wood blinds should not come into contact with water as they can cause the finish layer to peel off. If you have wood or faux wood Venetian blinds, we recommend that you use light cleaning methods such as dusting.


Fabric Blinds (Pleated, Roman, and Cellular)

To clean fabric blinds, clean and dust the fabrics using a vacuum cleaner at the lowest setting. If you don’t have a household vacuum, you can use a hairdryer. Blow the dirt caught between the creases and the openings, and do not squish any bugs that you find between the honeycombs because they will leave a stain.

If the blinds are stained, clean them with a damp microfibre cloth but do not oversaturate.

How to Clean Vinyl or Aluminium Blinds

You can clean vinyl or aluminium blinds just like faux wood blinds by dusting or light cleaning with a cloth. But if they are many, this method of cleaning takes a lot of your time and its best to deep clean them.

Unhook the blinds and soak one set at a time in a bathtub, and use a sponge to work on both sides of the slats. After cleaning, dip them again in clean and plain water to rinse away the soap suds.

After rinsing, lay the blinds on some towels to soak up all the water then hang them up to air dry.

If your tub is not big enough to soak your blinds, hang them outside on a clothesline on a hot sunny day, spray them with soap and spray with a garden hose. Work on both sides and scrub with a soft brush. Rinse and leave them out to air dry.

Additional Tips

  • You don’t have to buy the blind cleaning tools; you can make your own by attaching a couple of microfibre cloths with some clips, rubber bands or a pair of tongs.
  • Always keep track of your slats because you can get distracted when cleaning, making it impossible to know where you left off. Hook a pin to the last slat that you cleaned.
  • Protect your blinds when cleaning. Do not spray the cleaner on the slats, spray on a cloth and wipe each slat at a time.

Call the Professionals

If you’ve read this guide and still think that cleaning your Venetian blinds is a tedious task for you, or you don’t have the time, you should consider hiring a professional Venetian blind cleaner. A professional blind cleaner will take down your blinds, clean them using the right method and put them back in place. A skilled Venetian blind expert can also make all the necessary repairs when cleaning.

FAQs on How to Clean Venetian Blinds

How do you clean plastic Venetian blinds?

Fill a tub or bucket with water and add the right amount of dishwashing liquid. Take a sponge or microfibre cloth and clean all the slats and both sides of the blind. Rinse and hang them to air dry.

How much does it cost to get blinds clean?

A professional Venetian blind cleaner will charge anywhere between $70 to $150 per blind.

How many times should I light clean my blinds?

You should wipe the dust off your blinds every time you’re cleaning your house, at least twice every month.

How to rid mould from your home for good

Mould can ruin clothes, furniture and be terrible for your health. Here's some effective ways to get rid of mould from your home.

How to rid mould from your home for good

If you live in Sydney, you’ll know it’s been a very wet autumn and a cold start to winter. Along with the awful weather, mould and mildew may have also snuck into the home and taken up residence in your bathroom or wardrobe.

No matter how much house cleaning you do, it can ruin furniture, your clothes and there is a real health risk. Mould can cause issues such as sinus, asthma, yeast infections, headaches, fatigue, depression, skin and respiratory infections and aching joints. It’s toxic and needs to be taken care of immediately.

Your first instinct will be to go to your local supermarket and stock up on mould killing products, but I hate to be the bearer of bad news – they won’t work. And I’m going to tell you why.

Mould vs. Mildew – what is it?

Mould is a type of fungi (yep, gross) and mildew is a type of mould. Mildew is what can show on surfaces like wood, wool, leather, silk, cotton and linen) and it’s pretty much everywhere and only needs water to get a colony started.

Mould and mildew love warm, moist, sometimes dark spaces – that’s why it’s important to air areas like garages and cellars regularly (especially after rain).

How to get rid of mould?

Feel like throwing everything out?  Unfortunately, it’s the mildews food source, which means you’ll have to get rid of the water source. To do this requires you to dry out your home and eliminate any moisture and dampness.

Are you renting?

You should tell your landlord (in writing) as they have a duty to maintain the rental in reasonable repair, which includes mould. For more information head to tenants.org to find out what your rights and responsibilities are.

Here’s a quick list of things you can do to prevent moulds from occuring:

  • Make sure you have ventilation leaving doors and windows open on dry days.
  • Insulate your ceilings to keep them warmer so it’s less prone to condensation – moulds water source.
  • Open up the curtains and windows to let the sun in (remember it likes dark spaces).
  • After a rainstorm check for leaks and water pooling on the roof.
  • Dry all wet areas.
  • Clean indoor plants of dust and extra water.
  • Wipe away condensation.
  • Use a dehumidifier – set it to less than 55% humidity.

What about bleach?

Bleach will only mask it and not get rid of the mould at all and if you are suffering any allergies from the mould, those symptoms will stick around too.

To clean mould, you’ll need…

  • Face mask
  • Goggles (especially for ceiling and walls)
  • Gloves
  • Newspaper
  • Micro-fibre cloth
  • Bucket
  • Broom
  • Toothbrush
  • Old stockings
  • Oil of Cloves
  • Vinegar

Fixing Mouldy Things

Washable fabrics (curtains, cushions, bedding, towels, clothing)

  1.  Soak in 1 cup salt and vinegar in 10L of water with 3 drops Oil of Cloves – Leave overnight.
  2. Next morning, squeeze out as much as possible and hang in the sun until dry and leave out for an additional hour as a salt crust forms.
  3. Use a soft brush to remove salt crust over the newspaper and dispose of it after.
  4. Machine wash with warm water and hang to dry as normal.
  5. Spray with 3 drops Oil of Cloves and 1L of water and leave to dry.

Non-washable fabrics (suede, leather, silk)

  1. Lay down sheets of newspaper and put the items on top.
  2. Mix some coarse salt with a little vinegar and a drop of Oil of Cloves.
  3. Leave to sit for a day in the sunshine.
  4. Brush off mould as mentioned in washable fabrics and spray again with Oil of Cloves water mixture.

Leather goods

  1. Put 3 drops of Oil of Cloves with 1/2 cup baby or coconut oil.
  2. Wipe mouldy area in a circular motion.
  3. Leave to soak and store in a light airy location.

Non-portable/washable fabrics (carpets)

  1. Spray with a mixture of Oil of Cloves (3 drops), 1/2 cup vinegar, 5 cups of water and then sprinkle salt over the top in a thick layer.
  2. Leave overnight to dry and then vacuum.
  3. Repeat if necessary.

Mouldy grout

  1. Use a toothbrush or grout brush and dip into vinegar and then in a mixture of 3 drops Oil of Cloves and 1/2 cup bicarb soda.
  2. Brush while fizzing on grout.
  3. Repeat and afterwards spray with clove oil and water mixture and leave to dry out.

Cupboards

  1. Hang a stick of chalk tied together with ribbon to absorb moisture.
  2. When chalk become damp, hang outside to dry.
  3. Reuse chalk bundle.

Walls and ceilings

  1. Mix 3 drops Oil of Cloves, 1/2 vinegar and 5 cups water.
  2. Use a clean broom, and the leg portion of stocking over the head and dip into solution.
  3. Sweep over the mouldy area.
  4. Allow it to dry and repeat.
  5. Every month spray walls/ceiling with a solution of 3 drops Oil of Cloves to 1L of water and leave to dry completely.

All of this cleaning can take a lot of energy and time, so if you need a helping hand there are plenty of Airtaskers in your local neighbourhood who can help.

Do you have any more mould killing tips? Share with us in the comments below.

New parent’s guide to cleaning

If you’re coming into or recently inducted into parenthood, you already know that you’re in for an amazing time and "New parent’s guide to cleaning"

If you’re coming into or recently inducted into parenthood, you already know that you’re in for an amazing time and a hell of a ride.  You’ll settle into your new baby cleaning routine soon enough, but in the meantime, we’ve got a guide to cover some essential ‘new parent cleaning’ tips.

Deodoriser for nappy bins

Babies are cute, but sometimes when they go number 2 (or number 3, or the dreaded number 4…) they have a special way of making a stink. You’ll come to realise soon enough that rose-coloured glasses won’t mask the smell of spent nappies and wipes. Keep baby changing areas smelling nice and fresh by cleaning the nappy bucket with a homemade deodoriser. There are plenty of recipes you can try online that use everyday household products like baking soda.

How to sterilise a bottle

It’s recommended by many health authorities to sterilise bottles before and after use, to ensure your baby is protected from unnecessary, harmful bacteria growth. One of the easiest and most cost-effective ways to sterilise items is to boil them.

To do this:

  • Disassemble and clean the items as you normally would.
  • Place them in a large saucepan with enough water to cover.
  • Bring to a rapid boil for at least 5 minutes.
  • Allow everything to cool, then carefully remove the bottle bits and drain them dry on a sterile bottle drying rack or surface.
  • Store them safely for their next use.

You can use the same method for other items that’ll end up in your little one’s mouth, like dummies.

Pregnancy, Birth & Baby has more informative advice on cleaning and sterilising baby bottles.

cleaning baby bottles
Source: Lifefactory via Amazon

Cleaning cloth nappies

If you’ve chosen to go down the cloth nappy path, there are things you can do to ensure your baby has the cleanest, comfiest bottom around.

  1. First, before putting anything in the washing machine, you should remove any solids (flush it or bin it).
  2. Choose your detergent – you can help prevent rashes by using a sensitive skin detergent or by making your own using non-toxic, eco-friendly ingredients.
  3. Most parents swear by a hot wash (two for extra nasty nappies).
  4. Hang on the line to dry then finish the nappies off in the clothes dryer if you have one, to ensure they’re super sanitised and soft.

Stripping nappies

‘Stripping’ is a common term used to describe a method to get persistent stains out (urine, poop and even minerals from water). It involves soaking the offending nappies in a seriously hot tub of water mixed with a detergent appropriate to the material your nappies are made out of. You generally soak the nappies for up to 8 hours or overnight before draining the liquid and running them on a hot wash cycle.

cleaning cloth nappies
Source: Wikimedia

The easiest way to clean a high chair

High chairs + baby + meal time = a complete mess! You will be forever cleaning up the high chair, the area around it, and potentially the room it sits in, so having an effective cleaning approach is a necessity. Multi-tasking while you do a good clean is a parenting win!

  1. Once your little one is done eating (read: painting the high chair), use a warm, damp cloth to wipe as much gunk off the tray, chair ‘and everywhere’ that you can.
  2. Spray the tray, handles, harness, straps and seat with a cleaning product of your choice (commercial or homemade).
  3. Leave the chair for a minute or two: bath angel baby, call your mother, have a meal yourself…
  4. Once the mess has somewhat ‘softened’, use a damp cloth with a splash of white vinegar to wipe away the mess and any residual product. It should come off nice and easy (if not, repeat).

cleaning a highchair
Source: Pinterest

If you’d like some help getting your cleaning routine down pat from an experienced parent and domestic cleaner, or just want some help around the house when your baby arrives, you’ll find what you’re looking for on Airtasker’s cleaning network.

How to clean your fireplace

It’s nearing the end of winter, and although cleaning out your fireplace is probably the last thing you want to "How to clean your fireplace"

How to clean your fireplace

It’s nearing the end of winter, and although cleaning out your fireplace is probably the last thing you want to do, it’s important to stay on top of it so that there’s less cleaning required at the end of winter. Here’s some helpful tips on how to clean your fireplace.

cosy fireplace
Source: nous decor

Be prepared to get messy

Soot, smoke, ash, and crumbling chunks of charcoaled timber… be prepared for things to get more than a little messy.

  • Smock up – an artist’s smock, old apron, or even a plastic poncho will do.
  • Gloves – something heavy duty and made of fabric.
  • Drop sheet – you’ll definitely need a plastic drop sheet, or an old bed sheet that you’re happy to dispose of for the floor. Tape it down around the base of the fireplace door/opening, and a bit past the sides.
  • A mask – if you haven’t cleaned your fireplace in a while, it might be worthwhile wearing breathing protection and an eye mask to protect you while you get grubby.

fireplace drop sheet
Image credit: Ashley Poskin
Source: apartment therapy

Get the right tools and materials

Before you start, get yourself sorted out with the many bits and pieces you’ll need to clean a fireplace. You probably already have some of these items as part of your fireplace ‘tool kit’ or in your cupboard.

  • Wire brushes specifically for chimney and furnace cleaning – long and short handle
  • A scraper/small shovel
  • Dustpan and brush (that you don’t mind getting covered in black soot)
  • Vacuum cleaner – a hand held one or one with a brush attachment would be perfect
  • Used coffee grounds – if you’ve got some (we’ll tell you why below)
  • Scrubbing brush
  • Paper towel/drying cloth
  • A bin, bucket or cardboard box – or you can just use the drop sheet if you’re not going to miss it
  • Hearth or fireplace cleanser – either a commercial product or homemade version

Tip: Apartment therapy have some great homemade cleanser ideas that use typical cupboard products like cream of tartar and vinegar.

fireplace tool set
Source: Etsy

Basic steps for cleaning the fireplace

  1. Remove any chunks of wood or debris from your cold, dry fireplace (yes, let that furnace cool down first or Darwin will get you)
  2. Dislodge any out of sight objects up the chimney using a long stemmed brush
  3. Brush the sides of the inner furnace with a heavy duty or wire brush
  4. Sprinkle used coffee grounds over the ash – their weight and moisture help cling to the ash and prevent it from flailing around your living room
  5. Scrape or shovel the ash and small burnt leftovers out
  6. Brush the inner sides out with a dustpan and brush and if you have one available, go over it with a vacuum cleaner to remove the majority of the particles
  7. Use a hearth or fireplace cleanser of your choice to scrub the insides of the furnace walls, glass and door (don’t forget to clean the grate and fireplace toolkit too if they need it)
  8. Clean the exterior with the product of your choice
  9. Wipe everything out
  10. Collect all of your rubbish and dispose of it
  11. Allow to dry completely before using again

Okay, so you’re all set to get your Chim Chim Cher-ee on!  If you’d rather let someone else be an ‘appier bloke, find an Airtasker to ‘shake ‘ands with you’.  They’ll cheerfully spend time rolling around in the ashes and smoke.

If you’re keen to know how much does fireplace installation cost, visit our latest fireplace installation price guide.

Top 5 Cleaning Blogs

There are a plethora of blogs on the Internet that are filled with house cleaning tips, stain removal tricks and "Top 5 Cleaning Blogs"

There are a plethora of blogs on the Internet that are filled with house cleaning tips, stain removal tricks and even how to clean organically. So I thought I’d share some of the ones I love to read and get inspiration from to try at home and also share with Airtaskers.

Here are our Top 5 Cleaning blogs

The Organised Housewife

organisedhousewife

Mother of three, Katrina is the mastermind behind this lovely blog which features all kinds of articles from how to clean the oven to creative ways to flavour popcorn. The Organised Housewife inspires other mums to keep up with the family in some really interesting and fun ways.

Declutter home

declutterhome

Professional organiser Tanya Lea can help anyone get their life back in order by decluttering and sorting their home or office. With a wealth of experience, she shares many of her tips and tricks on her blog Declutter Home. What I especially love about her blog are the endless spring cleaning tips for organisation and Tanya covers everything from the bedroom to your passwords, things you just wouldn’t think about.

Homelife

homelife

I think you could find out almost anything you need to know about your home and garden on Homelife. It has some great focused articles such as top calorie busting cleaning jobs, How to clean and maintain your mattress and seven home eco sins. It’s not all about house cleaning either, but also decorating, recipes and shopping.

I Hate Cleaning

ihatecleaning

Yes, you read correctly the title of this blog is I Hate Cleaning and it makes it up there not only for it’s great funky website. Lana Jane allows us a look into her world where she battles with her hate for cleaning but also loves the feeling of a clean home. Lana has investigated the ultimate carpet cleaning solution and the natural ways to deodorize a fridge.

Stay At Home Mum

stayathomemum

With a young family, Jody found that she needed to be more frugal with her household budgeting and by sheer surprise they had a happier family life. On the Stay At Home Mum blog, Jody shares all her tips she learnt on living simply. One of my favourite articles is how to clean walls as she goes through all the possible scenarios such as crayon and grease marks and how to remove them.

There you have it, my top cleaning blogs that are awesome sources of inspiration for me. If you have any others please let us know in the comments below, we’re always looking for cool new cleaning websites.

Don’t forget, you won’t have to lift a finger if you hire an Airtasker to take care of the cleaning.

10 Ways to Clean with Baking Soda

You’re guaranteed to find baking soda in any pantry, often reserved for cooking, but there are plenty of other uses "10 Ways to Clean with Baking Soda"

10 Ways to Clean with Baking Soda

You’re guaranteed to find baking soda in any pantry, often reserved for cooking, but there are plenty of other uses for this natural mineral including home cleaning and medicinal purposes.

It’s common to find baking soda tips for cleaning your kitchen and bathroom, but I’ve looked into some other uses around the house. This way you can get more bang for your buck and make more areas of your home naturally clean.

Here are 10 Ways to Clean using Baking Soda

A. Odors

1. Animal odor
They can get mighty woofy sometimes even if you do give your pet a good wash regularly. However by adding baking soda to kitty litter or sprinkling it on a wet dog and brushing out, it can reduce those not-so-nice odors in a flash.

2. Smoking oder
Cigarette and cigar smoke is never nice for non-smokers. To make it a more pleasant social setting, place some baking soda in the bottom of the ashtray.

3. Carpet and rugs odor
Got a funny smell you just can’t get rid of? Sprinkle a little bit of baking soda on top and leave it for 15 minutes. Then give it a vacuum and if it’s not better, repeat.

Baking-soda-clean-rugs
Source: A Single Sunbeam

Find out how to remove pesky stains by reading Stain Removal – Myths vs Facts

B. Kid’s items

4. Baby furniture
Harsh chemicals should be kept away from the baby’s room, however using a ¼ cup of baking soda to 1 cup of water to wash the bassinet, change table and other items will do the trick.

5. Pool toys
Inflatable pools and pool toys can be cleaned from mildew by washing with a baking soda and warm water solution.

6. Toys
With illness easily spread among children, after play dates make sure you clean the toys to kill any bacteria. To do this, place a ¼ cup baking soda and ¼ warm water in a bucket. Put in the toys (or just wipe with a cloth), and then rinse with clean water and leave to dry.

cleaning-kids-toys

C. Laundry

7. Fabric softener
To make your towels all soft and fluffy add ½ cup baking soda to the rinse cycle.

8. Boost bleach
Too much bleach can be bad for your health and the environment, but by combining baking soda with bleach you can cut down your usage and make it more environmentally friendly. Just add ½ cup of baking soda for each ½ cup of bleach.

laundry-airtasker

Outdoors

9. Furniture
With outside furniture battling the elements, a quick wipe down with a 1 cup of baking soda added to some warm water will leave them sparkling. Just don’t forget to rinse thoroughly with some clean water and leave in the sun to dry.

10. Fly screens
Screens on windows and doors can collect dust, dirt and cobwebs but they are easy to clean with a damp cloth dipped into baking soda and a bit of elbow grease. Rinse with a damp cloth or if you can remove them, wash with a hose.

Looking for more natural cleaning products? Here are 4 natural kitchen cleaning products that will clean your house.

4 Natural Kitchen Cleaning Products That Will Clean Your House

Most people make the switch to natural cleaning products for general house cleaning due to the high amount of chemicals "4 Natural Kitchen Cleaning Products That Will Clean Your House"

4 Natural Kitchen Cleaning Products That Will Clean Your House

Most people make the switch to natural cleaning products for general house cleaning due to the high amount of chemicals (which may cause health hazards), found in many off-the-shelf products.

The benefits of ‘going green’ mean fewer health risks and less impact on the environment. With a little bit of extra effort you’ll be able to beautify your home naturally.

Making the switch from harsh chemicals, such as bleach, to home remedies isn’t as hard as it sounds. You’ll have most of what you need sitting in your pantry.

borax-vinegar-lemon-bakingsoda-cleaning
Source: Hello From The Natos

Here are 4 natural kitchen cleaning products that you can use in a way you’ve never thought of using them before:

Baking soda

It’s often used in cooking but it can also clean, deodorise, soften water and scour.

lemon-and-baking-soda-naturalcleaning
Source: Secretly Healthy

Oven
Attack an oven of grimy grease and cooking juices by making a paste of baking soda and water. Once made, spread paste over the bottom of the oven, leave for a few hours and then simply wipe off.

Toilet cleaner
Take a cup of baking soda and put it in the toilet to let it soak for at least an hour. Then pour a cup of white vinegar and leave for 5 minutes before flushing.

Citrus fruit

Lemon is the fruit used most in and favoured for its strong food acidity against household bacteria.

General disinfectant
Making citrus infused vinegar will take care of numerous home-cleaning tasks e.g. mopping floors, windows and surface disinfectant.

To make: Place lemon peels in a jar and top up with white vinegar for a few days. When you want to use it, just strain out the vinegar.

Food waste disposal (in sink)
These can get smelly so to ward nasty smells, cut a lemon in half and turn on the grinder and put in the lemon while the water is running.

Air fresheners

natural-airfreshener-lemon
Source: The Yummy Life

Everyone loves walking in the door to a fresh clean smelling home and your house will smell divine with this recipe:

Ingredients:
– Sliced lemon
– 2 tablespoons of rosemary
– Dash of vanilla

Method:
Place into medium saucepan with ¼ cup of simmering water. Allow cooling and placing in a recyclable bottom and get spraying.

Vinegar

Most households would have vinegar in the kitchen, however white vinegar is the one you’ll want to cut through grease, remove mildew, odours, stains and wax build ups.

Dishwasher cleaning
Place two cups of vinegar in a bowl without any other dishes and put it through a cycle. Your dishwasher will be all lovely and fresh.

Shower heads
Wrap a plastic bag with vinegar in it around the shower head and tie it so that the head is immersed. Leave for a few hours and then carefully remove.

Clean-Shower-Head-Vinegar
Source: Curious Nut

Burnt saucepans
No one likes scrubbing the burnt pans after cooking. So instead, fill the pan with water, add a cup of vinegar and bring to the boil. Then remove it from heat and add baking soda – WARNING! It will fizz. Empty the pan and scour.

Not sure how to remove stains? Here are the Stain Removal Myths vs. Facts

Borax

You can buy this in powder form and it’s often found in many cleaning products – however it is a natural mineral.

Bathroom soap scum
Create a no-fuss scum by sprinkling Borax in the show or bathtub and add water. Then just wipe over it and rinse well.

Find out more Bathroom Cleaning Tips.

Fridge
Place one teaspoon of Borax with 3- litres of warm water and wipe the shelves and draws with the mixture. Rinse well with water and wipe dry.

If you’re not sure where to buy Borax, Coles stocks the Bare Essentials Borax cleaner.

Don’t have time to clean or need a helping hand? Why not Get Cleaning Quotes with Airtasker and reclaim your weekend.