These small kitchen design ideas will change how you store your kitchen essentials and maximise your space further.
Who says you can’t enjoy a small kitchen? Upgrade your space’s overall look, storage, and functionality with a little DIY and these nifty small kitchen design ideas!
Adding a breakfast nook
When you live in a small home, it’s unlikely that you have a big dining room or even have one at all.
Placing a cute table and a couple of chairs can be the perfect spot for breakfast and dinner.
You could even keep matching chairs in the bedroom or living room, ready to use whenever you have guests.
Paint it white
White makes spaces look bigger and cleaner, so it’s a no-brainer to remove any dark tiling and splashbacks and give a lick of paint for a refreshing crisp look.
But don’t worry, that doesn’t mean you can’t add a splash of colour with home accessories. If you want to be on trend, use a metallic such as copper, rose gold or gold. Then, use timber to soften the room with chopping boards, seating and shelving.
If there’s no room for a table and chairs, why not add seating to the kitchen design? Yes, you will be sacrificing precious bench space, but if your apartment or tiny home isn’t an entertaining zone, do you really need a delegated area to eat?
It will also be useful for storing pots/pans underneath. When you’re not sitting on it, you could use it to rest your heavy shopping or use it as a recipe book holder.
Knock out a wall
Open-planned homes are all the rage these days, so if you have a pokey kitchen, consider knocking down some (or all) of the wall.
Doing so could make room for a desirable island bench, or if it’s a structural wall, see if you can knock out part of it to turn it into a breakfast bar.
If you’re a bit of a chef in the kitchen and have more than a couple of utensils and cooking equipment – you’ll need space. Instead of storing them in drawers and cabinets, which take up valuable room, take inspiration from the tool shed and use a pegboard.
Hang your kitchen tools, utensils, pots and pans on underutilised wall space, such as behind the door or inside the pantry.
Crockery art
Like pots and pans, your lovely crockery doesn’t need to take up space in cupboards. Use the sideboard table in the living room or a bit of extra room in the bookcase to keep them in until you need to use them.
There’s always a bit of extra space by the fridge and cabinetry, which can be used smartly as additional storage. Even if it’s to hold small items such as herbs and chopping boards, every bit of space helps.
Retractable bench space
When you’re at home-viewing opens, bench space in a kitchen is a big non-negotiable for the cooks in the family. It’s essential to have adequate room to lay out ingredients, chop food and store microwaves or toasters.
However, just because there isn’t enough bench space doesn’t mean you can’t create some. You can have it built-in to pull out easily whenever you need more space or want a place to sit and eat.
Open shelving
There’s another way to store plates, cups, herbs, pots, and just about anything – open shelving. There are many options and styles that you can choose so that it fits within your current design.
When putting up the brackets and shelves, make sure you use a spirit level so that it’s straight. If home DIY isn’t your strong point, you can hire a handyman to help you get things done!
Ready to bring your kitchen ideas to life? Connect with a professional designer to map out your interiors effortlessly.
You can prepare a list of repairs ahead of time and have an expert get it done instead of dad. This way, dad will have more time to celebrate Father’s Day weekend with the rest of the fam!
Whether it’s the garage, a garden shed, or dad’s home office, he can feel energised and excited to hang in his squeaky clean man cave without lifting a finger.
Get the car washed
You don’t need a big, fancy gift to make dad feel special on this day. Make his everyday drives to work more comfortable and dust-free by taking care of his car for him.
Father’s Day isn’t complete without something special for dad. It’s the thought that counts, so do some extra thinking about what your dad will appreciate this weekend.
If dad loves hitting the gym, surprise him with new workout gear or accessories to help him reach his #fitnessgoals.
Meanwhile, music enthusiast dads might want a new set of earbuds or a new vinyl record of their favourite band or artist.
Food is always a good idea no matter the occasion! Why not have all dad’s favourites delivered this Father’s Day and enjoy a fun night in?
Spoil him and allow him to indulge in cravings, whether it be his favourite steak or his usual from his go-to fast food chain!
Take care of the garden
You might have seen your pops out in the garden every other weekend, either mowing the lawn or trimming hedges here and there.
This Father’s Day, consider hiring a gardener instead so he can relish the outdoors without doing all the work.
Check out this gardening maintenance checklist if you’re unsure of what usually needs tending. For starters, here are some things a professional gardener can help you with:
With Spring coming soon, you’ll want to get the swimming pool ready for everyone to enjoy. Hire a professional to clean your pool instead of dad doing all the work. This way, he can just jump right in and have a blast with the kiddos!
Hire a dog walker
Give dad a break from his early morning dog walks and pet duties this Father’s Day. Here are a few items you can tick off from his fur parent checklist:
Make it a competition to see who’ll hit the bull’s eye with archery lessons
Whatever the case, let dad choose an activity you can all do together and make it a bonding moment to remember.
Plan a Father’s Day event
There’s no better way to celebrate dad than by surrounding him with his friends and family. Put on your party planning hat, or hire an event planner to help you set up an intimate gathering.
From catering to entertainment, fill the room with things your dad loves. He’ll love the extra personal touches you make for this celebration.
You can even make your photo shoot extra special for dad by turning it into a themed shoot based on his favourite movie, comics, or TV show.
Nothing beats quality time spent with the people we love, especially on days like Father’s Day.
So whether you’re hiring extra help at home, personalising a gift, or organising a party, let a Tasker help you get things done so dad won’t have to worry about a thing.
Creating a cozy environment with a great look is very easy to do by yourself!
Shutters can enhance any window. Plantation shutters, in particular, are a very popular and functional option, but they can be expensive! This is why learning to make your own DIY shutters can be a fun project that also saves some cold hard cash!
Making your own DIY plantation shutters can be easily done from plywood with a little time and the helpful steps below. Read on for a DIY project that will make your home more comfortable and aesthetically pleasing!
The benefits of DIY plantation shutters
Plantation shutters aren’t just for looks. They provide insulation on cold and hot days. They can help you keep the heat out during the summer and offer a layer of protection against the cold. Plantation shutters seal up against the window frame, reducing the escape of air.
This energy-efficient option is also easy to clean with a vacuum cleaner brush attachment. They also avoid the need for any cords that may be reachable at low levels for pets and kids. Instead, they use a control arm on slats, making them both safe and sturdy.
How to make plantation shutters (DIY)
The tools you’ll need
Tape Measure
Drill
Miter Saw
1 3/8″ Shank Forstner Drill Bit
Router Roundover Bit
Drill Bits
Skill Saw
Table Saw
Kreg Jig
7/64″ Self Centering Drill Bit
Wood Router
Metal Snips
Scratch Awl
The materials you’ll need
4’x8′ – 3/4″ Plywood (x1)
8″x27″ Flat Sheet of Metal
Frameless Cabinet Hinges
Wood Glue
4’x8′ – 1/2″ Plywood (x2)
Metal Pop Rivets
1 1/4″ pocket hole screws
1″ Finish Nails
How to create your own DIY shutters: Step by Step
Step 1 – Cutting frame and slats
Start with ¾” plywood and cut using a skill saw to turn the full sheet of plywood into four smaller pieces. The inside window and louvre frames are made using ¾” plywood. The slats will be made from ½” plywood. Cut the ½” plywood into smaller sections, then cut the slats with a table saw, ensuring each cut is perfectly straight.
Step 2 – Chamfer each slat
Use a wood router to make the front and back slats rounded. A simple round-over bit should do the trick to chamber the edges. A router table is preferable to chamfer the corners perfectly.
The control arm that will open and close your slats can be placed on the front or back. The arm is a flat sheet of metal that joins the slats together. For this, each slat needs a notch cut out on the back. Use a table saw and raise the blade 5/8 of an inch. Clamp several slats together, then cut a notch the same thickness as the saw blade.
Step 4 – Drilling holes on each slat
Your slat holes need to be exactly in the centre of each slat to ensure even gaps between them. Use a drill press and drill straight and evenly centred holes.
Step 5 – Chamfer the rail boards
The louvre frame will feature two side pieces attached to the slats on the top and bottom rails. Use a table saw to chamfer each board at a 45-degree angle.
Step 6 – Drill pocket holes
Drill two pocket holes on the backside of the chamfered rails using a Kreg Jig. These holes will hold the louvre frame together. Make sure you set the Kreg Jig for ¾” wood thickness, then drill the holes.
Step 7 – Measure and mark the holes on the stile boards
The louvre stile pieces need to be measured from the bottom at 5 1/2″. This will be the centre of the first slat. From that mark, continue every 3″ until you get to the last mark at 5” from the top of the stile.
Step 8 – Drill holes for the frameless cabinet hinges
Frameless cabinet hinges are an optimal choice for a more minimal look, and they allow you to open the louvres without knocking the trim. Use a 1 3/8″ by 3/8″ Shank Forstner Drill Bit along with a 7/64″ Self Centering Hinge Drill Bit to drill holes for the hinges.
Measure 12″ from the bottom of the stile board and 12″ from the top, then place the hinge at the 12″ mark before pushing down on them with a scratch awl. This marks the position with a little dent. Drill a 1 3/8″ hole in the centre of the mark with a Shank Forstner drill bit, then position the hinge inside the hole and pre-drill the screw positions using a self-centring hinge drill bit on every stile board that requires it.
Step 9 – Attach rails to stile boards
Assemble the frame of the louvre by attaching the top and bottom rail to the board with the hinges. We recommend using 1 1/4″ pocket hole screws and wood glue. Insert the slats, ensuring the notch for the control arm is facing the stile board with the hinges.
Step 10– Attach second stile board
Take the other stile board, inserting the slats into the holes, then attach the stile board to the rail using 1 1/4″ pocket hole screws and some wood glue. Attach the frameless cabinet hinges as well.
Step 11 – Making the control arm
This may be the most complex part of the process:
Use a flat sheet of metal that is 27” long
Cut 1” wide strips
Measure ½” from the bottom and make a mark (this will be for a nail to control the first slat)
Continue marking every 3” on the metal strip
Use sheet metal snips to cut out the control arm
Place on a flat surface and hammer flat
Use a scratch awl at the first ½” mark and hit it hard enough to make the nail go through the metal slightly
Repeat this process for all of the marks
Attach the control arm to the louvre using 1 ¼” finish nails
Step 12 – Assemble the window frame
Your window frame will be the same size as the louvre. Start by drilling two pocket holes on both sides of the upper and lower frame board. Attach these boards with wood glue and 1 1/4″ pocket hole screws. Assemble the frame and attach the hinge’s mounting plate to the inside. Measure 12” from the top and bottom of the window frame, then attach the louvre to the frame. Screwing a small mounting plate hinge by itself is easier than holding the louvre while trying to attach it.
Step 13 – Paint and install
Paint the window frame and the louvres before installing. Allow it all to dry, then insert the frame in the window, securing it with wood screws. Attach the louvre hinges to the mounting plates on all of the frame windows.
Board-and-batten shutters are easy to make and are a great way to add old-style charm to your home, protect windows and increase the security of your home.
What kind of wood do you use to make shutters?
Plywood and basswood are popular options for shutters. They can be painted and stained and are flexible and light, perfect for a variety of designs. The only downside is that they are more expensive when compared with synthetic shutters.
Can you make shutters out of pine?
Yes, pine is a great option for exterior shutters and areas with mild, minimal temperature fluctuations. Pine is, however, a softwood that expands and contracts, meaning the internal movement over time will make them somewhat more susceptible to water damage.
Building shutters to improve your home
It may be clear that the steps above are not for the absolute beginner. You’ll need some specific tools and knowledge of how to use them. If you are equipped with all of this, we hope you create some stunning shutters that improve the look and your home with ease!
If this may be a little above your DIY pay grade, there is no shortage of skilled Taskers who can help with shutter repair and installation. Cost-effective shutter options are still within reach for those who choose not to create them from scratch themselves.
When you have more places to put it, you can buy more stuff! It makes sense.
A little extra storage space is always a good thing, no matter how big or small your home is. If you learn how to create your own DIY shelves, this becomes easy to achieve all over the home!
We have three different yet simple shelving options you can create yourself, all of which are wall-mounted, so they won’t take up any floor space. This makes them all perfect for even the smallest rooms! Your blank walls can become usable storage or a place to get a little decorative, displaying a certain collection. Basically, we’re giving you an excuse to buy more fun stuff! Read on for our favourite DIY wall shelves.
The three easiest DIY shelves you can make
Shadowbox shelves
Shadowbox shelves offer a contemporary style that consists of rectangular boxes, usually made of ¾-inch-thick hardwood like birch or red oak plywood. You can build them to any dimension, but we recommend aiming for 6 inches deep x 24 to 36 inches long x 8 inches tall.
You can install a single shelf or in groups of two or more, which leads to a shadowbox pattern. To create them, follow these steps:
Cut the four parts that make up each box (top, bottom and two ends)
Double-up on the ¾-inch plywood so your box is 1½ inches thick
Cut the plywood parts to the desired width
Crosscut them roughly three inches longer than needed
Glue together the two plywood pieces for the four parts
Tack-nail each section with a pneumatic pin nailer until the glue dries
Cut each shelf part to the required length with a 45-degree bevel on each end
Glue and nail together to form a rectangular-shaped box
Conceal the exposed plywood edges with 1½-inch-wide iron-on veneer
Cut a ¾-inch-thick x 2-inch-wide mounting cleat to screw the shelf to the wall
Place the cleat in between the ends of the box
Slide the cleat up tight against the underside of the top section, flush with the rear of the box
It’s always nice to give the shelf a light sanding with 120-grit sandpaper and apply a finish of your choice. To install the shelf, mark the stud spots on the wall, then drill a screw-shank clearance hole through the mounting cleat into the wall at each stud location. Make sure your shelf is level, then drive 3-inch screws through the cleat and into the studs. Make sure you include some finishing washers as well.
The most popular home shelf option are those that defy gravity! Floating shelves look like they come straight off the wall with no visible support. They essentially look like a thick wooden board, but they are really a hollow box that houses a wooden cleat securely screwed into the wall.
The standard size for the hollow shelf is about 3 inches thick x 6 inches deep x 22 to 24 inches long, but once again, you can technically make them any size you want (just be wary of putting too much weight on them).
Here’s how to make floating shelves DIY:
Cut your sides and front for the shelf from ¾-inch-thick hardwood
Cut a 45-degree bevel onto both ends of the front and one end of each side
Glue and nail the parts together
Cut two pieces of ¼-inch plywood as the top and bottom
Secure the plywood to the hardwood frame with glue and nails
Lightly sand, paint or stain as desired
Create the mounting cleat to fit snugly within the opening at the back of the shelf
Screw the cleat into two (or more) wall studs
Ensure everything is perfectly level
Slip the shelf over the cleat
Fasten in place with finishing nails
Shelf standards
Shelf standards are a type of manufactured shelving that have vertical slotted metal bars and flat metal brackets. These brackets clip into slots in the standards. This is all then mounted to the wall with shelves placed across the brackets.
While technically, you don’t “build” these from scratch, they are an affordable shelving solution that is easy to install and surprisingly strong. You can clip the brackets pretty much anywhere, and it’s easy to adjust the spacing to change the shelving size whenever you want.
Two shelf standards have the ability to support shelves up to about 24 inches long. You can have longer shelves if you install three or more standards.
Shelf standards are easy to install; the key is aligning, so the shelves are perfectly level. It is also important to screw the standards into wall studs to ensure maximum strength. This is the best way to ensure quality standards that you can rely on:
Screw one standard to the wall first
Make sure it is perfectly vertical
Clip a bracket onto the standard
Take a second bracket and clip it onto the uninstalled standard
Position the two brackets in the same slot on both standards (very important)
Hold the second standard against the wall in front of a stud
Lay a level across the two brackets (raise or lower the loose standard as needed until perfectly level)
Mark the wall with the screw-mounting holes on the second bracket
Screw the second standard to the wall
Repeat these steps for all of the remaining standards. After this is done and you are confident your brackets are level and secure, clip the brackets in and lay the shelves across them.
There are many pros of DIY shelving, predominantly their lower cost. In most cases, buying the materials for DIY shelves is much cheaper than purchasing ready-made shelving. You just need to account for your time to build them and ensure you do everything right the first time! The other major benefit of building your own shelving is customising the sizing to meet your exact needs.
How do you hang shelves without nails or screws?
If you want to avoid nails or screws (essentially any permanent marks on your walls), opt for adhesive strips. Command picture hanging strips, reclosable fasteners, and velcro removable mounting strips are some popular options. You can find these at supermarkets, hardware stores, craft and office supply outlets.
How do you hang floating shelves without studs?
There are several different options when it comes to finding support for a shelf. The most common is a drywall anchor, a plastic screw that plugs into the drywall. A molly bolt is also a good option if you have plaster walls or need to handle a little more weight. Finally, for really heavy shelves, opt for toggle bolts. All of these should be available at your local hardware store.
What is the cheapest wood for shelves?
These are some of the cheapest and most popular wood options for shelves:
Pine (one of the most affordable softwoods)
Plywood
Cherry (a hardwood that is lightweight and easy to use)
Koa
Red Oak
Paduak
Mahogany
Shelves all over the place
Now that you have three relatively easy-to-create shelving options, you can go nuts with shelves all over your home! As mentioned above, the beauty of these methods is that they avoid taking up any floor space. So you can still keep a semi-minimal look while creating storage and display room in your home.
Now, we are aware that the steps above do require a little bit of DIY knowledge, and this isn’t always easy for everybody. This is why another great option is finding skilled Taskers who can do it for you! Check out our custom shelving experts who can make the exact shelves you need for you, and our wall hanging and mounting Taskers who will make sure you have complete peace of mind in everything that goes up on the wall.
If you are comfortable with your DIY skills and ready to get creative, we have some more handy reading for you! Check out our wall shelving ideas guide for a little inspiration. Once you know how to create your own DIY shelving, it’s just a little imagination needed to come up with some cool, unique storage ideas that will be as aesthetically pleasing as they are functional. Stay tuned for more DIY projects!
Want to make your handheld router even more effective? Read on.
As those who use them know, a handheld router is a versatile and useful tool. Turning it upside down and mounting it to your own DIY router table, however, opens up the possibilities and tasks your humble router is capable of.
We’ll assume that if you are reading an article about making stuff for your tools, you have some tools. So gather them up and read on to learn how to build a simple DIY router table that can also provide some handy bench and storage space in your work area.
Just note, building a high-quality DIY router table can be complicated for beginners, it is best suited to those who know their way around a workshop (you know, the type of people who own routers that need tables). Here are the things you’ll need for your router table DIY.
Required tools:
Clamps
Corded drill
Countersink drill bit
Drill bit set
Dust mask
Router
Shop vacuum
Table saw
Tape measure
Glue
Hearing and sight protection
Jigsaw
One-handed bar clamps
Required materials:
1-5/8-in. screws
2″ washer-head screws
Polyurethane finish
Safety power tool switch
Wood glue
Contact cement
Nail-on furniture glides
Step 1: Building the cabinet
Choose the dimensions to suit your space and assemble the cabinet box first. Next, cut the sides and back and band them with hardwood edging. Glue on the edging, using clamps for a bit of support. The edging protects the edges of the MDF and provides a professional finish.
Use washer-head screws to put the frame together as this provides strength and eliminates the need to drill countersink recesses. If you want to include a middle shelf in your design, be sure to measure the height of your router first. Your shelf location should allow you to remove the router motor with ease.
Hang the doors using “full overlay wrap” hinges so the doors can completely cover the front edges of the sides. Nail on some furniture glides and mount an external switch.
Cut three holes in your cabinet for:
The power cord
A vacuum hose
A hole in the top for the router (in the next step)
The tabletop will sit over your cabinet top. Glue one layer of hardboard to some MDF core. Weight or clamp it down to dry, then trim the hardboard and cut a hole (as mentioned in the above point) for your router. It makes sense to centre the hole from the back of the tabletop for the most support.
Centre the tabletop on the cabinet, then trace the hole onto the cabinet top. Cut the second hole 1/2 in. larger than the tabletop hole, and add a second layer of hardboard to the tabletop. This layer won’t have a hole in it as it forms the work surface, which provides support for the router.
Add some hardwood edging and plastic laminate and ease the edge with a chamfer bit to prevent chipping. Install the router by drilling a router-bit hole to the size of your largest router bit. Fasten the router base to the tabletop, and the main section is done.
Step 3: Making the DIY router table fence
Take a plank of MDF the length of your table, cut a hole in it, and then cut the plank in half to create matching parts. These will act as the base and the rail. The idea is that the fence forms cutouts that act as an opening for the router bit.
Interestingly enough, you can use your new DIY router table to cut the slots of your fence rail. Attach the two fence halves with glue and screws, and your table is good to go.
Why a router table is useful
Why even mount a router on a table? The primary benefit is stability. When compared to a handheld router, using a DIY router table can be faster as it is easier to push wood across a router than pushing the router across the wood. A sturdy table and supportive fence provide greater control and accuracy.
For larger jobs, a router table is a must-have. For example, creating raised-panel doors is a task that requires big router bits that a handheld router is not capable of (or safe to use). Some specific router bits, like those that cut interlocking door or drawer joints, need a level of precision that cannot be achieved by hand.
Finally, the router table can be helpful when shaping parts that are too small for handheld routing. The added bonus of a router table is the space for a shop vacuum which ensures dust control, something that is not possible with a handheld router.
Additional touches you can include on your table
If you want to take your DIY router table to another level, include a drawer box. Make sure you do this last so you can use your new router table to cut 1/4-in.-deep rabbets in the drawer sides.
(If you want to skip the rabbets, make the front and back of the drawer 1/2 in. shorter).
Mount the drawer on full-extension slides and give everything a polyurethane finish, inside and out. Add some door pulls and magnetic catches, and you’ll have a fine DIY router table indeed.
Yes – router tables are a very useful addition to any workspace, especially if you cut your own mouldings. A router table essentially makes things easier and faster when compared to using the router alone. No more clamping the boards or struggling with narrow boards that are hard to shape. Just remember to use a push stick when necessary to protect your fingers.
Can any router be mounted to a table?
Within reason, any fixed base or plunge router should be able to be mounted to a router table. This becomes easier if you are creating your own DIY router table from scratch, as you can custom design its size to fit your router.
What can you make a router tabletop out of?
For a budget option, opt for MDF or particleboard when creating your DIY router table. If you want something slightly higher in quality, hard plastic sheets such as phenolic or UHMW will make an excellent tabletop. These materials are durable, so they will last longer and provide better performance (however may be hard to cut). UHMW is another option that offers ultra-low friction so parts can slide effortlessly across the table.
Can you attach a plunge router to a router table?
Yes, a plunge router can be used in a router table. Some will work better than others, and you will need to consider different safety practices depending on the type of mechanism in your setup for the router lift. In general terms, however, a plunge router is just as safe as a fixed-base router.
Adding a simple router table to your woodworking shop
If you have read the above steps and your head is in a tizz, we don’t blame you. These instructions are certainly best suited to those who know their way around a workshop and have an intermediate level of woodworking skills. The type of people who are likely looking to level up their work area with a router table in fact.
If your skills aren’t quite there yet, or perhaps you want a cool router table to give someone who knows how to use it as a gift, we have the solution. A range of talented Taskers can help with building unique furniture or wooden items, so you can find the best option for you, give them your ideas or specs, and get a unique table for future use.
Those who are handy in the workshed and are looking for fun new projects like the DIY router table, feel free to check out some of our other how-to blogs. There is never a reason to be bored, so keep yourself busy, get creative and build some pieces that look great and will be useful as you expand your skills.
At this point, you may be feeling like there isn’t a lot to love about lockdowns. While we don’t necessarily disagree, there are some small positives that we should all focus on! One example is the bank balance! With a few tips for how to save money when you are stuck at home, combined with the fact that we aren’t crushing our accounts at da club every weekend. Who knows? We all just may come out of lockdown with a new Tesla*! (*Tesla not guaranteed).
While not going out is less than fun, it does afford some financial benefits, as can all of this spare time we suddenly have. Let’s dive into how you can put it to good use with some lockdown money-saving tips that will help the bank balance to look good!
How to budget and save money fast
Tip #1: Limit the online shopping
Ooft, this one stings. Online shopping is one of the saviours of lockdown. There are really only two days in lockdown, ones where packages arrive and ones where they don’t. Hands up, who else is craving human contact so badly that they are trying to develop a deep friendship with their amazing delivery person?
Well, a little bit of self-restraint is needed to fight the temptation of online shopping. It’s fun to click a button and do away with your month’s budget without feeling like you’ve spent anything, only to emerge from lockdown with 50 different variations of the Monopoly board game and a heap of regret.
Combat this by putting restrictions on certain websites to make the checkout process more time-consuming. Avoid storing your payment details, do away with your buy-now-pay-later services, and at the very least, leave the items in the basket overnight. This not only helps to ensure you actually want what you are buying, but you may also get one of those “did you forget something, here’s 10% off” emails!
You may also benefit from limiting your screen time to just work or chatting with friends, so you don’t buy 20 new pairs of sweatpants out of web-surf boredom.
Tip #2: Utilise free entertainment
Surely by now, you have exhausted all of the options on Netflix? Before you go down the road of re-watching Tiger King, be creative with some free, fun things you can do at home.
Spend some time learning how to cook your favourite meal from scratch, invent your own family games, get crafty and creative with some new hobbies or read one of those many orange Penguin books you have laying around the house for looks! You may even come out of lockdown with a new skill or passion as a result!
Just because you have run out of Amazon Prime, that doesn’t mean you should add Disney+. Streaming service fees can quickly add up and significantly dent your wallet.
Try to only have one provider on the go at all times. Are you done with Amazon? Cancel it before you sign up to Stan. Can you share with a friend to get two platforms for the price of one? There are plenty of free streaming services like SBS On Demand and ABC iView available that will give you hours of streamed entertainment without you having to spend a cent.
Tip #4: Pay off those loans
Interests may be really low at the moment, but loan rates are still higher than savings rates (they always will be). Rather than letting these tips or your nights in result in a bigger savings balance, pivot and have them create a lower loan balance.
This is a great way to save money in the long term. Always have an emergency savings buffer in your account, but chuck the rest off those loans and avoid the piles of interest that can build up over the years.
Tip #5: Buy insurance
We know it’s weird to say “buy insurance” in an article about saving money, but we live in unprecedented times. Those holidays or AirBnB weekends you are planning have never been riskier, so make sure you get insurance to avoid losing the money from flights or accommodation (if the next lockdown rolls around unexpectedly).
Tip #6: Claim all work expenses against tax
Lockdown means that many of us are now working from home, which we previously have never done. There is a bigger benefit to this than spending all day in sweatpants (or no pants!). You can claim lots of costs associated with working from home, such as washing and travel (even though there isn’t much of that).
Speak to your tax accountant about the many new work-from-home things that can lower your tax bill substantially. Also, remember that tax refunds can be backdated, so consider the things that may be relevant from lockdown one.
Tip #7: Shop around and find the best deal
You have a little extra time so use it to research the best deals on literally everything. Look at your phone deal, health insurance, energy provider and more. On online marketplaces like Airtasker, you can compare rates and get affordable handymen to fix leaks and other emergency expenses. Imagine if you could save $10 per month on those things alone, that would be an extra $360 in your pocket each year for a little bit of research!
There are plenty of comparison websites available that can make the research element even easier as well. There is no excuse not to save!
Tip #8: Redo your budget
Lockdown is a great chance to take another look at your budget and the areas where you’re spending the most. There are things in the list above that you can start with and likely many other areas where you can cut back such as food expenses and groceries. That being said, here’s our guide to meal planning in case you’re unable to get takeaways from your local restaurant. Or you simply don’t have the time or patience to cook during this stressful pandemic.
How to plan meals and do meal prep during lockdown
Another great money-saving way to soak up some time is with meal prep and planning. This also has the dual benefit of ensuring you are sorted for breakfast, lunch and dinner! Consider the following:
Consider meal planning as an activity and take an hour to plan meals for the week; this will also take the stress out of cooking.
Make a list of meals and snacks you love and tape it inside the pantry door, so you have a shortcut that simplifies meal planning.
If you have kids, involve them in the task. They love autonomy and responsibility and are more likely to eat the food if they’re involved. Let them unpack the food delivery, find recipes and help write the plan.
Always make double and freeze it; your future self will thank you.
Research new meal plans by finding free options online. There is no better way to stay healthy and challenge yourself to create some new recipes.
When thinking about how to save money on utilities, there are some simple things you can do around the house, including:
Switch to energy-efficient bulbs
Change air filters regularly and keep vents clear
Replace old appliances
Buy a smart thermostat
Turn off lights and powerpoints when not in use
Seal doors and windows
How can I save money on food and still eat healthily?
Eating healthily doesn’t have to cost the earth, in fact, there are ways you can learn how to save money on food and eat healthy, such as:
Planning your meals
Sticking to your grocery list
Cooking at home
Cooking larger portions to create leftovers
Never shopping when you’re hungry
Buying whole foods
Buying generic brands
Avoiding highly processed food
How can I save money on a budget fast?
When it comes to how to budget and save money fast, there are a few starting points to keep in mind:
Learn to budget and gain an in-depth understanding of your finances
Focus on avoiding or getting out of debt
Create a designated savings account
Automate savings and bill payments
Put a spending limit on your credit or debit card
Streamline your streaming services
Rolling out of lockdown like a boss
Picture this; you’ve put our money-saving tips into play, and you’re now ready to leave lockdown with a stacked bank account (possibly even a top hat and cane that you’ve bought with the extra funds to complete the look).
To make lockdown a little easier, check out the Taskers, who are available to help with things like grocery delivery and fresh food delivery for those looking to stay healthy.
We also have a stack of other How To guides that you can read through to entertain yourself, boost your skills, and do some good around the home! We recommend starting with our guide on how to clean the oven. Many people say that oven cleaning is therapeutic! We also don’t need to say this, but you have to have a clean oven. So, embrace the task and have fun!
Make sure to check the lockdown restrictions in your state or area before booking home or mobile services.
Have you ever dreamed of a room with walls full of books?
There is a reason why people love collecting books (and why you probably need a DIY bookcase to house them). They are enjoyable to read, sure, but after you have closed the cover, they become little gems of interior design beauty that showcase your interests and tastes while making great talking points.
They also take up a lot of room. If you learn how to build a DIY bookcase, you can customise this handy piece of furniture to any space, store your books, and create a great reason to need to buy more of them.
Building a DIY bookcase only requires moderate carpentry skills and some patience, so read on for the DIY bookcase plan and learn what you need to do!
How to build a sturdy DIY bookcase
Choosing the materials and size for your DIY bookcase
There is a lot of room to move with design and size when it comes to making a DIY bookcase, as it needs to fit your space and look. In this example, we’ll list some common choices; just keep in mind that they are all interchangeable based on your preferences.
We are using two pieces of plywood for each side of the cases, separated with 1/2-in.-thick plywood strips. The shelves will fit into dado joints that are routed into the case sides. We are going to glue and screw our shelving into the dadoes, meaning they can’t be adjusted later. If you think you will want to change the size of your shelving at some point, you’ll need to skip this. We’re pretty sure books don’t grow though…
Measure your books before you decide how tall the shelves should be. A general rule for a bookcase is shelves between 7 in. and 14 in. apart to accommodate pretty much everything. Depth-wise, books generally fit in 8- to 9-in.-deep shelves.
Building your bookcase DIY
Birch veneer plywood is an ideal choice for building bookcases. Start by building a base with a depth of 1 1/2 to 2 in. less than the depth you will have for the bookcase itself. The height must be 1/8 in. taller than any baseboard moulding (if you plan to install some).
Set the base into position, checking that everything is level. This is very important, so check the level right to left and front to back. It is also a good idea to fasten your bookcase to the wall studs to prevent any tipping forward. You can do this by using 3-in. drywall screws. Another option to ensure safety is driving angled screws into the flooring through the inside of the base.
Cut some 3/4-in. plywood to your desired width for the case sides and shelves with a table or circular saw using a straightedge guide to make exact cuts. Crosscut the case sides to your desired length, ensuring they are 2 in. shorter than the distance that runs from the top of the base to the ceiling. Cut all the shelves to length, preferably no longer than 36 in. to avoid sagging when you fill them with books.
Clamp the two opposing case sides edge-to-edge to ensure the dadoes line up and mark each dado location. Next, clamp a straightedge guide laying across the two sides and position it square with the plywood edge. Use a 3/4-in. straight bit with a router and make sure it is adjusted to cut 3/8 in. deep.
Use the router across both plywood pieces, and if you plan to use biscuits for any face pieces, cut the necessary slots by using a biscuit joiner. For the taller sides, space the slots 12 to 14 in. apart. Cut the slots into the shelves to finish this step.
Assembling the DIY bookcase
You can use carpenter’s glue with the dadoes. Make sure you set the plywood shelves in place, then secure them with 1 5/8-in. drywall screws. The beauty of this design is that it needs no back piece and can sit flush with the wall, using the wall as the back. Alternatively, you can use it in the middle of a room as a see-through bookcase.
Use a hanging rail to screw the case to the wall. Secure the cases by using 3-in. drywall screws that have been put through the hanging rails into the wall studs.
Optional: Adding a face frame
Depending on how fancy you want to get, you may like to provide a nicer finish for your DIY bookcase by adding a face frame. We suggest starting with the horizontal base rail at the bottom and hold it against the bottom shelf to mark the rail at the centre of each slot that has been cut into the shelf. Use a biscuit joiner to cut the corresponding slots into the base rail and use some carpenter’s glue to attach the base rail to the bottom shelf.
When doing this, we recommend No. 20 biscuits in the shelf slots, so all you have to do is simply press the rail into place using a rubber mallet to tap in and tighten. Make sure you wipe away any excess glue as soon as possible, so it doesn’t dry and look messy.
For the vertical stiles, hold each stile to the front edge of the bookcase and repeat the same process as above to make the biscuit slot locations. Cut the slots again using the biscuit joiner, and apply glue to both surfaces just as you did above.
Essentially the glue-and-biscuit with a rubber mallet finish can be repeated when attaching any face frames to the shelves. While face frames are mostly decorative, they do stiffen the shelf to prevent sagging. When all of this is done, we recommend waiting roughly 8 to 10 hours for the glue to cure before you start loading up your book collection onto the shelves.
If you are looking for cheap bookshelf ideas, get a little creative with some of these for inspiration:
Use the simple box
A strap of leather and a plank can look rustic
Sculpt bookshelves using old drawers
Put crown moulding on simple bookshelves to lift their look
Pick the right pattern to emphasise your library
Can I build my own bookshelf?
Yes! All you need is a table saw, plywood and some imagination, and you can design and build a custom bookshelf with ease. A DIY bookcase can be tailored to any colour scheme or decor. It also doesn’t just have to display books, as you can use it for knickknacks, a media collection or anything else that fits!
How do you make a cheap bookshelf sturdy?
Use a piece of 1/8-inch plywood or hardboard that has been cut to the dimensions you require. Set the backing in place and square the case, nailing the backing to the bookcase using 1-inch finish nails. This will provide added stability to your bookcase.
What can I use as a bookend?
Any heavy object that is at least 3/4 as tall as your books will do. You can either have matching bookends, ones that purposefully don’t match, or an object on one end only at the end of a row of books.
You are now one step closer to living in a library
Your dreams of owning a personal library are no becoming a reality as you can build a bookcase for any section of your home. We do, however, realise that the steps above are a little above a beginner’s skill set. So, if your carpentry skills are not quite there yet, we have another option for you.
Search the skilled Taskers who are available to provide bookcase assembly so you can ensure your wall of books lives in housing you can rely on. We also have experts in desk assembly and other office furniture assembly as well if needed. Save yourself a little time and enjoy some peace of mind in knowing the job has been done properly.
If you knocked the DIY bookcase project out of the park and are looking for the next way to flex your creative muscles, have a read of our other ‘how to’ blogs. We have one that teaches you how to make a photobook that looks simply amazing. Pretty sooner, everything you have to display in your home will look its best!
Get ready for the ultimate movie night anywhere in your home or garden!
Are you a hard-core movie buff? Do you secretly love school holidays when you and the kids can make a batch of popcorn, build a blanket fort and watch children’s classics, pretending you’re in your own private movie theatre? Ever wanted to up the ante and create your own DIY projector screen for a home theatre? Read on to learn how!
A night at the movies
In terms of history, motion pictures are a relatively recent cultural norm that has only been made possible by the unprecedented technological advancements of approximately the last hundred years.
The first projected motion picture presented to an audience was achieved by the Lumière brothers in Paris, France, in 1895. Since then, the technology explosion of the last 60 to 70-years has seen silent, grainy black and white movies and television shows evolve into stunning 8K high-resolution motion pictures with crystal clear high-definition surround sound.
Traditionally, home theatres have been a luxury afforded only by the rich and famous. However, as technology has become more affordable, compact and powerful, people worldwide have been making their childhood dreams come true by creating epic home theatres for their families and friends to enjoy.
For those of us that have felt the pinch of recent international economic instability, this dream still feels allusive. So the question is, can you achieve your dream home theatre on a budget?
Well, for those of you who don’t mind a bit of a do-it-yourself challenge and putting in some elbow grease, the answer is yes!
Read on to learn how you can make your home-cinema dreams come true with some ideas and tips on how you can install a DIY projector screen into your home.
Although big-screen TVs have been a dominating force in the world of modern audio/visual media, real cinephiles, like audiophiles with vinyl records, believe nothing beats a projected image via a projector.
Projectors have, in the past, been a hefty financial investment, one that generally does not make the budget essentials list. However, with the rise of e-commerce, finding a high-definition projector at a budget price online has become easier than ever before, and you have the added benefit of having access to a global market.
Online shopping has made projector sales a competitive market, and many traditional retailers are more than happy to close a good deal. Make sure you use this to your advantage when bargaining at your local hi-fi store; you’d be surprised how much you can knock off the ticketed price.
Another bargain hunters paradise is the second-hand projector market. You can often find high quality, brand name projectors on social media marketplaces or websites like eBay and Gumtree.
Projector owners often treasure their projectors and take good care of their investment. Usually, the owner is either selling their projector due to lack of use or upgrading to a later model.
Of course, online spending does come with risks, like complicated returns if faults are found or no after-sales warranties or guarantees. If this kind of possible outcome bothers you, then your bargaining skills at a new or refurbished goods retailer may be a better option.
However, the fact remains that achieving a quality DIY projector screen solution for your home will require a good quality projector. Although there are bargains out waiting for you, like all purchases, you will generally get what you pay for.
DIY projector screens and projector screen paint
Now that you have secured your most crucial piece of home theatre equipment, your projector, you will now need to decide how and what you will project your favourite films onto.
There are many different options when choosing the right projection application, including:
Freestanding projector screens
Wall hung projector screens
Retractable electric projector screens
DIY projector screen paint and more
Read on to learn more about the most common DIY projector screen solutions for your home theatre.
Freestanding projector screens
If you want a home theatre setup that you can pack down after each use, this may be the best option. These types of screens come in a wide range of designs and sizes and vary in price considerably depending on the brand and design.
Sizes can range from anywhere between 60-inches to 120-inches. Some may have a pack-down frame that requires assembly, which then has the material screen hung on fastening points.
Other freestanding projector screens may have manual, springloaded, or electronic systems that retract the screen after use and keep it crease-free, protected and clean. These can cost a little more but are worth the investment long-term.
Wall-mounted and retractable projector screens
Wall-mounted projector screens can be removable, permanent or retractable. Generally made of the same material as a freestanding projector screen, these screens can be stretched and fastened onto hooks or permanently adhered to the wall.
Some wall-mounted projectors have a manual or electronic retraction system. However, these wall-mounted DIY projector screens can be pricey, and a central unit must be fitted to the wall.
If you choose a powered retractable wall mounted projector screen, power may need to be run by a qualified electrician also if you want the unit to be wire-free.
If you want to get really fancy and have some dollars to spend, then you can get an electronic retractable projector screen that can be installed into the roof, making the screen invisible until you need it.
Again, you can find bargains online, and online prices may give you some bartering leverage if you want to buy retail.
If buying online, do your research, make sure the supplier is reputable, and return policies are in place. For example, if you are purchasing an adhesive or wall fastened DIY projector screen, the chance of a fault would be unlikely.
DIY black projector screens
For the most part, projector screens have been uniformly white to maximise the projector’s image quality. However, as projector resolution has evolved into high-definition, black screens have been developed.
The main benefit of using a DIY black projector screen is that a black surface better reproduces the darker portions of the image. This is similar to dark, backlit LED flatscreens.
DIY black projector screens have not been perfected. This means particularly bright images can give off a rainbow or shimmer effect. Some viewers may find this unpleasant to the eye.
DIY projector screen paint
You may not have considered that you have a perfectly good projector screen already installed in most rooms; the wall!
The main issue with using a plain white, untreated wall as a DIY projector screen is that the undulation, imperfection and rough finish of the wall can dramatically reduce your image resolution quality.
DIY projector screen paint is designed to produce an ideal surface for a clean and clear projected image.
There is a range of speciality DIY projector screen paints on the market. The right one for you depends on factors such as:
The power or “Lumen” rating of your projector
Ambient light in the room
What kind of images you will be projecting
Either way, DIY projector paint is effective, both for image quality and affordability. This space can also double as a live projection picture show. Show family photos, holiday snaps and memories while entertaining friends and guests.
Can I use standard fabric as a DIY projector screen?
The answer to this question is yes, with a maybe. Standard white fabric may be too thin and lack density to give you a high-quality image.
The white, reverse side of blackout curtain cloth can be a good alternative; however, you may be able to pick up a real screen for cheaper than the blackout cloth. So, unless you have some extra laying around, a screen may cost a lot less than you think.
What kind of lighting is best when using a projector?
As a rule of thumb, the blacker the room, the better. However, depending on what you are watching, some ambient light can be better. This is especially the case when watching personal footage, documentaries, or sports. Anything where interaction and conversation are likely.
If a dimmer switch and downlights fall within your budget, all your bases are covered. Easily move between pitch black and mood lighting with one of these!
Can I use modern multimedia and devices on a projector?
Unless you are buying an older projector model, most modern projector units have HDMI, USB and high-definition media ports. These allow you to run DVD and Blu-Ray players, or attach your PC, laptop, tablet or smartphone directly into the system.
Get the popcorn ready
Now that you have a bunch of DIY projector options, it’s time to plan the movie night. If you really want to level up your home cinema game, there are some people who can help! Search a range of taskers who offer home theatre set-up, wall hanging and mounting services and home theatre design.
We also have another article that can provide some outdoor entertaining ideas. Pretty soon, your home will be the ultimate place to hang!
Your splashback can be like a mini-feature wall for your kitchen!
Learning how to tile a kitchen splashback by yourself is one of the easiest DIY ways to improve the look of your home. This simple and affordable upgrade can be a lot of fun as there is no shortage of kitchen splashback options available when it comes to tiles. You get to flex your creative muscle while upgrading a functional area of your kitchen!
You have a lot of options when it comes to materials for your splashback, but glass, mirrored splashbacks, and stone splashbacks can be much more expensive and very difficult to keep clean. On the other hand, a tiled splashback is easy, affordable, robust, and simple to clean, all while looking amazing. It also allows for patterns and colours to suit the look of your kitchen.
Read on for all the steps for how to tile a kitchen splashback and take this fun DIY project on today!
Removing the existing splashback
If you are getting rid of an old splashback or renovating, you will first need to remove whatever it was that formed your existing splashback. You can tile over it, sure, but the finish simply will not be as good. Go the extra mile with the effort of removing the existing splashback. Once you have, you can reinstall some new plasterboard and start with a clear flat surface.
Alright – now that you’re ready for new tiles, here’s a helpful infographic summarising all the steps to DIY tiling in general:
Source: Airtasker
Read on below as we dive deeper into tiling kitchen splashbacks, specifically.
How to tile a kitchen splashback onto new plasterboard
Prep the surface and make sure your plasterboard is free from lumps or bumps. These will interfere with your tiling. Also, always put protective sheets over your benchtops so they stay free from damage that can be caused by tile adhesive and grout.
Include something to support your new tiles. If you have a benchtop, perfect, but if you are tiling between two cupboards, temporarily attach a block of wood to support the tiles and ensure a clean line.
Get some tile adhesive from your local hardware store. It often comes in a powder that you will mix until it looks like toothpaste.
Choose a starting point and use a 6 or 8mm notch trowel to apply a line of adhesive that covers the area that will make up one row of tiles. It’s always a good idea to start at the bottom, pushing the trowel upwards to apply the adhesive. If you are creating a mosaic pattern with your tiles, use a 6mm notch trowel. If you are laying in lines, use an 8mm notch trowel.
Put the first row of tiles in place; this will form the foundation for the following rows. Place spacers along the line. This will ensure the tiles are lined up correctly and evenly spaced. Use a spirit level to make sure everything is straight.
The hardest part will come at the end of the row. Unless you are unbelievably lucky, you will likely need to cut your tiles to create the perfect fit. You can do this by placing the tile upside down on a tile cutter, running a cutting blade along the line where it will need to be re-sized and either cutting it with the cutter or applying pressure to break it.
Place the cut tile at the end and butt it into the corner or architraves.
Repeat all of the above steps to the completion of your full splashback area and leave the spacers in their positions for at least 12 hours.
At this point, the adhesive should be set, and you can remove the spacers.
Adding grouting to your splashback
Once you have laid the tiles and the adhesive is set, you will need to add some grout. Grout is often available in a wide range of colours, so you can plan ahead with your tile look in mind, making the grout part of the feature. Just make sure that you find a grout that is suitable for 3-6mm tile joints.
Prepare the grout as per the instructions from the manufacture on the packet, then follow these steps:
Use a rubber trowel to apply the grout in a massage-like motion. You should be adding grout into the joints in a 45-degree circular motion. Fill all of the joints and remove any excess grout as you go.
Wait for roughly 30 minutes allowing the grout time to set, and use a clean sponge to wipe away any excess grout.
Choosing the design for your splashback tiles
As there are literally thousands of tile choices for splashbacks, how do you choose the right option for your home before learning how to tile a kitchen splashback? While it partly depends on your budget, you should first decide if you want your splashback to be a feature or to blend in with the existing look.
If you opt for a feature, feel free to get colourful or even choose a pattern. Approach it like you would a feature wall in the living or bedroom. If you want a more minimalist look, choose a white or single colour that matches your walls and cupboards.
Should you DIY your splashback at all?
Refreshing your kitchen splashback is an affordable way to do a mini-makeover. Upgrading your kitchen splashback to a tiled option is easy to do and a great DIY project, even for those who do not consider themselves to be super handy.
Tiling a kitchen splashback should be somewhat simple, providing you follow the above steps. As a reminder, here is an overview of the process:
Start by preparing the surface by clearing the old splashback and creating a level area
Make sure your tiles have a benchtop to support them
Prepare some tile adhesive
Apply it to the required position on the wall, one row at a time from the bottom
Place the tiles on the adhesive with spacers to ensure they are spaced evenly
Repeat this process row by row
Wait 12 hours
Remove the spacers
Apply some grout liberally, wiping away the excess as you go
You can install a splashback over existing tiles as long as they are securely attached to the wall. There should be no cracks or broken tiles as this may impact the adhesion of the panel. The existing tiles will also need to be level, so it is best to remove any uneven tiles as they can distort the final look of your new surface.
Should you tile a splashback?
The goal of a splashback is to protect your kitchen walls from water and oil splashes. Therefore, a practical approach is to use tiling with the bonus of it being a great decorating scheme.
When tiling a wall, do you start at the top or bottom?
Always start tiling roughly 3/4 of the height of your tiles. Start with the bottom row of the tile and work your way up from there.
Can you start tiling in a corner?
It is likely that your tiles will need to be cut, so they perfectly fit the perimeter of your room. If you begin in a corner, you can start your pattern with full tiles on a straight line moving evenly into the room. It can be more difficult to get the pattern right if you start in the centre. Starting in the corner also means that is one less tile corner you need to cut.
Not-so confident in your DIY skills?
While we say this is a simple DIY task, learning how to tile a kitchen wall splashback may still be above some fresh DIYers abilities. How long to tile a kitchen splashback depends on your skills – you simply may not have enough time!
If that is the case, we have a range of expert Taskers who can help handle the project for you. Ensure a professional finish and save yourself the hassle!
Add a very handy skill to your DIY repairs repertoire.
Whether you are starting from scratch with a new home reno or simply adding a feature splashback to your kitchen, sealing your tiles with grout is a vital element of your build. Learning how to grout tiles yourself not only saves you money, but it gives you a handy skill that you’ll call on for upkeep, ensuring your tiles stay as good as new, for as long as possible.
Grout protects your tiles from dirt and moisture and is actually quite quick and easy to apply. In fact, many people are surprised at how simple and quick this important job can be! You don’t always need the professionals or to say goodbye to your bathroom for a week to achieve a stunning refreshed look.
If you need to learn how to tile first before you grout, check out our highly detailed DIY tiling guide!
To help, we’ve detailed a simple step-by-step guide that can be used for both how to grout tiles, and how to regrout as well. A professional finish is easy to achieve!
Everything you need to grout tiles
Tub of grout
Adhesive
Squeegee or spreader
Sponge
Bucket
Cloth
You’ll be able to find a range of different grout types at your local hardware store, so ensuring the project sticks to your budget should be very achievable. It will also be important to grab some grout sealer while you are there for the aftercare of your new grout.
Understanding the different grout options
To help prepare you for that trip to the hardware store, it is essential to have a base-level understanding of the four main types of grout:
Cement-based: The most popular option for DIY tile projects, not the most robust grout option but easy to work with
Epoxy: A little bit more expensive but very effective for tiles that require need a lot of water resistance, for example, the bathroom
Caulking: Usually available in a tube or caulking gun, and best for tough-to-reach corners
Latex-modified sanded cement: Similar to the cement option but with higher levels of water resistance and bonding characteristics
If you are unsure of what will be best for your project, chat to the staff and let them know exactly what you’ll be doing, they will be able to point you in the right direction!
How to grout tiles – Step-by-step
Step 1: Preparation
If you are working with powdered grout, pour some water into a bucket, then add the grout. Stir and continue to add more crowd until you reach a consistency of whipped up ice cream.
Step 2: Application
Use a squeegee or grout spreader to pick up some grout then force it into the gaps that are between your tiles. You may find it significantly easier to work diagonally at a 45-degree angle when applying the grout, only doing small areas at a time, so your grout doesn’t dry before it is in the right position.
While the grout is still workable, cure and tool it into the joints, wiping off any excess with a damp sponge. Give it about 10 minutes then go over with again with a wet sponge.
Step 4: Sealing
The final step is making sure the joints are waterproof. This is done with a grout sealer that is often applied twice. Just make sure that your tile is dry before applying to ensure the best result. From here you just et the tile sit to dry, then polish it with a cloth.
How to regrout tiles – Step-by-step
Nothing looks better than new white grout, and nothing looks worse than grout that has become mouldy or dirty. If your grout needs a refresh, or you want to get a little experimental by changing its colour, regrouting is the way to go and easier than you think!
This weekend job will seriously boost the look of your space, and all you need is a grout rake and an off-the-shelf product.
Step 1: Prepping the area
Cover the floor with an old sheet to save clean up time and pop the plug into the bath or sink to avoid grout falling in there and causing a blockage. It’s also a good idea to open windows to ventilate the room and clear out the dust. A safety mask and goggles are a good idea as well.
Step 2: Remove the old grout
Use your grout rake, or an electric grout remover to clear out all of the old grout. Start in the middle of the tile and draw a line with your grout rake with a slow, steady movement. Start with vertical lines, then go horizontal. Give the area a wipe down when you are finished to get rid of any excess dust.
Step 3: Applying the new grout
Mix up about 20 minutes worth of grout to ensure you don’t have an excess amount that will dry before you get to it. Chuck some on your grout spreader and work it into the lines. Run over the tiles with the edge to clear away any excess.
Step 4: Drying
Use a damp tile sponge and clean away any excess grout, then leave it to harden for about half an hour. You can use a grout finisher to tidy any indented lines by running the rounded end along the line with a soft amount of pressure.
From here, leave it all to dry for a few hours, then take a clean cloth and polish the powdery residue.
When it comes to handling the grout on your wall tiles, the steps are mostly the same, save some slight differences. The mixing and creation of your grout, with the powder and some water, is the same, but you’ll want to protect your floor from splatters. Lay a drop sheet secured with masking and remove any spaces that may be in-between the tiles.
Spread a generous amount of your grout mix onto the tiles then use your grout tool to work diagonally across the tiles. This helps the mixture get right into the gaps. To really secure your grout, run the flat edge of the tool across the tiles which also helps to remove the excess. Repeat this process until the mixture in the joint begins to set.
Once this is all done, take a damp sponge and wipe diagonally across the tiles leaving a clean joint that is full of grout. Leave the grout to dry completely then buff the tiles with a soft cloth, and your wall tiles will look as good as new!
Frequently asked questions
How long do you leave grout before wiping?
When you first finish applying your grout, leave it to harden for about half an hour. At this point, you can tidy any indented lines with the rounded end of your grout tool with a soft amount of pressure.
After you have done that, leave your project to dry for a few hours, before cleaning and polishing. When all this is done, sit back and enjoy your fresh new look!
Can you put new grout over old grout?
This is not recommended as it will be harder to achieve a neat and professional-looking result. Take a bit of extra time and use a grout rake to clear out all of the old grout.
The best way to do this is by starting in the middle of the tile and drawing a line with the grout rake in a slow and steady movement. Once you have cleared away all of the old grout and excess dust, you are ready to apply the new grout.
Do you need to seal grout?
Yes, it is very important that you seal your grout to ensure it stays water-resistant and offers you a decent amount of longevity. To do this, purchase a grout sealer from your local hardware store and apply it twice or per the instructions on the packaging.
Ensure that your tile is dry before applying the grout sealer to get the best result. This final step is crucial in protecting all of your hard work, so don’t skip it!
Enjoy your easy DIY new bathroom look!
Just like that, you have refreshed the look of your bathroom or kitchen without an exorbitant cost or too much hard work. Fresh grout will make your space look brand new, while also protecting it from moisture and dirt, saving you from a hefty renovation sooner than necessary.
If you have caught the DIY bug, mastered your grouting and are wondering what the next DIY project you can take on around your home is, check out our blogs about kitchen flooring, splashback ideas, bathroom tiling ideas and even some great design tips for your front porch! There is no end to the improvements you can do, and it’s time well spent, boosting the look of your home and its value! Get to work!
No more TV dinners with your brand new DIY dining table.
Every home needs a dining table, but there is a real sense of accomplishment when it’s a DIY dining table! You’ll be able to impress your guests with the fact that YOU BUILT the piece of furniture that is holding up their food and drinks!
As another benefit, if you use 100% reclaimed wooden planks, you’ll achieve the look of a rustic industrial DIY dining table while also recycling materials. It may take a while to prepare the wood to achieve a smooth finish, but the result will be truly stunning.
You can use any reclaimed wood for a project like this and completely customise it to the size of our room. Reclaimed wood can be tricky to work with (cue the splinters), but the outcome is worth it, and you’ll save a few trees in the process! Just make sure the wood is completely dry before you begin, and read on to learn how to create a stunning DIY dining table.
The tools you’ll need
You’ll need a few basic and specialist tools before you begin:
Wrecking bar
Electric or hand plane
Claw hammer
Rubber mallet
Biscuit jointer
Circular, plunge or sliding mitre saw
Belt sander
Clamps and ratchet straps
Building a DIY dining table: Step by step
Step 1: Clearing the boards
When working with reclaimed wood, you’ll need to start by removing things like existing screws and nails. This is where you’ll need the wrecking bar to help. Make sure you are starting with dry and clean wood.
Step 2: Plane and sand each piece
Use an electric or handheld plane (or a thicknesser) to sand and clean up the boards even more. Once planed, sand each piece with a belt sander to leave a nice smooth finish. The smoother the wood, the easier and more effective the next step will be. Optional: you can stain wood depending on your preferred table. Going for a farmhouse style? Weathered, white-washed wood gives off rustic vibes – perfect for a DIY farmhouse dining table. Or why make a DIY pallet dining table with pallet wood and paint it in a chevron pattern? It’s up to you.
Step 3: Joining the pieces together
Ensure you have clean and dry wood. Use a biscuit jointer to cut an even groove into the side of the wood and ensure a good straight join along each piece. Place a small piece of wood (a biscuit) to line up the two pieces evenly against each other (this also adds a bit of strength to the join). Clamp some beams across the top and bottom of your planks to ensure a completely flat finish, then glue the pieces together.
Sash clamps can be used to straddle the width of your boards with ratchet straps to account for the length. Make sure you glue your boards on a flat even surface, so you know that the whole piece will be perfectly flat. You want to avoid bowing in the wood or joins, or you’ll be stuck with a wobbly table!
Use wood glue, and be aware that it dries pretty quickly. That being said, we recommend that you leave this section to dry overnight, just for some peace of mind in knowing the glue has properly done its job.
Step 5: More sanding
When your tabletop is glued properly, it’s time for more sanding. The goal is to get the tabletop as smooth as possible in preparation for the filling of any gaps and imperfections.
Step 6: Filling gaps
The tabletop will need some epoxy resin to achieve a perfectly smooth finish. A simple wood filler will also do the same thing. As you are using reclaimed wood, it is quite likely that it is in a bad way with lots of holes and imperfections. Tape off the areas you need to fill with resin, then mix and pour it all in one go. There will only be a couple of hours before the resin starts to set, so you need to prepare your surface so you can work quickly.
You can use basic electrical tape to cover the joins and gaps that exist on the underside of the tabletop. This is important as it will prevent any resin from leaking through the bottom. Mix the resin in a small cup, then pour it in the required areas.
Let the resin set overnight in a well-temperature controlled room (roughly 18 degrees Celcius) to ensure the resin does not cloud over.
Step 7: Final sanding
That’s right, one more round of sanding is required. Plane the whole surface, then do the most sanding you have ever done in your whole life. Keep in mind that you are dealing with resin, so you may need a 1200 grit paper to achieve a super-clear finish.
Step 8: Attaching the legs
You can pre-buy your legs in a style that suits the aesthetic of your home or have a welder create a custom look for you for a pretty low price. Depending on the style of your legs, you’ll have various methods of attachment. Usually, however, they will have a plate that you’ll screw into the underside of your tabletop.
Step 9: Wood protection
Whether you’re using pallet wood or making a DIY pine dining table, the final step is protection. Keep in mind; it will be housing food and drinks, possibly some poker or board game nights, so the inevitable drink spill will eventually happen. The good thing about reclaimed wood is it already has a used look, so some stains or drink rings often blend in much better than on a sparkling new table. Still, it’s best to protect your surface.
Apply a wood stain or oil and lightly sand after each layer. It is up to you how many you wish to apply; you’ll be driven by the look each layer creates and your personal preferences. Allow the stain to dry, and you’ll be staring at a new dining table that you have made yourself! Feel free to make it al fresco and proudly show off your DIY outdoor dining table.
A simple overview of the steps required to build a table is as follows:
Cut the wood
Build the uprights
Connect the long supports to the legs
Attach the casters (if applicable)
Secure the MDF
Join the 2x8s
Sand and sand some more
Attach the top to the MDF
What materials do I need to make a table?
There are a number of modern table and countertop options when it comes to materials, inclusive of:
Granite
Glass
Wood
Marble
Stainless Steel
Tile
How much overhang should a tabletop have?
Overhang is the amount of tabletop that projects out over the base. This will vary depending on the design of your table, but a rough amount should be four inches along the sides and ends.
How do you secure a wobbly table?
Small rubber stoppers can be a good way to prevent your table from wobbling. You can attach them to the legs depending on which side of the table requires a little more support. Alternatively, you can sand the taller legs down to reach a stable height across all four.
Other ways to improve your dining room
The dining room table is an important part of any home as it provides a place to gather, share a meal, converse and during off-peak dining times, work on various projects!
The living room can often be one of the most used areas of the home. If you need a little help to make it something extra special, there are plenty of Taskers available for that exact reason! You can find people to help with dining room painting, to give a new coat of paint to the room to match your new DIY dining table.
Finally, we have some other articles to help you turn your dining area into one of the most exceptional areas of your home. Have you ever wanted to design a boho style dining room? We have the guide to do that right here. Need some more ideas? Check out our dining room ideas article for some inspiration. Make sure your dining room is a comfortable and functional area that represents you, and you’ll enjoy every minute you spend there!
A little extra protection from the elements never hurts!
Learning how to screen in a porch is a perfect skill for those who want to make their outdoors a little more indoors. You can get a lot more use out of an existing porch by adding screens that protect you from the elements.
Your porch is already an extension of the internal living area, so why not increase the amount of time you spend outdoors by screening in your porch? There are many benefits to this, like keeping you protected from insects and blowing leaves to decrease the amount of cleaning you’ll have to do.
Read on for some helpful tips to give your porch a whole new appeal as a second family room in which you can entertain friends or spend a relaxing evening alone.
The materials you will need to screen in an existing covered porch include
Lumber needed for building screen panels
Screen fabric
Screws
Paint to finish the frames
How to screen in a porch
The first part of your installation assumes you have existing deck posts or walls to attach the screen frames to. If you don’t have one and need to build a roof over an open deck, we recommend professional construction to ensure the right process is followed to keep everyone in your home safe.
If you have a suitable cover on your porch already, all that is needed are frames to support the screens. The screen panel size and configuration will depend on your porch size and individual design taste. If you live in a high-wind region, opt for smaller screen panels which can be easier to repair if broken.
Start by cutting a two-by-two to the sizing of your boards top and bottom rails for one panel. You can repeat this for as many other panels as needed. Drill four pilot holes through the two-by-twos, then switch to a driver bit to create two 1/2-inch screws into the face of the floor.
Step 2: Construct the frame
Make a rectangular screen panel frame with two boards at the top and bottom and two longer boards for the vertical sides. Use four metal braces to construct the frame, and for some additional structural support, include a horizontal centre rail if you like. Secure each rail in place with metal corner braces.
Step 3: Add the screen material
Stretch your chosen screen material (more info below) across the face of the panel and down on the sides. Keep the screen tight and staple the sides. Cut off any excess with scissors.
Step 4: Bolt the panel to the frame
Drill two holes at the top of the frame so you can attach them to your patio, and do the same with the floor section. Then, insert some three 1/2-inch bolts through the four holes with washers and wing nuts. Should you need help with your patio first, you can book patio builders to install one for you!
The materials you can use for your screen
There are many options to form your actual screen; some of the most popular are as follows:
Fibreglass screen fabric
There are many benefits to this option, including the fact that it is available in many different colours and is easy to work with. You won’t have to worry about rust or corrosion, but people with a pet cat may wish to avoid it, as claws easily shred it.
High visibility screen fabric
Also made from fibreglass but with a fine weave and thin fibreglass, this option is perfect for optimum visibility and will seem nearly invisible from the inside of your porch.
Aluminium screen fabric
This sturdy screen option is perfect for those who see strong winds; however, it is a little more difficult to install, and it creases easily. Try to avoid the uncoated versions of an aluminium screen, as they can corrode or rust in humid climates.
Pet-resistant screen fabric
If your family includes a few furry members, then this options is best for you. A great pet screen features durable vinyl-coated polyester that can withstand scratches and tears. It is resilient and thicker than other options, however is also more difficult to see through. For these reasons, you may wish to only instal the pet-resistant screen enclosure on the areas a pet might scratch, like the door or lower screen panels, then use a higher visibility option on upper screen panels.
Solar screen fabric
Made from synthetic fibres, this option will block or reduce the amount of sunlight, protecting those porches with furniture that might fade. It is also a great option if you need to reduce the heat on the porch.
Important considerations before screening your porch
Codes and other considerations
Before you do any work, it is important to consider any permits that may be required. Call your local building authority and make sure that your planned changes are free to go ahead without approval. Generally, this should be fine; however, those who are making structural changes, like adding a roof, will probably need a permit.
One final check applies to those who live in a residential development with binding restrictions that apply to the property’s exterior look. It may be that you are not able to screen in your porch or must follow a specific design to keep the exterior look of the building cohesive. This is also relevant for those who may have a homeowners’ association that maintain continuity of design over the property.
Yes! Any improvements to your porch can be a great way to add value to your home. It is, however, important to keep in mind that the screens are not typically included in appraised square footage of your home, but to a potential buyer, having these additions in place already will undoubtedly make a home more attractive and add value.
What is the best screen to use for a screened-in porch?
Fibreglass is the most common screen type used for porches as it is inexpensive while providing good visibility. It has minimal glare from sunlight and won’t crease, meaning it is easier to work with and harder to damage.
How much does it cost to screen-in a porch?
The costs for screening-in a porch can vary widely based on a number of factors. The key elements to determine cost include:
How big the area you are screening is
Which materials you opt to use
Will you DIY or pay for professional help
Do you need to add a roof, or is there an existing one?
If you’re just screening an existing porch for the installation, the total costs can mean a couple of dollars per square foot for materials. You can also purchase porch screen kits which will provide you with everything you need. Depending on where you’re from, these can once again vary in price based on the quality of materials they offer.
Some other popular material options include:
High visibility screen fabric
Aluminium screen fabric
Pet-resistant screen fabric
Solar screen fabric
Final tips for a DIY screened-in porch
The DIY screened-in porch is extremely doable for those who have an existing covered porch and know some basic carpentry techniques.
If you attempt to do it by yourself, just keep in mind that sections can be cut down if you need them to fit a smaller area, but once cut, it can be hard to ensure they are adjusted to fit a larger area. Make sure you understand your porch dimensions and configuration before you get to work on sizing the individual sections.
If building your own screen panels seems like a task that is slightly above your skill level, or you simply do not have the time to get it done, consider some help! You can find a range of skilled taskers that know how to screen in a porch with aluminium frame system or any other materials. Have the job done by a pro, save time and enjoy peace of mind in knowing it has been done correctly.
If you have caught the DIY bug and successfully screened-in your porch, you make like to consider another project to add more privacy to your home. Read our article about privacy fence ideas and move onto your next project that helps to make your property a little more secure.
Give your home a style update with a new internal or external door—check out these doors you will adore!
Beautiful doors, whether interior or exterior, are an important element of your décor. Ideally, interior doors should complement their surrounding architecture and help create a sense of harmony between all the other interior elements. Front doors should suit the style of your home too, but they are more about big, impactful first impressions and of course security needs. Similarly, service doors (such as from the backyard to the garage) also need to be more secure than interior doors do. But no matter what kind of door we’re talking about, it should be high quality and durable, lasting many years of daily use.
If you’re looking for internal door ideas, below I’ve got a selection of both hinged and sliding doors. When it comes to slide door ideas, these can be doors that are integrated into the wall (pocket doors) or those on a rail system (including barn doors). Double French doors are another gorgeous option being used increasingly indoors, but they also make wonderful welcoming front doors.
So whether you’re looking for bedroom and bathroom door ideas, laundry room door ideas, garage and basement door ideas, front door ideas or perhaps something different like secret or hidden door ideas, have a scroll through these 50 door ideas for inspo. Oh, and what about doors for those four-legged family members? Don’t worry, I’ve even got a couple of homemade dog door ideas in the mix.
Internal door ideas – arched styles
Doors with curves and arches convey a feminine or vintage vibe and the organic roundness is very satisfying to the eye. Let’s take a look at some examples.
1. French pocket doors
Pocket doors are ideal for when you don’t have the wall space to accommodate a swinging or hinged door. They come in so many styles and my favourite is in a French door style with glazing above and solid lower panels. An arched double pocked door is an elegant and formal way to perfectly frame your living room.
2. Recycled timber
If the rustic or coastal look is for you, then timber doors will bring all the organic flavour you need. Old wooden arched doors give so much character to a space. Rough and raw timber doors also look beautiful contrasted with a decorative element that is more sophisticated, like a crystal chandelier.
Interior doors can make a strong visual statement, especially if they are black steel framed arches! They look simply stunning, especially juxtaposed with natural timber built-ins or floorboards. Glazed interior doors also have other practical advantages, like reducing noise transmission and controlling temperature.
4. Latticed doors
Arched double doors with lattice panels are truly gorgeous. If you’re lucky enough to find some reclaimed ones, they’re perfect for a contemporary Boho beach house.
Now let’s consider doors that have a linear design. Doors with straight lines tend to give a more masculine look (though not necessarily of course as you’ll see with some of the romantic designs below). They also often appear more contemporary than vintage (again, not always!).
6. White rectangular pocket doors
For a classic look, opt for white pocket doors which saves you space since the doors don’t swing outwards. This is a look that really suits the modern coastal or farmhouse aesthetic. Combine with an industrial brass pendant light and gorgeous timber flooring. Then just add a woven basket full of flowers or foliage to really drive home the organic flavour of the space.
This is a good option for those who like a stark and minimalist interior. Swing doors are often chosen because they won’t hit the walls or furniture when they open. And further, there’s no need to install a door frame as the doorway opening itself remains untouched.
8. Pink pocket doors
For a vintage-inspired look, paint your pocket doors a pretty pastel-pink. It will add the subtle sophistication and charm of your typical chic Parisian apartment. For help with having your sliding or pocket doors installed, you can find a local expert in door installation.
9. White minimal French doors
French doors really open up the space between adjoining rooms. They’re not only aesthetically pleasing but they enable views between spaces. And the flow of light gives the illusion of more space. They come in any finish or colour but I think fresh white is such an attractive look.
10. Reclaimed doors
If your style tends towards a modern farmhouse, you can’t go wrong with a set of reclaimed timber doors. Look for ones with intricate panels. Rustic and full of character, reclaimed doors can be found if you’re lucky by scouring salvage yards, or you can source them from dedicated vintage door suppliers.
I like the idea of adding smaller reclaimed timber doors to your home, such as for your kitchen cabinets. These add a sense of history and lots of charm while allowing you to blend vintage and contemporary elements in your kitchen to create a rich layered effect. Get some help in installing doors or windows to your home.
12. Turquoise vintage pocket
To add character to a modern farmhouse laundry room, why not add a vintage pocket door in a pretty pale turquoise blue?
13. Black steel frame door
Industrial-flavoured black steel framed interior doors are really popular lately. You could go for a Crittall glass partition with hinged doors, which shows off the sophisticated clean lines that this style of door boasts. Or maybe a black raw steel partition with hinged French double doors. The more modern aesthetic is to have less divided lites (those being the individual panes).
Show off a dramatic hallway with a series of black steel framed partitions and doors. Chunkier metal frames and trims are less common than the slimmer profile frames but are a good way to add a powerful black accent to your space. Once again this is a stylish way to define or separate an area, that suits many different décor styles. And it lets you close off a space while still keeping that open feeling. Speak to an expert in glass doors who can customise your doors for you.
15. Simple timber internal door
For a lovely warm touch of organic timber in your décor, how about a beautiful panelled raw wood door with a matching timber door trim. When it comes to door trim ideas, people actually often choose to combine a more ornate door moulding with a simple door, or a plain and simple casing if it’s the door that is to be the more dramatic element. But you can also make the door trim as minimal as your door.
Barn door ideas
16. White sliding barn door
Barn doors are popular for homes with a rustic modern farmhouse aesthetic, but they’re also great for adding an urban industrial vibe to contemporary style homes. A simple, chic and minimal barn door can look truly sophisticated. These days you’ll find a barn door for your farmhouse bedroom, farmhouse kitchen or even a farmhouse bathroom.
17. Timber and glass barn doors
You can create a sliding ‘barn door’ using any kind of door, made of any material and with any finish. Even reclaimed vintage French doors can be hung on a track system for those modern farmhouse vibes. However, it’s less common to have glass-paned doors to a bedroom, since more privacy is usually desirable.
Barn doors are great for large doorways where you don’t have sufficient space for big doors to swing open into a space. You can also make things more streamlined by using single-track bypass hardware which enables two doors to slide on the same track, as opposed to traditional double-track bypass barn door systems.
19. Barn door with pattern
Lots of people love the barn door for its modern farmhouse vibes, as popularised by Americans Chip and Joanna Gaines and their US reno show “Fixer Upper”. Copy the Gaines’ barn door style by updating it with a diagonal board design or by painting it black. But there are many different readymade barn doors on the market if you aren’t handy with DIY.
20. Glam barn doors
Barn style doors don’t have to be rustic—for a chic contemporary living space that has a distinctly elegant feel to it, add long brass pulls on the sliding doors.
Ah, frosted glass. There’s just something so pleasing about it. Frosted glass is wonderful for interior doors to create privacy while still allowing the natural light to flow through.
22. Fluted or reeded glass doors
Reeded glass, aka fluted or ribbed glass, is another kind of decorative obscure glass treatment that provides a layer of privacy, as well as plenty of visual interest. There’s loads of texture, interesting and subtle shifts of light, and an inherent mystique.
23. Wired glass French doors
Wired glass is a particular kind of obscure glass that has a metal mesh grid integrated. Once again it provides more privacy than plain glass, while also adding an interesting graphic touch and lots of pleasing texture. This kind of glass was originally chiefly used as exterior safety glass (because if it breaks, the mesh holds the glass pieces together) but is increasingly popular in interiors.
24. Mid-century flavour
A frosted glass partition has a beautiful effect, just giving a faint blurry silhouette of the next room. It can give a space Mid-century flavours that you can amp up with your furniture. The patterned glass has a natural retro feel which fits perfectly into the aesthetic.
25. Black frosted glass doors
Another popular kind of decorative frosted glass is stippolyte glass, which has a tiny dimpled look. Offering a high level of privacy (also called ‘obscuration’ in the trade), this kind of glass has a wonderful pattern that suits many different styles, from contemporary to period.
Another decorative door option that increases privacy is to have mirrored panes (or ‘lites’ as they are technically called). Adding a mirror to your door also amplifies the light and makes a space appear larger than it is.
27. Lettering on door
Frosted glass doors are perfect for hiding unattractive mess like piles of laundry clutter while still maximising the light flow through your home. For flavour and personality, you could embellish your door with stencil lettering indicating it’s a laundry.
28. Old door ideas
A new door doesn’t have to be an expensive outlay. You could also grab an old door from a salvage yard and upcycle it. Why not give an old door a new life with black chalk paint? And if you love the look of frosted glass, you can get it on the cheap too with a frosted glass spray—these add a semi-transparent coating that emulates the look of frosted glass.
Have an old door that needs its paint stripped? You can get a paint stripping expert to handle that for you.
Door trim ideas
29. Fancy trim door
Framing your door properly is really important not only to conceal the seams and transitions between your doorjamb and the wall but also to enhance the visual beauty of your doorway. The material around your door is called the door trim (also known as door casing) and you might also hear it called molding when it’s more elaborate and decorative in nature. An ornate doorway molding will add plenty of visual interest to a space.
30. Painted doorway trim
When it comes to door trim ideas, you can use the trim to really define your doorway space. Don’t be afraid to add colour! You can find a local house painter to help spruce up your home with a brand new colour palette.
Secret door ideas
31. Hidden doors
Hidden or secret doors are intended to hide a door in plain sight by seamlessly blending it into a home’s surrounding architecture. Flush-mounted doors can virtually disappear into the wall, leaving just their ghostly outlines. Perfect for a really streamlined and minimal look.
32. Hidden door shiplap
Conceal a door with white shiplap panelling, to create a continuous looking wall. It may be as simple as covering your door with panels.
Secret doors can add a little intrigue and mystery to your home, concealing a private space or, in this case, hiding a bar like some kind of contemporary speakeasy. Concealed behind a bookcase, for example, it’s very much the stuff of childhood imagination!
34. Temporary door ideas
Not all internal doors have to be solid—you might like to install a fabric ‘door’ of some kind instead, such as a macrame curtain. You can find heaps of tutorials for these online and they’re actually not all that tricky to make! A macrame curtain lets the light through while adding texture, and brings plenty of beachy Boho vibes.
External back doors
Below I’ve got a range of exterior back doors and service doors, from simple and minimal to ones that are a little bit fancy.
35. Simple glass and wood door
A classic timber framed glass door leading from a mudroom to the backyard is perfect for a cool coastal aesthetic. The natural timber emphasises the connection between the interior and the garden, framing the garden view like a painting.
Another option for a service door is to give it a contemporary update with a black steel insert featuring multiple small ‘lites’ (the little window panes in a glazed door). This style of door is a chic option for a modern home.
French doors are much loved for the way they can enhance the indoor-outdoor connection, how they flood a space with light, and because of their natural sophistication. Double French doors leading from a kitchen to a garden are perfect for a modern, coastal farmhouse kitchen setting.
38. Black frame door
For a modern home , you might feature a simple framed glass door with a modern black frame that contrasts nicely with all the typical crisp whites of a laundry. These doors are perfect if privacy is not an issue and allow you to enjoy your garden view when working in the laundry.
39. Modernist red door
Pack a powerful punch of colour with a glossy fire engine red service door. It would look amazing in a black and grey interior colour scheme. Speaking of gloss, the finish of your doors is something to consider, since high gloss ones will highlight imperfections, but offer the benefit of being easy to wipe down. By contrast, flat finishes are harder to clean. You could go for something down the middle, like a semi-gloss or eggshell finish, which have a lovely sheen but are still easy to clean.
Now let’s take a look at a small sample of beautiful front doors but you might also like to look at our collection of front door ideas.
40. Timber slatted front door
For a home that has an overall aesthetic preferencing natural materials, go for a stunning timber door such as a grilled/slatted design. It will give your home a gorgeous minimalist and earthy look.
41. Antique church doors
If you love a statement door with a real sense of story, and history, you could look at sourcing vintage doors to set your home apart from the rest. A set of reclaimed oak church doors with ornate hand-forged iron hinges would lend so much character. It’s amazing what some of the stores have available on the market, with imported vintage doors many centuries old!
Finally, if you have a pet you’ll know the value of a good dog or cat door, but sometimes they can be quite utilitarian (even ugly!) in appearance. Make yours look charming instead by adding a miniature real door and trim. There’s nothing cuter than a pooch-sized door complete with mini doorknob and lock.
Not too keen on DIY? Find yourself a local expert who will install a pet door for you.
43. Farmhouse style pet doors
And one last one for the furbabies: a farmhouse styled back door with latch and chain style pet door. These ones, compared to the ‘flap” style pet doors, make it easier to control your pet’s access because you can fully close the pet door.
So there you have 43 beautiful door ideas, from service doors to secret doors and plenty in between. Are you inspired to change a door or two in your home? Let me know your favourite interior and exterior door styles in the comments.
Achieving the perfect fit for your curtains can be easy.
Curtains are a very important feature in the home, not only do they provide protection from the elements and privacy, but they are also a great interior design opportunity. To ensure they look their best, however, you need to learn how to measure curtains the correct way.
There cannot be a standard rule for curtain measurement, as style, look and curtain-type all come into play. That being said, this handy guide will account for the main options so you are not left out in the cold!
A beautiful window treatment brings style to your home, but the correct window and curtain measurements are vital to ensuring the best look. Read on to learn exactly how to determine the right size for your curtains and create a truly stunning feature for your interior.
Start by choosing a mounting technique
The first step before you begin to measure for curtains is deciding the mounting technique you will opt for. This is vital as it becomes a part of your measurement. The key is deciding whether you want to mount your curtains outside or inside the window frame. These two options will create two very different aesthetics, so consider the look of them both before making a choice.
The two options can be broken down like this:
1. Outside Mount Curtains
This is the most common mounting style when it comes to hanging curtains. Curtains mounted outside of the window frame mean the rod is secured to the wall for support. This hanging style gives the illusion of a larger window, while also offering complete coverage which is far more effective at blocking out all of the natural light. This offers a more luxurious look for your interior.
2. Inside Mount Curtains
A little less common due to the specific look the inside mount creates, this method sees the curtain rod secured inside the window frame. This provides a more minimalistic and streamlined look. The one point that some may consider a downside is the fact that inside-mount curtains will not completely block out light. This option is better for those who wish to achieve a modern look.
The length of your curtain rod will typically extend 3 to 6 inches past the window frame. This will, however, depend on where you will be installing your rod. The options for rod installation include inside, below, or above the trim mount, and all of these options have a different effect on the length.
Here are the considerations you’ll need to make for each option:
Inside Trim Mount
If you are aiming for a more streamlined look with suspended curtains from within the window frame, you’ll want curtain rods with protective end caps. You can choose a rod with an expandable design the right fit, and in keeping with the modern style, you’ll want your rod to be as wide as the interior of the window. You can go slightly wider if you want your curtains to have a gathered look.
Below Trim Mount
Let’s say the top of your window frame has a design or look that you love and want to remain visible. Mounting your curtain rod below the trim will showcase the craftsmanship of your frame without sacrificing any privacy or style. In this case, you’ll aim for a rod that sits around 3 to 5 inches past the width of the window on both sides.
Above Trim Mount
The most common placement is about 6-12 inches above the window frame. This is dependent on the available space present between the ceiling and top of the window. Your curtains can be hung as high as 20 inches above the frame which will give a long look. The rule is the wider and higher your curtain rod is; the larger your window will look.
This next part is also dependent on the particular interior design you are going for. The right length needs to be considered with how you plan to hang your curtains, the various options of which will create a varied look.
You can choose from the following:
Above Sill: Typically 1 cm above the windowsill.
Below Sill: Curtains that end roughly 15 cm below the windowsill
Floor Length: Dependent on style, the common option is curtains that end 1 cm above the floor
The standard rule is that your curtains are about 1 1/2 to 3 times the width measurement of your window. This can vary based on the fullness you choose and style you want to achieve. If you have gone with fuller curtains, you’ll get a more decadent feel, whilst curtains with a shorter width give a more tailored look.
It’s always a good idea when buying curtains to ensure they come in a pair if the curtains are sold separately by “panel” you’ll need to double the listed width. You can use a tablecloth or blanket to compare full sizes.
When it comes to measuring the length, you’ll need to work out the distance from the bottom of the panel, to the rod pocket. Keep in mind that the length you choose will need to consider your hanging method and aspired look. Always place the measuring tape in the top inside corner of the window or at the top of the window frame and measure down to your desired length.
If you are dealing with a higher curtain placement, you’ll need to measure up from the top window frame by 20 inches to create an elongated look.
If you are looking to install eyelet curtains, they will need to be hung from curtain poles. To measure, simply find the size between the finials, or decorative ends, which will give you the width.
For the drop, the inner edge of the eyelet will be set down 3 cm from the top of the curtain. Allow for this when measuring to ensure that your curtains will not hang too short. Measure from the top of the pole all the way to where you would like the curtains to finish then add the 3 cm on top of that.
For example, if the finished drop from the top of the pole is 220 cm, your drop will actually be 223 cm. So you would order 223 cm eyelet headed curtains.
While it is somewhat dependent on the look and style of curtain you are aiming for and using, most curtains and window treatments require two to three times more material for those hoping for an amount of fullness in their curtain appearance.
Start by measuring the width of your curtain rod from left to right; usually, the curtains finished width should be at least double the width of your window for the standard curtain full look. It is important to note that this is applicable for a full curtain look, those after a more modern and minimalist style will keep their curtain measurement closer to the actual size of the window.
Do you measure each curtain?
If you are buying ready-made curtains, they are usually sold in pairs. The size on the pack will tell you the measurement of one curtain lying flat. The individual sheets are often referred to as panels. The amount you require will be dependent on the size of your windows. Another factor to consider is the style of curtain you wish to have. Those aiming for the bunched, full look will often need to double the length of their window to achieve it. For a more minimalist look, you’ll keep your material size pretty close to the size of your windows.
How are made to measure curtains measured?
When determining the size of your curtains, it is always advised that you use a metal tape measure. The width is always the first measurement provided. For example, 46” x 54” (117cm x 137cm) will tell you that each curtain is 46 inches (117cm) wide with a 54 inch (137cm) drop. There are a few other factors to consider, such as your mounting technique for the curtains and the specific style you hope to achieve. be sure to double-check all of your calculations before placing a made to measure order.
Have fun decorating your space!
The right curtains can drastically change and improve the look and feel of a room. They certainly offer some functional benefits, but the design side is where the fun is! Double-check all of your measurements to ensure you’ve calculated the right sizes then enjoy picking your colour scheme.
Feeling comfortable with the requirements for measurements but a little stuck for style ideas? Not a problem at all, have a read of our curtain ideas blog for a little inspiration, and you’ll be well on your way!
Get your prized paintings and pictures hung straight with this handy guide.
One fundamental way to turn a house into a home and make a space your own (unintentional rhyme) is by learning how to hang a picture accurately and safely. A well-hung picture or piece of art not only looks fabulous but ensures your possibly expensive artwork and framing remains on the wall.
There are a few general rules for hanging pictures, and various methods depending on the type of frame. For the most part, your art should be at eye level and away from direct sunlight or heat sources. The eye-level rule is negotiable; however, as you may like to get a little creative or perhaps you are creating a gallery wall which requires varying heights.
Mastering the location of your art is one thing, ensuring it is hung safely, another. Read to learn some of the finer ways to hang a picture and the steps to ensure your art stays up!
How to hang a picture with a hook
If you are hanging a piece of art that has a bit of weight to it (mainly due to the frame), it’s best to find a stud so you can anchor a wall hook or nail securely. If you don’t have access to a stud near where you want to hang the art, then you can use hollow wall anchors or toggles, which are available at any hardware store. These will expand and spread the pressure of the hook, providing a more secure grasp on the wall.
If you are dealing with a lighter picture, there are plenty of adhesive hooks that will do the trick and avoid you having to drill or nail into your wall. Most adhesive hooks can hold up to 7kgs and can safely be removed without damaging the paint.
For brick walls, you can drill a hole with a masonry bit, push a plastic wall plug into the hole and insert a screw. If you have timber panelling in your home, a nail, screw or picture hook will do the trick nicely!
How to hang a picture with a wire
You have the option of tweaking your hanging method to use a wire secured to the frame as opposed to the metal hook placement. This can be handy if you have a deep frame and only requires a couple of screweyes to attach the wire.
Place the screweyes into the inner right and left-hand edges roughly a third of the way down the frame. From here you can loop the wire through the screweyes and choose how long you want to leave the wire, just make sure it can’t be seen when the weight of the picture pulls it down.
If you are looking for a wall stud, likely because you will be hanging a large or heavy picture, you can rap your knuckles along the wall. When you feel and hear a solid backing, you’ve found a stud. If you are unsure, you can use an electronic stud finder for a more accurate answer. Studs are typically spaced every 16 inches and are usually about 1½ inches thick.
Before drilling or nailing, it is important to make sure there is no electrical wiring nearby so make sure you are not hanging the picture above or near any outlets or ports.
How to hang a picture
Everyone wants a level of peace of mind that their art will stay on the wall. You don’t want to nervously spend your time on the couch below a gallery wall or brace yourself each day when you come home expecting to see smashed glass on the floor. To avoid this, the following steps make hanging a picture easy:
Hold up your picture in the position of where you would like it to be
Mark a line that runs along the top of the frame
Hold the picture wire all the way up with your finger
Measure the distance from your finger all the way to the top of the frame
Also, measure all the way down that distance from the pencil mark on the wall then mark the spot
That spot will be where your chosen picture hook will go. Attach your hook to the wall via whichever method listed above suits then carefully hang the picture. You can use a spirit level to make sure your picture is straight.
How to hang a picture with sticky or velcro strips
A very popular modern options for hanging pictures and art, especially for renters, is the sticky tab or velcro hanging strips. These will provide a stronghold and also come off the wall cleanly, leaving the paint intact.
If you have freshly painted walls, it is important that you wait seven days after painting before you apply strips and never attach them to paper or soft surfaces on the picture frame.
Follow these instructions for the strips:
Wipe the section of the wall that you want to attach the strips to with rubbing alcohol
Separate the strips and click the two velcro sections together
Remove one side of paper liner and stick it onto the frame
Press firmly on the strip for 30 seconds
Remove remaining liners and press frame firmly onto the wall
Remove the frame from wall to allow the wall-side strips to reinforce
Wait one hour for the adhesive to build then reattach the picture
Removing the strips
To ensure damage-free removal, pull the tab at the bottom of the strip slowly stretching it straight down against the wall. Make sure that you never pull away from the wall.
These strips will work well on painted, stained or varnished wood, glass, tile, metal, painted drywall and other smooth surfaces. Avoid using them on wallpaper, brick, rough or non-stick surfaces, or fabrics. You will be able to find various strip sizes, all of which relate to a differing weight. The strips can be used in either a vertical or horizontal direction.
You can! In fact, this is a simple and reliable way to hang a picture if you have access to a wall stud. Studs are typically spaced every 16 inches and are usually about 1½ inches thick.
A single 1 1/2-inch or 2-inch finishing nail is good for pretty much any picture. Drive the nail into the wall with an angle of at least 45 degrees. This offers a significantly greater holding power than a straight nail into the wall.
What is the proper height to hang a picture?
In this case, “proper” is subjective depending on personal taste the design look you are going for. As a general rule, your art or picture should be at eye level, ensuring you keep it away from direct sunlight or heat sources. The idea behind this is much like that of an art gallery; you want to be able to stand and enjoy the piece of art comfortably by looking forward. You can, however, get creative with this and tailor you positioning to the room, other furniture, and most certainly, other art.
If hanging multiple pieces, try to make sure the top of the frames are in line with one another, even if they are different sizes. This method keeps things neat and sets a border for your art.
What is the formula for hanging pictures?
Positioning it usually the trickest part of hanging a picture, the hanging itself is somewhat easy in comparison. Once your picture is up, it will likely stay there for quite some time, and if it ends up being in the wrong position, you’ll be bothered by it constantly.
Spend some time figuring out where you would like your art to be, then mark a line that runs along the top of the frame. Hold the picture wire all the way up with your finger (if using a wire) and measure the distance from your finger all the way to the top of the frame (or hook). Measure all the way down that distance from the pencil mark on the wall then mark the spot; this is where your fixing will go.
Turning your home into a mini-gallery
Hanging pictures and art not only brings warmth to your home and makes it more visually interesting, but it is also a great way to show off or tailor your personal style and interests. There is no shortage of art in the world, and the kind that you choose to adorn your home with can say a lot about you!
Renovating your bedroom? You simply can't go wrong with this classic colour pairing.
If you’re not sure what kind of bedroom to create, you’re in luck. While some styles fade, black and white bedrooms are always in fashion. The monochrome look is a classic choice that will last the test of time. Plus, black and white bedrooms allow you to create a beautiful foundation that you can build upon with colour whenever you like.
Ready to see why this is the most popular colour combination? Let’s dive on into these 27 black and white bedroom ideas.
1. White bed
Sometimes it’s best to keep things simple. And that’s exactly what this bedroom does. It’s perfectly styled with off-white walls, a sweet white bed and beautiful lush bedding. I really like the grey knitted throw – it’s such a great addition to the bedding.
Create contrast in your bedroom by painting an entire feature wall soft matte black. Complement the feature wall with artwork and bedding featuring similar tones.
Sometimes all you need to do to a black and white bedroom to make it complete is to add a colour or two. Burnt orange cushions look awesome with monochrome colour palette and they add plenty of warmth. Or, you could incorporate bold colour pops in an artwork.
4. Tones of grey
This bedroom design is a slight variation of the classic black and white combination. It’s a little more muted and cool. What makes it this way is the shades of grey, from the dappled grey wallpaper to the charcoal bedhead. Adding timber elements brings in some necessary warmth when going for a black, white and grey combo.
There’s nothing like a pop of saturated colour to completely elevate a monochrome space. The good thing about a simple black and white bedroom is that it provides the perfect blank canvas for adding pops of colour. And of course the beauty of cushions is that you can switch them out and change colours whenever you like!
6. Wallpaper
Bring a dose of graphic black and white into your mainly grey bedroom with a striking wallpaper print like this one. For more inspo, also check out these bedroom wallpaper ideas. Then once you make your choice, you just need a bit of help with the wallpaper installation.
Create an elegant bedroom by using high-end furniture pieces like a sleek black dresser. The truth is that you don’t have to blow your budget on expensive furniture. You can create a lookalike luxe dresser by switching out the old handles on your pre-existing dresser and adding modern finishes.
Want to hand over the dresser build to an expert? Hire someone to do the dresser assembly for you.
8. Sleepy sanctuary
Create a cosy black and white bedroom by paying attention to all the details. Missing out on the little things is where people usually get unstuck when it comes to design. So carefully consider the kinds of cushions, prints, and patterns you’re going to use – because they can make all the difference!
If you want to hang pictures or add decor to your room but don’t have space (or you’re in a rental), take your window sills into account. These are handy little spots for placing items like bedroom plants, candles, books or picture frames.
10. Mix patterns
A fresh, clean and simple black and white bedroom here, with a mix of monochrome patterned bedlinen, cushions and throws. I like the white bedside table blending into the wall, and the unusual black painted window shutters.
I’m a big fan of plants – the more the better, in my opinion! I know that not everyone is a green thumb. But the truth is that you can find some really fabulous plants that don’t require a lot of work. Peace lilies are my go-to plant. They’re so easy to look after and all you need to do is water them when they’re looking sad.
12. Charcoal and white
This bedroom looks like a relaxing paradise to lounge around in. I’m obsessed with the charcoal and white linen that looks oh-so-comfortable. Plus, the warm grey wall looks stunning with the jet black bedhead.
What’s one way to fancy up your bedroom and set it apart from the rest? Statement pendant lights, of course! Lighting is especially important when you are bringing in dark tones to your bedroom so it’s worth considering a mix of light sources, including ambient and task lighting.
14. Boho vibes
Create a casual, creative space by playing around with textures and patterns. A simple Boho bedroom design for example might involve décor in the form of hats hanging on the walls, a variety of patterned black and white cushions, a timber bench at the end of the bed, and a beautiful vintage dresser.
A floating shelf is a simple way to add to the visual appeal of your bedroom. It’s a great choice for those who want to inject a creative touch into their bedroom design but still want to keep things minimal. It’s the perfect spot to place your black and white décor pieces.
16. Hang a branch
Add a rustic touch to your modern bedroom by hanging a branch above the bed. This doesn’t have to be complicated either. Simply find a large branch and some foliage in your backyard or a nearby park, secure some string to either side of the branch, and hang it up over a nail in the wall. Plus, a piece like this will really stand out against a beautiful background, like this black feature wall!
17. Four-poster bed
Create a classic space while keeping things contemporary and coastal with dark timber touches (like a dark timber four poster bed) combined with warm neutrals. It’s such a relaxing colour palette. For extra drama, add in floor-to-ceiling curtains.
18. A touch of velvet
I’m a sucker for velvet, especially velvet seating. So to add a luxe touch to an otherwise basic black and white room, why not add a dark grey velvet bench seat at the end of your bed.
19. Room with a view
If you have an amazing view out of your bedroom window, a black and white bedroom will ensure your inside décor doesn’t compete with the colourful outside world! A simple black bedframe, white bedding, grey panelled walls and a black pendant light are all you need to act as a subtle frame for your view.
It can be easy to just add practical pieces of furniture to your bedroom like a bed, side tables and a lamp. But no bedroom is complete unless every detail has been taken care of! So as you prepare for your black and white bedroom renovation, consider other elements like decor. Some options: vases with dried flowers or fresh greenery, mirrors, stools and bench seats, baskets and magazines. It’s these little things that will make your bedroom stand out from the rest.
Take your bedroom design back in time by adding old-school touches to your space. Now, this doesn’t mean you have to make everything old… But you can combine the old with the new by using modern materials like smooth black metal, with vintage touches like an old repainted wooden chair as a bedside, brass clocks or other décor, and an old-school style lamp.
Incorporate some smart storage into your bedroom with an IKEA wardrobe. Their large robes are so versatile, coming in all different sizes and colours – so you’re bound to find something that suits your black and white bedroom. And if you don’t want to do the building yourself, there are plenty of wardrobe experts who can do the assembly for you. Why not consider adding in a tiny office space!
While this room is mostly white and light, there’s plenty of black in the mix. From the black and white doona cover to the black bedframe against the textured white wall, the little touches make all the difference. Mid grey curtains connect the high contrast elements.
Soften your black and white bedroom with a natural material like rattan. This woven material is durable and versatile, making it perfect for any kind of space. The best thing about it is that it will go with practically any colour scheme. But it looks especially great with other neutral colours like dark black timber, white and light grey.
25. Plants all around
If there’s one really easy way to spruce up your bedroom, it’s by adding lots of plants! House plants can boost your mood, productivity, concentration and even your creativity. Plus, they’re instant stress relievers that are constantly producing oxygen. So if you’ve got a blank space that you want to switch up, why not purchase some of these green friends from your local nursery.
26. Touches of black
Even if you have a bedroom colour scheme that’s mostly white or ecru like this, you can add plenty of impact by bringing in just a few black accents. Here, it’s the textured cushions as well as bedside décor.
There you have it, 25+ black and white bedroom ideas. Which design was your favourite? I personally love the more simple, minimal styles because they serve as the perfect foundation to build upon with colour and decor. Comment and tell me which one you loved the most!
It's time to ditch the old musty curtains and frame your windows with something beautiful.
Curtains make a big statement in a bedroom but they’re often one of the most forgotten design elements and they’ve definitely come in and out of fashion. Now’s the time to have another look at your bedroom and imagine one of these bedroom curtain ideas could give it a refresh.
Whether you’re wanting to add some character to your room, create a bit of privacy, or let the light flood in, there are so many different curtain and blind designs to suit your style and taste. To help you get started, check out these 20+ inspiring bedroom curtain ideas, from light sheer fabrics to glamorous velvet, and everything in between!
1. Simple white
Let’s start with classic white. Beautiful white curtains are a wonderful way to help add softness and light to a bedroom that contains lots of dark timber furniture or other dark elements.
A Boho style bedroom is becoming another classic space and the ideal curtains for a Boho bedroom are muted, soft, organic tones. This bedroom is made very French Boho chic with the vintage gold leaner mirror, quaint bedside, and pretty details like candles and fresh flowers.
For a feminine but mature bedroom space, heavy striped linen curtains are a gorgeous choice. How fabulous is this little dressing table setup? These curtains would be perfect for adding texture in a crisp white space as well.
If you prefer a more muted or earthy colour palette, this might be the choice for you. The brown tone of the curtains here matches perfectly with the colour of the walls. Brown is the ideal complement to a verdant view like this too.
Keep things soft and classic with a calming baby blue and white colour scheme. This will serve as the perfect foundation for draping curtains, gold touches and elegant photo frames. And you can amplify the effect by choosing a navy blue painted metal bed frame.
Dark curtains are a great choice for offsetting a stark white room. And navy blue is the ideal colour choice when it comes to dark curtains, being not as harsh as black.
7. Grey tones
If you love a sophisticated aesthetic, grey curtains may be the choice for you. Grey certainly doesn’t have to be boring! You can use textures and patterns to avoid flat drabness and bring everything to life.
Greens and neutrals are a match made in heaven. Whether you add a dose of greenery with a feature wall or with your curtains, enhance the organic flavour by adding a statement potted plant or two to your bedroom.
Light and bright more your style? Take inspiration from this white on white room. The curtains make a subtle statement in this space, keeping it light and airy, especially since they are not full length.
White and timber is a match made in heaven. This colour combination is totally trending right now and I just can’t get enough of it. Thick white linen curtains are ideal for this space.
Make a statement with bright coloured curtains like these salmon pink (or might they be Millennial pink?) ones. I’m not one to go for coral tones but I’ve got to admit, these curtains look absolutely amazing in this space.
When you think of curtains, you may immediately think of something that’s simple, plain and white. But you can still stick to a light, white colour palette while having a bit of fun while you’re at it. Textured curtains do just that – providing the right amount of interest and adding a bit of fun to an otherwise plain room.
There’s something so elegant about a white and black colour palette – it’s so chic. And your curtains play a big part in finishing off this kind of style. If you want to go for this look, choose curtains that are in that colour scheme – think black, white or a shade in between like grey!
This grey and white bedroom is gorgeous! I’m a sucker for floor-to-ceiling curtains and these ones sure are grand. What I love about these curtains is that they perfectly compliment the darker grey tone of the walls as well as the lighter grey bed frame.
Want to get a little creative? Make your own curtains from scratch! DIY drop cloth curtains are all the rage right now, and they look great in a classic or farmhouse-style home. To get started, you’ll need drop cloths, curtain rings and a curtain rod. From there, follow a step-by-step tutorial and create!
There are plenty of DIY tips going around on blogs and YouTube. Alternatively, if you’d rather hand over the work to an expert, hire a handyman to install your curtain rods for you.
16. Moss green
For a space that’s a little bit more moody, and that’s totally on-trend for 2022, moss green linen curtains are the perfect choice. And it’s a colour works beautifully with light timber touches.
17. Keep it neutral
Sandy tones are popular right now and it’s easy to see why. A simple shade like this will go with any colour palette but especially other organic tones.
If you have a beach abode, why not keep things simple and sophisticated with a design that’s pale but not stark white. Curtains with a little grey or silver provide a bit of contrast to plain white walls. Luxe it up by allowing them to run a bit longer than your usual curtains and drape over the floor!
19. Classic style
Here’s another classic bedroom design (this post is full of them!). And this one makes the most of neutral tones with a subtle touch of black and gold. I’m all for gold – the more the better, I say.
In my opinion, the more natural the better! I love nothing more than having the windows open and feeling the gentle breeze against my face. If you love to enjoy the best of nature, then sheer linen curtains are ideal as they’ll gently flow in the wind.
Add a pop of colour and texture to your simple bedroom with bold aqua velvet ones like these. When it comes to choosing bedroom curtain colours, you might simply go for favourite colour. After all, your bedroom should be a space that you enjoy.
There you have it, 20+ bedroom curtain ideas. It’s amazing how a simple change in curtains can completely transform your room. My favourite curtain design is sweet, simple linen. What about you? I’d love to hear which design you want to implement. Comment and let me know!
Learn how to put a professional finishing touch on all of your woodworking projects.
Wood is such a popular material due to its natural beauty, but sometimes its initial colour doesn’t always work with your other interior design touches. The best way around this is by learning how to stain wood which can alter the colour or grain visibility of bare or stripped wood.
The great thing about wood is its natural variance, no two pieces are alike, even in the same species. This does, however, make it necessary to always run a quick test of any stain you are considering on an unnoticeable spot to ensure you are happy with how it reacts with the particular wood.
Read on for everything you need to know about staining and material types and master the art of tailoring your wood to a range of different looks!
Choosing your stain type
While learning how to stain wood, it is important first to understand the types of stains available. It is a good idea to first check that the stain you are considering is compatible with your wood type. There are two stain types, water and oil-based:
Oil-based stains
Provide a longer working time making them perfect for larger projects like floors, cabinets, and doors which reduces the risk of unwanted marks from drying stain
Will not raise the grain, saving you the task of sanding
Water-based stains
Lower in odour
Quick-dry to speed up the duration of your project
Easy to clean with soap and water
Available in an extensive range of vibrant colours
How to stain wood
When it comes to how to apply wood stain, they all require open pores to help with their absorption. If you are applying a stain over a finished surface, the colour of the wood will not change.
As the existing finish blocks the pores, the stain will not absorb and will wipe off. To ensure your stain takes hold and offers you the look you are after, consider the following tips:
Always sand bare wood lightly which will open the pores in preparation for staining. It’s a good idea to start with medium-grit sandpaper, working down to fine-grit sandpaper. Always sand in the direction of the grain each time to avoid scratches.
Apply stain with a bristle or foam brush, or a cloth.
Large, open-pore woods, such as oak, mahogany and ash require more pressure when applying stain to ensure it gets into the pores. Brush against the grain to achieve this.
The longer stain is left on, the deeper and more vibrant the colour will be.
Remove unabsorbed stain by wiping in the direction of the wood grain with a dry cloth.
Once your stain has dried, use a clear finish to enhance the overall look, protecting both the stain and the wood
One of the most popular hardwoods, oak offers a very strong grain pattern with large pores which make the absorption of stain very easy. This is why oak works with a wide variety of stain colours with little risk of it turning blotchy. Oak offers particularly good results if you use a pre-stain wood conditioner first. To ensure you fill oak’s deep pores, use a liberal amount of stain worked in with a cloth and swirling motion.
Poplar
Poplar is a great option if you want a similar grain pattern to cherry wood with less of a reddish hue. If you use a stain with a red colour in it, the less expensive poplar will give the look of the much higher priced cherry.
Along with oak, you can find poplar used in kitchen cabinets, see here for more timber kitchens ideas.
Pine
When it comes to how to stain pine wood, it is easy to get great results with only a light application of stain. Use a liberal coat of a pre-stain wood conditioner and work with light to medium colours. Be careful when using darker stains as the knots and blemishes will make it hard for even absorption.
Hard maple
This dense and tight-pored wood makes absorbing stain much harder. The grain pattern is uneven, so stains are absorbed in varying degrees. To make things easier, start with a coat of a pre-stain wood conditioner and use a light to medium coloured stain.
Mahogany
This popular hardwood offers dark, rich colours and is full of natural oils, so additional staining is rarely necessary. If you do decide to stain some, use an oil-based stain to ensure a good compatibility with the natural oils.
Cherry
Once again, this wood does not need much in the way of staining thanks to its distinctive reddish hue. Cherry has a subtle grain pattern and very small pores, so changing its look significantly is quite a task.
Birch
Birch is an inexpensive way to replicate the look of the more expensive maple wood, popular in furniture and cabinets. The problem is, this wood does not absorb stain evenly, which is why dark coloured stains are essential. Once again, a pre-stain wood conditioner will make the task much simpler.
These hardwoods are very similar to oak, so a similar process should be followed. They have large pores for easy absorption of the stain and work with a wide variety of colours with a low-blotch risk. Always use a liberal amount of stain for these woods.
Alder and aspen
These lightweight hardwoods are growing in popularity as they are affordable and easy to machine. When it comes to staining, however, they are unfortunately difficult. These wood varieties absorb stains unevenly, so to help reduce blotchiness a liberal coat of a pre-stain wood conditioner will be necessary.
When it comes to applying stain, the wood variety and type of stain will determine the best application process. Stains are best applied with a bristle or foam brush, or a cloth. As a general rule, the smaller the pores of the wood, the more stain that will be required.
If you are working with a wood such as oak, which absorbs stain quite easily, the stain should be stain worked in with a cloth and swirling motion. One the other hand, if you are working with a tighter-pored wood such as, hard maple, you will need to apply a significant amount of pressure to ensure the stain is absorbed.
In most cases, prepping your wood with a liberal coat of a pre-stain wood conditioner will make the application process much easier.
Can you stain wood without sanding?
All woods require open pores to help with their absorption. If you are applying a stain over a finished surface, the colour of the wood will not change.
For this reason, it is essential to always sand bare wood lightly to open the pores in preparation for staining. It’s a good idea to start with a medium-grit sandpaper, working down to a fine-grit sandpaper, sanding in the direction of the grain each time to avoid scratches.
If you do not sand your wood, the stain will not absorb correctly and likely wipe off easily with a cloth.
Do you sand between coats of stain?
It is not necessary to sand between coats of stain. However, if you do take the extra time to do this, it will provide a better finish. The best method for this is to wait until a coat has dried, then use 220 or 240 grit sandpaper to lightly sand surface.
As you do this, you will notice a white film over the finish as you sand. There is no need to worry as this will disappear as you apply the next coat. Always remember, it is vitally important that you do not sand the final coat.
Ready to stain wood like a pro?
Hopefully, this has given you everything you need to know to change the look of your wooden furniture or various other projects. Once you master how to apply wood stain, you open up a world of possibilities for changing the aesthetic of your home.
However, if you don’t want to risk potentially ruining some expensive furniture or fittings due to beginner mistakes, you’ll be pleasantly surprised by how many people there are nearby ready to help with wood staining.They can help with almost any part fromfloor sanding andfloor polishing to complete hardwood flooring care and restoration to breathe new life into your home.
And let’s not forget the exterior privacy fences which look superb when stained black for a dramatic look. Get an extra helping hand with your fence staining.
So there you have it, how to stain all different types of timber to give your wooden furniture, or even your entire kitchen, a refresh. If you have any other tips, please let me know in the comments below!
How Handyman price work and more. Advice on how to save on your next hire.
When we say ‘affordable handyman’, what we’re really talking about is getting bang for bucks.
Price too cheaply, and you risk a botch job. On the other hand, there are heaps of companies out there who will charge you a massive sum for something as simple as changing a light bulb.
So how do you navigate this minefield?
How handymen set a price
First things first, you need to get a grip on exactly how handymen charge out their services.
The end price is usually a combination of three things: labour, equipment and a call-out fee. We’ll cover the last two a little later.
Handyman labour is typically charged by the hour, and the rate is often determined by the skill level of the handyman. There’s no science to this, each handyman determines their own rate. The average hourly rate of a handyman is in the $30 to $50 price range. However, there are professional handyman services that may charge up to $90 an hour. Below is a rough guide on the cost involved in hiring a quality handyman:
A call-out fee is unique to handyman services and it’s basically a fee that you pay to get the handyman to come and inspect your task. It typically costs around $40 to $50 and covers the handyman’s expertise, petrol and travel time to your home. This is either factored into the total price or paid upfront for the work.
Iain says you may be able to negotiate a lower fee by hiring a local handyman that’s close by. If it’s convenient, they may waive or lower the fee.
So, should you buy the building materials?
It’s another way you can save on handyman costs. So, for example, if you’re replacing a door, you buy the door, the handyman installs it.
Iain says handymen typically expect to have to provide all equipment and materials for any task, unless you say otherwise. Depending on the complexity of the task, it’s best to let them, he says.
Iain’s seen situations where people have tried to save money by buying the materials beforehand, but wasted money buying the wrong things. He says you should stick to this rule:
For tasks that are very basic (something you could do yourself), you can buy the materials ahead of time and shop around for a good price.
For tasks that require expertise or specialist knowledge, then leave it to the handyman to get the materials – it’s part of the job.
So there it is, some basic ways you can cut the cost of your next odd-job. While you may be able to save money on the call-out and materials, be wary about getting a bargain with the cost of labour, or you’ll end up paying more in the long-run.
Got odd-jobs on the to-do list? Look no further! Post your task now and receive free quotes in minutes!
Needing a bit of a change? Let's look at some DIY home renovation hacks you can take on yourself
Making changes to your home doesn’t have to be a big costly project because sometimes the most noticeable difference comes from the smaller changes. By going at your own pace with some help along the way you can take your time, manage your finances better and really enjoy the DIY home renovation experience.
Top DIY home renovation tips
Be realistic – your budget will probably blow out because let’s face it, no renovation goes according to plan. It saves a lot of stress if you account for a financial buffer from the start.
Check with your council to ask if any special permission is required for your renovations. This will save you a lot of heartaches later.
Do your research – there are plenty of home improvement articles and videos but you just need to check a couple of different sources before you get stuck in.
Consider giving your house a fresh coat of paint; it will make a huge difference in ambience and it’s also a good time to rearrange the furniture as it will all need to move away from the walls too.
Got old carpet? Rip it up. It’s all about polished floorboards with a beautiful rug or polished concrete these days.
Bathroom
Measure up the bathroom size and then everything in it. Sit down and draw up a floor plan of your current bathroom and use that figure out how to create more room. If you have a small bathroom, you have to be a little more creative with the space, such as how you use the right shelving to make it look larger.
Use a pedestal sink or simply a sink with no vanity cupboards beneath it in a small bathroom for more floor space. This eliminates the home renovation costs of re-creating an entire plumbing system for your bathroom.
But if you’re still worried about storage, create some open shelving for bath products, towels and magazines. This is an elegant-looking yet simple and easy solution for bathroom clutter that only takes a few painted planks of wood and brackets.
Living room
Need more storage in your living room? DIY! Turn a big old wooden box into your coffee table, or simply add sides and a door to your existing coffee table. That way, you can store things in an easy to access place that is out of sight (e.g. Christmas decorations, linen, extra glassware, etc). This will also encourage you to keep your coffee table cleaner as you need to be able to access what’s underneath.
Another way to add more storage is with shelving. Consider attaching a flat-pack set of cupboards to your wall and painting them the same colour; this will then allow the shelving to melt into the wall behind and not look as much like shelving. Using open shelves on a blank wall (or even a feature wall) is a great way to store candles, tissues, lamps, books, etc.
Bedroom
If you don’t have enough room for bedside tables, you can attach shelving above your headboard – just make sure nothing will easily fall on you while you sleep.
Your current wardrobe set up might not be the best use of space. This is the time to ask the professionals about changing the inside of your current wardrobe system. Reducing or increasing your hanging space can make a real difference.
Paint a feature wall in a calming blue or green to mix up the room and also help you sleep easier.
Kitchen
Painting and replacing all the handles on your kitchen cabinet doors is the easiest way to make the most dramatic change. Picking a light colour will really freshen up the room and make it look larger.
These days you can paint just about anything. There’s even paint for tiles and laminate, which means you don’t need to knock out tiles and replace – you can just paint over it and it will get you by for a while.
The laundry is a pretty neglected room but with some simple updates you can turn it into a functional space you may even want to spend more time in.
Some basics that you can add to spiff up your laundry are cupboards that have an integrated ironing unit with a space to hang freshly pressed shirts.
If you have a standalone sink, look at building a bench space around it to make it more usable when your handwashing your delicates.
We have plenty of Cheap Home Renovation Ideas for a bit of extra inspiration and if you need a helping hand, there are plenty of Airtaskers that can help you get your DIY home renovation task done.
We all make mistakes, but don't make these ones when renovating
It doesn’t matter if you’re going down the DIY path or looking to get a building expert– no amount of experience is going to guarantee a completely seamless, stress-free renovation. If you’re considering renovating, whether to ‘flip’ a place or enjoy it for yourself –
Here’s a list of top renovation mistakes to avoid:
1. Renovating on impulse
Take for example a bathroom renovation and a split decision to remove a wall or the sink, but not having the expertise or budget to complete it. So you remain wall-less or sink-less for months… or worse, years! Key outtake here is to never start without a plan.
2. Design without intent
It’s important to design with intent. Do you want to renovate to increase your property value in preparation for sale, or do you intend on settling in and enjoying the place for a few years?
Try to keep this at the forefront of your mind. As exciting as Pinterest boards and magazine clippings can be, you need to be realistic about the purpose of the reno and how much you should invest in it, i.e. don’t put your dream kitchen into a house that you plan to rent out.
3. Not enough planning
The easiest way to get yourself into a pickle is to go in with no idea what you’re doing, or what’s going on around you. You can help yourself by putting a bit of time and effort into understanding what it is you want to achieve and working out the end-to-end plan of how you’re going to get there. Think about sequencing, your timeline, and your budget.
It’s also wise to have an in-depth renovation checklist, which will help you stay focused on what exactly you need to get done, at what stage and also at what cost.
Tip: Don’t do the polished wooden floorboards first and then start work on the cabinets… sequencing is important.
4. Rules and regulations
Check regulations with your local council (including times you can get noisy) and check what tasks require a license. Local council planning approvals and application fees are required for certain things. You may need to use a council building inspector or an independent building inspector.
5. Lack of competence
If you’re going DIY, make sure that you or the people helping you are competent at the task at hand – three mates and a carton of beer do not guarantee an immaculate paint job. Educate yourself: Google, YouTube and your local hardware store staff are your friends.
Tip: Bunnings has some great, free DIY advice and even runs free ‘how to’ workshops (most importantly, you can grab a sausage sizzle while you’re there).
6. Unrealistic living arrangements
If you’re already living in the place you’re renovating, you may want to consider temporary accommodation while the work goes on. Renovating can be really stressful and really draining, and on top of that, having a messy, dirty place with little to no privacy might end up being the last straw.
7. Not enough wiggle room in the budget
One of the top renovation mistakes that almost everyone is going to make is blowing the budget. To avoid budget blowout, talk to professionals, tradespeople and people who have renovated before, prior to commencing work.
Research the work that you’re going to be doing and try to think of every possible expected and unexpected expense you might encounter. Put contingency funds aside that aren’t ‘part of your budget’ so when you find a termite nest, you’ve got some spare cash lying around to resolve the situation and move on.
8. Tradie arrangements
If you’re going to hire a contractor to do the work for you, it pays to shop around.
A golden rule is don’t go with the first tradie you meet – get three or more quotes for all trades
Review the quality of their previous work
Know who is doing the job – them, or do they contract it out?
Know who their suppliers are – some only use x brand or x store
Make sure they’re licensed as required
Ask what is and isn’t included in quotes
Sort the contract out properly – have stages upon which payment is made and negotiate time damages in the contract prior to commencing construction, and
Most importantly, go with your gut.
If you’re having trouble finding someone, there are a number of licensed tradies for hire on Airtasker.
Do you have any more tips you can share with us on renovation mistakes to avoid?
It's one of the most practical inventions ever, full of hidden features you probably never knew existed!
How are your tape measure skills? Surprisingly, a tape measure is one of the most practical inventions ever, full of hidden features you probably never knew existed that will make the odd DIY home improvement job so much easier!
Check out all the things your tape measure can do:
1. The ‘screw grab’
You probably already knew that you could hook (or clip) the end of a tape measure over the edge of a surface and walk backwards to extend the tape out, but have you ever wondered what that little slot in the metal hook is for? That little slot is a ‘nail and screw grab’, which neatly slips over the flat head of a nail or screw to help you hold the tape in place when you’re flying solo.
Another neat little feature that makes home repairs and odd jobs easier is the serrated edge of the metal hook on the end of a tape measure (not all have them, so check). By dragging it back and forth on a surface, you can mark out a measurement down to the millimetre.
Clearly, the hook must be our favourite part of the tape measure because we keep talking about it, but here’s one more… You’ll notice the hook on the end of the tape has some ‘play’ or wiggle room on it, and the end centimetre of the tape may be slightly smaller than a true centimetre. This is because depending on whether you’re measuring on the outside or inside of something, you’ll want the hook thickness to either be counted as part of the measurement or not; therefore, there is movement each way of about a millimetre or so. This movement is called ‘play’.
Tip: Most tape measures come already calibrated for accurate measurements, but depending on how critical the measurement you need is, you might want to check how much ‘free play’ is allowed and calibrate the tape. Getting this done professionally can be a costly exercise, so why not get one of Airtasker’s expert handymen to take a look at it for you for a great price?
Well duh! But seriously, stay with us… We live life by the metric system here in Australia, but it is still common for imperial measurements to pop up every now and then, such as the plans you got off the internet. So it’s quite handy that tape measure tapes are often marked out by centimetres and inches, and broken down further into fractions (e.g. 1/4 inch).
5. The length of the tape measure ‘housing’ counts
The housing (i.e. the hand-held container that ‘houses’ the tape) can actually be a very handy sidekick for home repair jobs. If you’ve ever tried to measure the inside length of something, you’ll know it can be quite difficult.
Well, good news – the housing of the tape measure is often marked with a measurement of length (e.g. 10cm) that you can use to make life a bit easier. Instead of trying to measure the inside of something corner to corner by bending the tape, position the tape measure inside and draw the length of the tape out from surface to surface. Take note of the measurement on the tape (e.g. 65cm) and add it to the length of the tape measure housing (65cm + 10cm = 75cm)… and voila, accurate measurements!
Depending on what you want to use it for, there are different lengths of tape measures available that are better for some jobs than others. For example, an 8m tape is great for the hobbyist doing small home improvement jobs like cabinetry, but for bigger jobs like outdoor and construction, you might need something longer and possibly stronger.
You can get tape measures with magnetic hooks, blade locking mechanisms, and ones that can do a ‘stand out measure’ for hooking objects far away (i.e. you stand in one spot, and use your hand to extend the tape; it holds its weight and extends horizontally). This is getting into advanced handyman territory though; watch yourself!
Now that you’re armed with insider information, it’s time to show your tape measure skills to your friends. Have you got any other tape measure tricks to share with the rest of us amateurs?
Before you pick up the tools - double check you've got these things sorted.
Deciding to renovate is a massive decision because there’s so much to consider like planning, finding trades and costs. We all have lots screenshots of beautiful homes and a dream-like Pinterest board that we love, but let’s be honest, most of us will also be working with within budget. So with all this in mind, it’s important to create a renovation checklist to avoid becoming overwhelmed or going over budget.
So let’s get started and go through what should be on your renovation checklist.
Planning and researching your renovations
Narrow it down
When you’re looking to renovate your home, you need to think about whether you’re going to be truly ok with all the noise, dust and not to mention being without a kitchen or bathroom for a while. You can either narrow it down to smaller areas so that you can move to different rooms as the renovation progresses, or if it’s a knock down you’ll have no choice to move in with family or into an Airbnb (which let’s face it, you don’t want to do that longer than you absolutely have to).
If you’re budget renovating, the best way is to try to do as much of it yourself and conquer smaller areas so that you don’t have to move out and can save costs.
Collect ideas
Gather all the ideas you love and order by room via a Pinterest board, on your phone or even a magazine clippings folder. This will help you think about what you want to do and also develop a consistent theme that will flow throughout your home.
In your room-by-room considerations, collate a list of the specific issues (e.g. dampness), recommendations and options you have considered.
Once you have all of your inspo, pick up sample paint colours that you can try on the walls, carpet clippings and timbers to see how it works with the paint colours, and also look at the different permanent fixtures you want such as lights in person. You might decide to go with a different look as you’re inspired by other ideas in store.
Finalise renovation budget and priorities
Calculate what your maximum spend is but also put an additional budget together for any extras that you initially forgot – you might think you’re fine but all renovations tend to go over budget. Next, prioritise the areas most important to you (or that need the most attention) and that you use the most (such as the bathrooms and kitchen). If you can afford to renovate those rooms, they should be the first you look at.
Decide who will complete your renovations
Finding a tradie who can do a great job and isn’t going to hurt your wallet is tough but personal recommendations from family or friends are your best starting point.
Arrange to meet with a few different builders to run them through your plans, so that afterwards they can give you a quote and also possible start dates as many of them are booked out months in advance.
Material quotes
Get quotes for your all of your materials to know what the end cost will be. Don’t forget to shop around and also haggle to get a better price. Your tradesman might also be able to help with discounts or industry connections.
The renovation begins!
Read the fine print
Make sure you carefully review the paperwork (i.e. contracts) supplied by your builder and other tradesmen. Iron out any ambiguities before you sign the dotted line.
Before you get too far into the renovation process, don’t forget to also avoid these top renovation mistakes.
Get the home ready
If you’re living at home during the renovations, you may need to re-jig your living arrangements during this time. Think about the best way to manage this. If you are having your bathrooms renovated, you may need to hire a portable shower and toilet unless you have some lovely neighbours!
If you’re moving out during the renovation, think about your options – including living with family or friends, or short-term (hopefully) leasing.
Renovation complete
First, Sigh with relief! Second, go through your house and contract thoroughly to make sure that everything has been delivered as initially agreed.
If anything is missing, simply make a list and go through it with the person you contracted. It’s always better to be safe than sorry, so make sure you keep all your documents, agreements and contracts in a safe place just in case anything happens down the track.
Don’t forget to celebrate your renovations and enjoy your amazing new space.
You either love them or hate them, but home repairs are a must when you own a home.
Owning a home is an exciting life achievement but after initial the excitement wears off and you settle in, you’ll realise that the upkeep is constant with cleaning, gardening and home repairs. Some repairs are simple and enjoyable, others a little more complicated – it all depends on the building quality.
Here are some of the more annoying home repairs you should be prepared for in your home:
1. Leaking roof
Check the condition of your roof at least a few times a year, even if there are no obvious signs of leakage. Hail storms, shoddy construction and UV damage can weaken the structure of your roof and allow water to get in.
Water leads to water damage, water damage leads to electrical damage, electrical damage leads to your house burning down… For Pete’s sake, if you find a leak, fix it ASAP!
It’s probably best to leave this one to the professionals. Hire a roof specialist or appropriately qualified Handyman to check and repair your roof (and clean out the gutters while they’re up there).
2. Squeaking floor boards
Floorboards are easy to maintain and look great but when you hear them squeaking as you walk around, it can get a bit annoying and not to mention worrying.
For a quick fix, use some talcum powder in between to stop the rubbing. If that doesn’t do it, you’ll need to secure them properly.
3. Door damage from pets
Do you have cats or dogs? Unless they’re extremely well trained you’re almost guaranteed that at some point that they’ll destroy your doors. Whether it’s by scratching up the wood or slashing through the fly screen, cute little claws can equal annoying door and fly screen repairs.
If it’s a small rip, some clear nail polish will do the trick to keep it closed until it needs to be completely replaced.
For door scratches, if they are shallow you should be able to sand them back and paint over or stain again. However, doors are relatively cheap so you could simply replace it and not put in the hard work.
Tacky wallpaper needs to go (and fast!) and it’s something that you can easily do yourself with a steamer or removing agent, knife and perforator.
Then you’re free to put up new beautiful wallpaper or repaint.
5. Dripping taps
Nothing is worse than when you’re trying to sleep and all you can hear is the tap drip non-stop. First thing is to try to replace the washer that’s worn out. If that doesn’t do the job, check out the manufacturer’s website and see if they have some notes on how to repair it.
6. Clogged drain pipes
After a big storm, it’s really important to make sure that your gutters are clear of debris and rubbish so that the water can drain easily. You’ll also need to check that it’s not pooling, which you can easily do with a garden hose.
If it is you might need to adjust them or if a whole side is bad, replace it.
7. Unfinished home repairs
One of the biggest peeves, especially for those who have just purchased a home, is having to repair unfinished work. Nothing is worse than having a missing tile staring at you because it was removed six months ago to get to a hidden pipe, then never replaced.
It seems so easy; mix ‘A’ with ‘B’, pop it on the wall and ‘Hey presto!’, the wall is fixed! If you think this is how holes are patched, you might be in for a rude shock…
If you don’t know what you’re doing, no matter how many times you scrape that goop, it won’t be right. You’ll be left with ridges and lumps, and then you’ll have to sand it and paint it.
We suggest that if you’re short on time, you just hire a professional and step back and watch the magic. You’ll save yourself a tin of goop and a lot of frustration.
If you’d like some help with completing any annoying home repairs, why not try out the services of an Airtasker Handyman? They’re multi-skilled, readily available and will get the job done in no time.


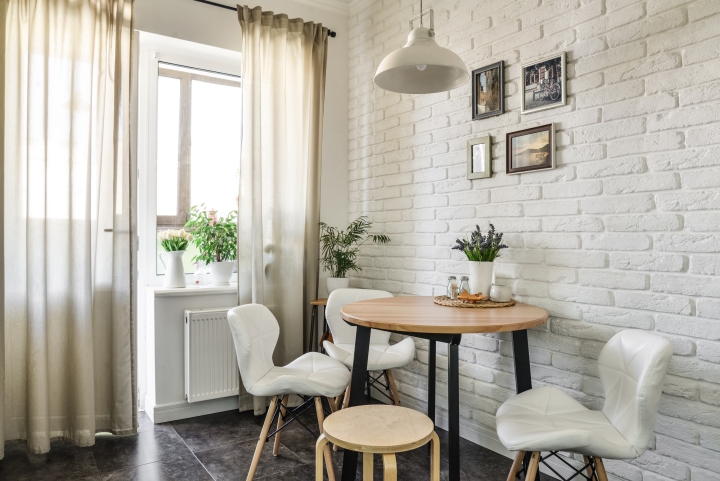
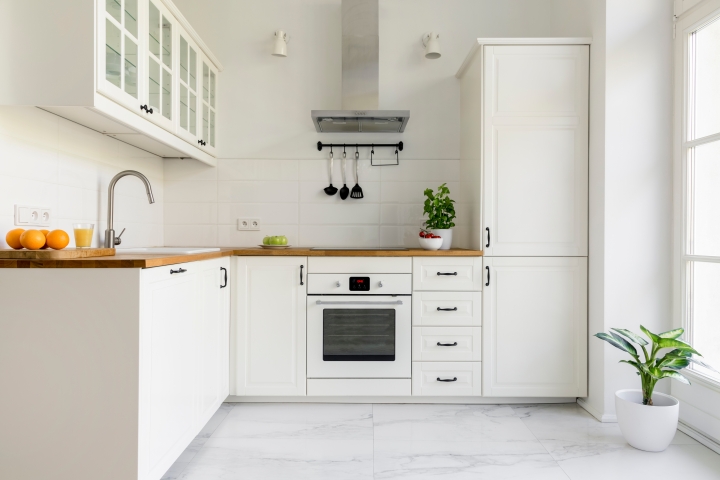
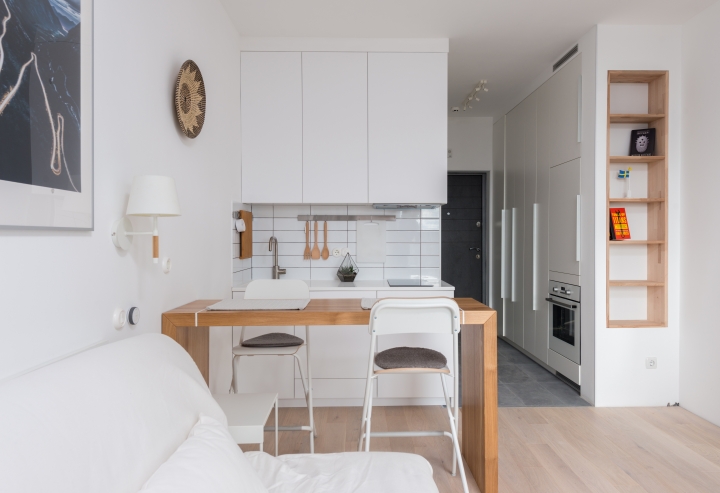
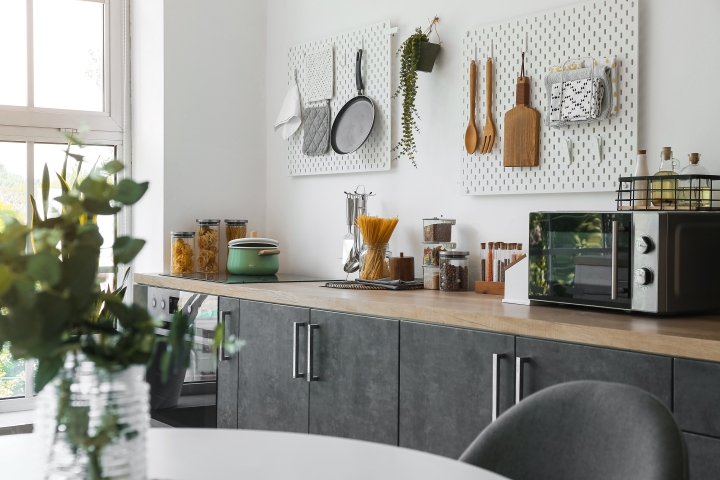
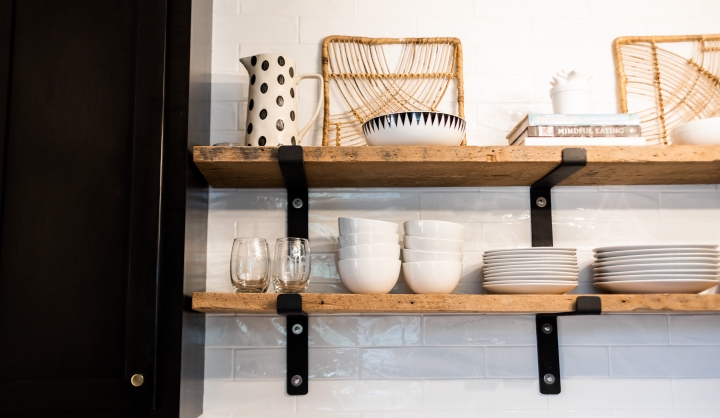

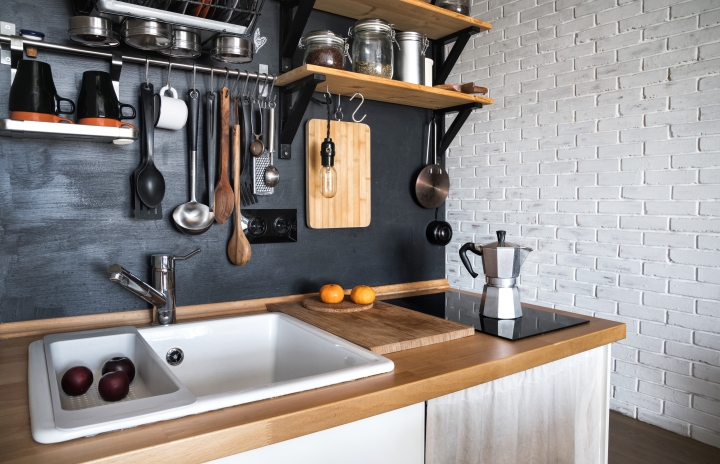

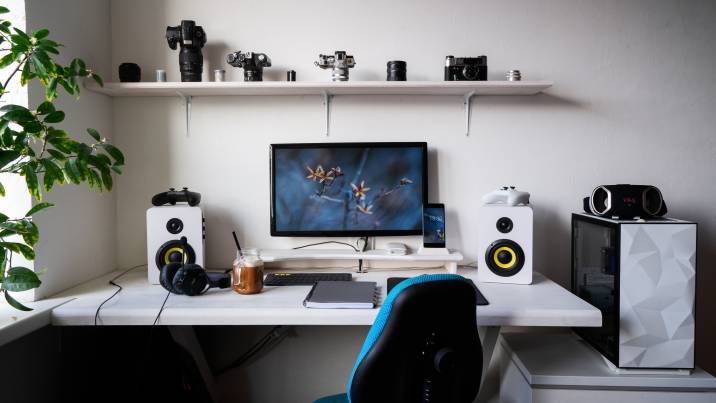


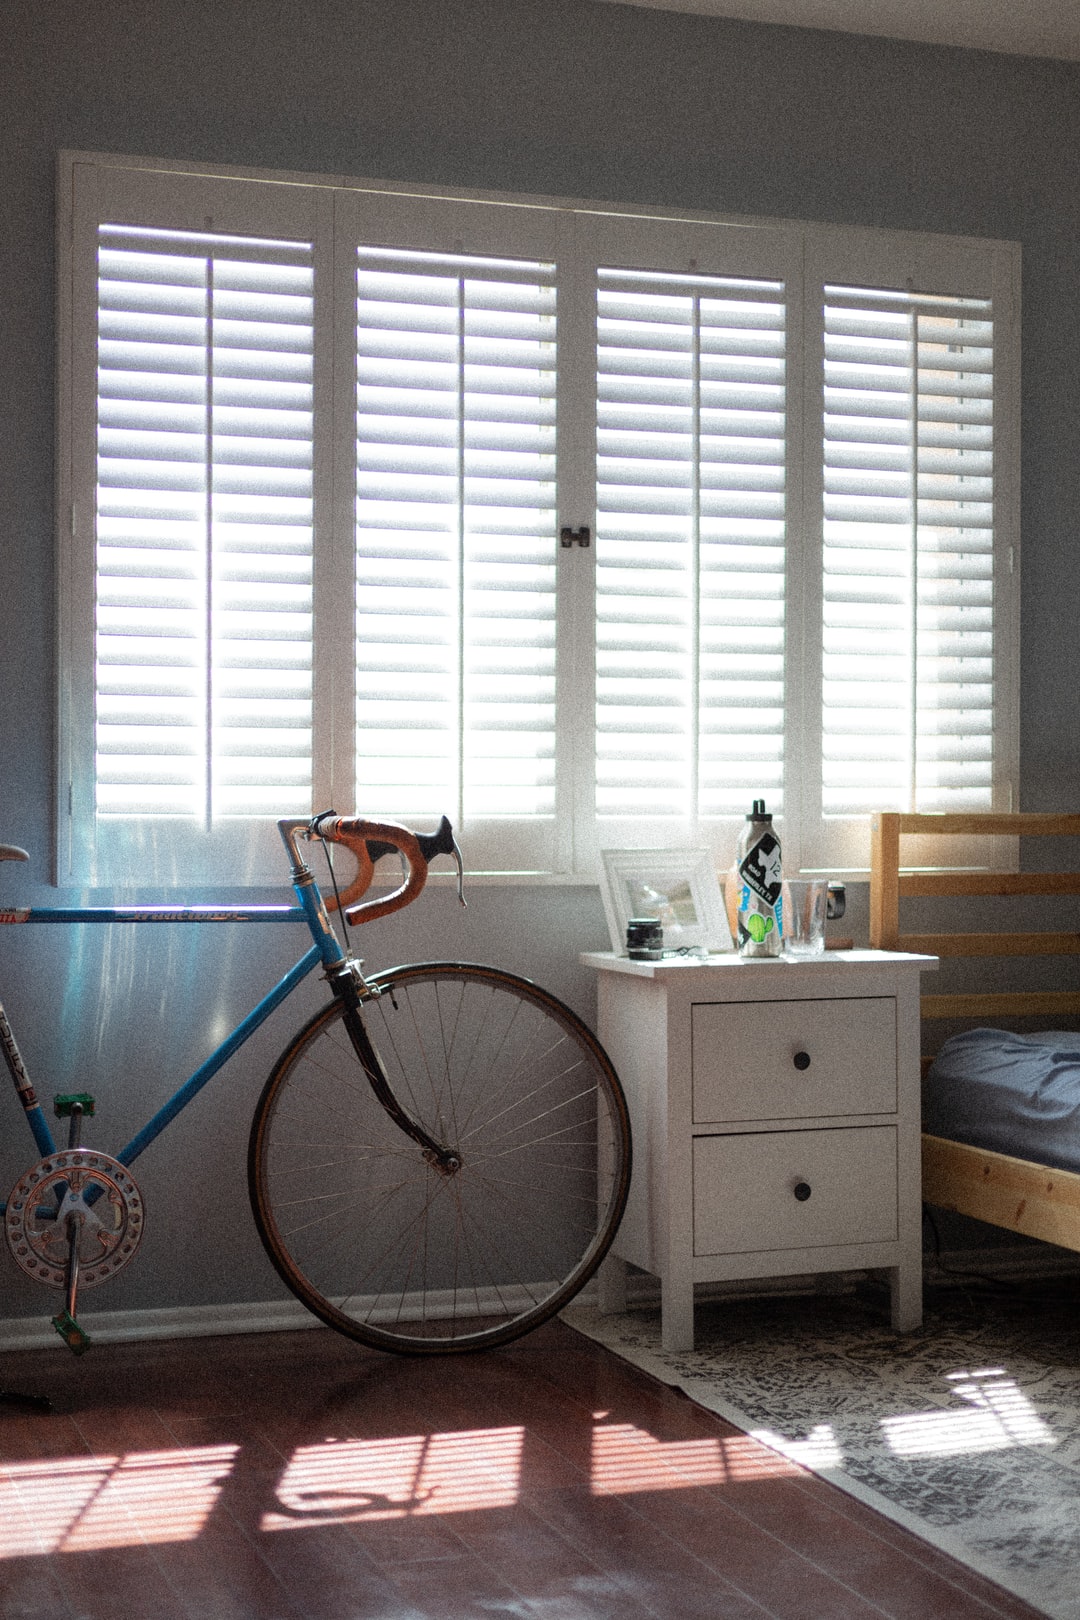
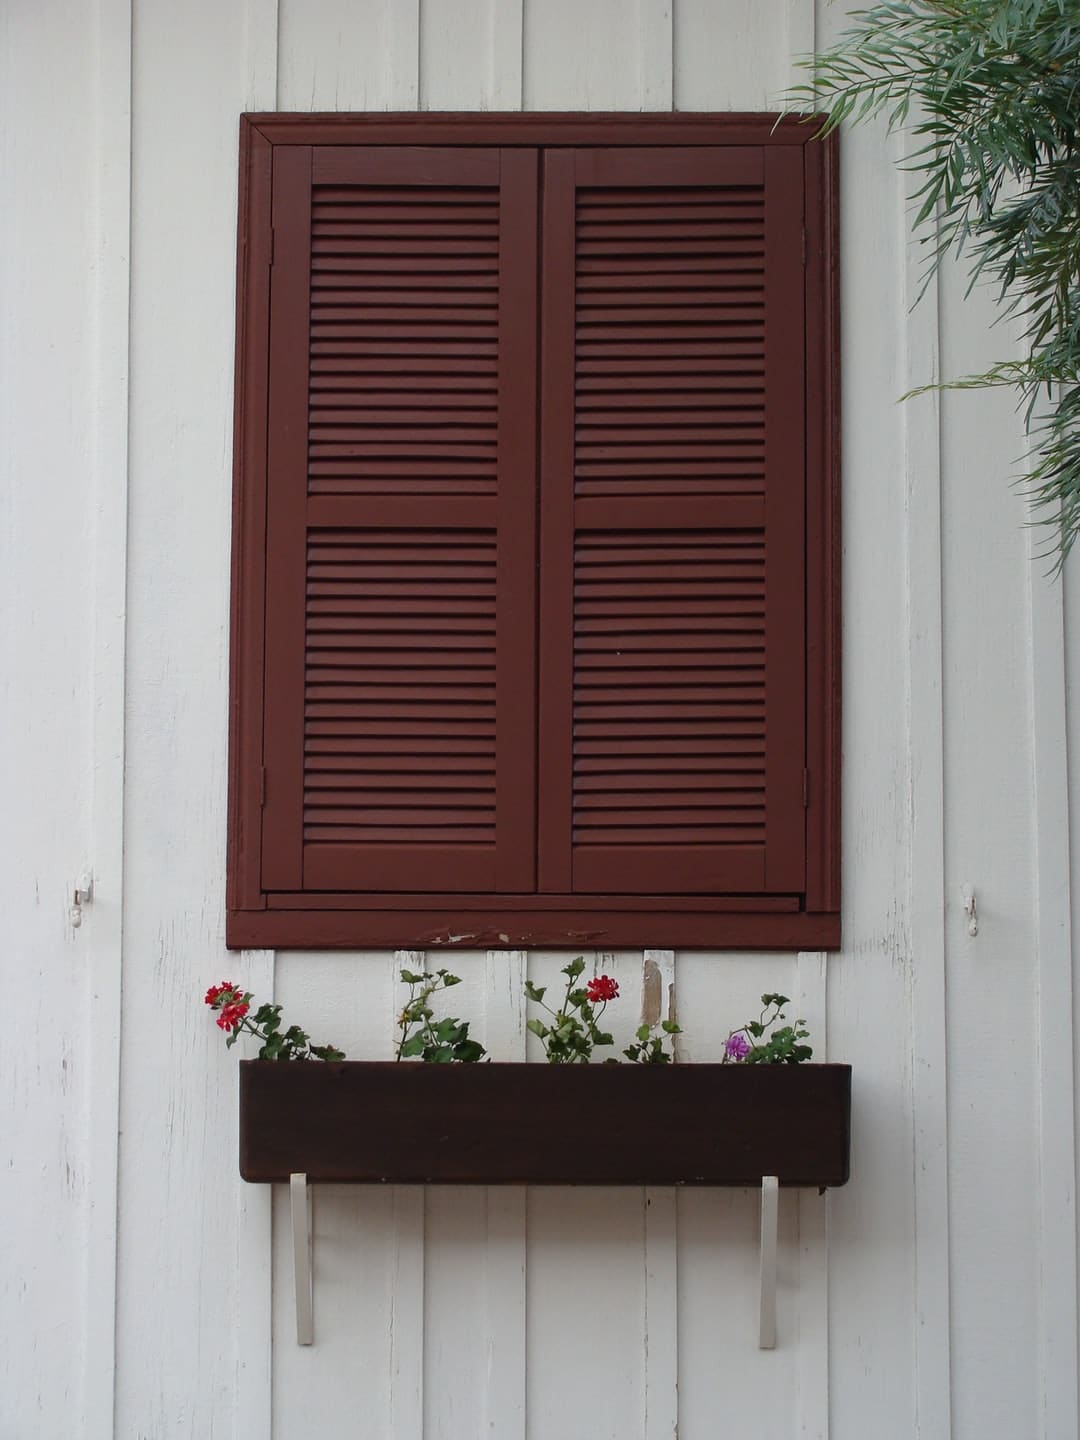
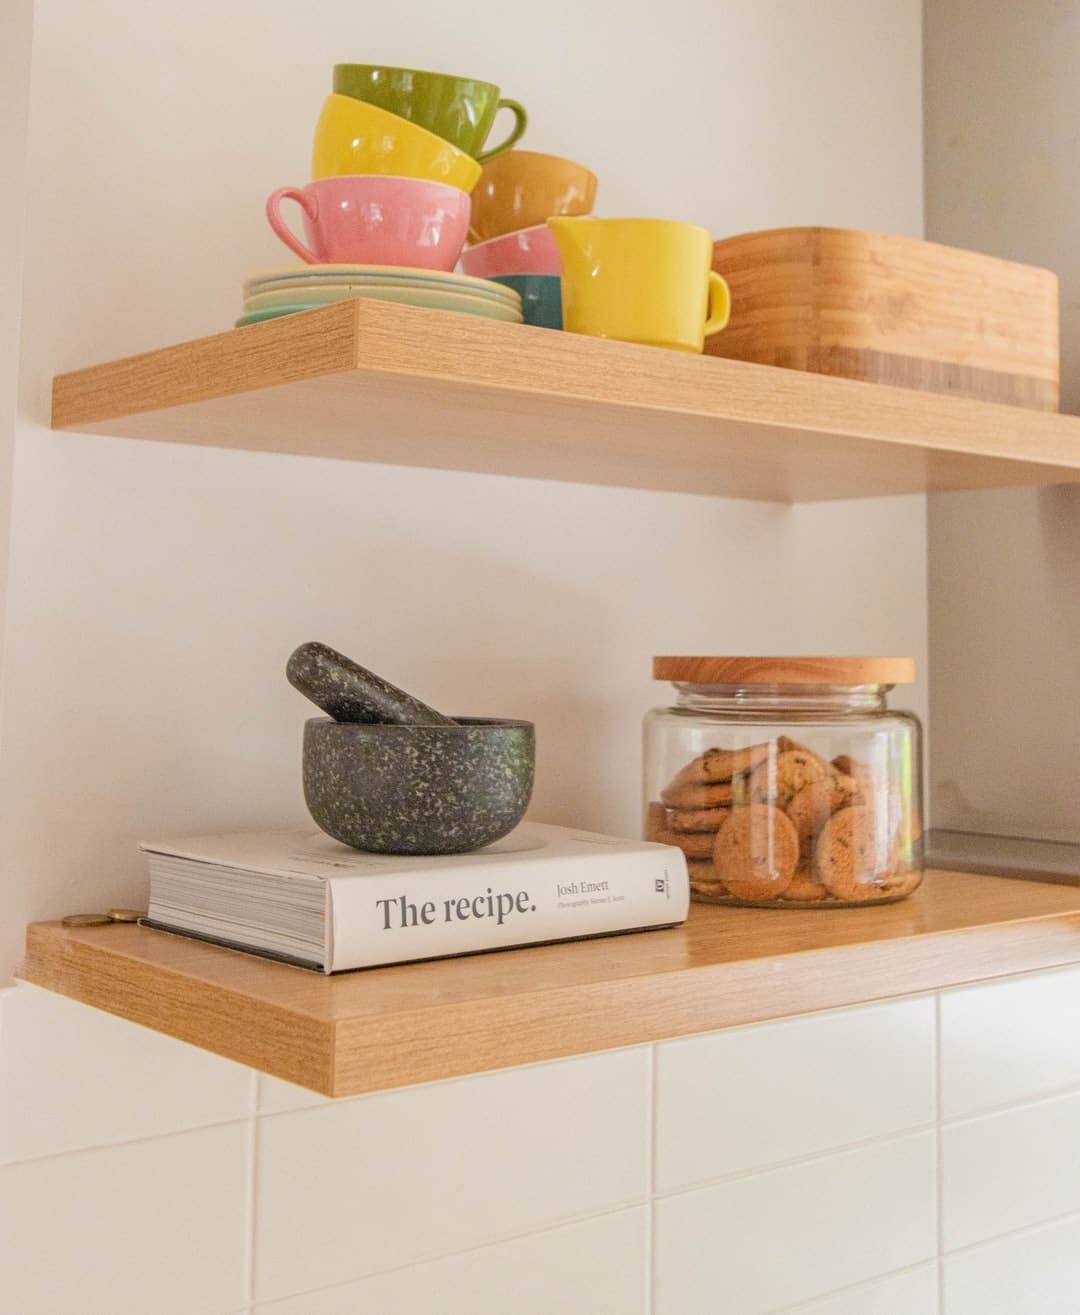

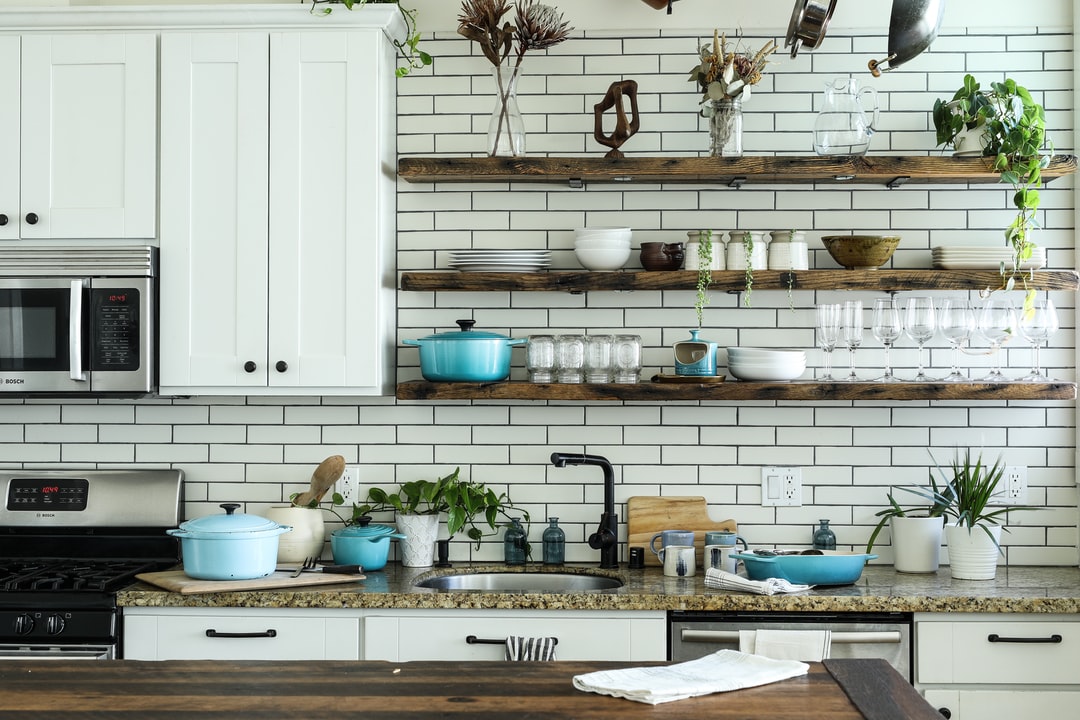
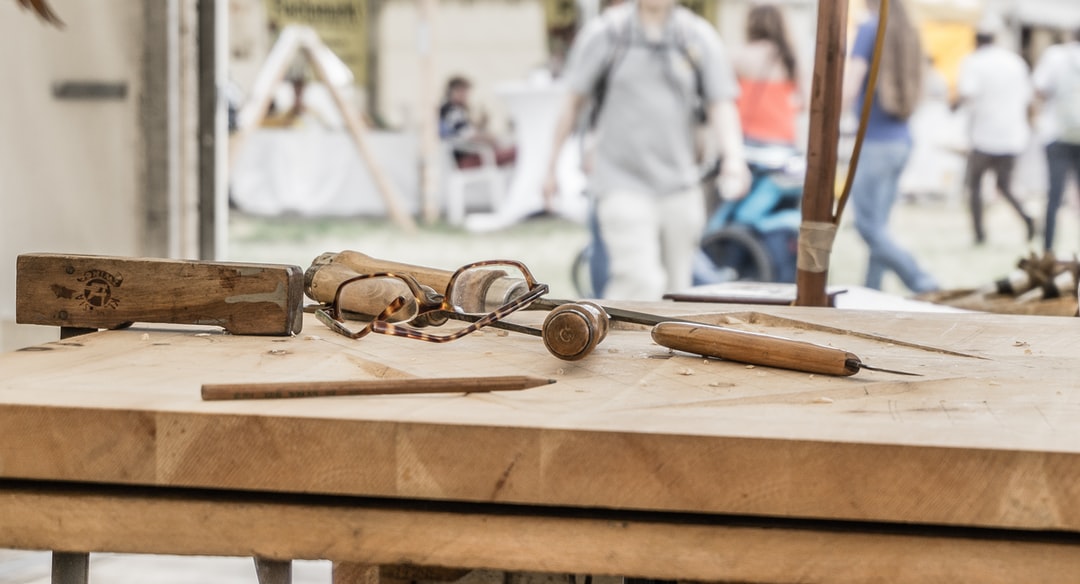

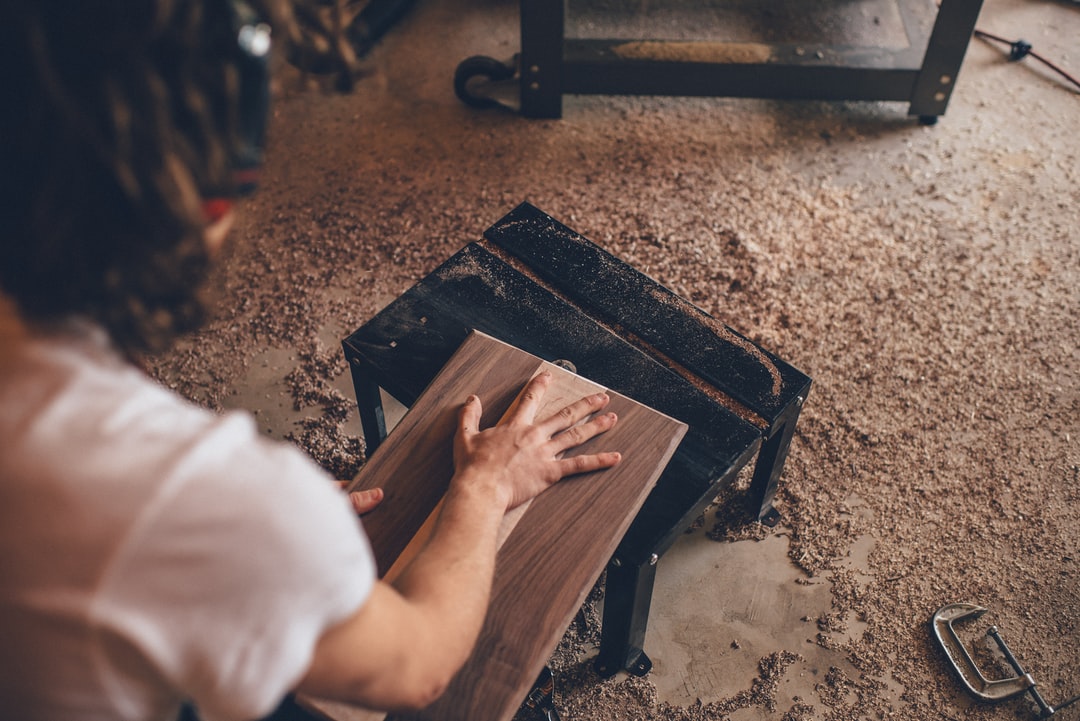


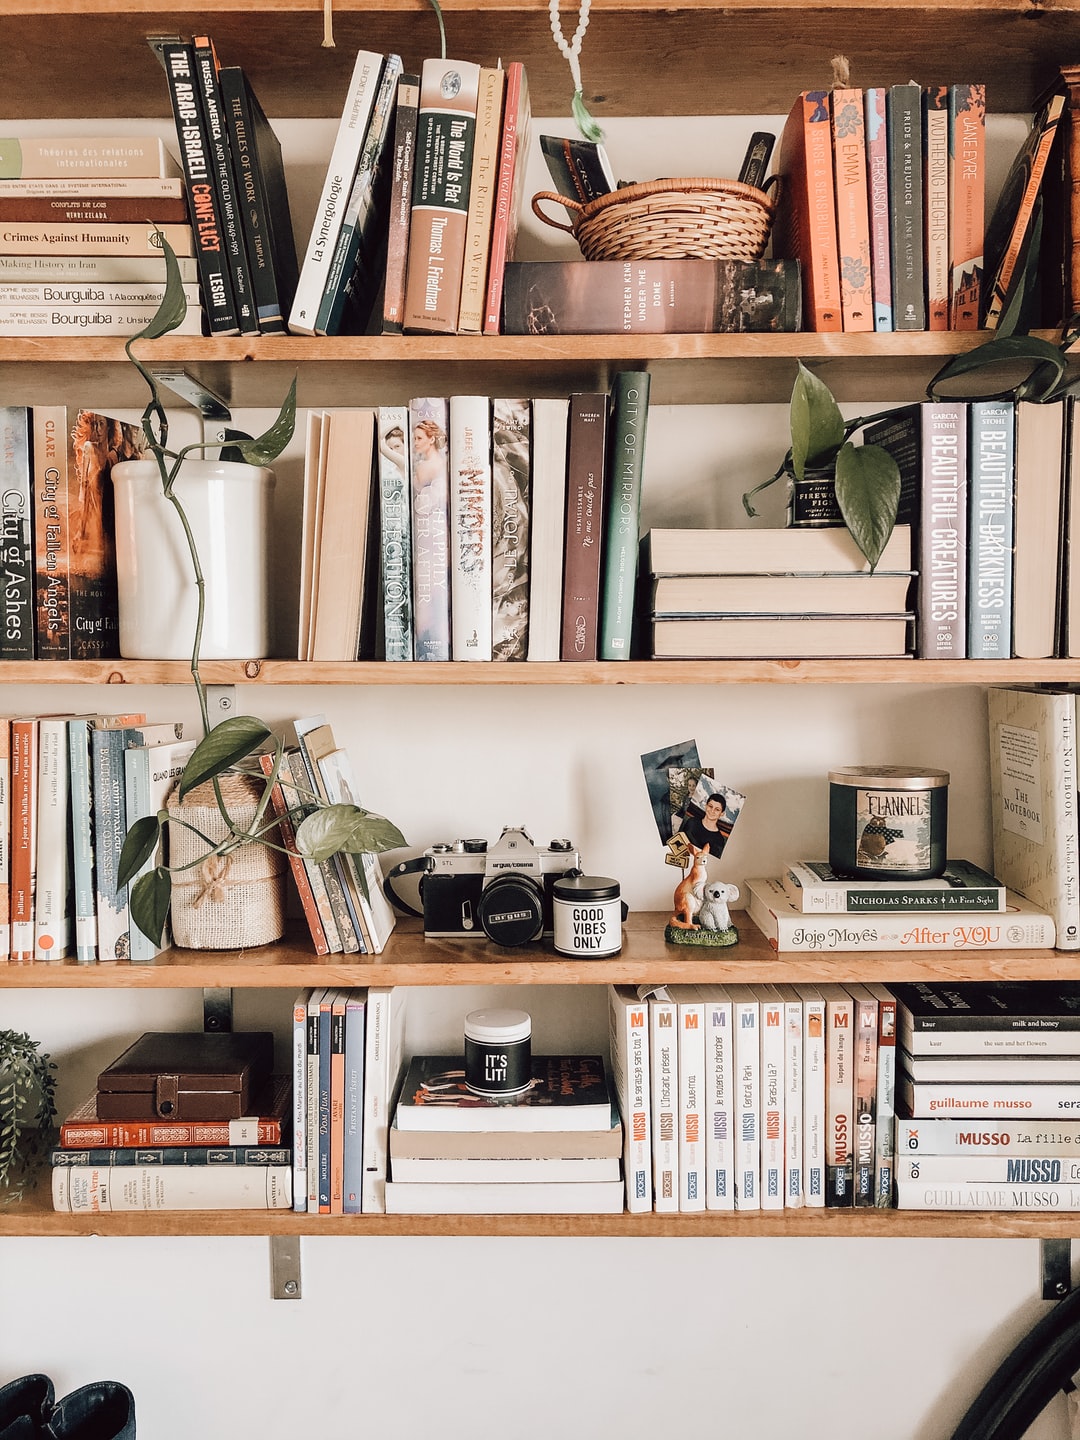

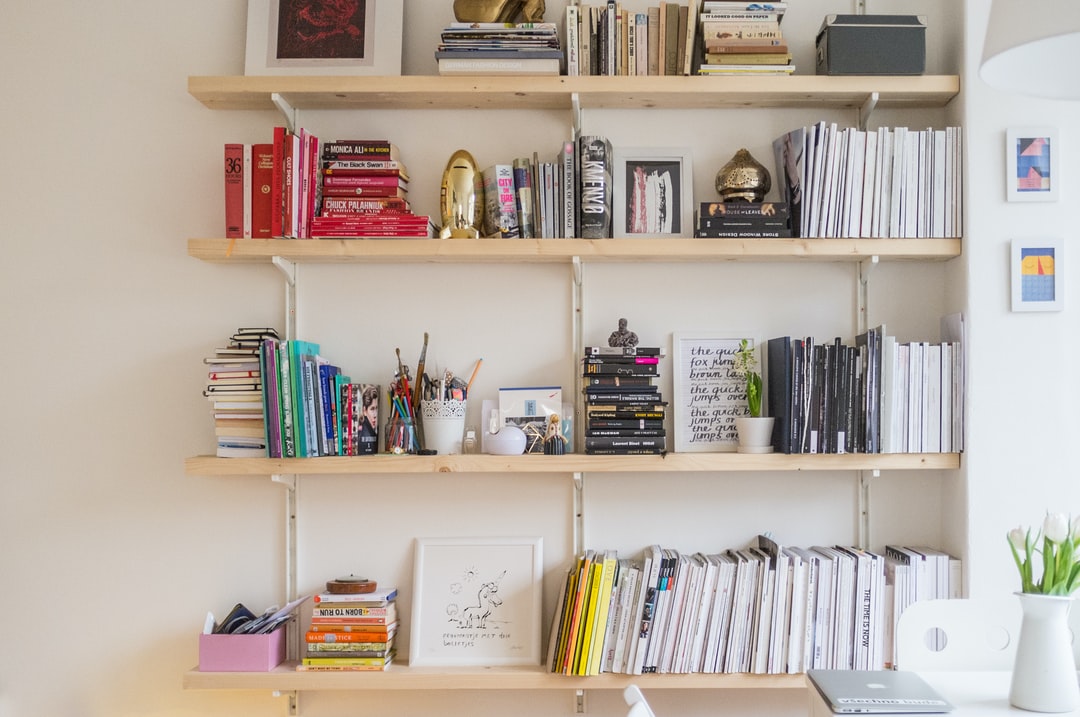


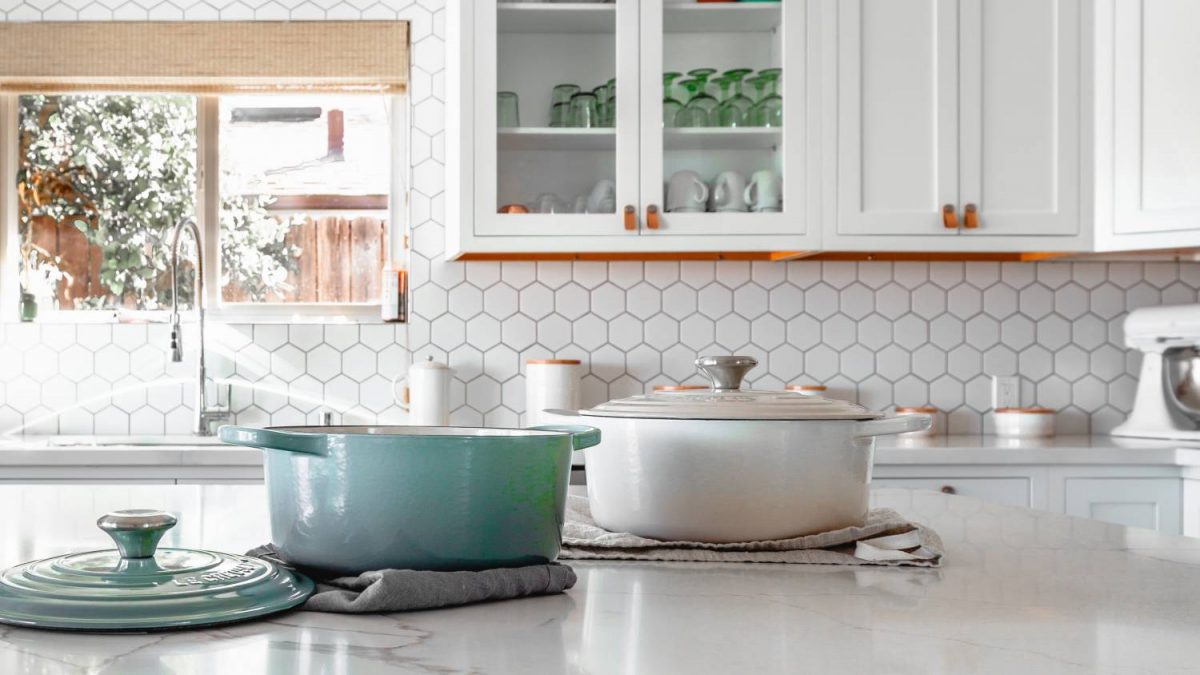
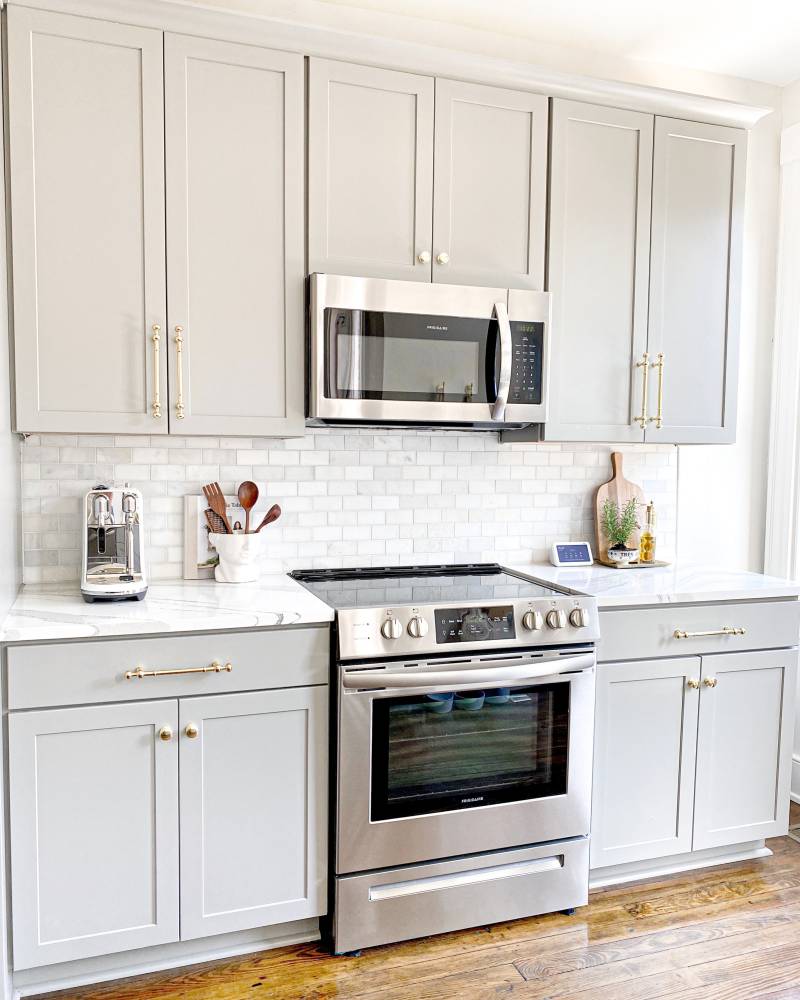
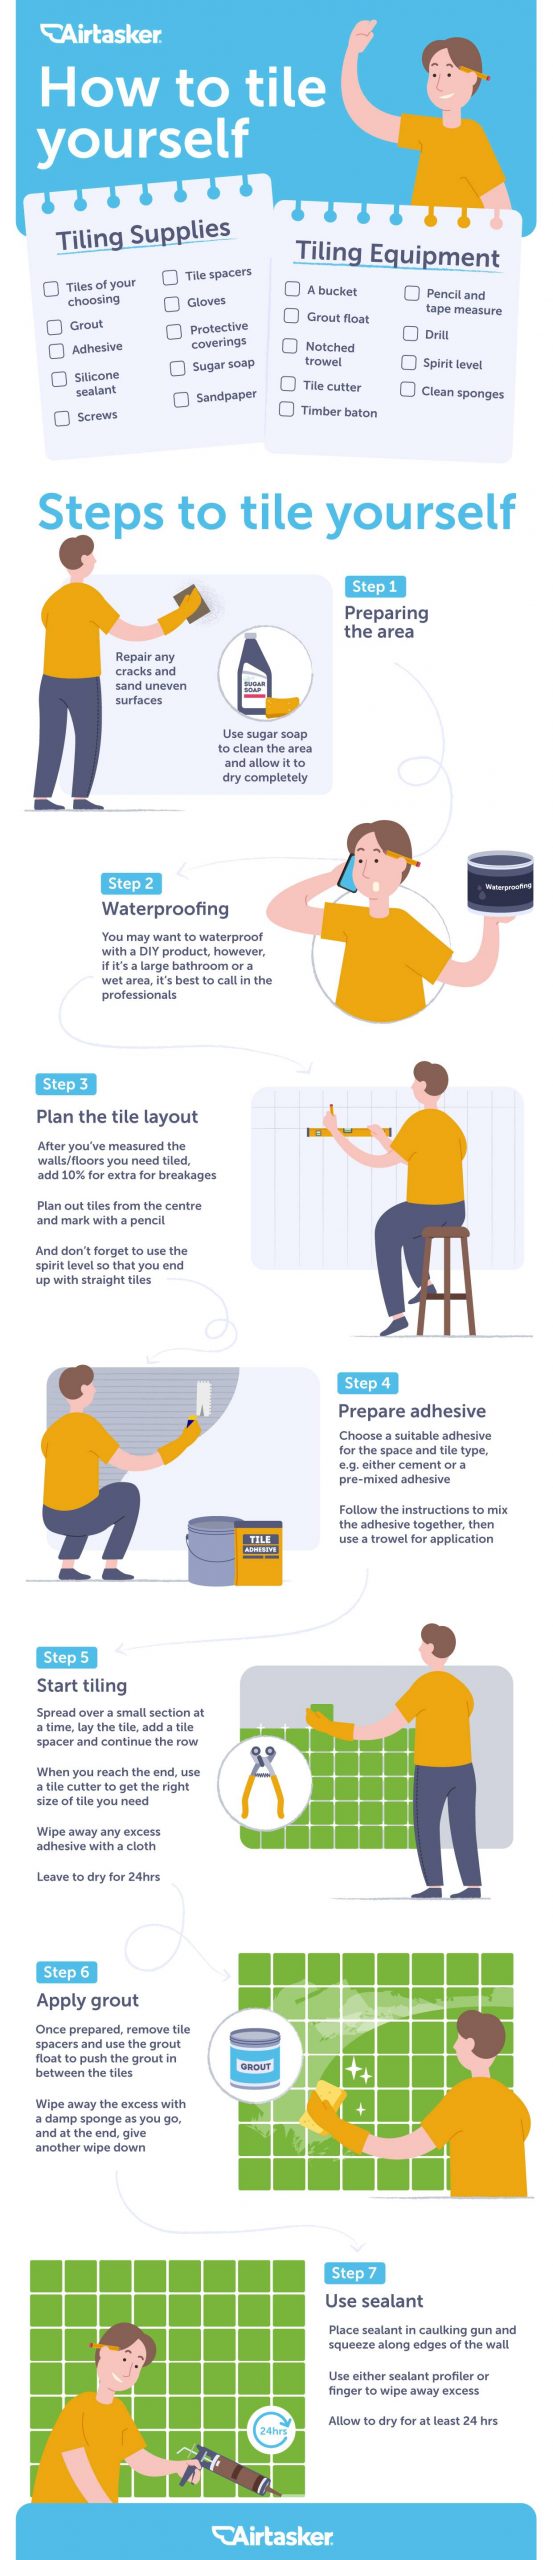
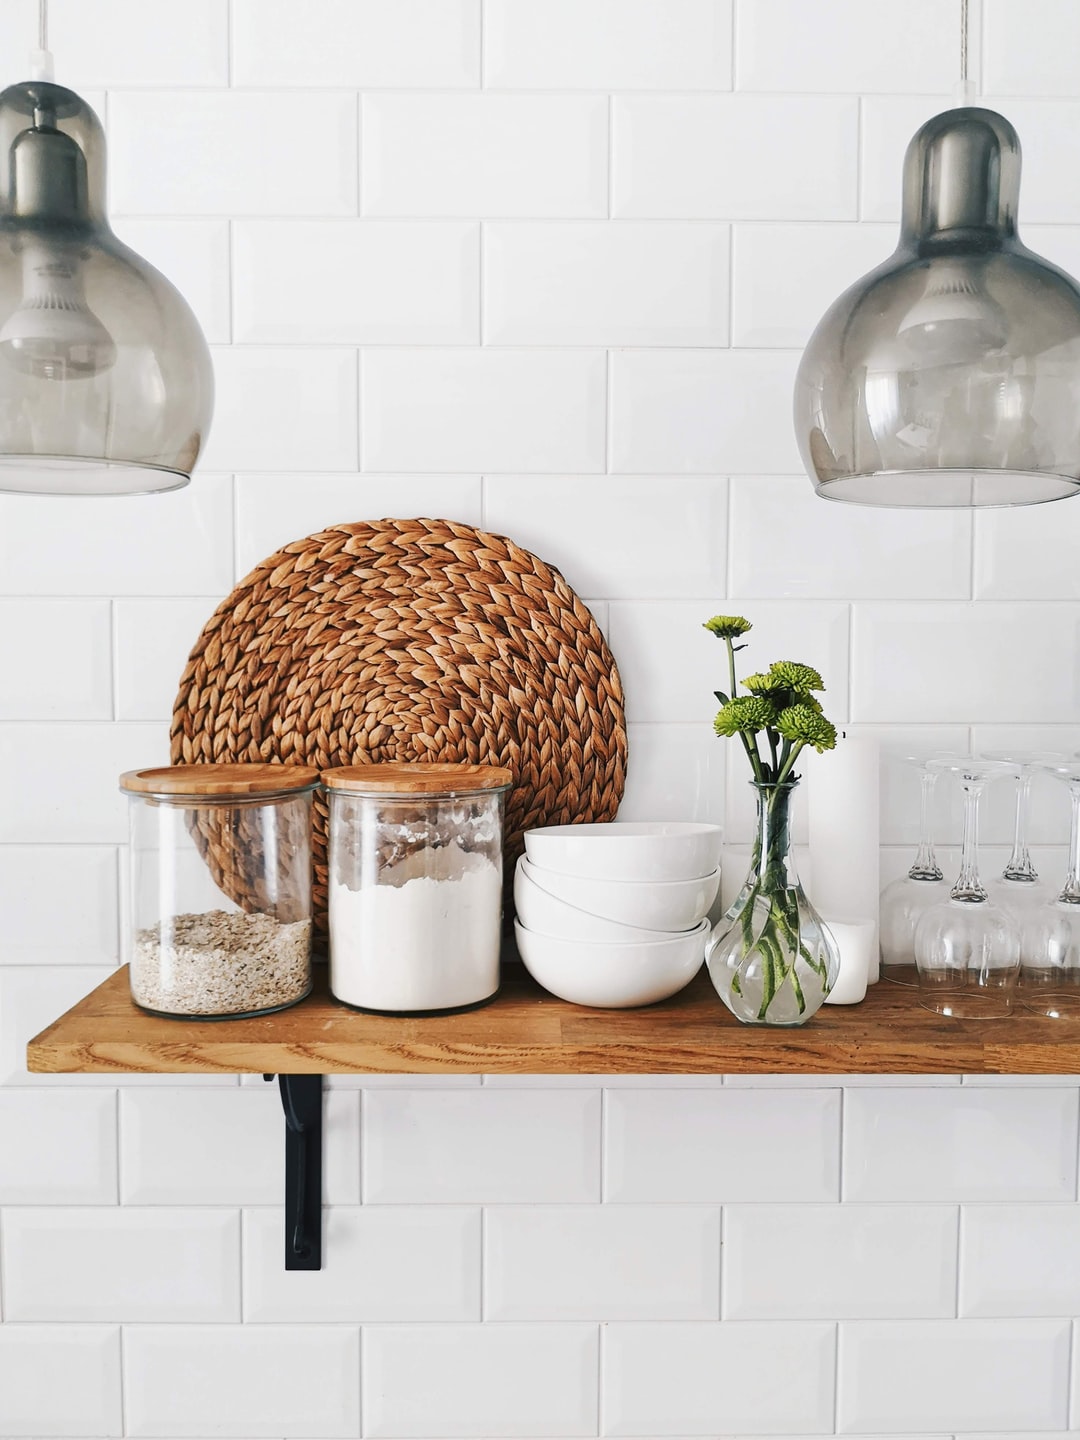
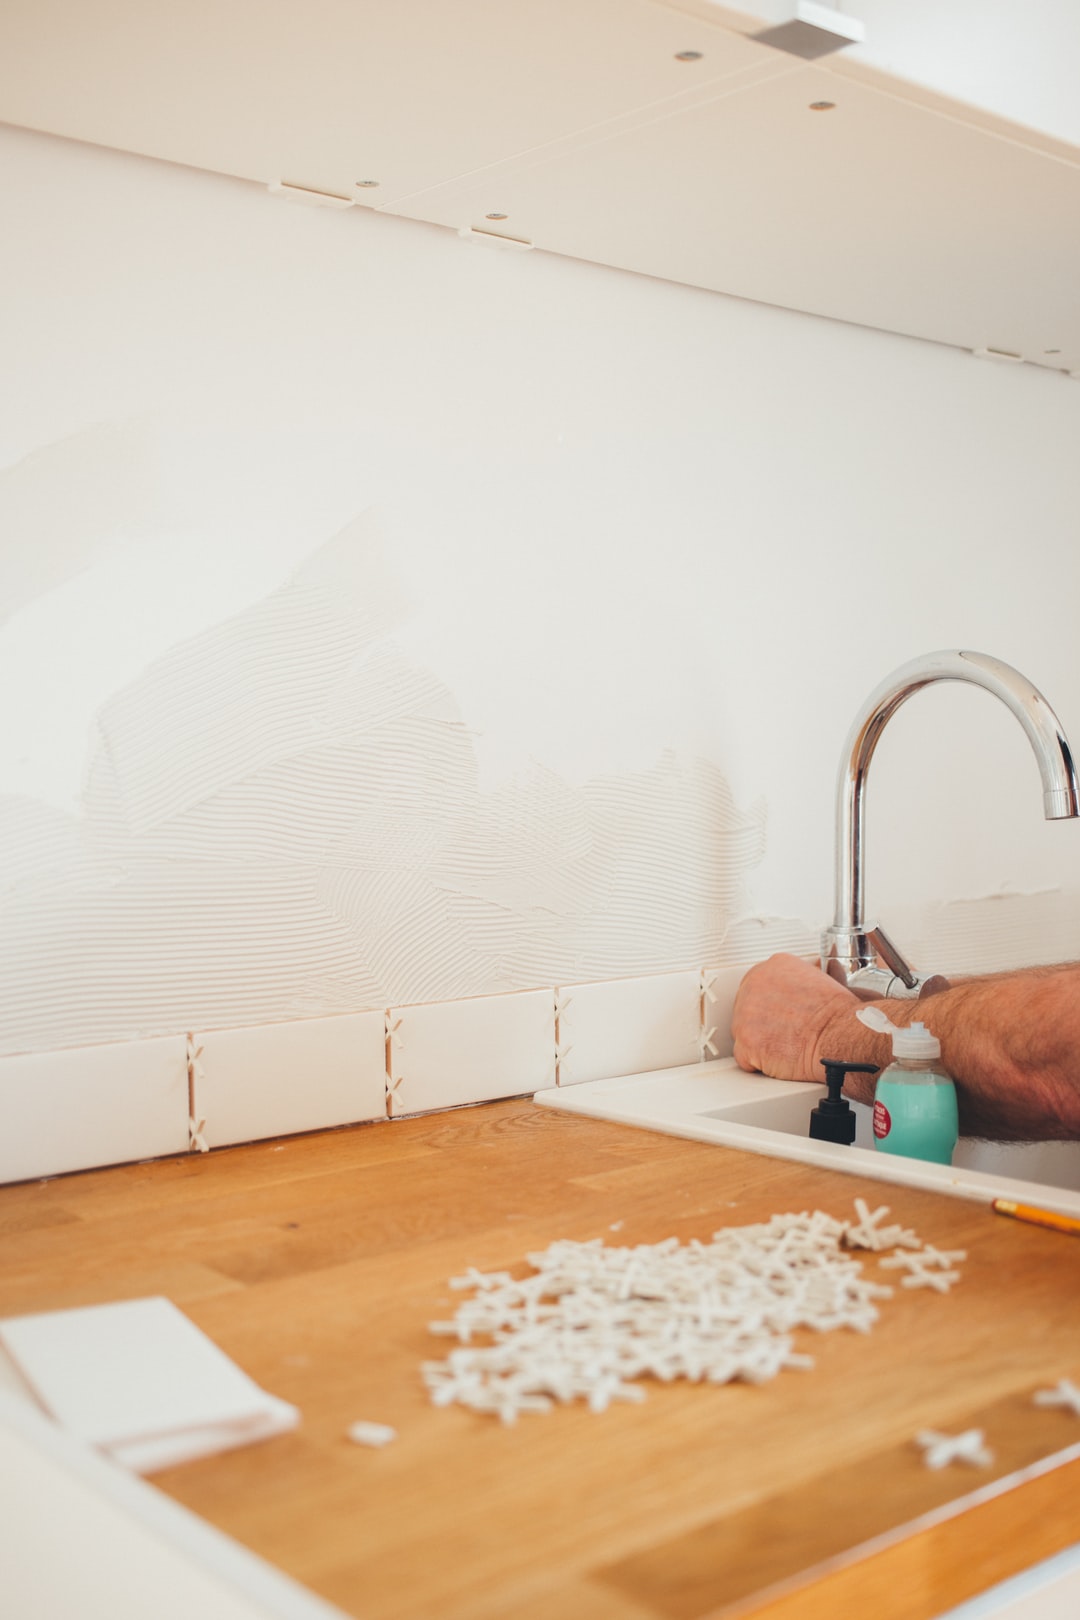
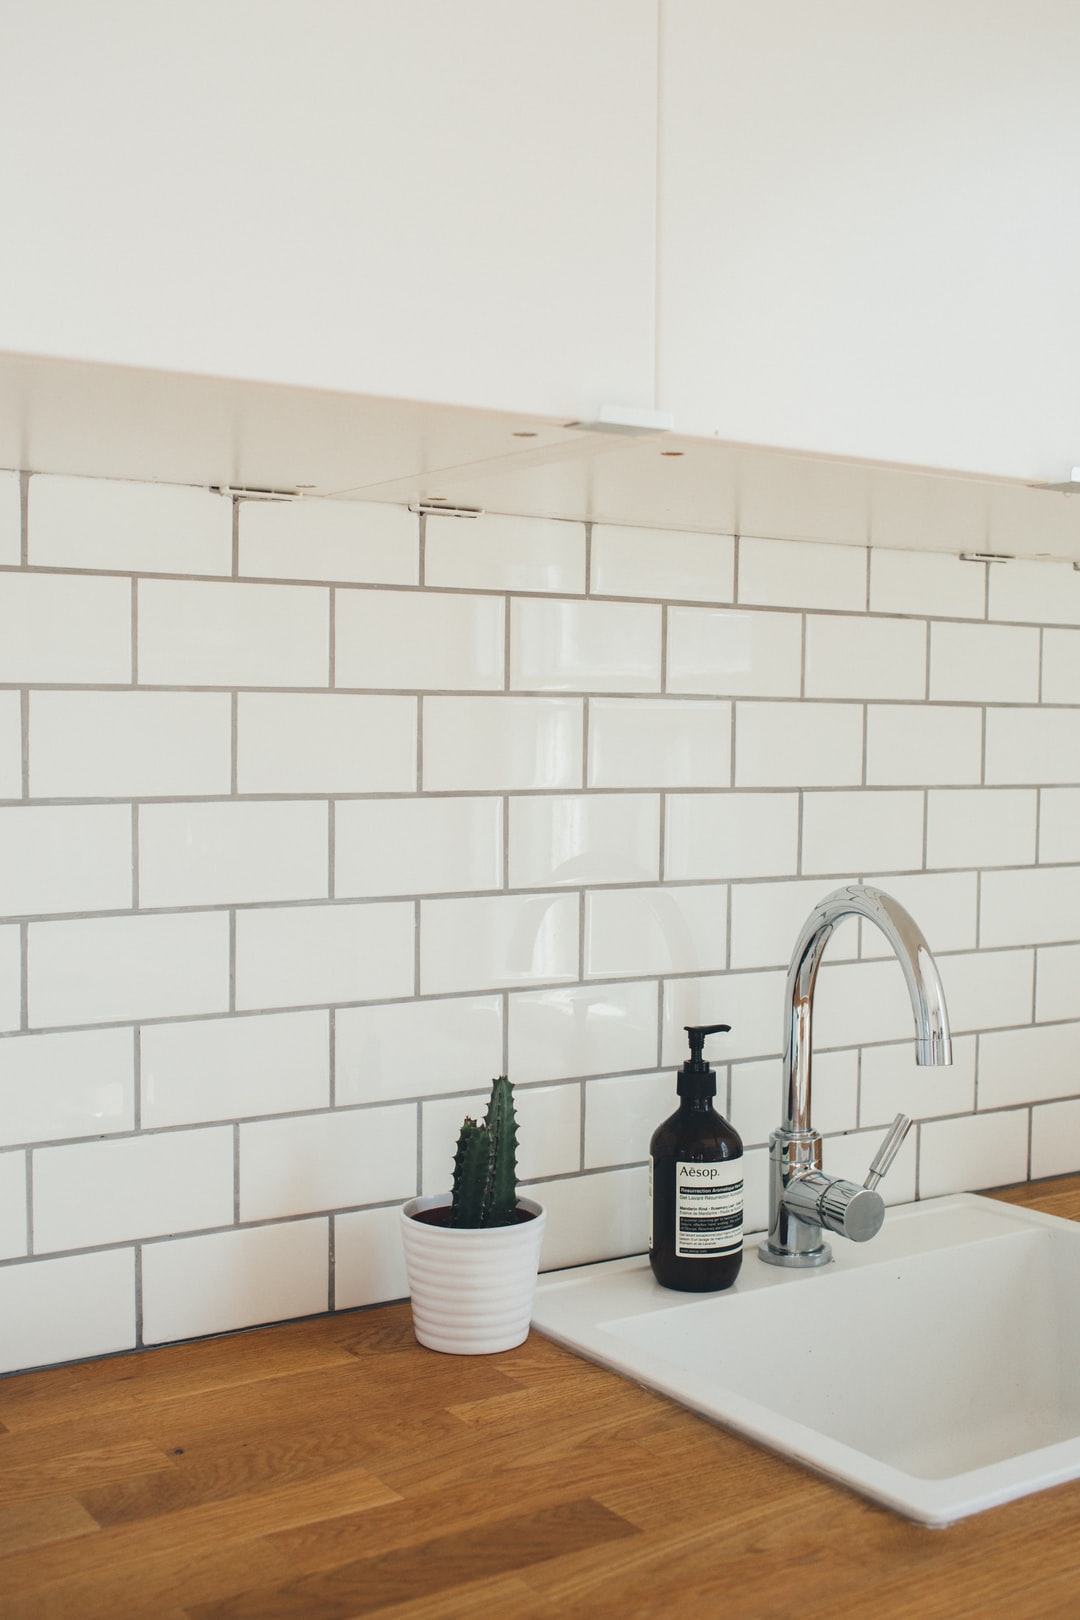
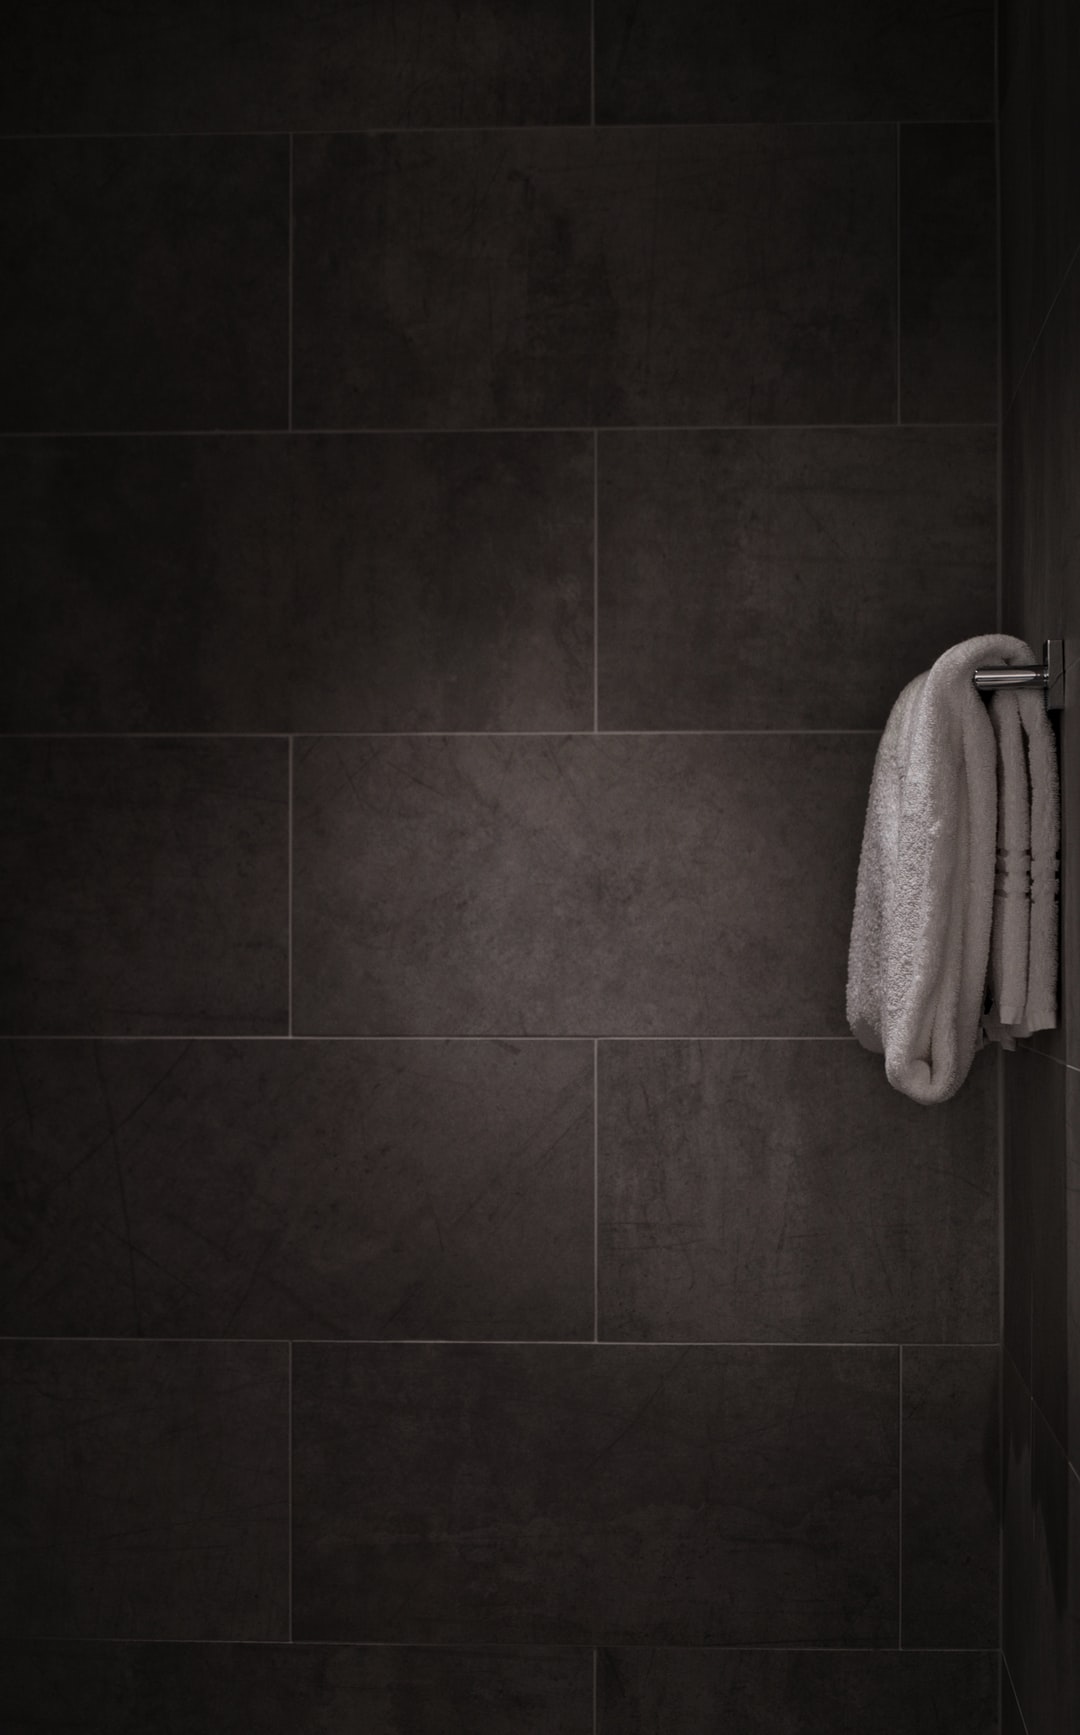
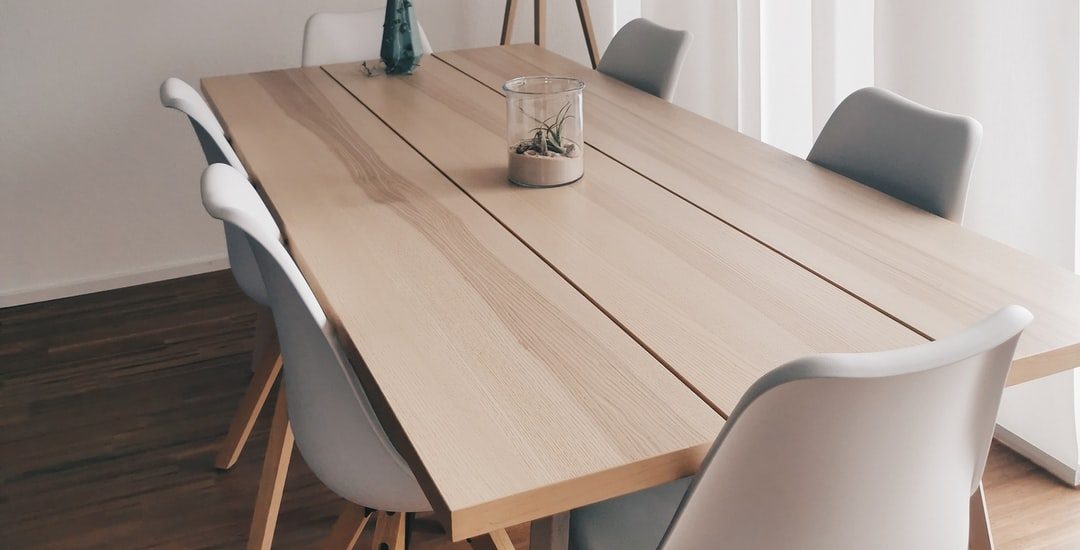
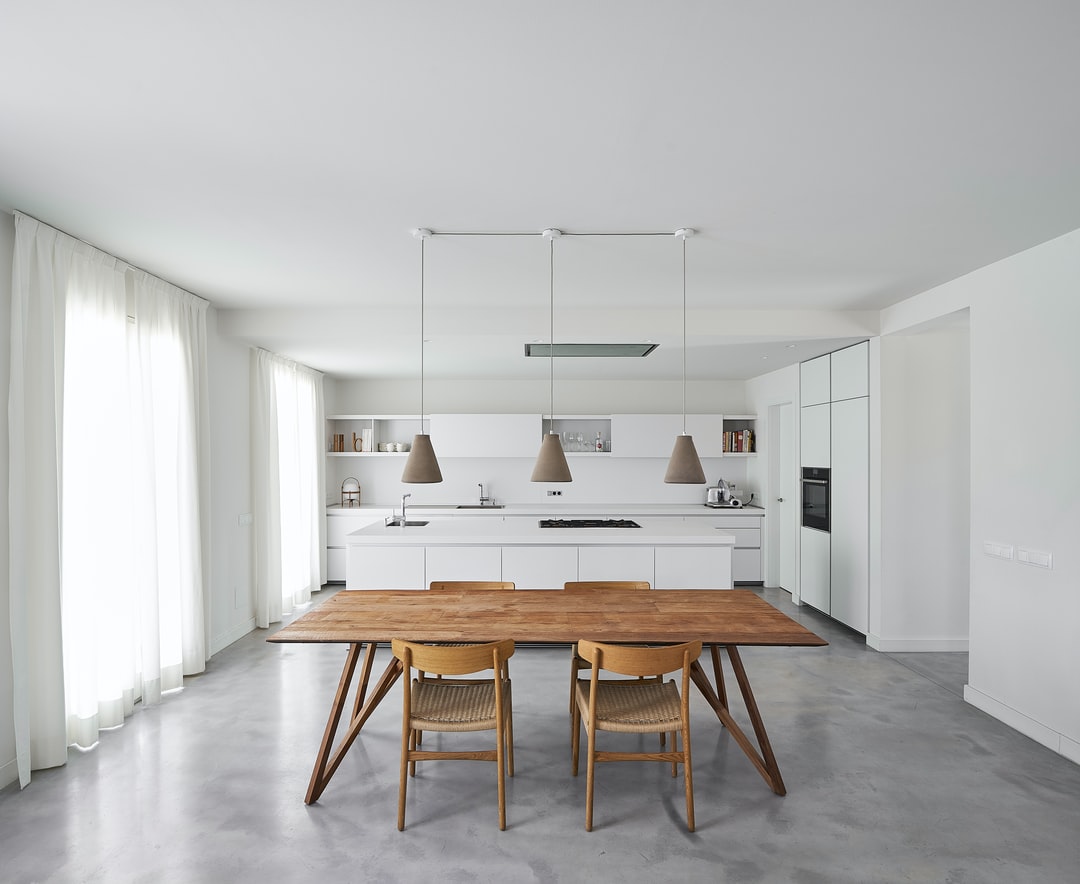
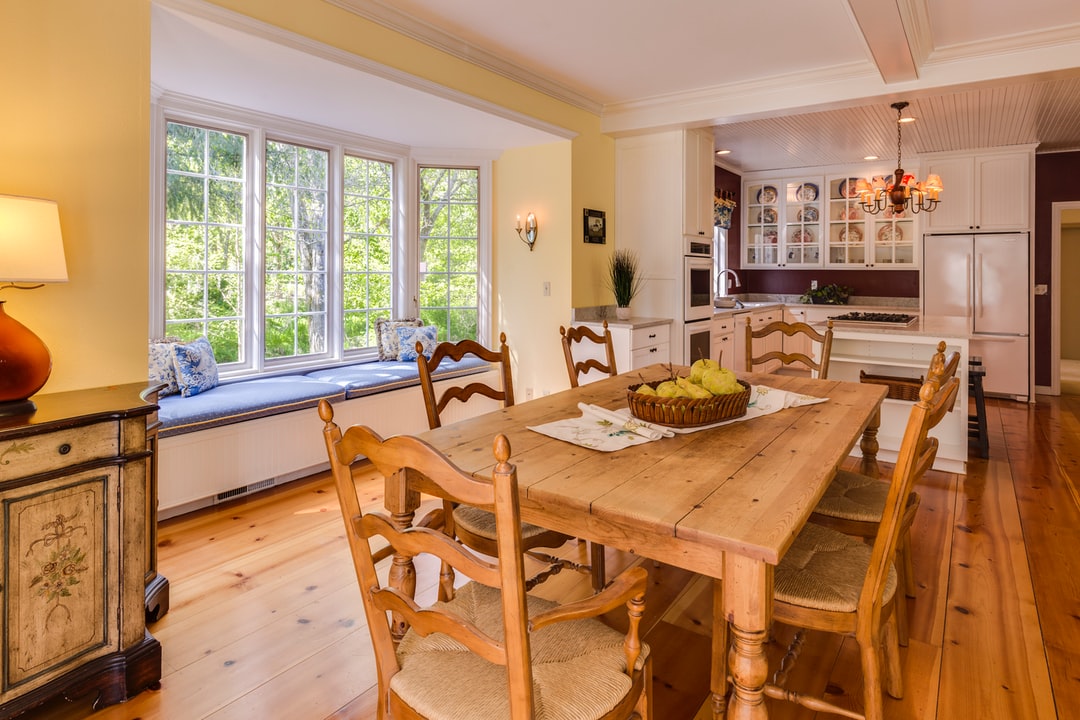
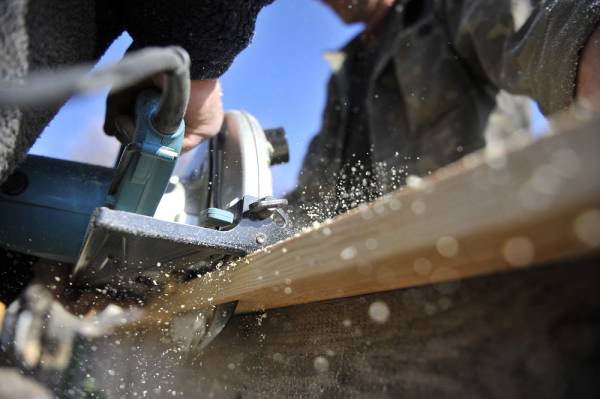
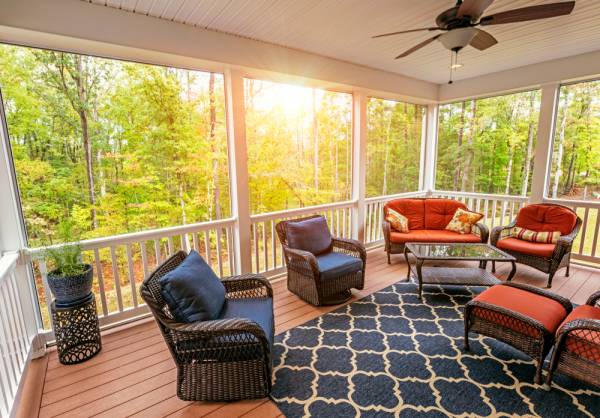


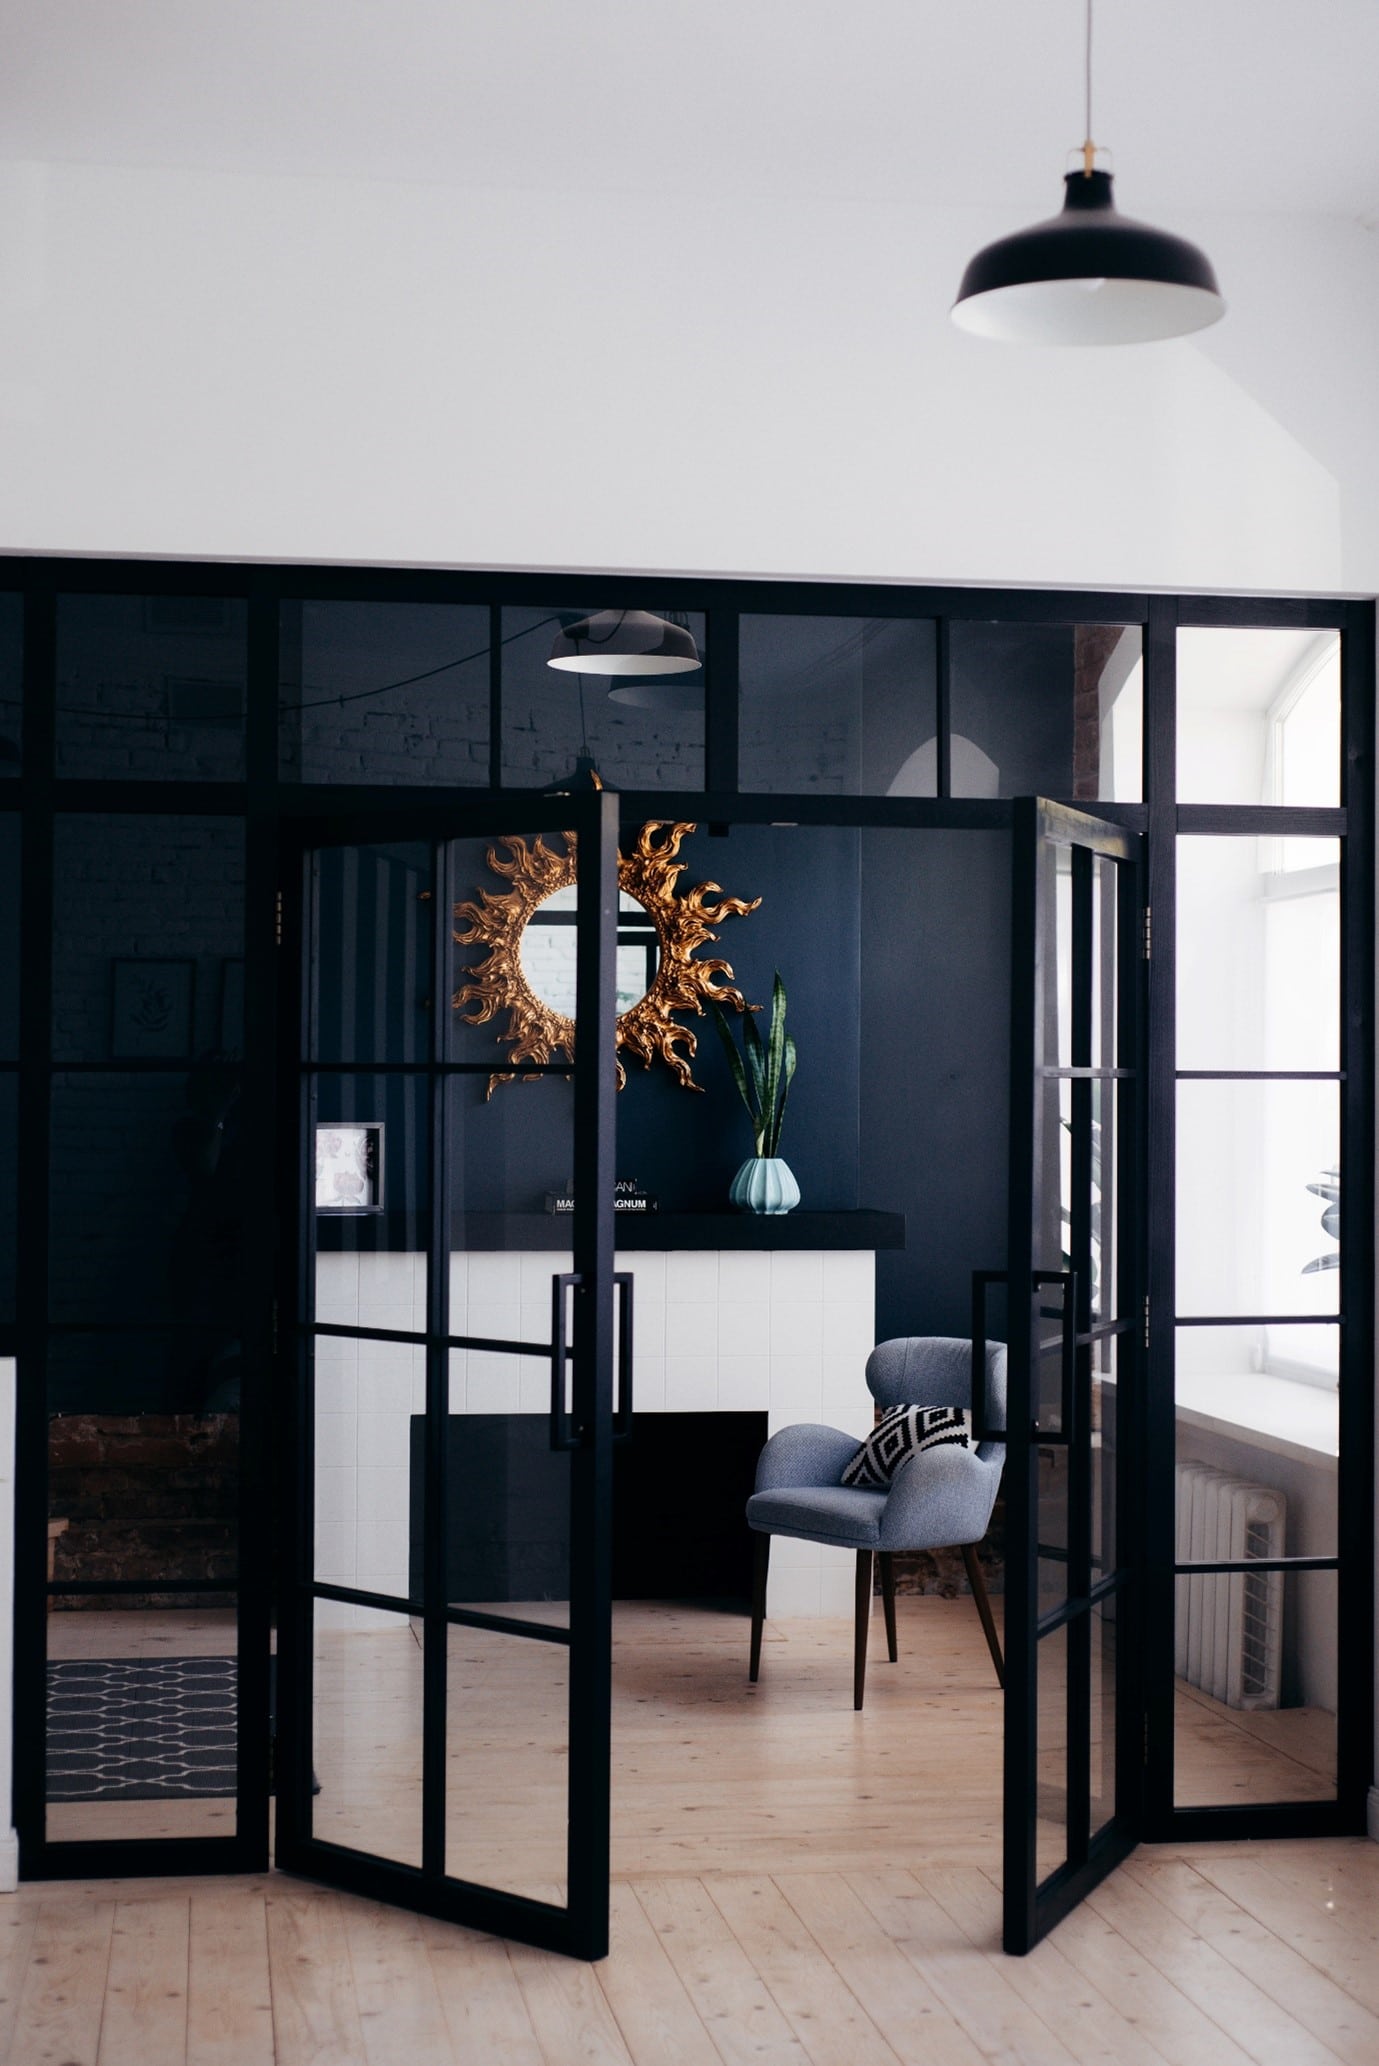
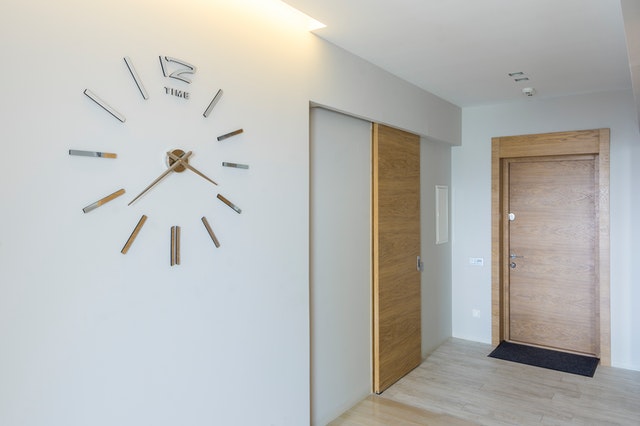
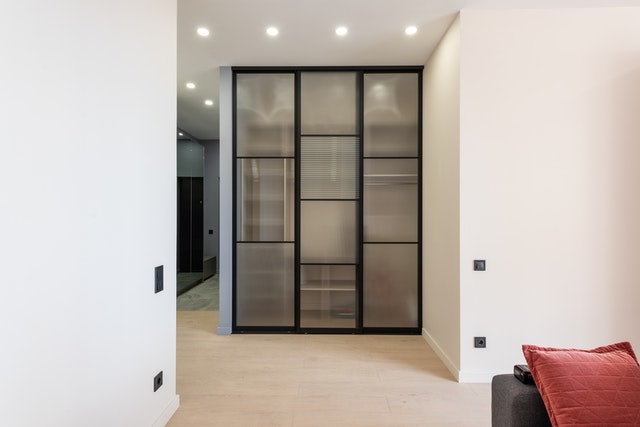
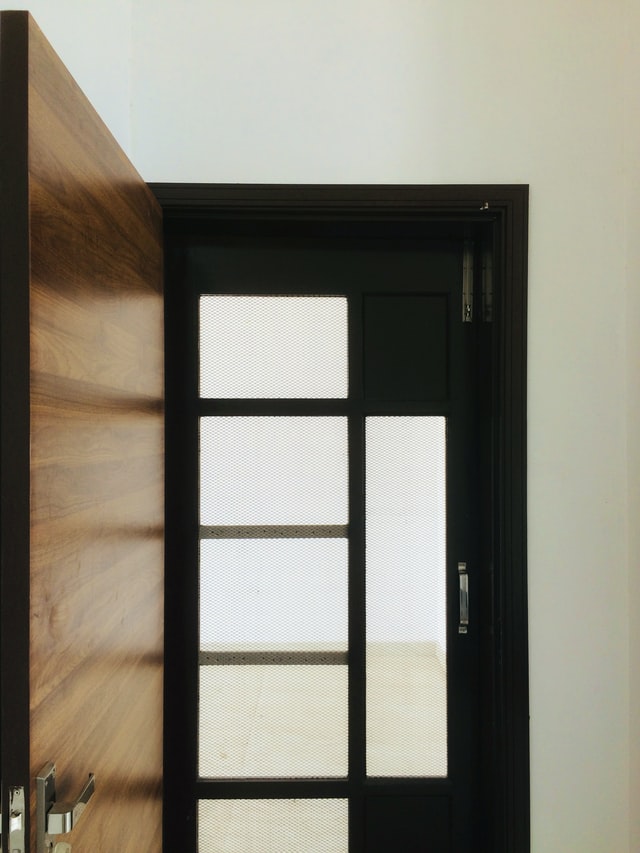


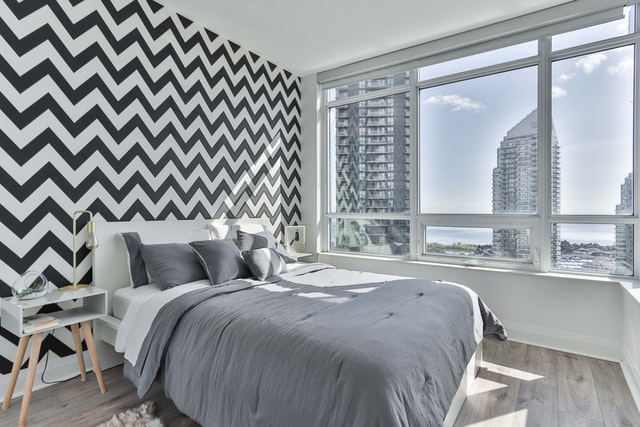
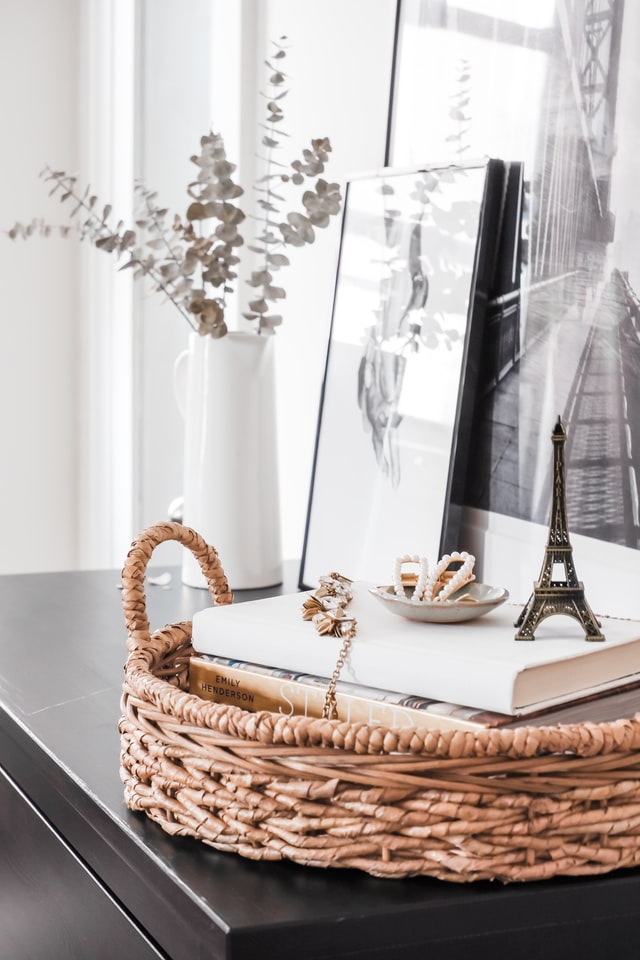
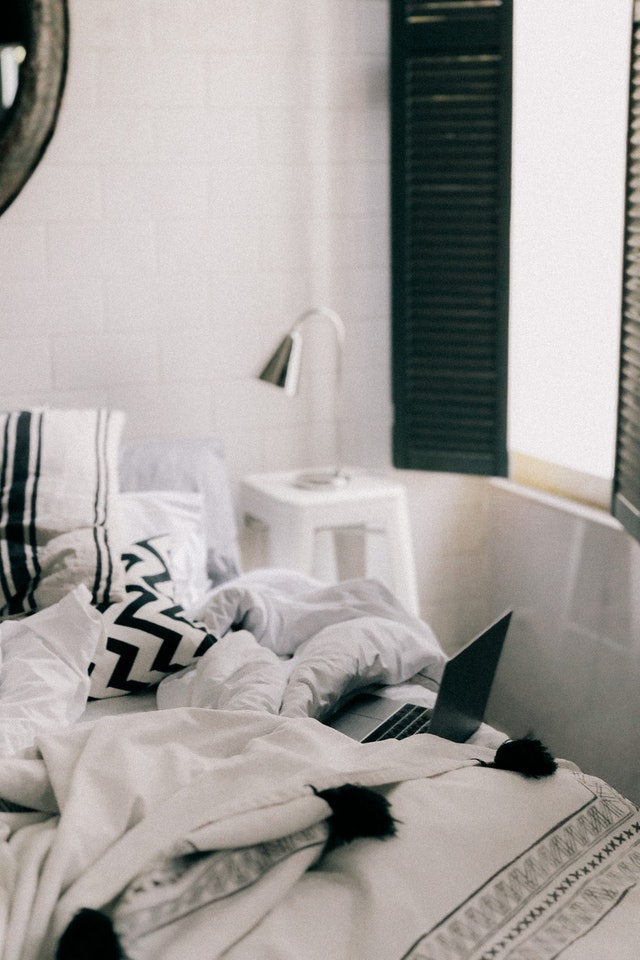
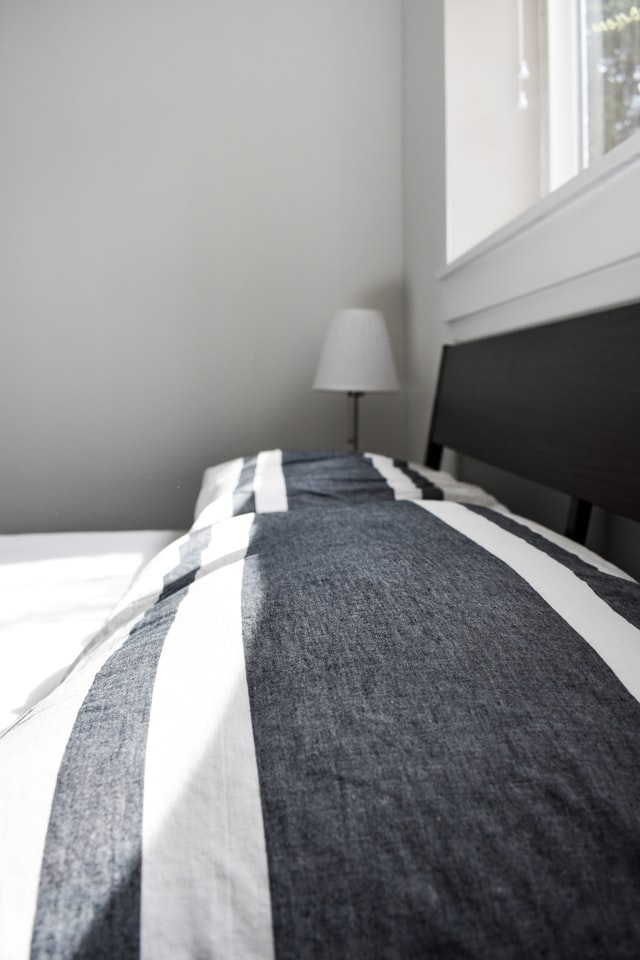

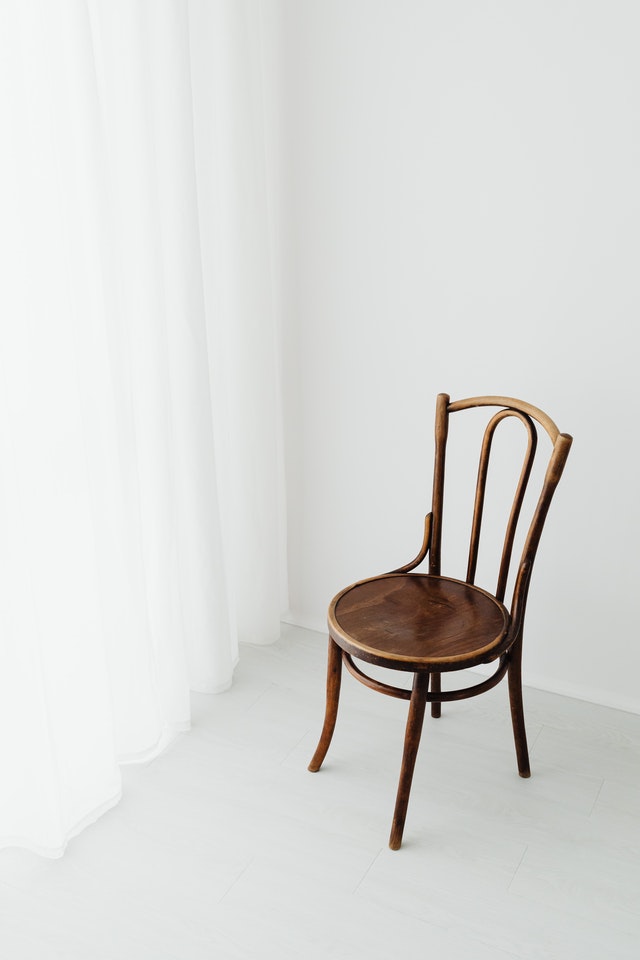
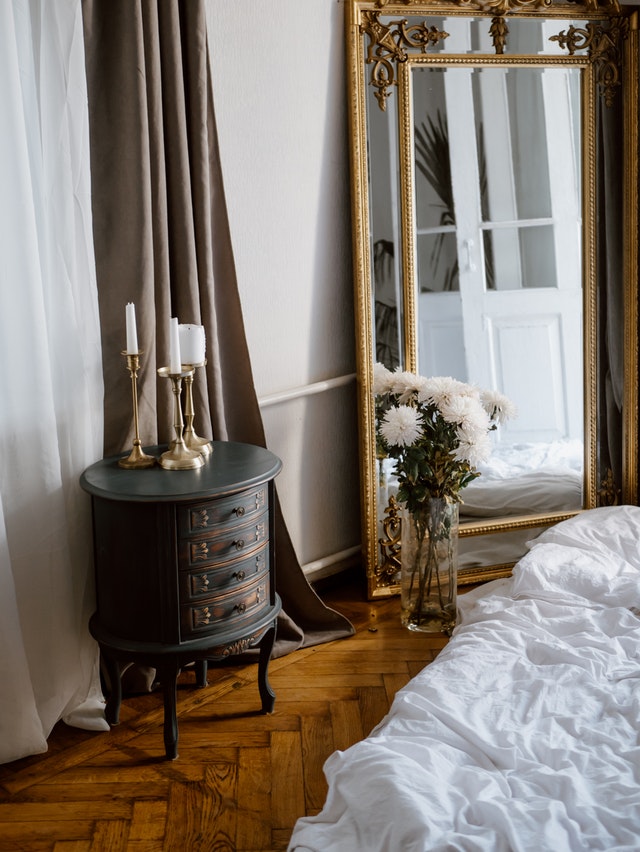
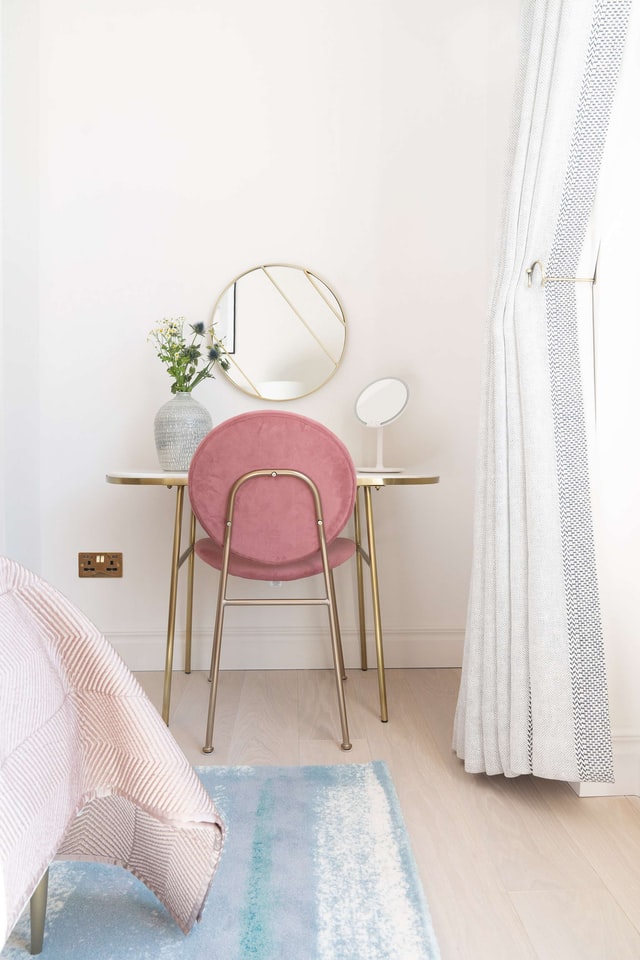
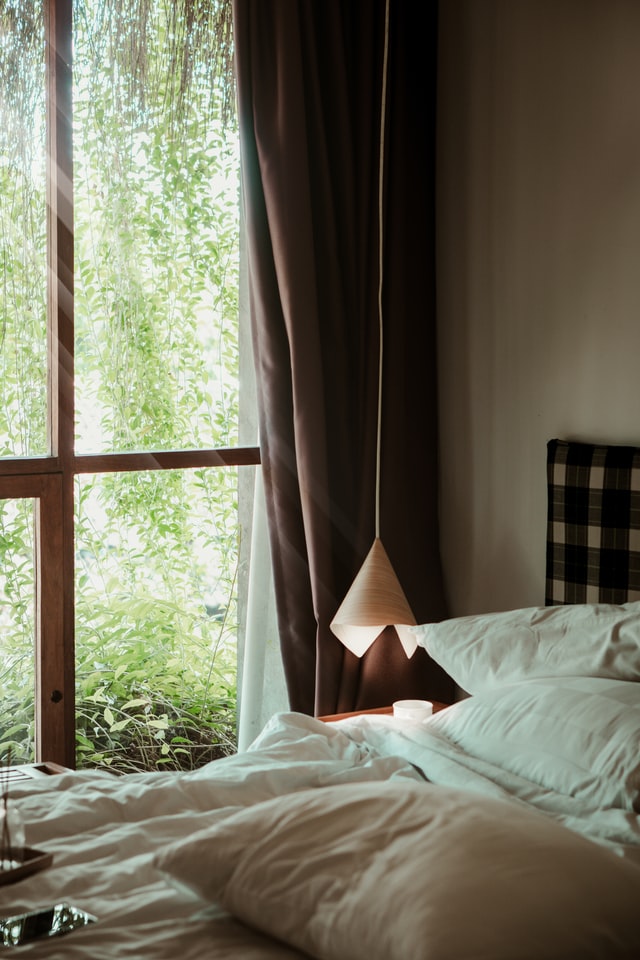


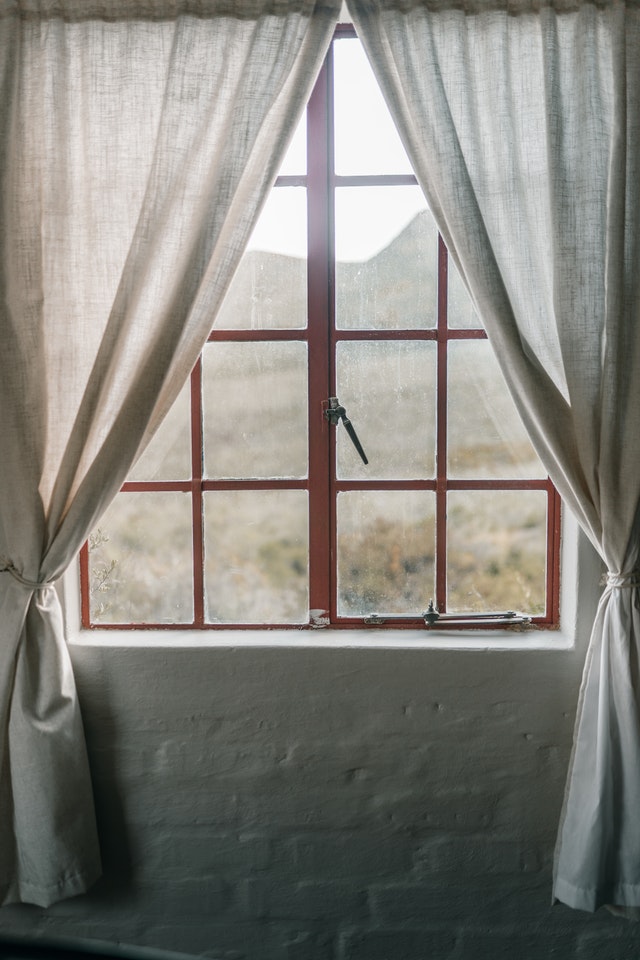


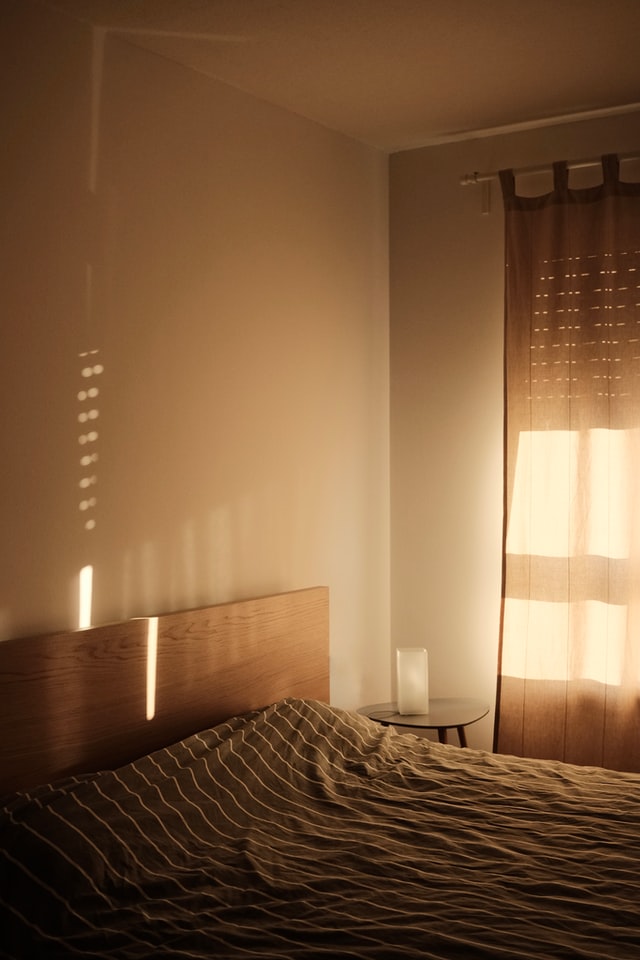

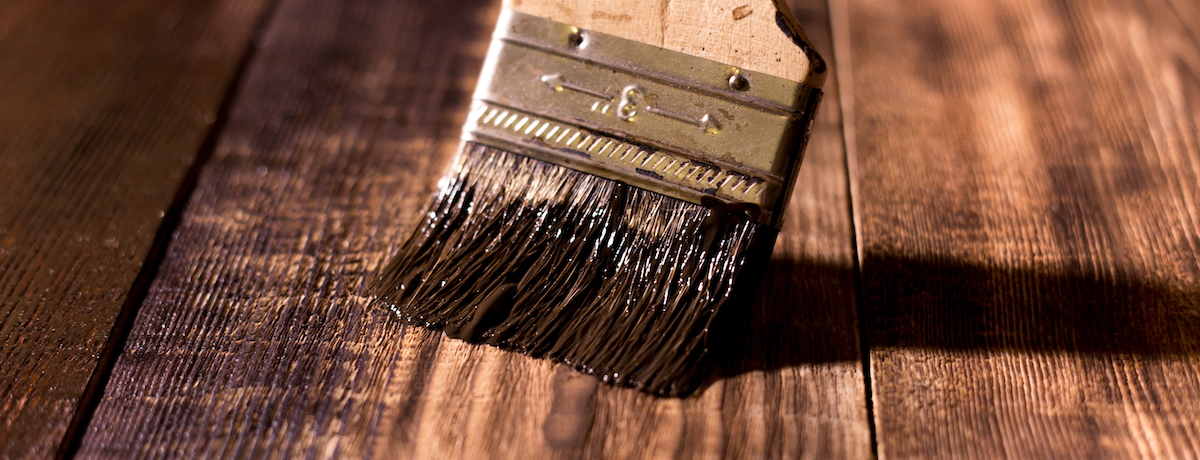

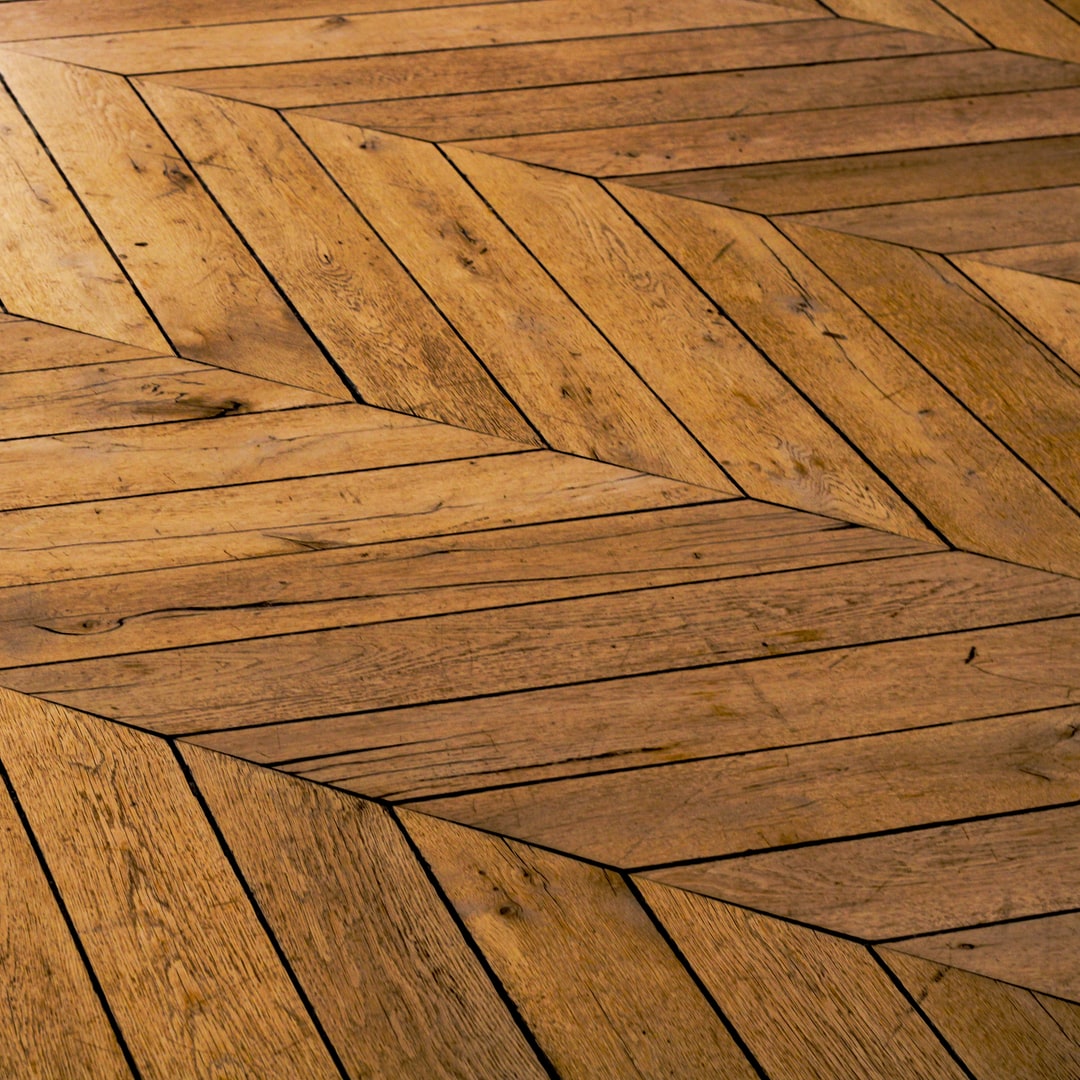


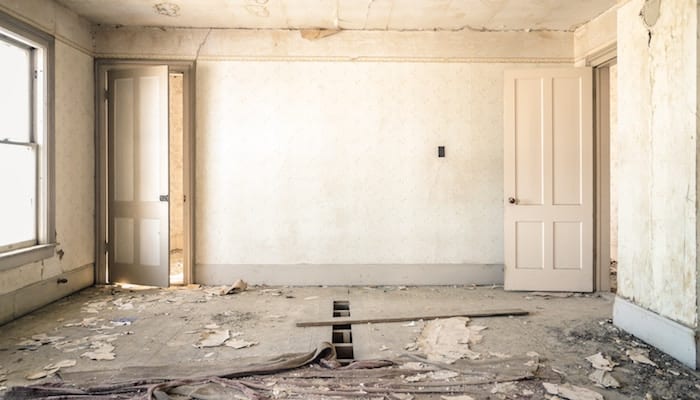
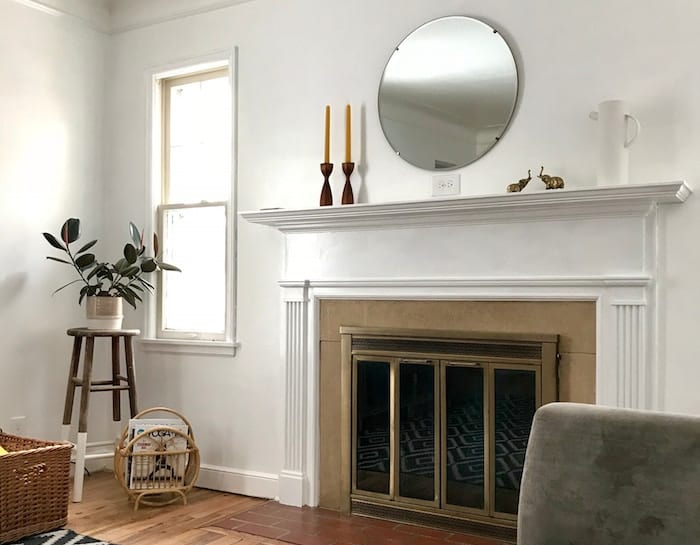

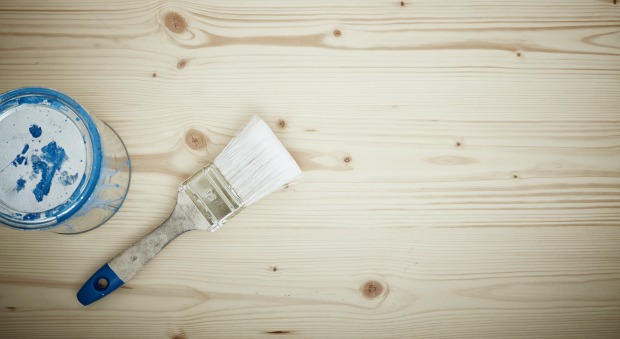

 Source:

 Source:


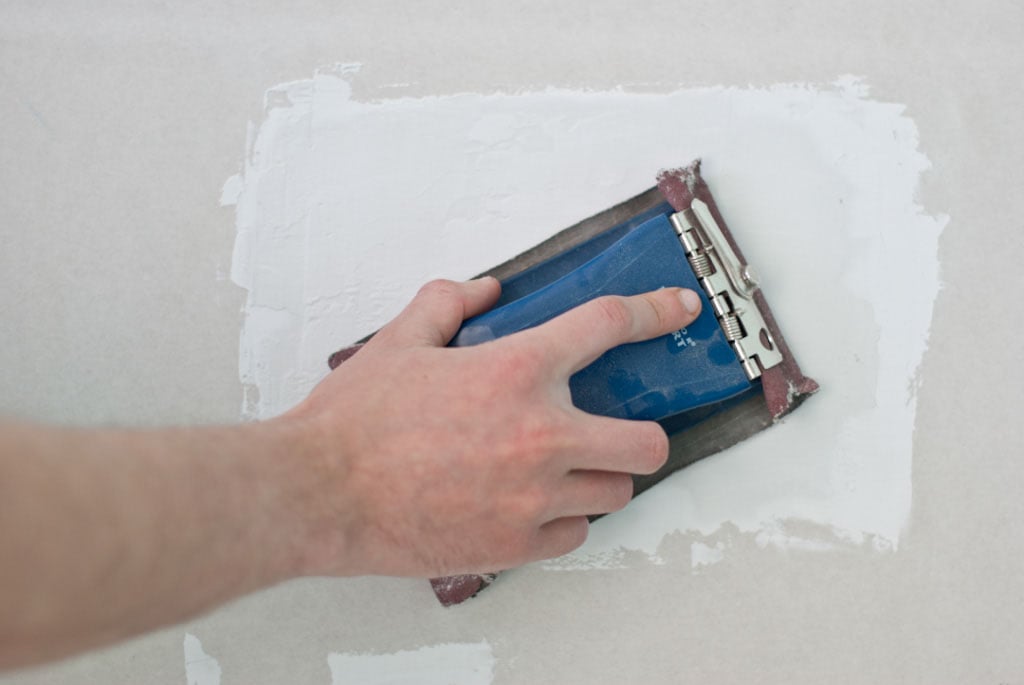 Source: